Playing to my strengths. working towards making functional wares. Objects that are inspired by food, its process and to showcase this through my practice of making tableware. In simple words my objects will be 
"inspired by food for food". 
i will aim to continue making glazes that capture colour, textures and visual qualities of the dish within the surface of the designed object. 
Celeberating Spices- within food. 
New line of inquiries: 
1. Being able to display these objects upright, so the inside of the vessel is visible to the audience. The inside of the object is what communicates the story, so this is the feature people show be able to see? 
2. Making considered forms, hint of tradition. 
-that instruct people to dine in a particular way?- introducing handles. 
Makers mark-
Taking the opportunity to refine my objects starting off with designing and making a decent, clean and professional looking makers stamp for my vessels. Inspired by Florian Gadsby's video on how to make a handmade porcelain stamps. I found the way he made his stamp with glazed ends was interesting, being able to use my glazes on a tool I will use everyday was indeed an exciting feeling. 
Refinement- Objects with handles:
Handles onto my forms are a addition I am seeking to explore within this unit. The reason for this is simply, handles are a requirement especially with large forms. They enable the user to conformably grip the vessel without worrying about burning themselves or dropping the object from its weight. 
Handles are a additions that i have not explored so far in my ceramic journey. They may seem like a easy task to achieve but they have to be done correctly to make the object elevate. 
What if I changed the bowl shape, make is more fitting both for the handle and the glaze?  ​​​​​​​
Handles can be achieved by a range of different techniques- the style is the most important. 
Through the above sketch I am trying to see the end result of the overall form. a vertical handle makes is look like a large cup, two handle make is appear like a trophy. 
Rounded/coil style is a good fit for a rounded shape bowl, they both compliment each other. 
A curved/ flared out shape enhances the look, give is more of an inviting in feeling. 
LOOK AT EXISTING COOKING VESSELS FOR INSPIRATION:
-Handle placement? style? material quality?
Vessels commonly used- traditional terracotta vessels commonly found in India are rounded pot style. The handles are small 'D' shaped on either ends to help lift the vessels. 
Metals forms have their unique quality highlighted like the beaten effect, shiny surface, screw embellishments at the handle placement. 
 
Rounded/ loop handle- single looks odd and isn't enough support to handle the entire form. These big bowls require at least two handles on either side or a long handle (saucepan style) to be able to hold the object. 
Handles are designed to aid the user when handling the object, so functionality before aesthetics. 
With these forms i was playing with the different types of handle attachments, single or double. I found the forms that replicated the of cooking vessels but in ceramics would be an interesting set. 
The above frying pan/wok style objects has a homely feel to it, the common frying pan make gives it a cozy and warmth feeling making a dear everyday object. i am particularly excited to glaze these objects with grainy/mottled effect glazes with the drippy rim to capture the cooking feel. 
Though these appear to be like cooking vessels they are serving dishes. 
Glaze development:
Ilmenite glaze- incresing percentages 6-8%
fired to 1280c
two clay bodies- Ivorystoneware and Almington. 
The reasons for this experiment was to see the effects i can achieve from increasing the colourants within the glaze. This glaze is the same as the one used on the bowls(blue centre) but through this test i found that the outcomes turn blue on very thick application. Also the fired temp was high making the drippy effect stand out. Furthermore, the dark colour on the iron body is very much a palette i found interesting and wish to seek this further. 
Crazing on the surface: 
Solve- increase alumina content within glaze, adding clay to the glaze recipe will make the glaze shrink less thus will fit well on the clay body. 
However, adding clay to the glaze shrink less, this means it wont melt more this will have an affect on the drippy style I'm after. this is something that is worth experimenting further. 
Glaze colour exploring-
Plum red (iron) glaze: saffron spice inspired. 
This glaze was a new recipe, the surface produced is very matt, satin. It does not appear to be having any fluid/ runny quality and nedd to be applied really thick the drippy effect. for these sample i wanted to experiment with brush marks. On these bowls they weren't as smooth or visually appealing this could be because i over crowded it with wavy mark. The colour of the glaze is very dark and is a beautiful against both lighter clay bodies. 
Moving forward i would overlay another glaze the top so it adds more interest to the surface.  
Magnesium glaze with the addition of Rutile:

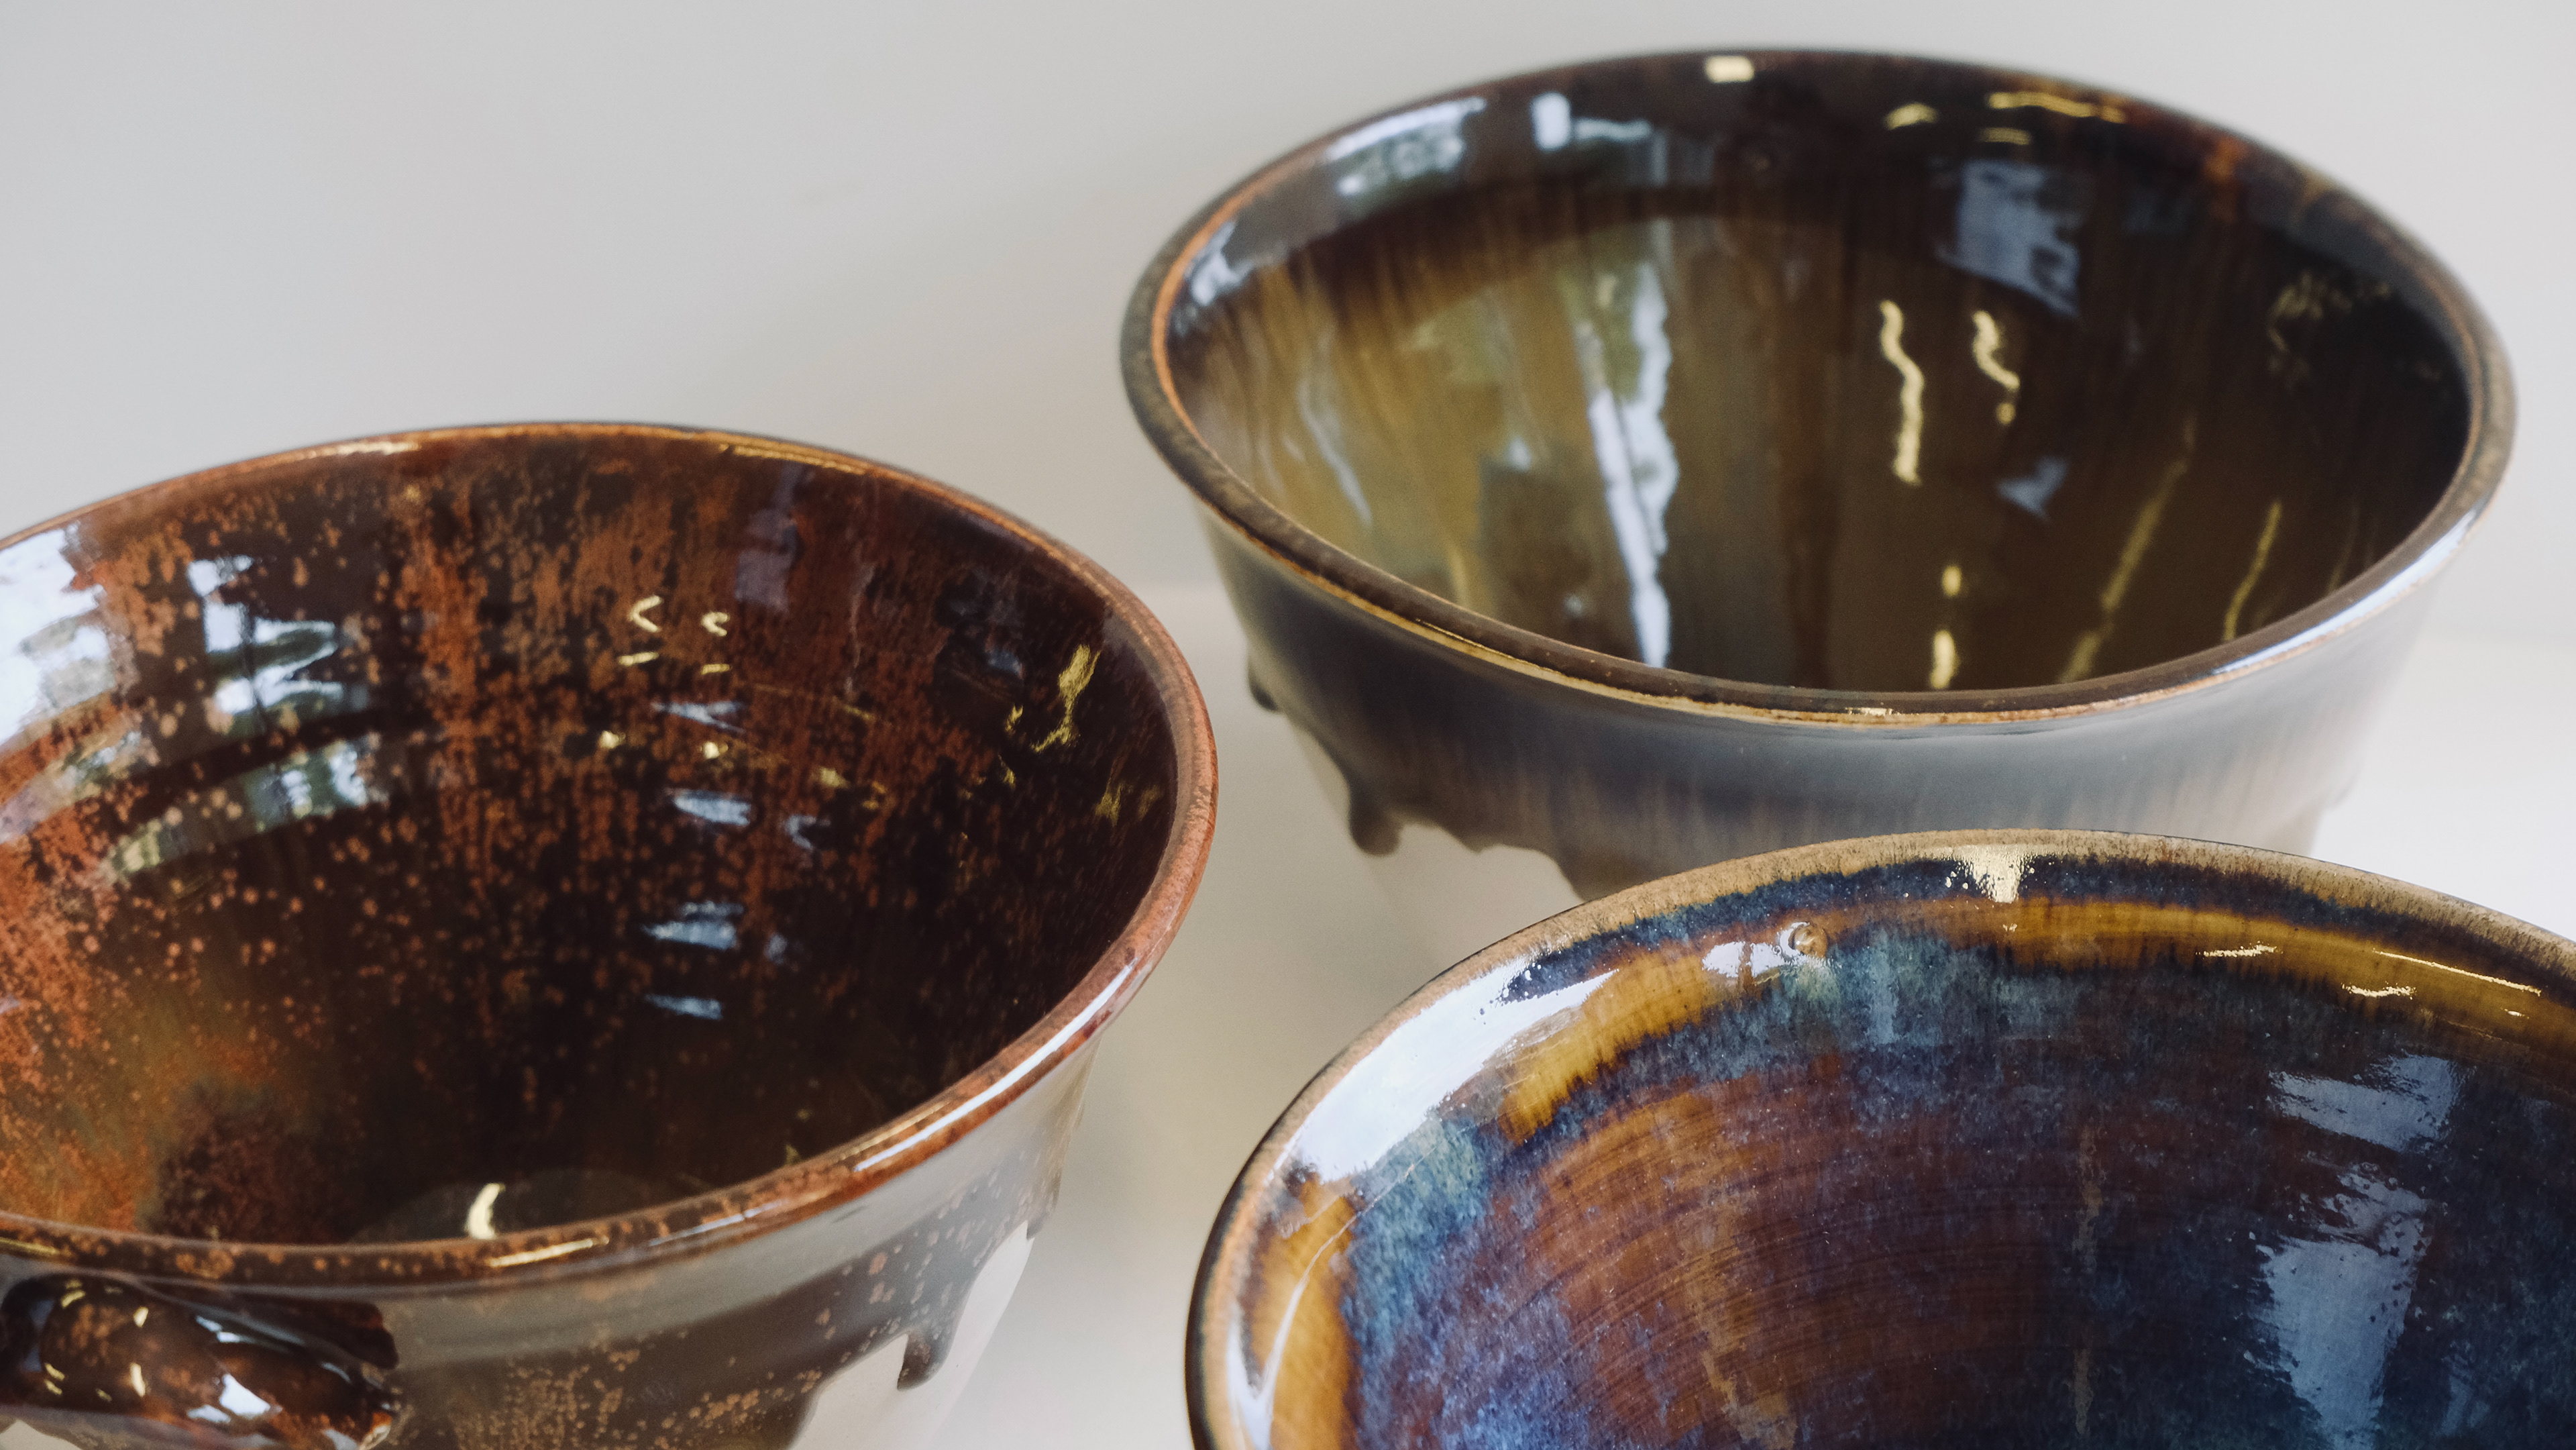
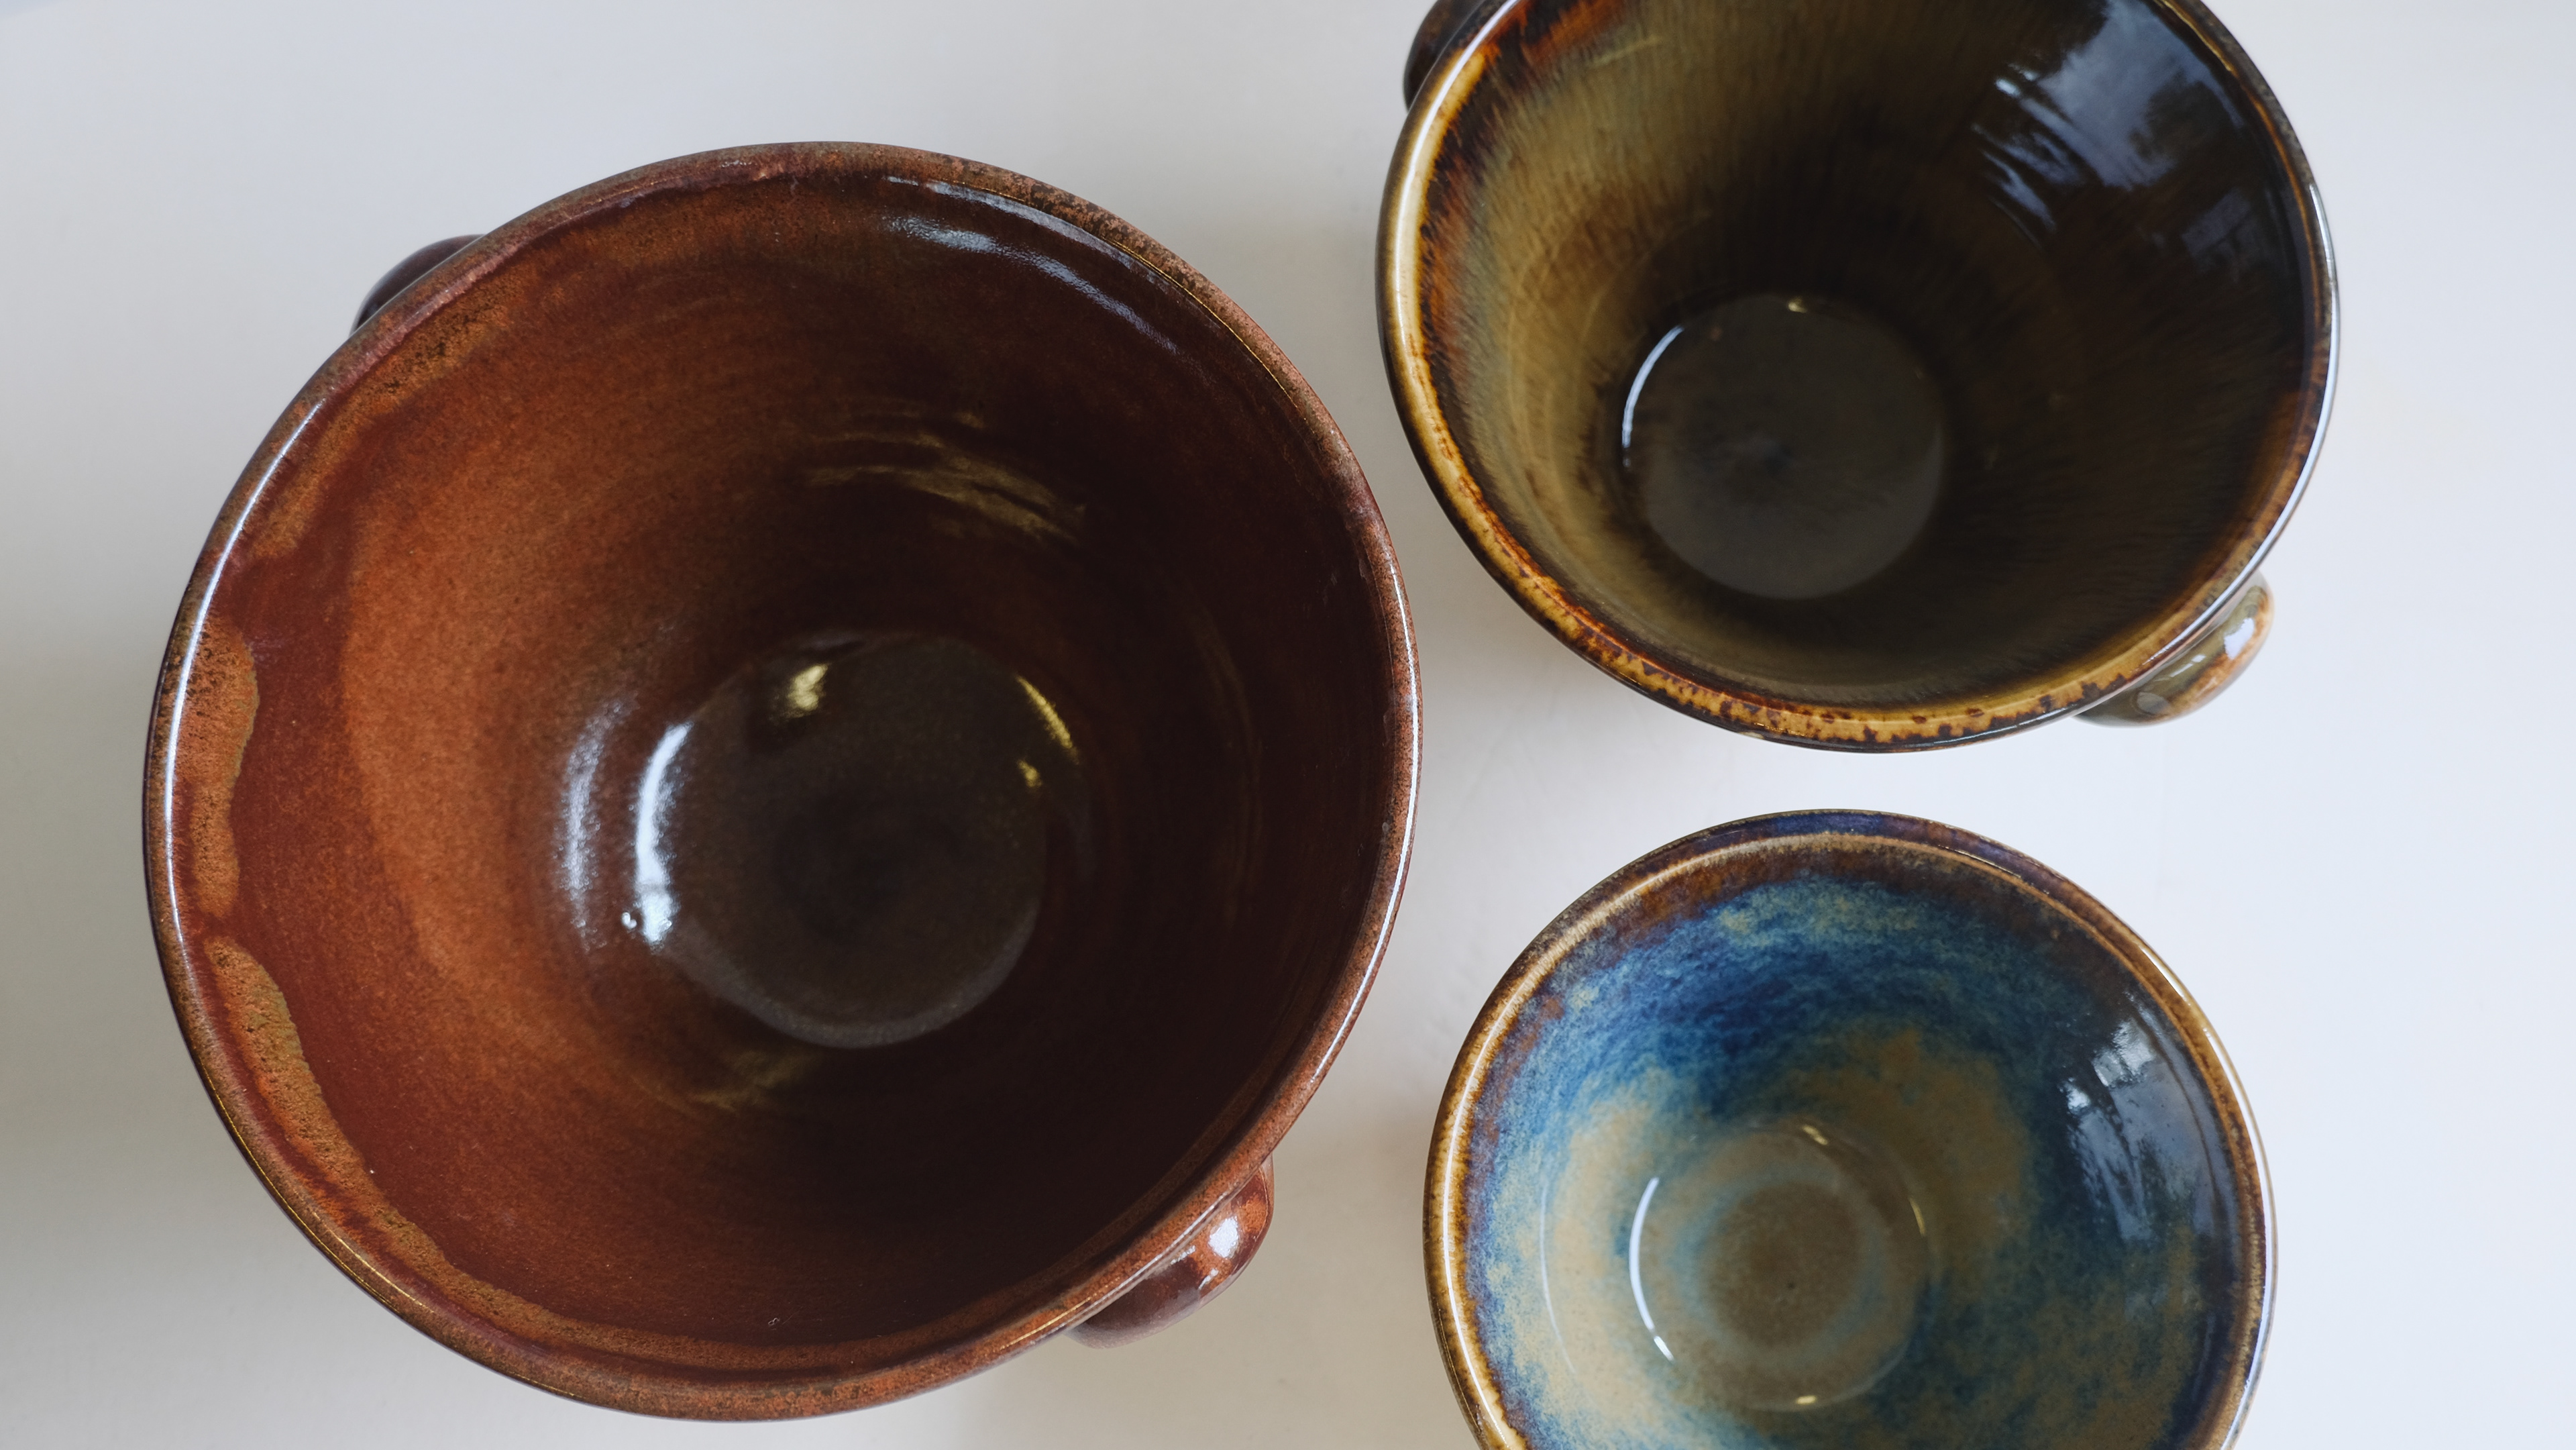
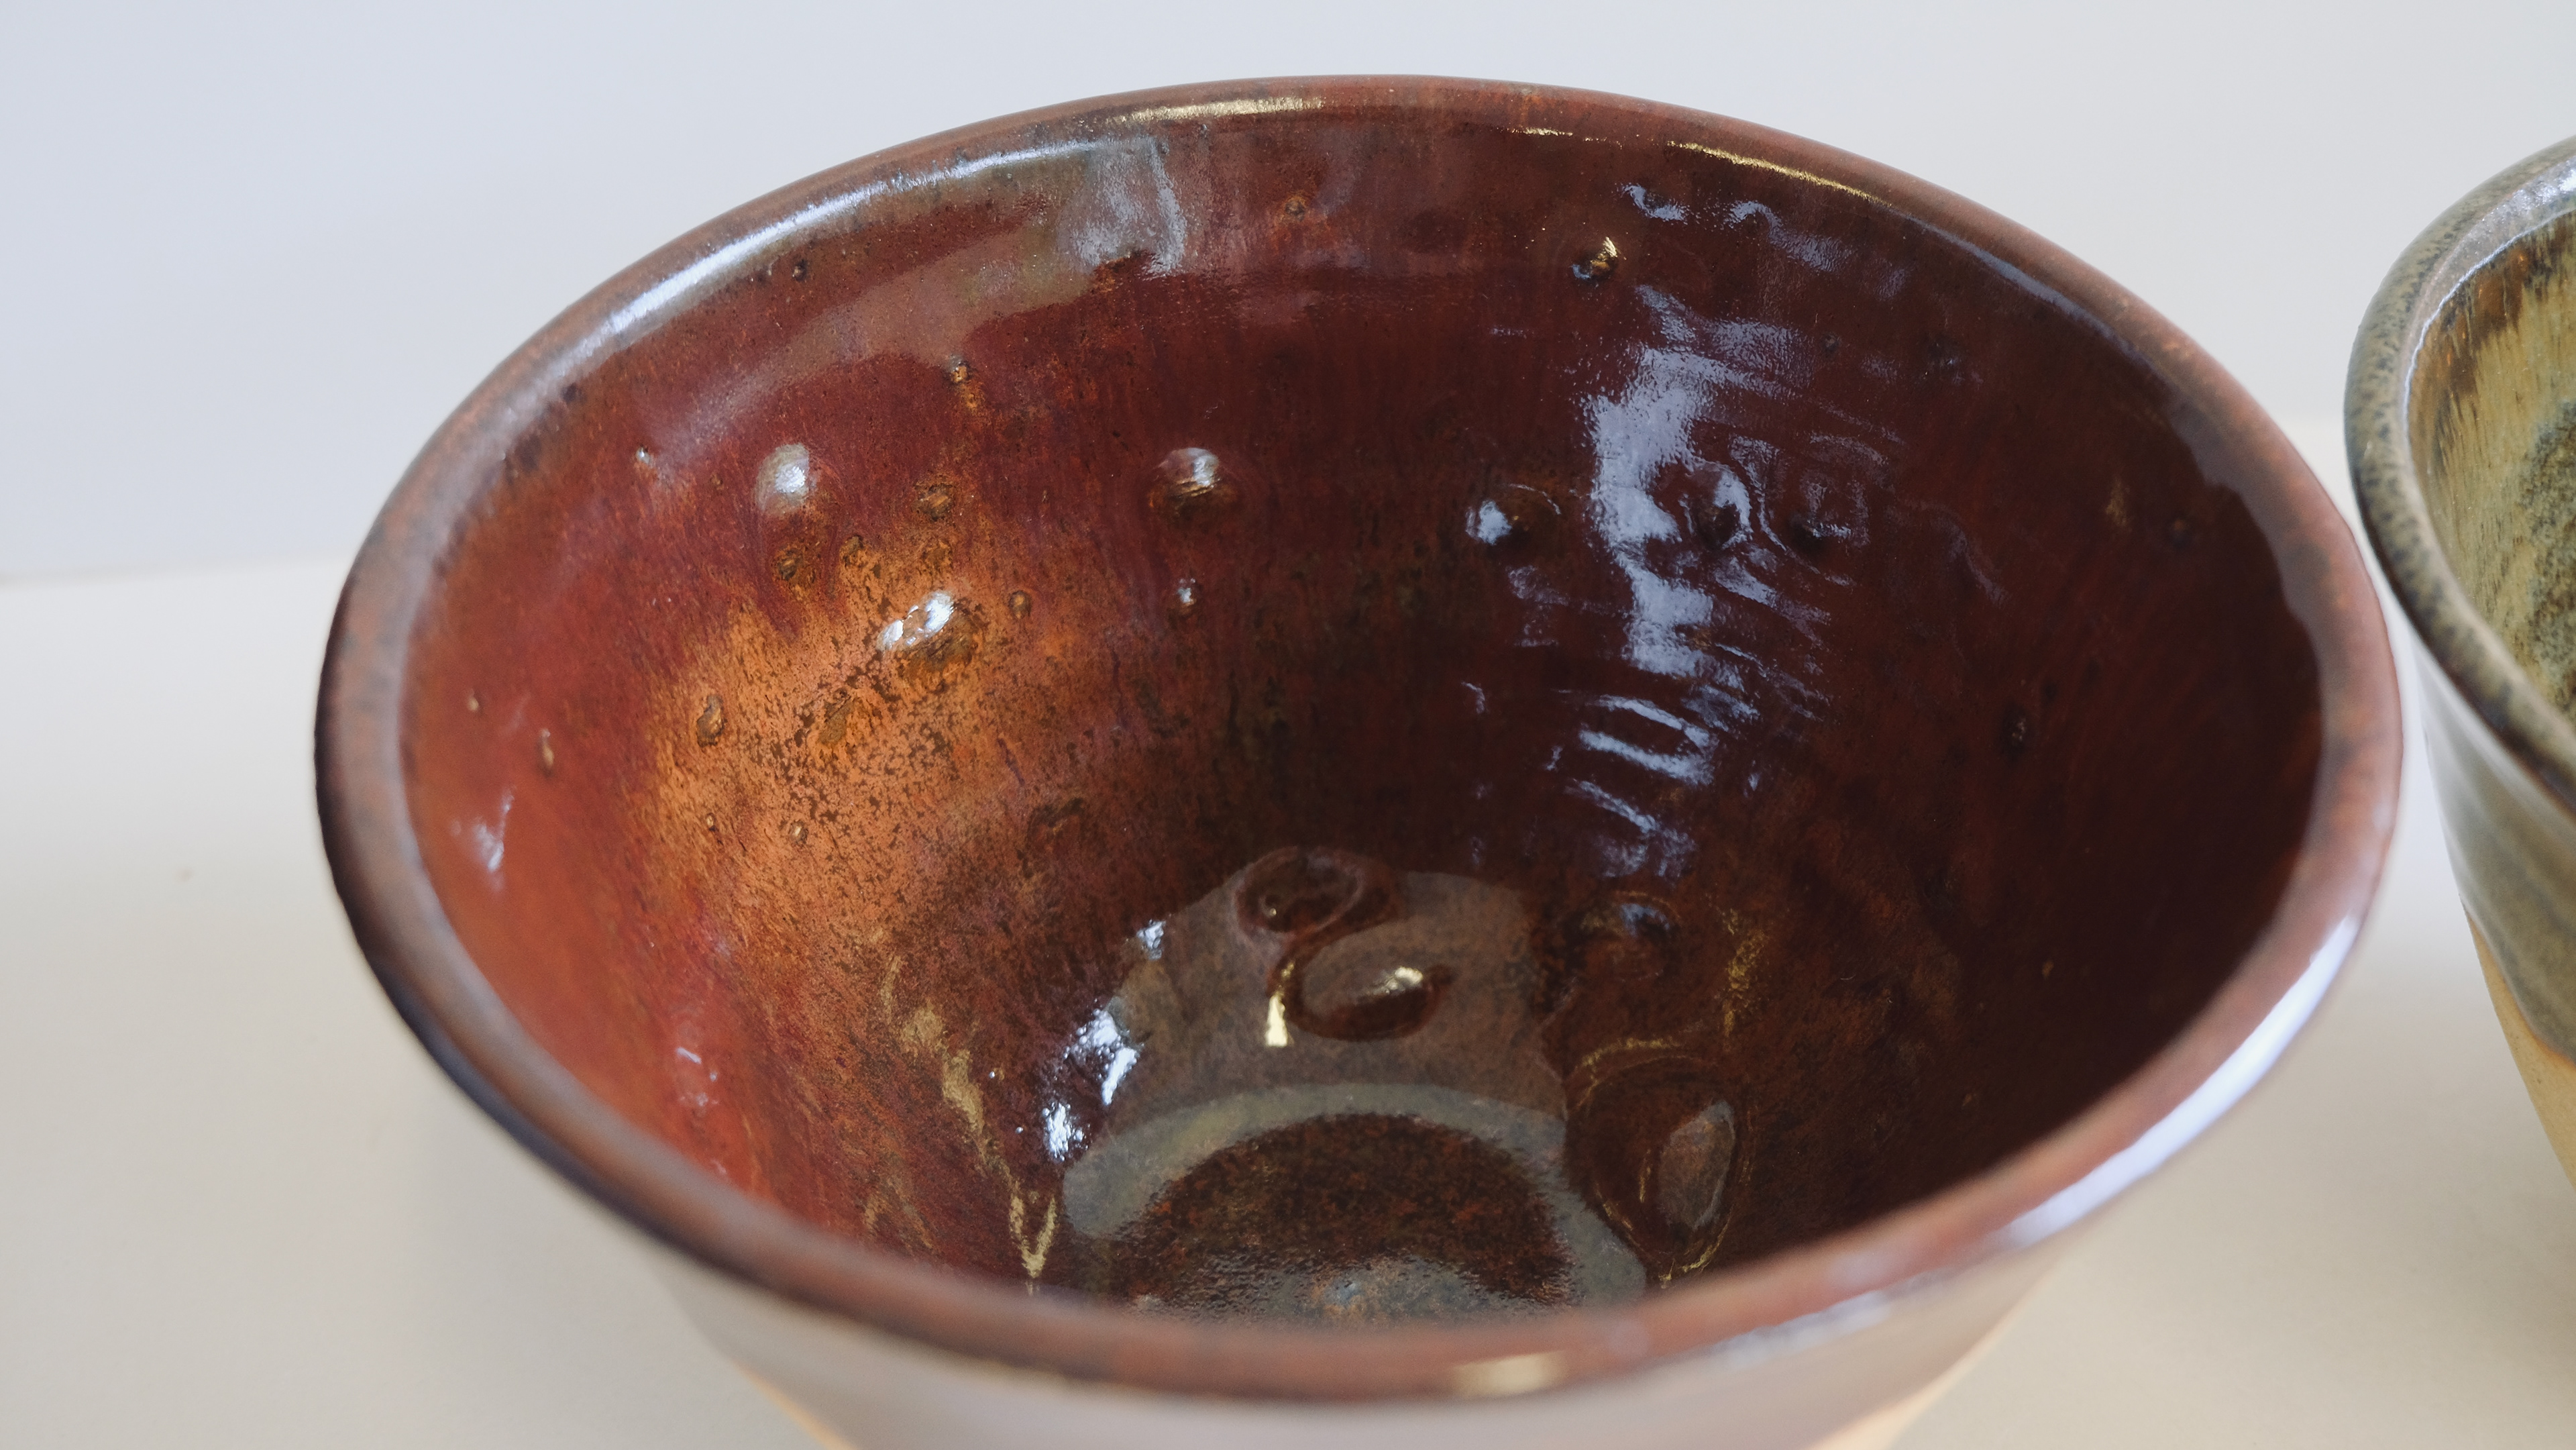
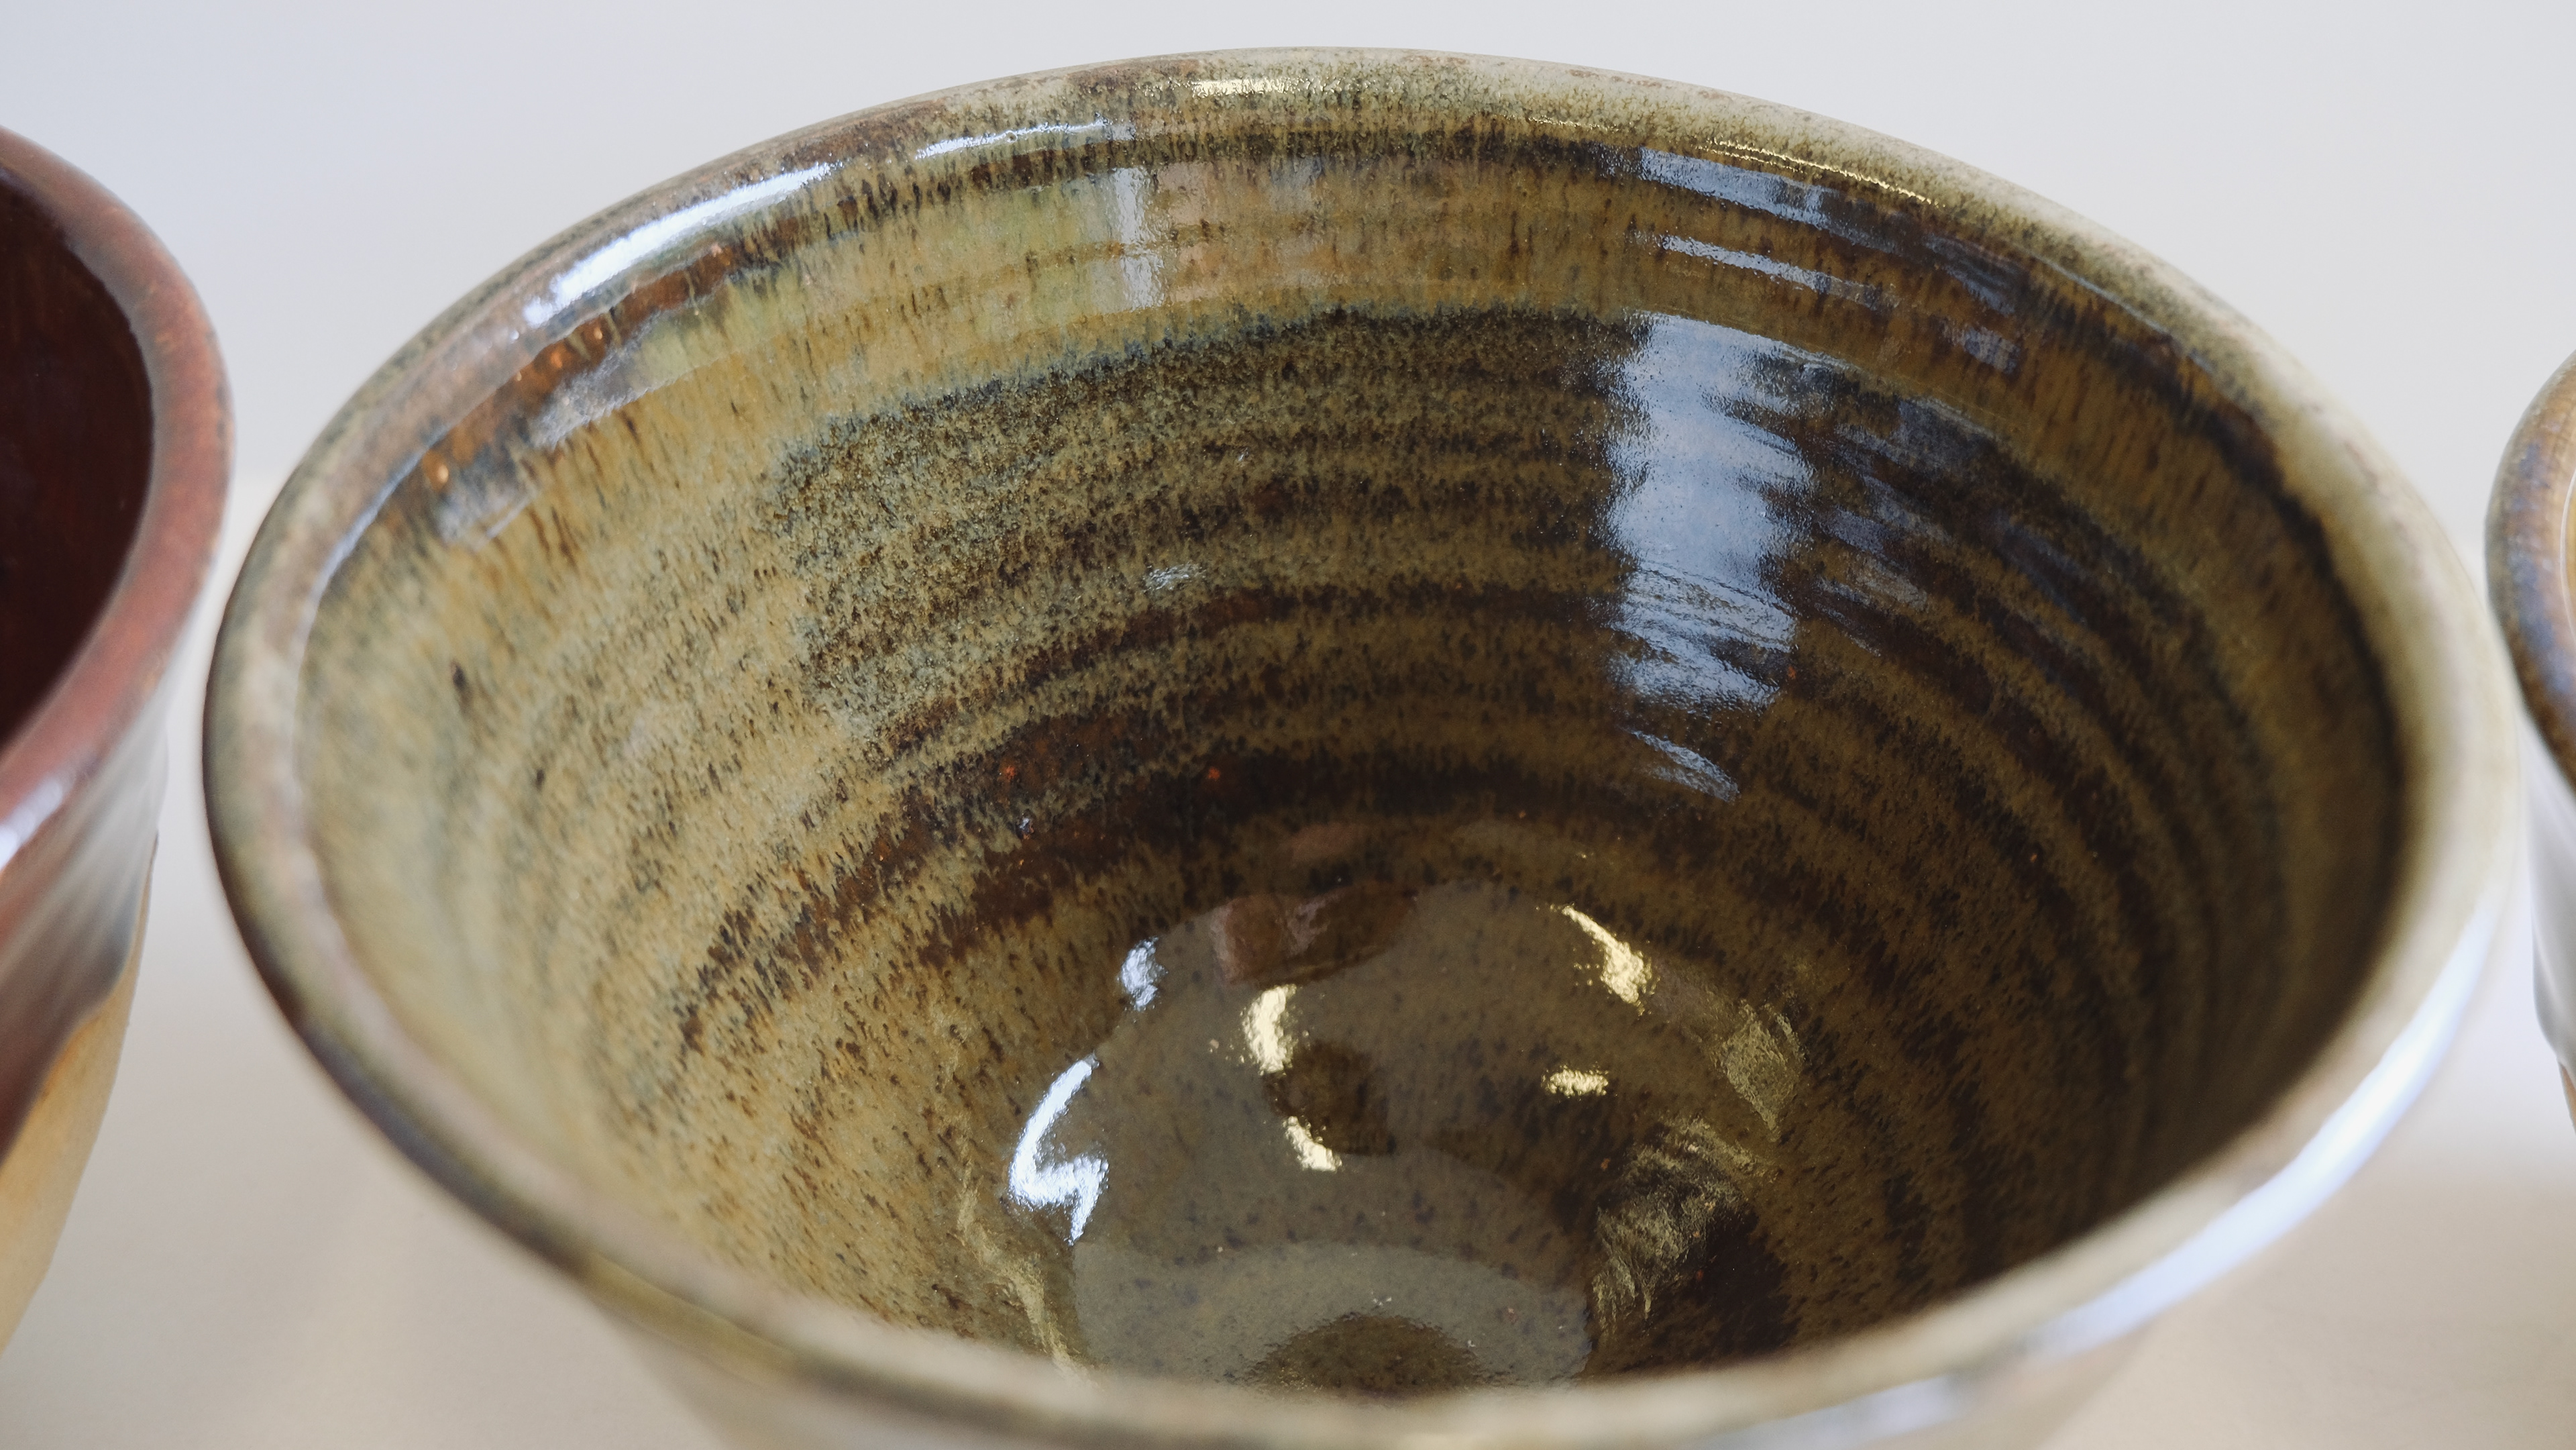
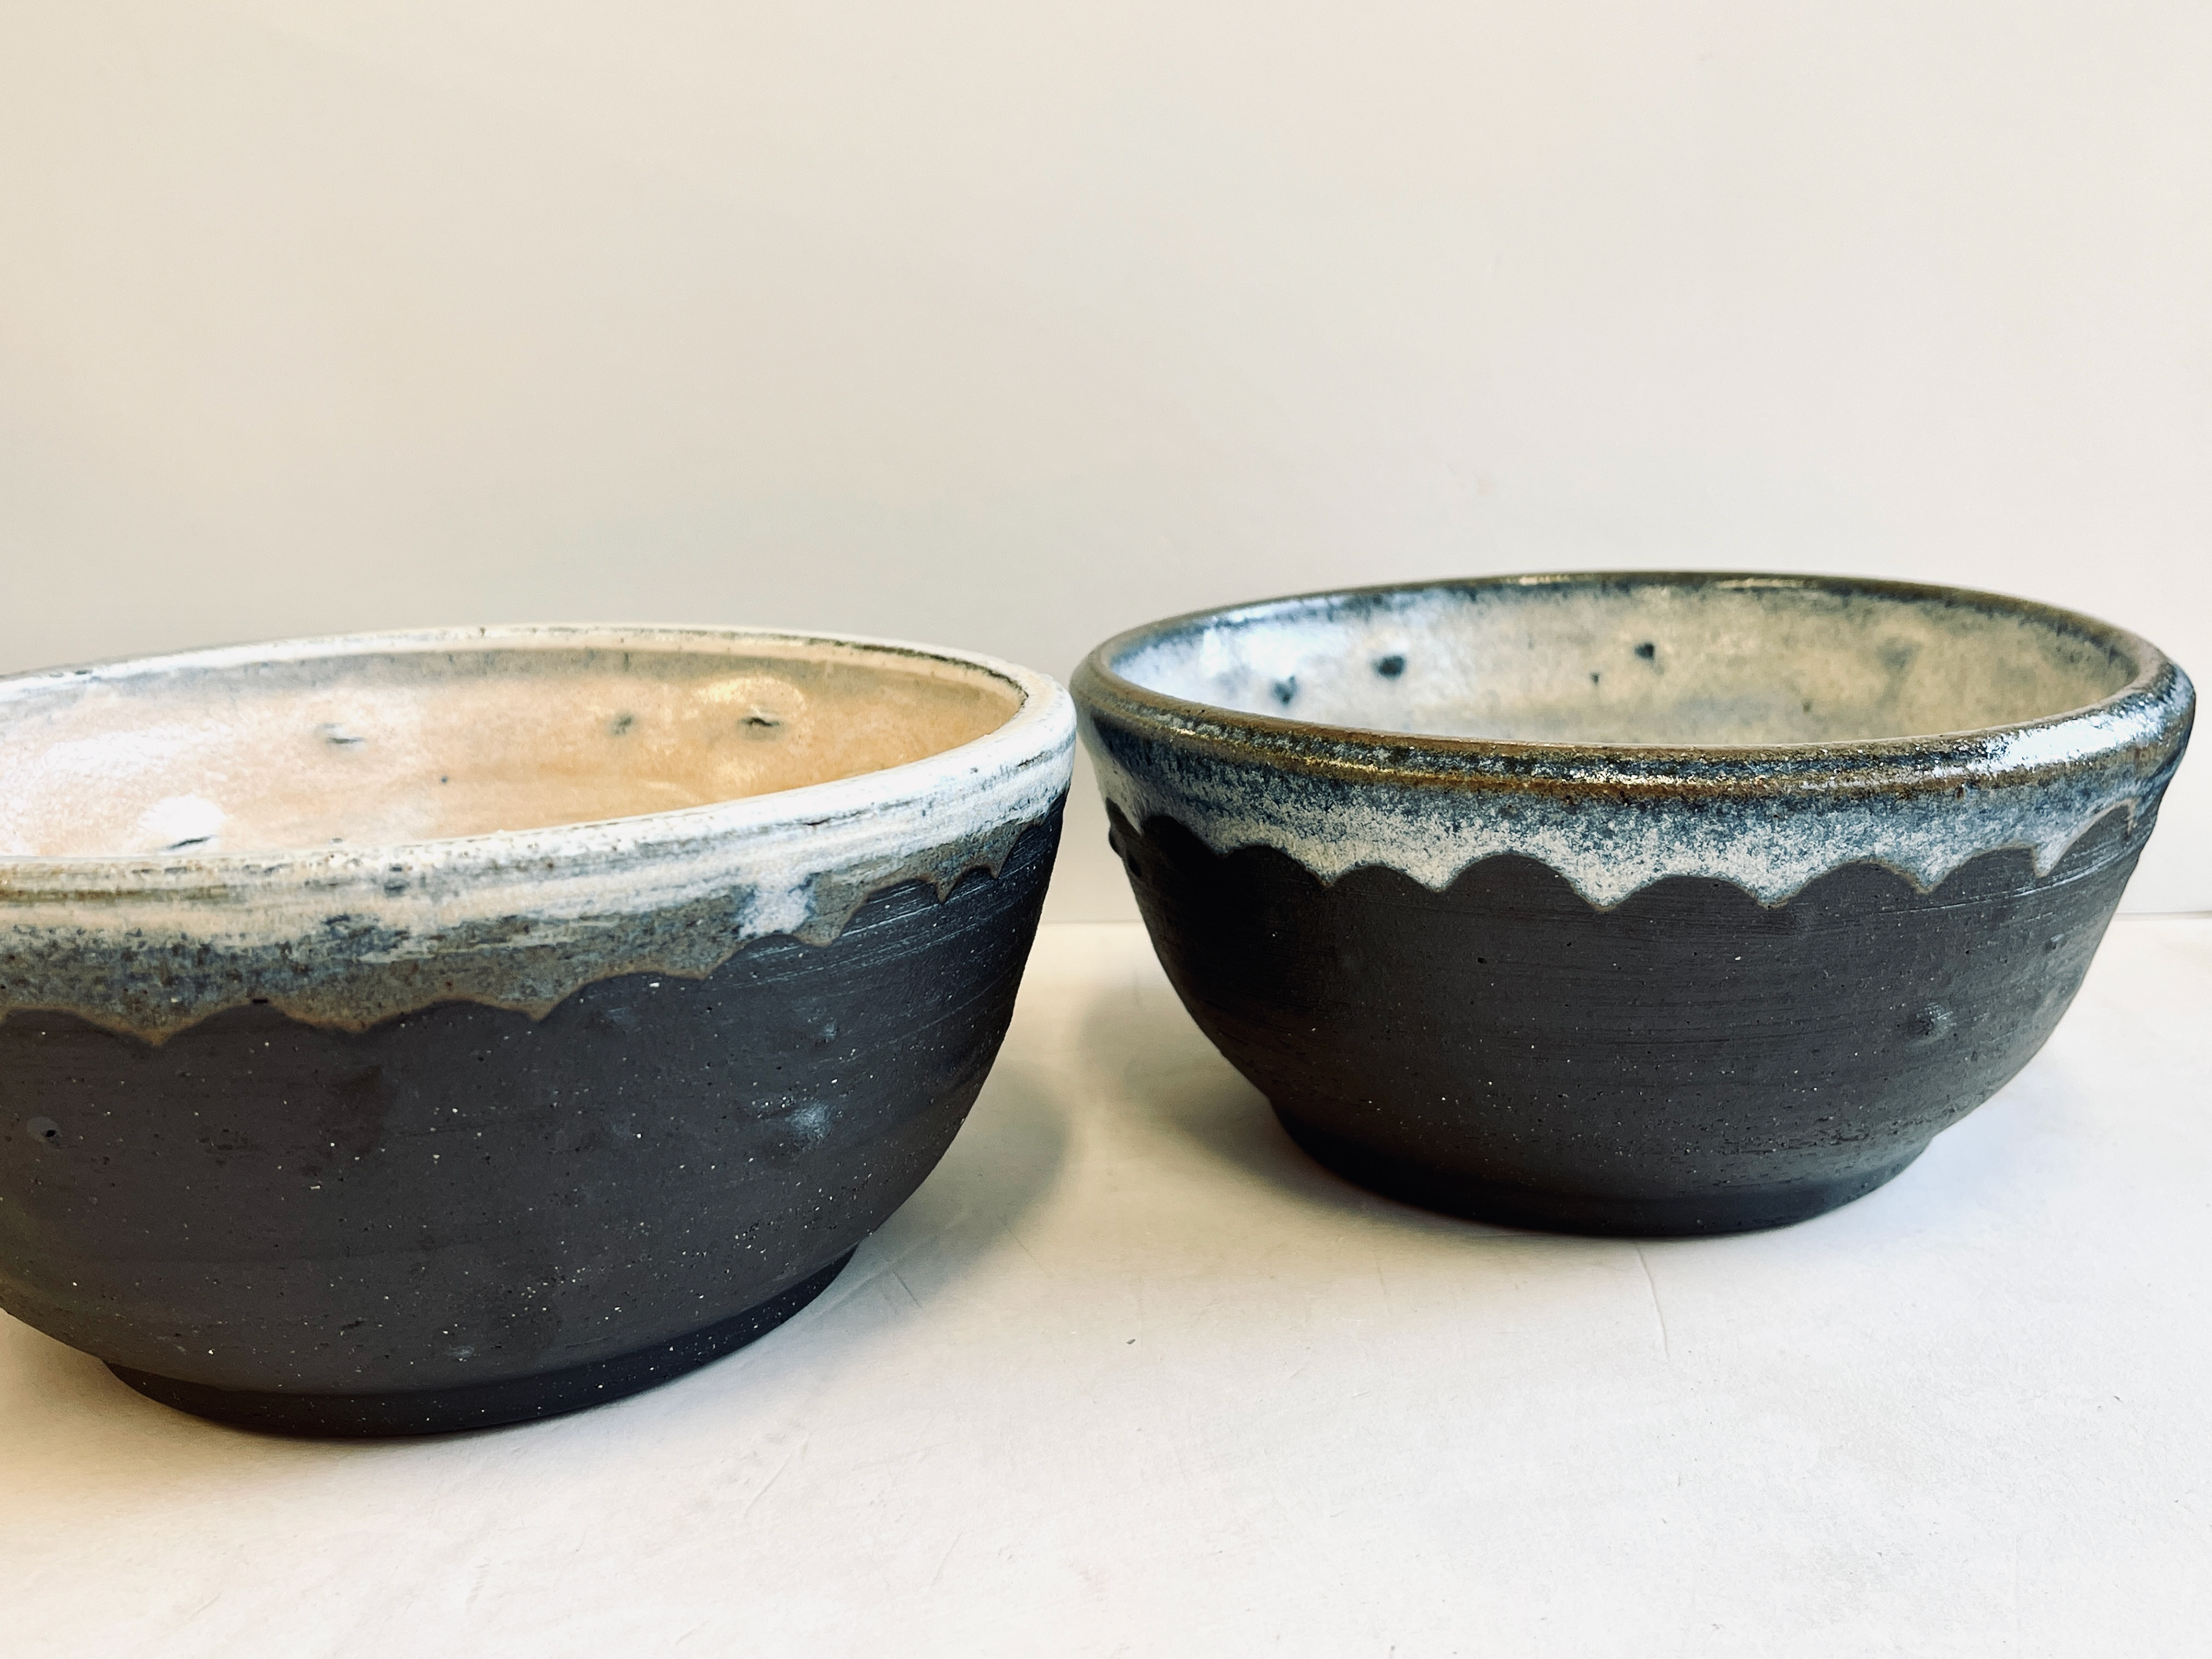
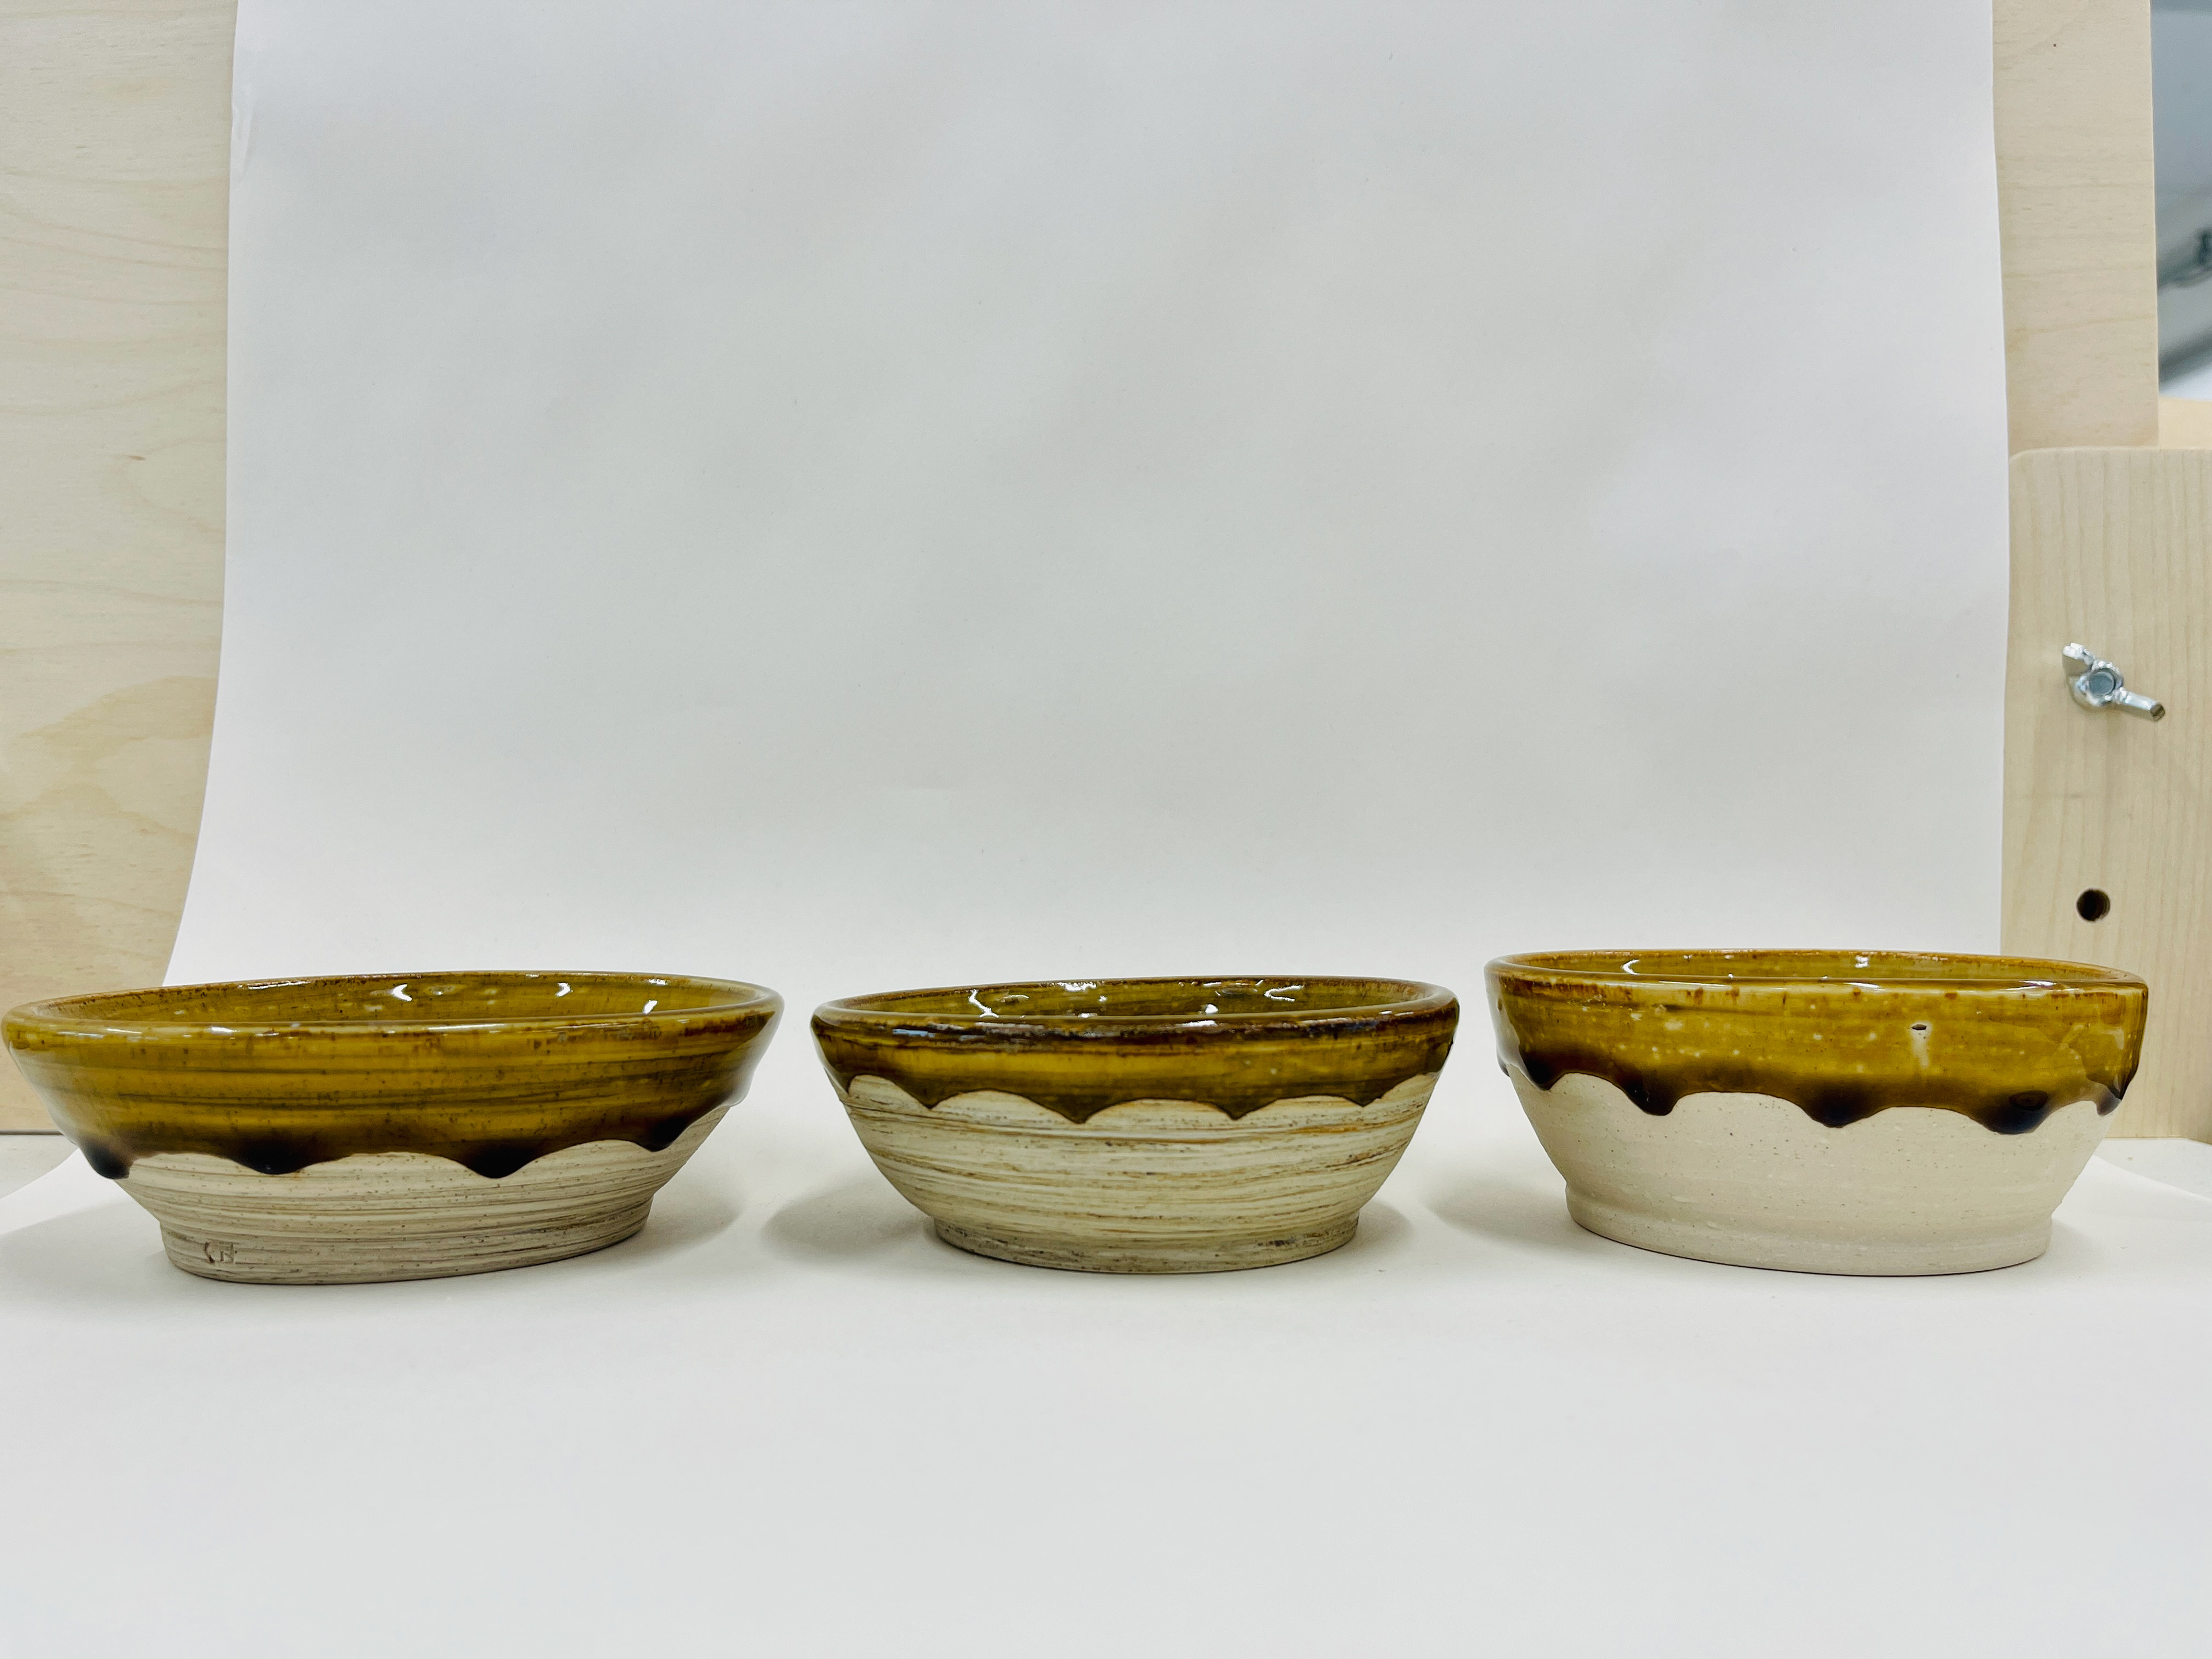
Left- Magnesium/Rutile glaze over ALM and IVS clay bodies. both the outcomes are yellow/brown. with little to no surface interest. 

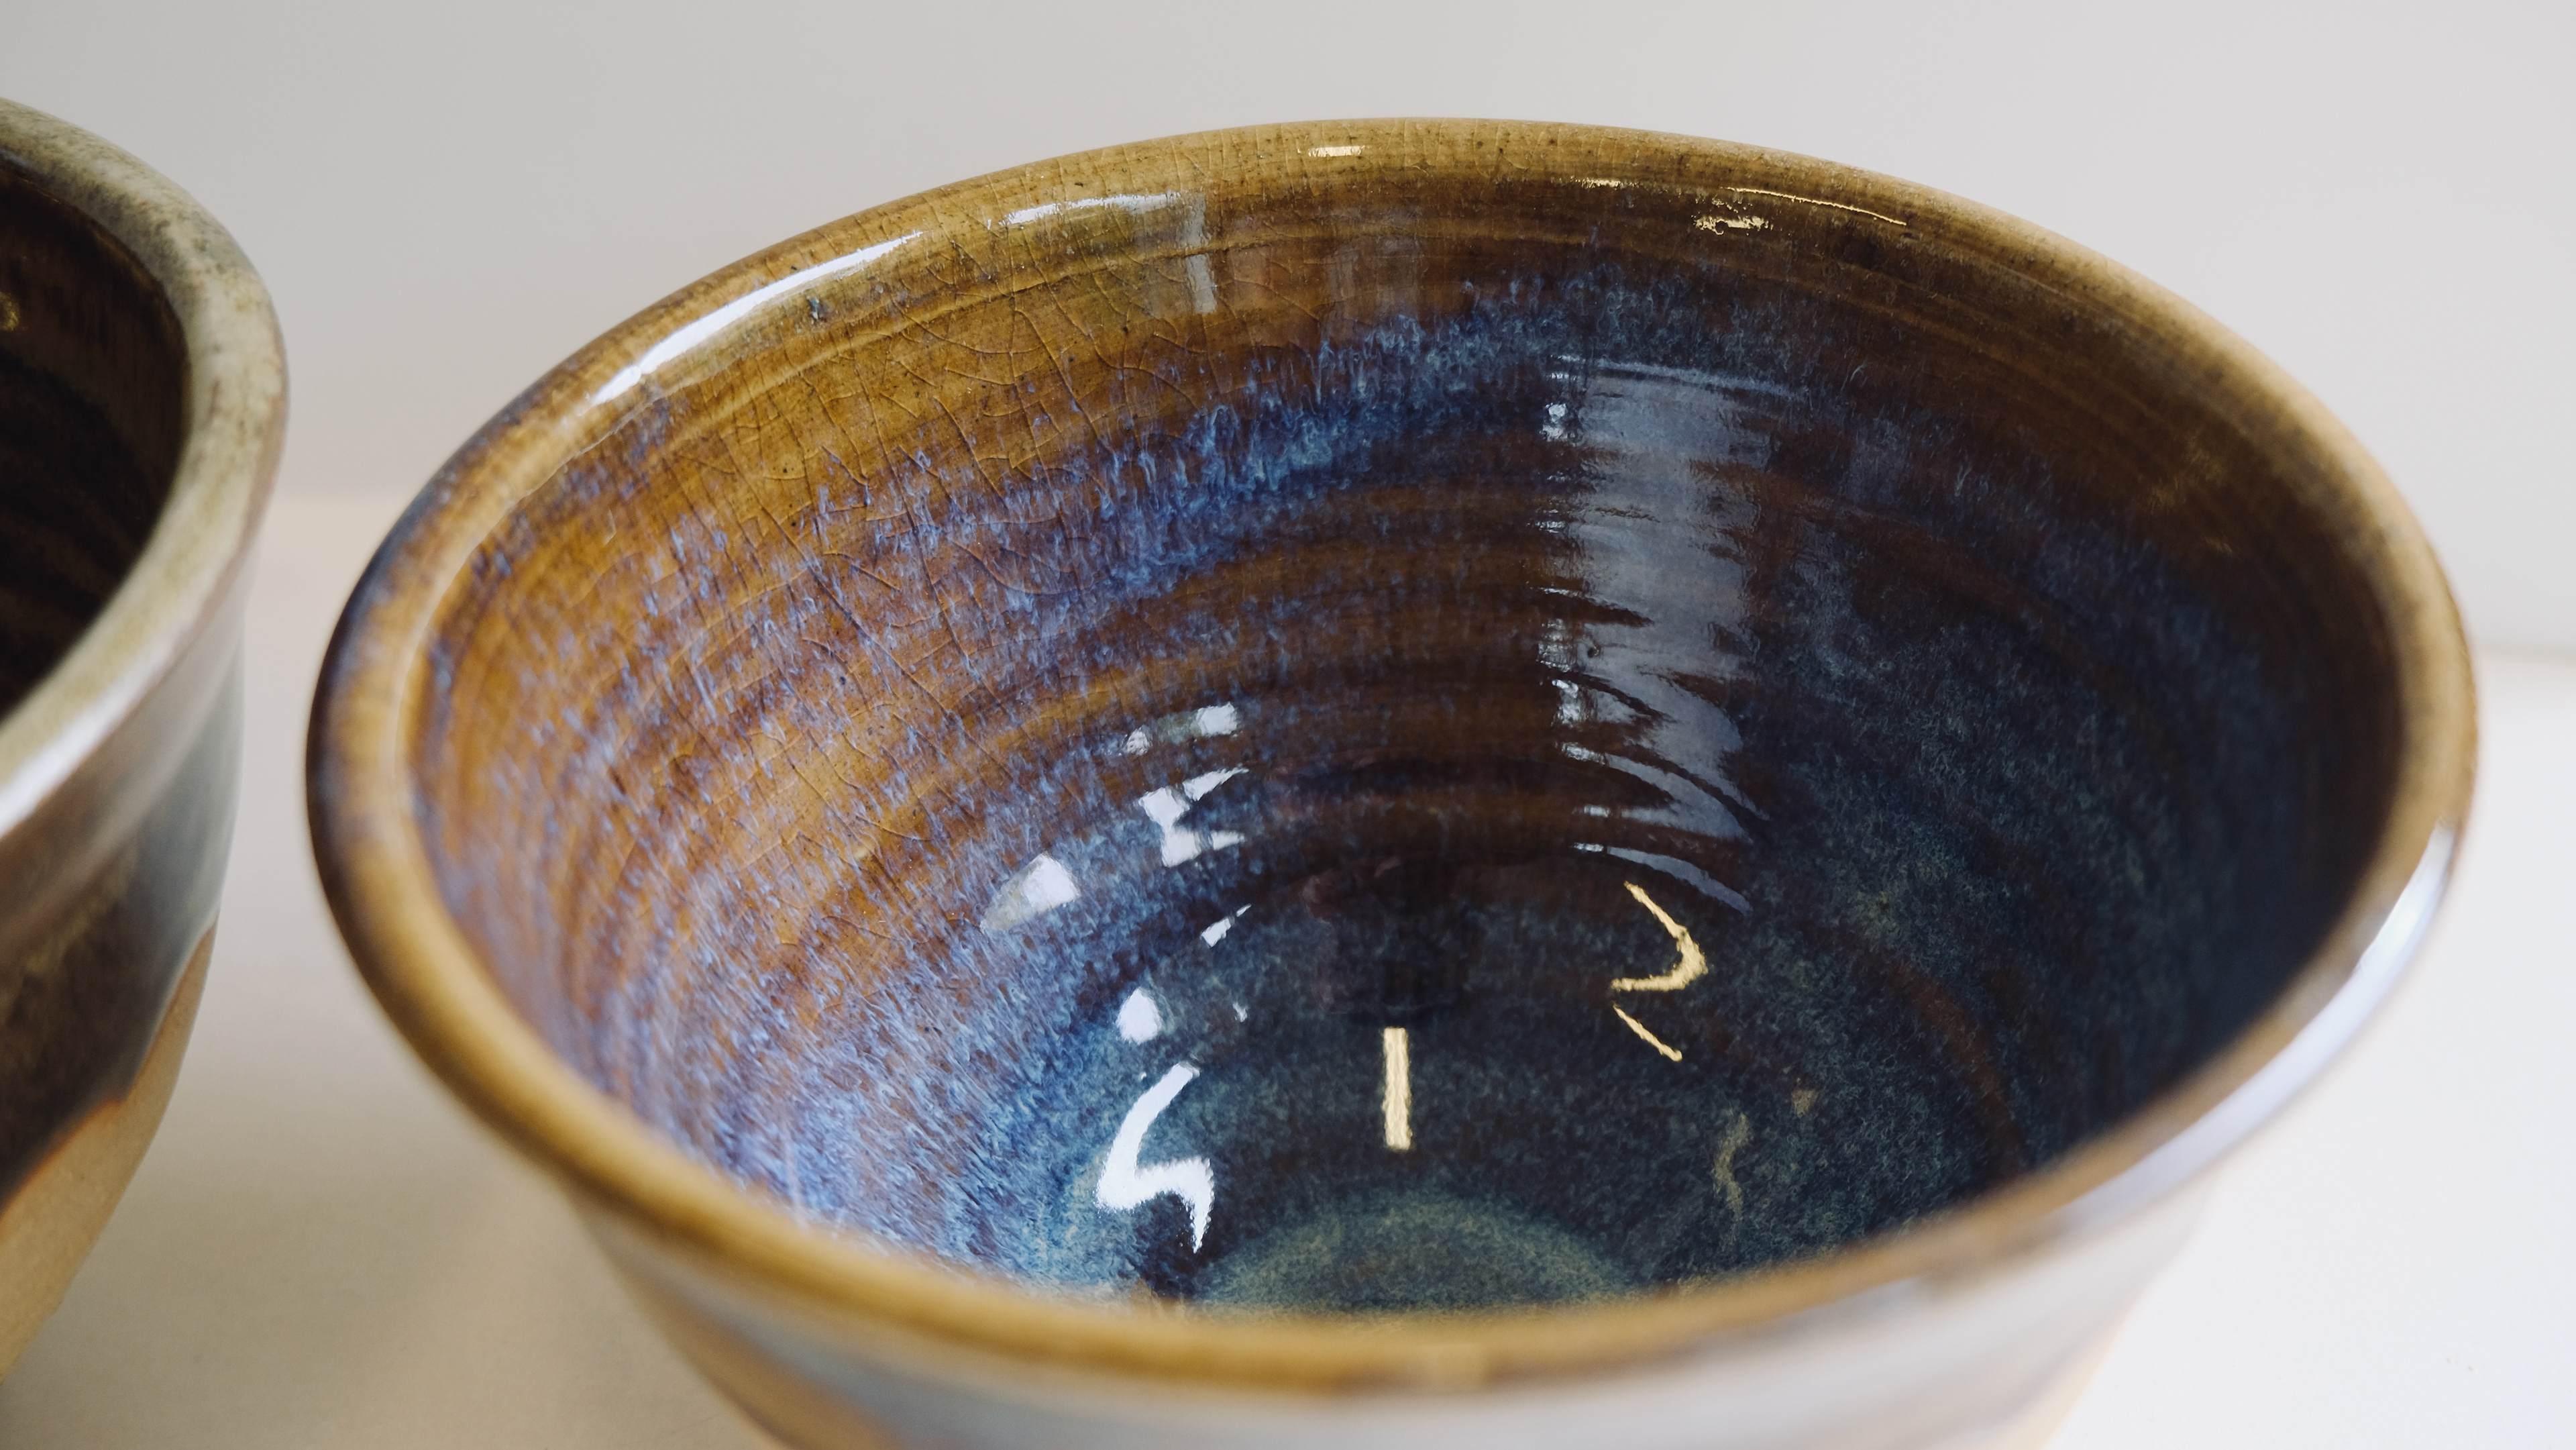
Middle- Enhancing glaze- generally used as a overlay to elevate already interesting surface. clearly visible from the samples the plain surface is shiny and brighter under the glaze. 

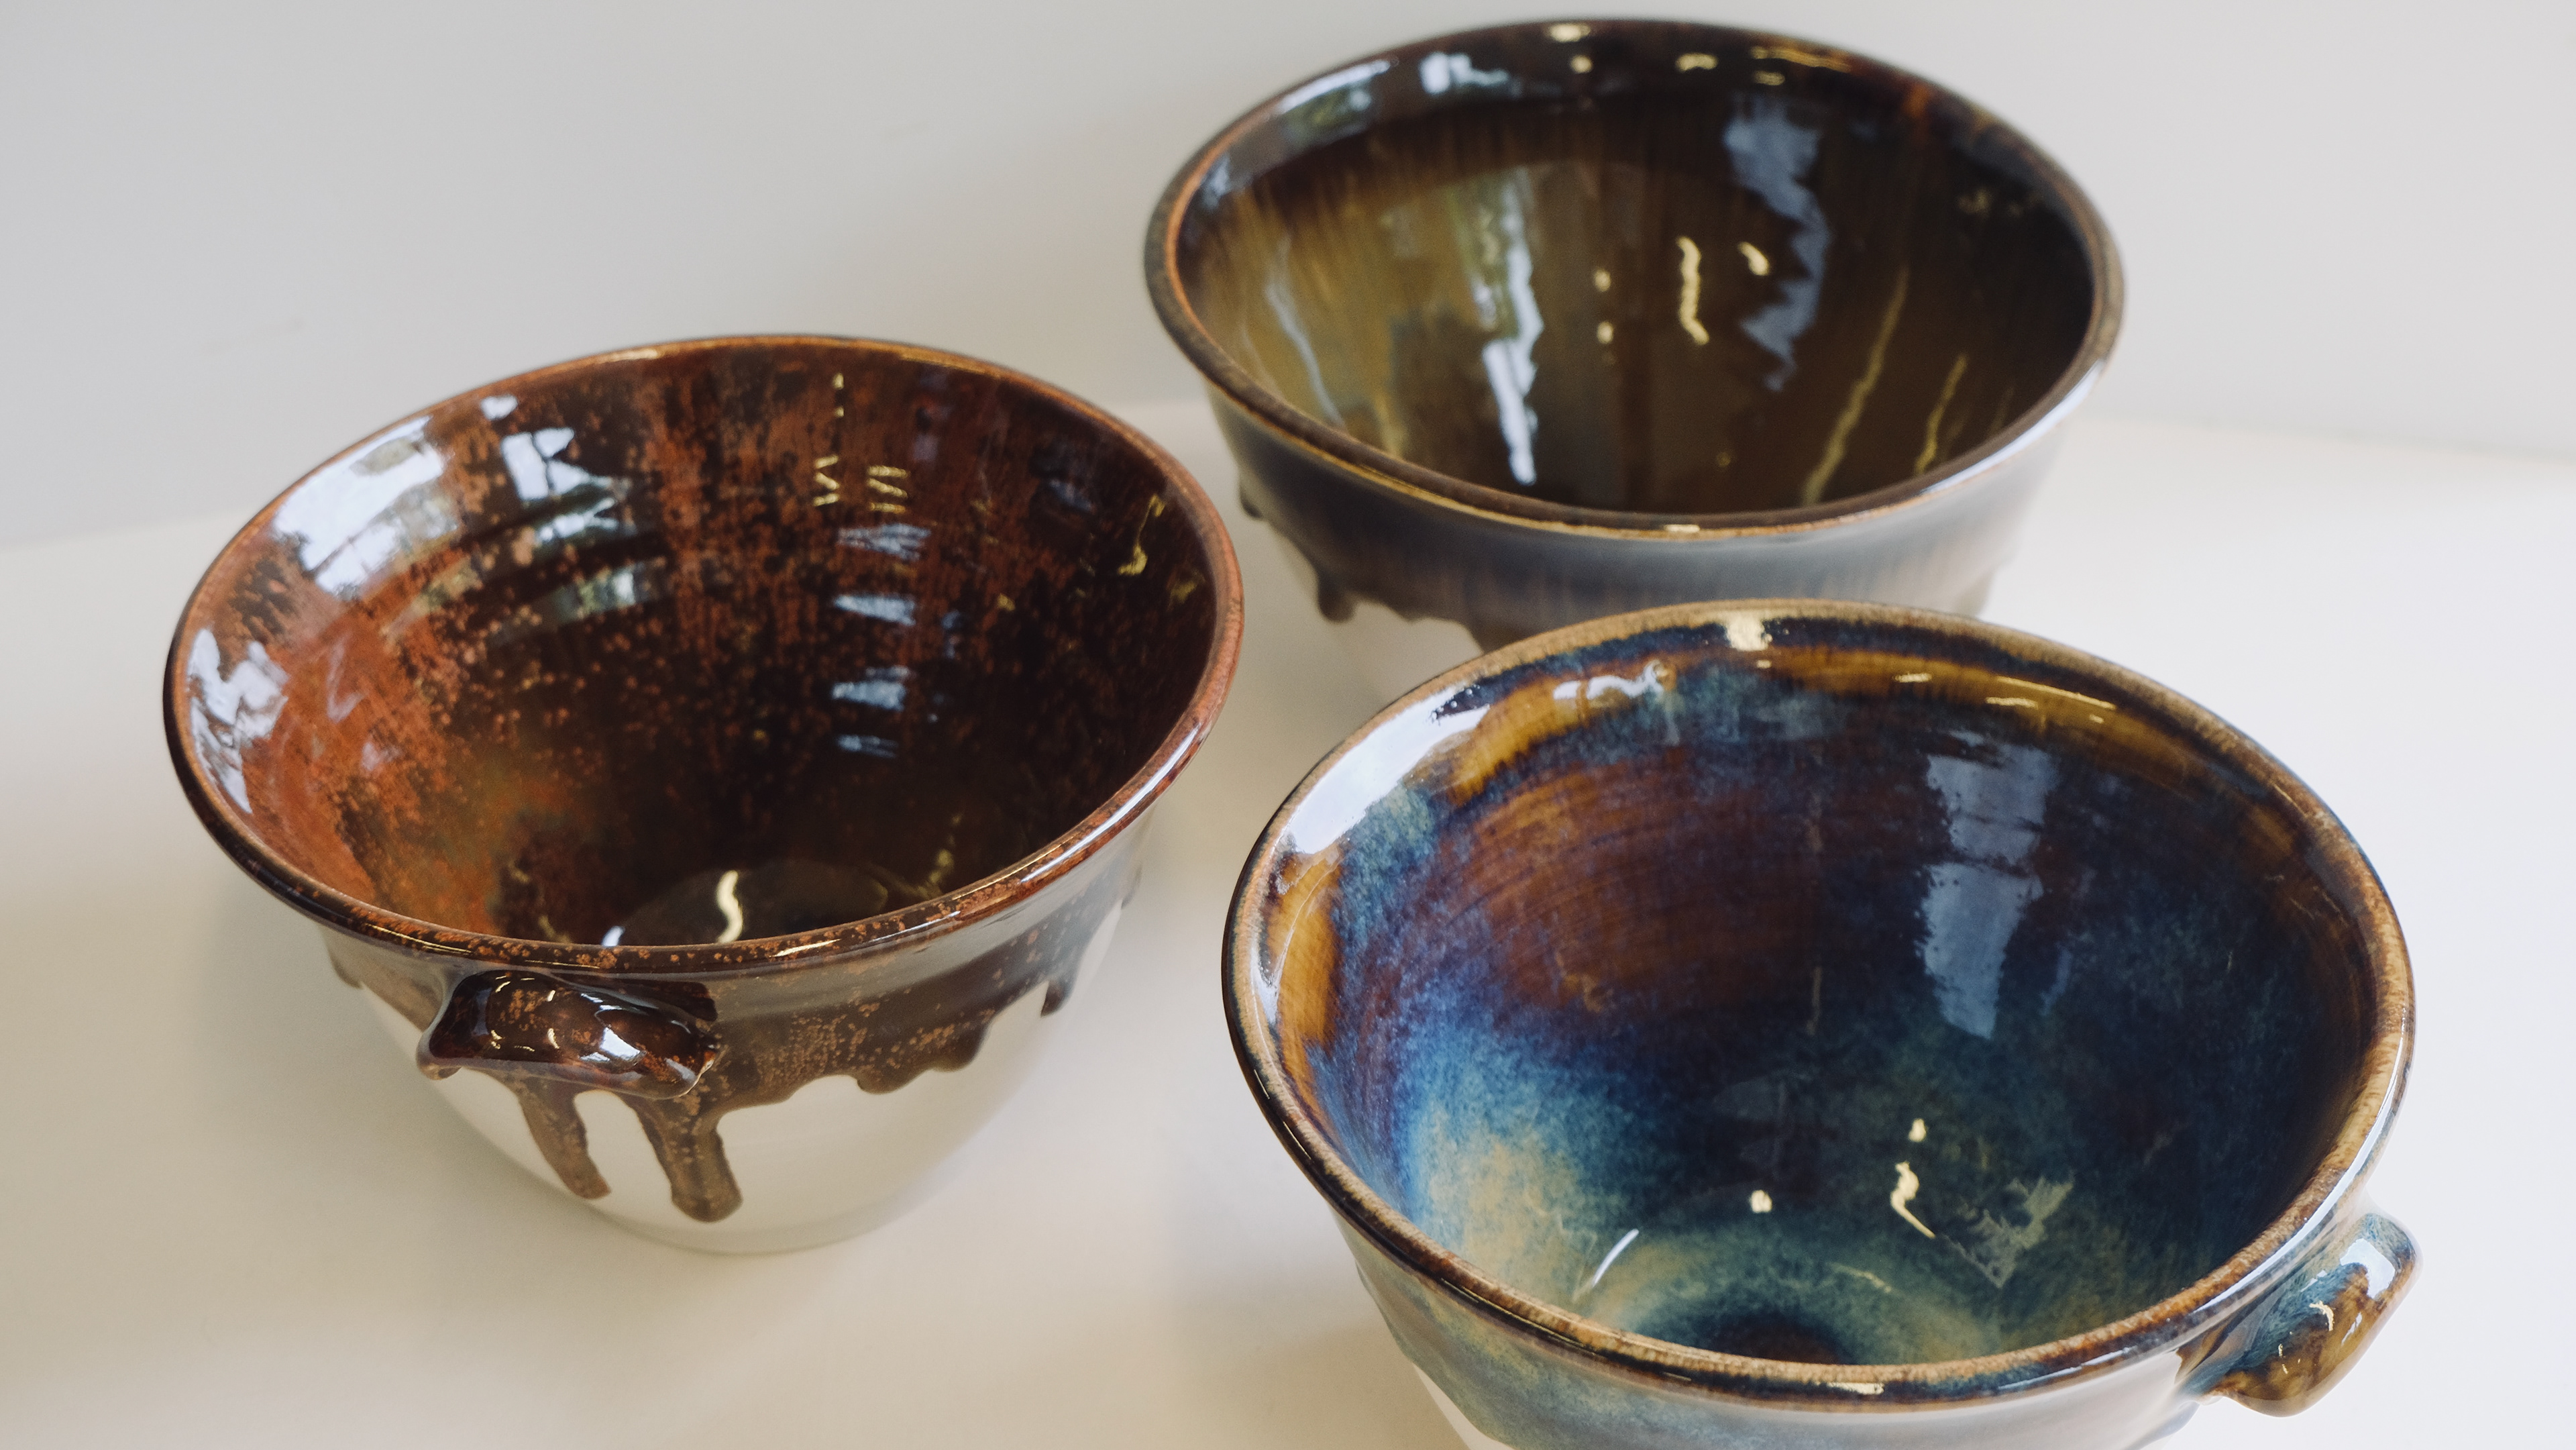
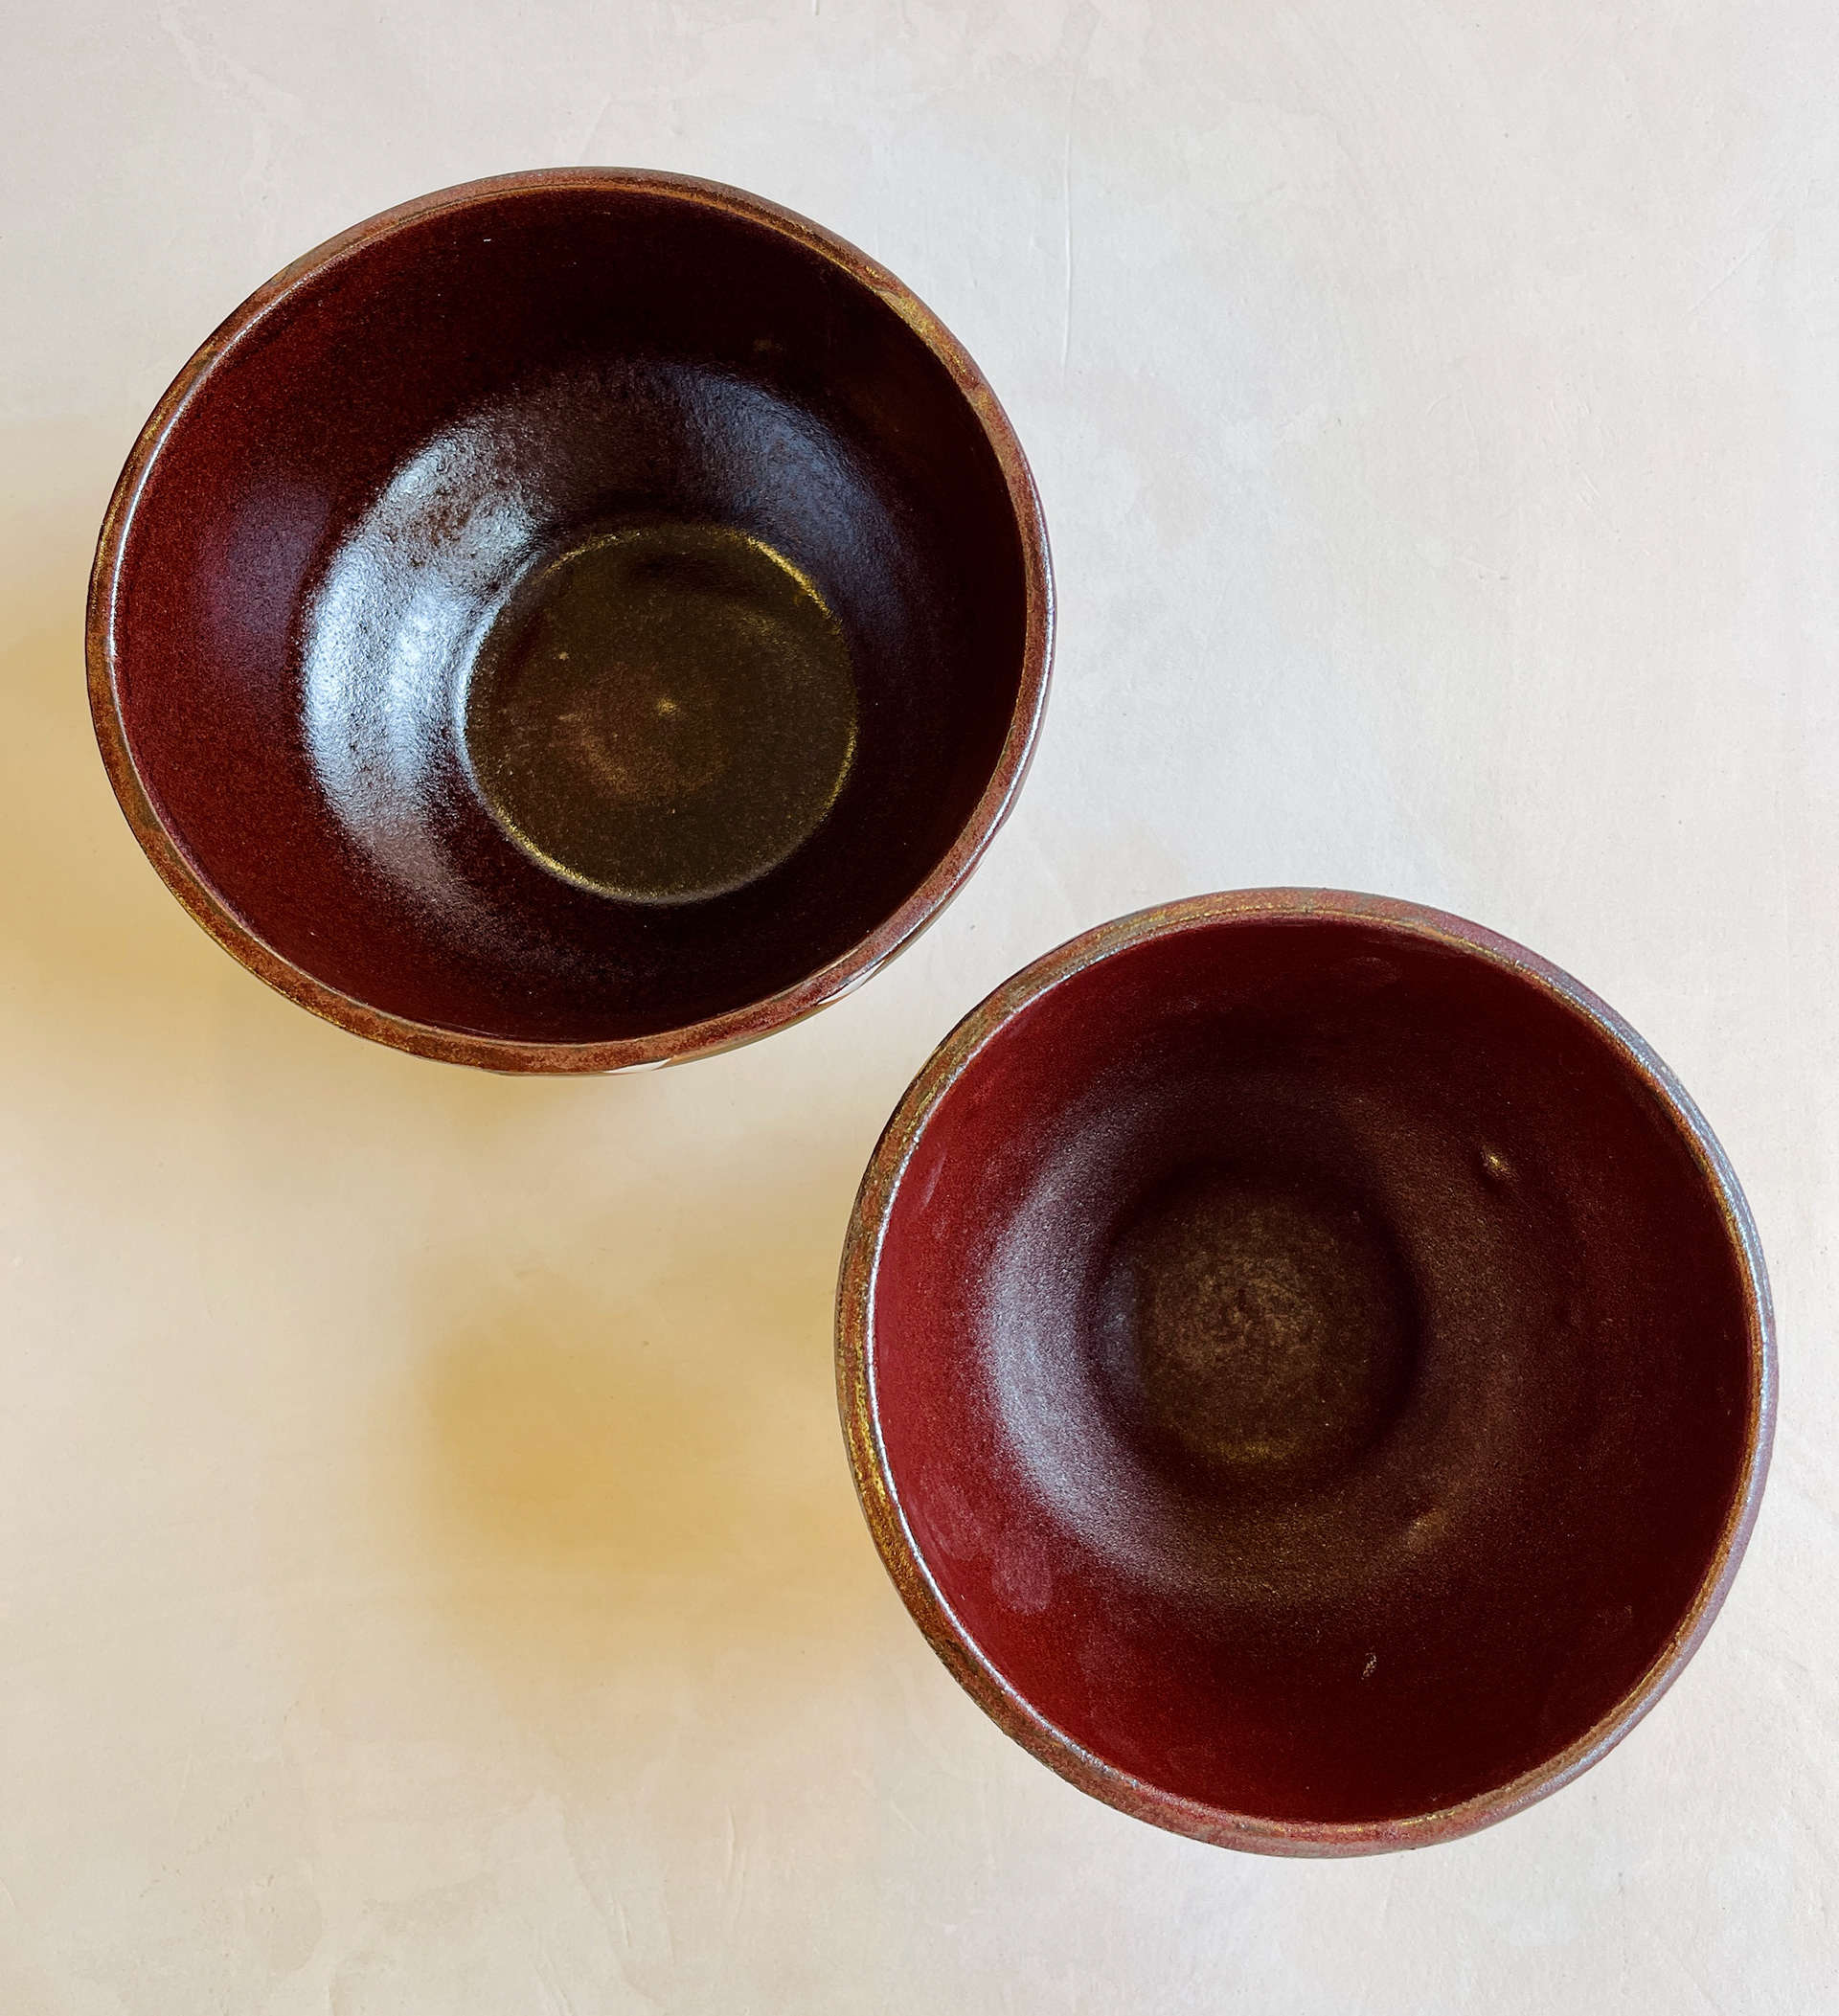
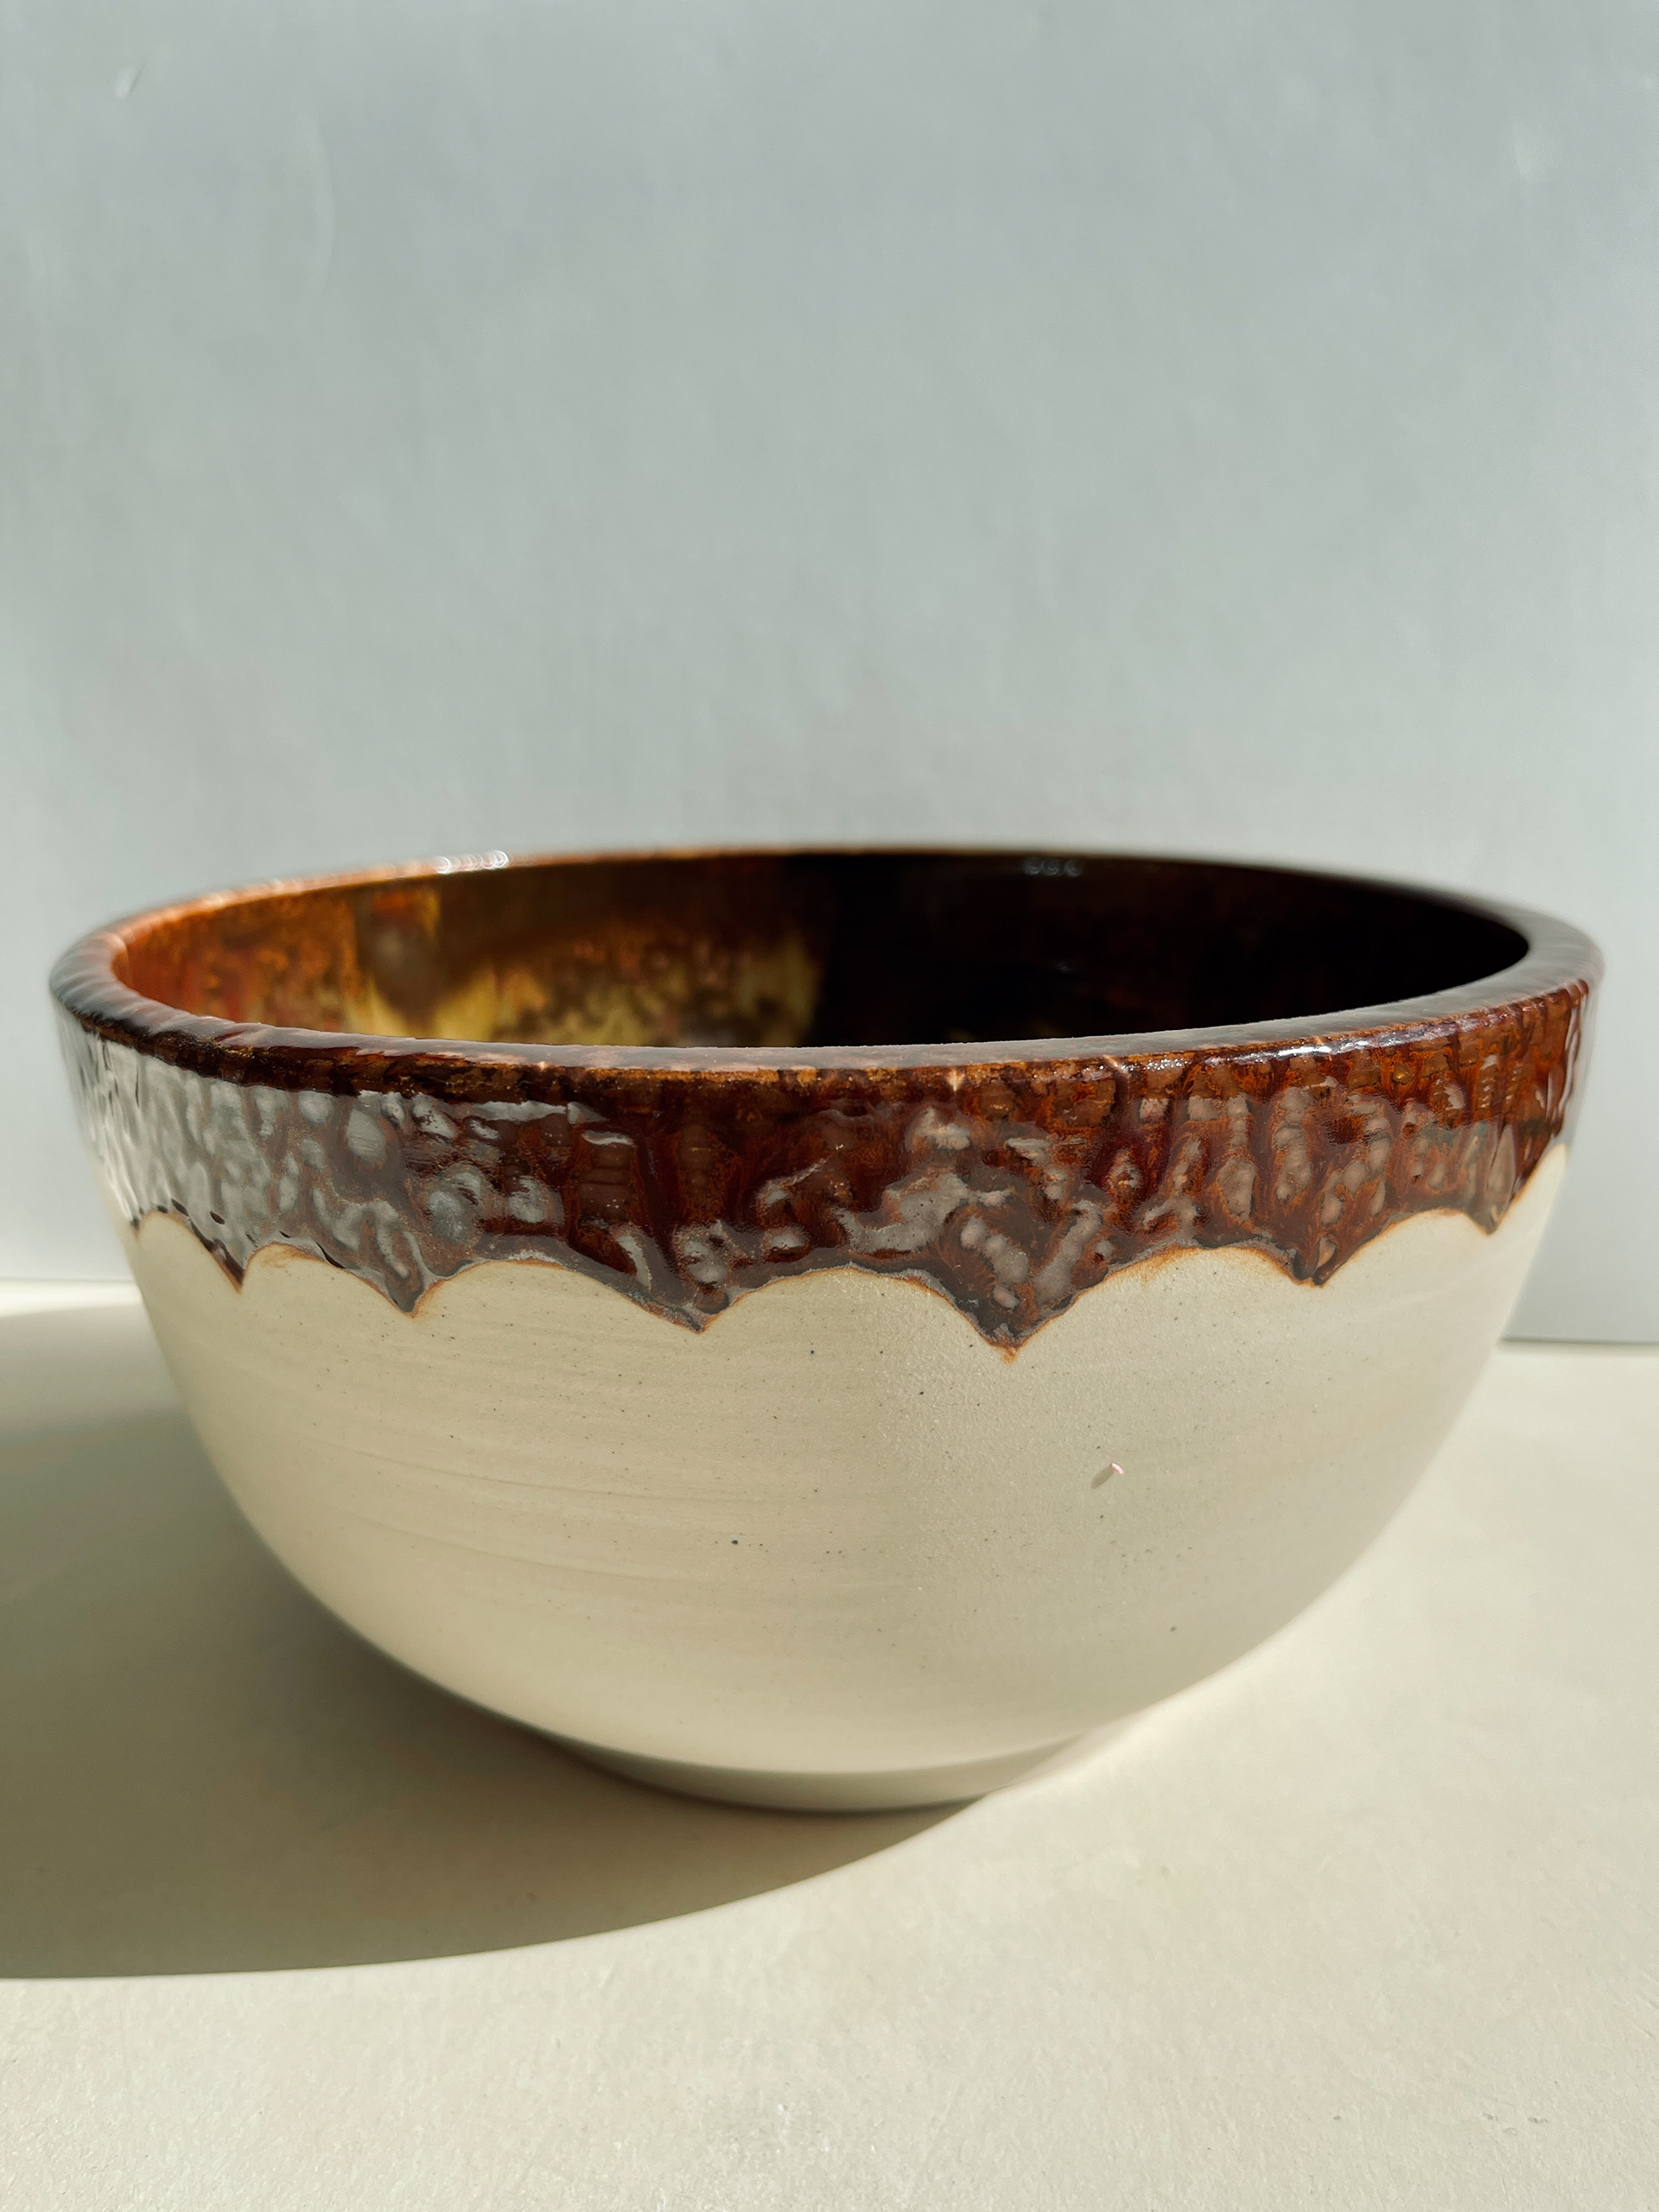
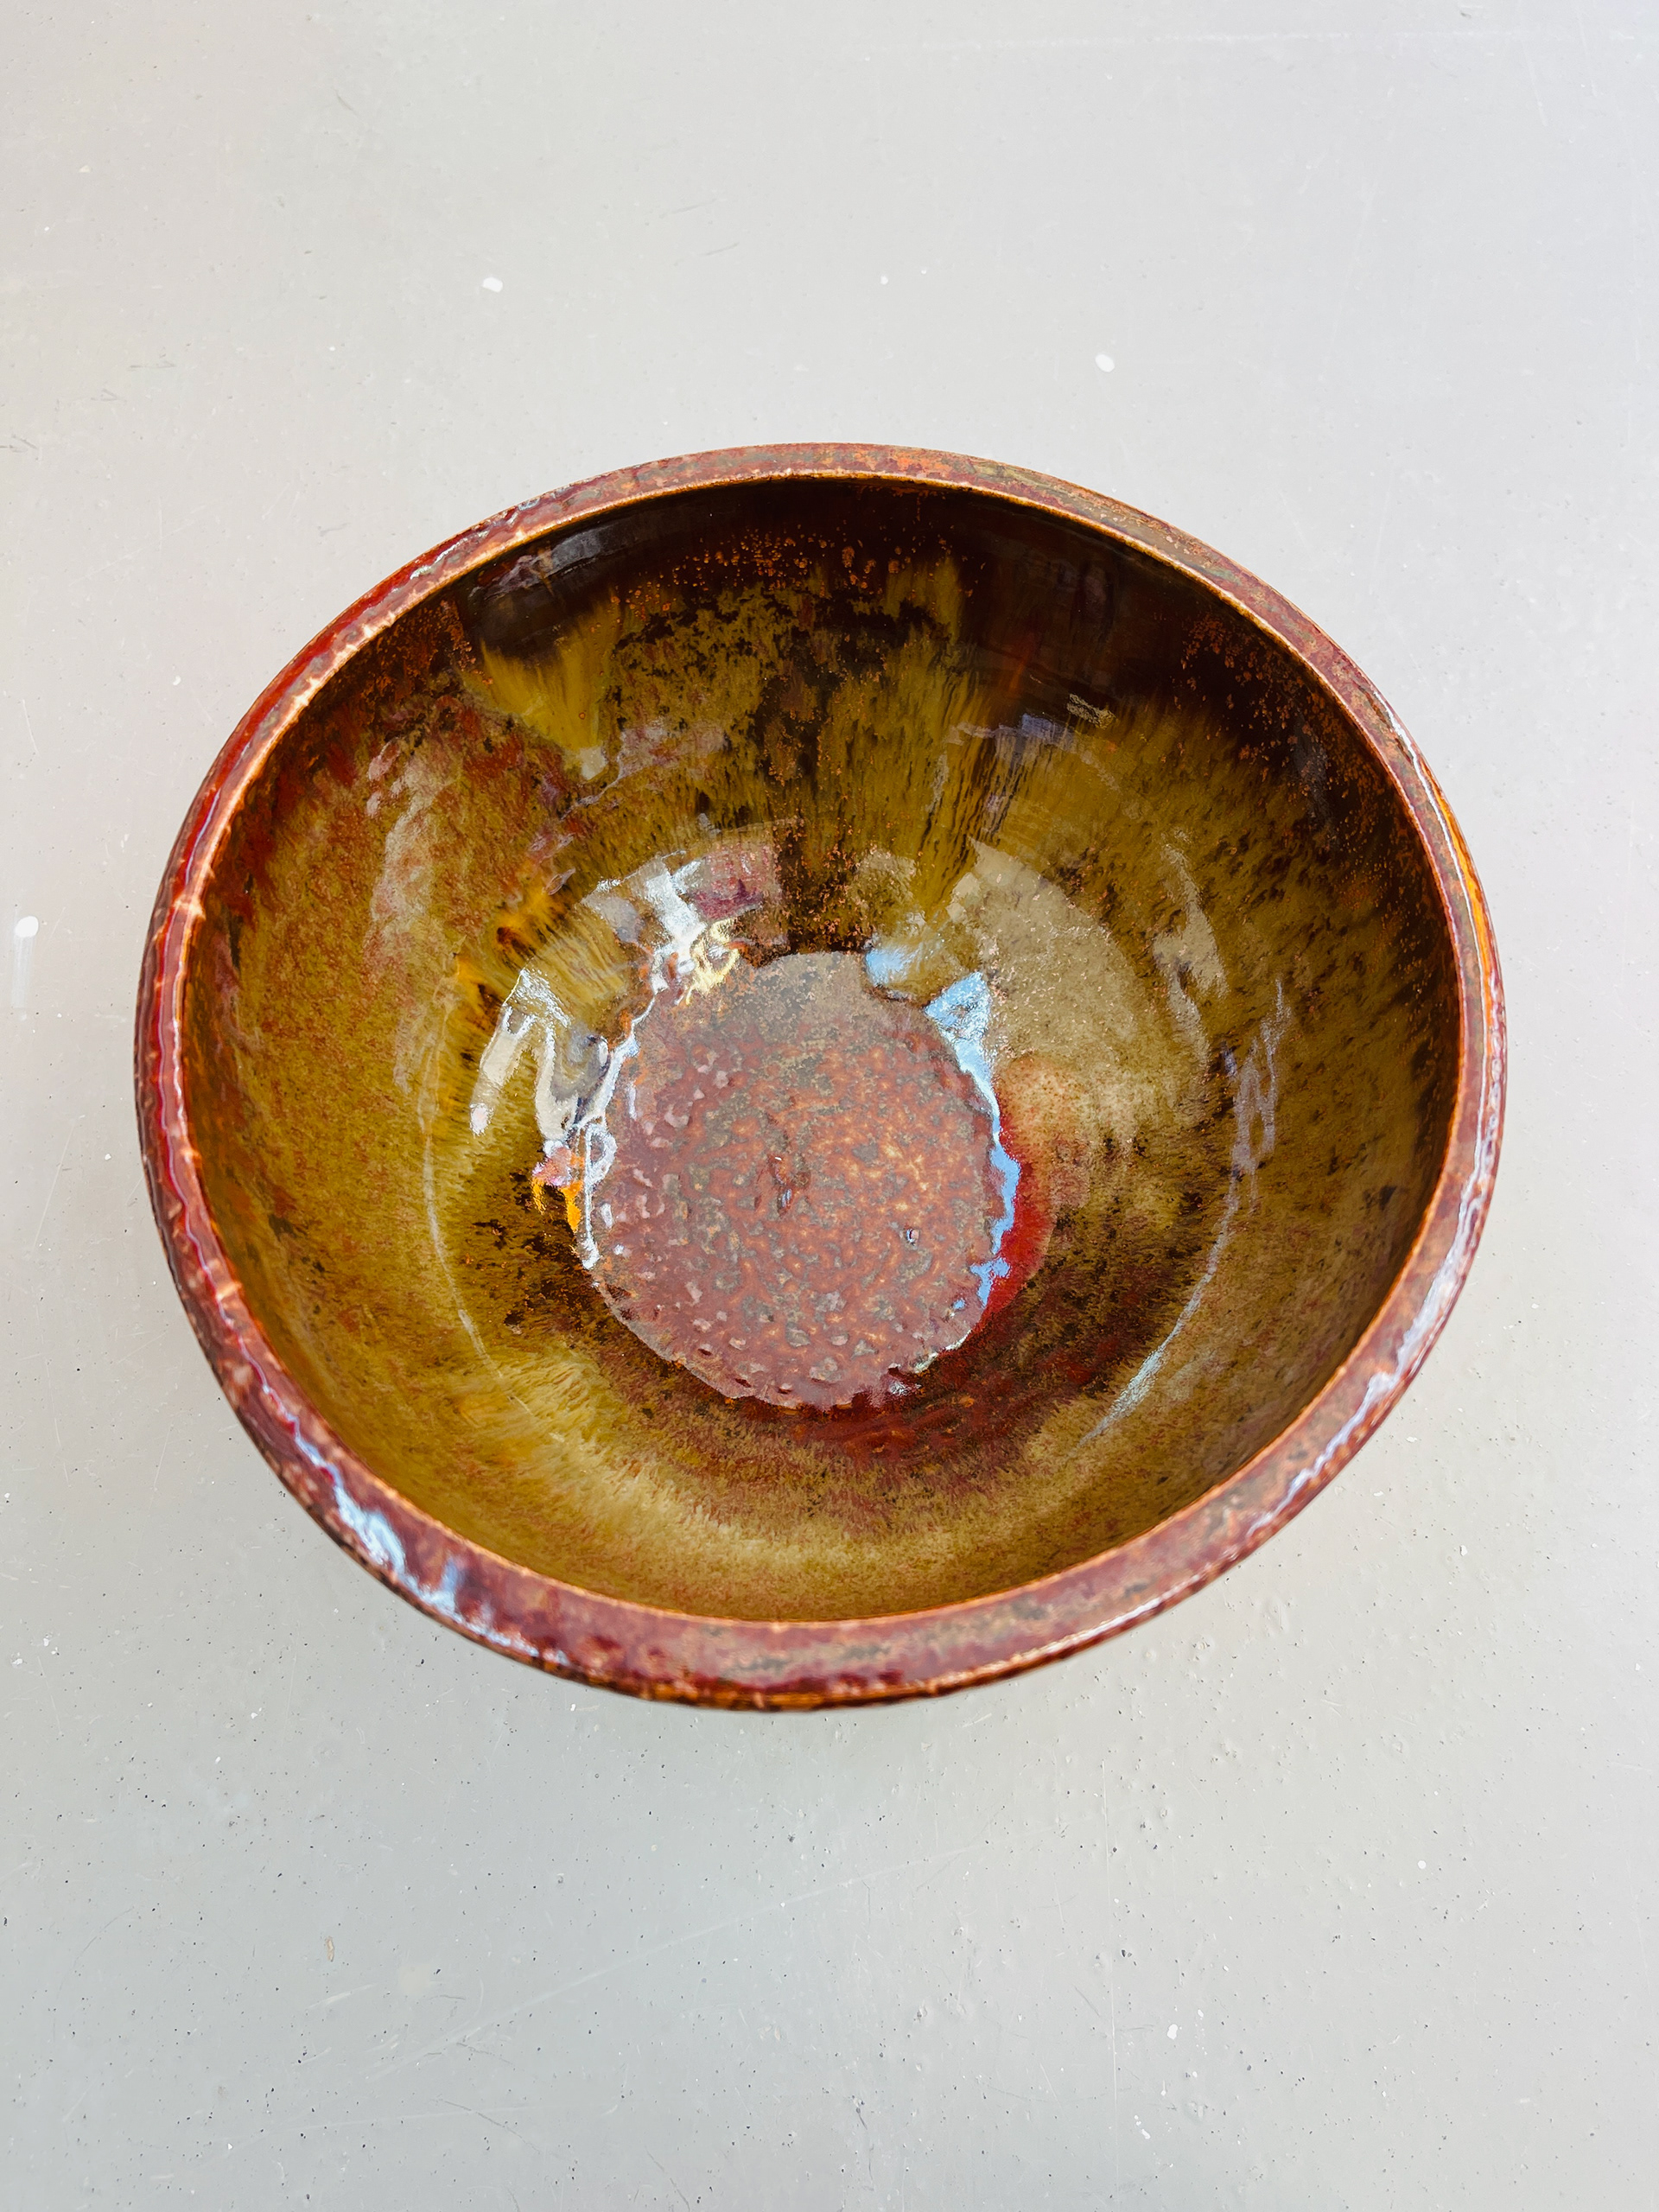
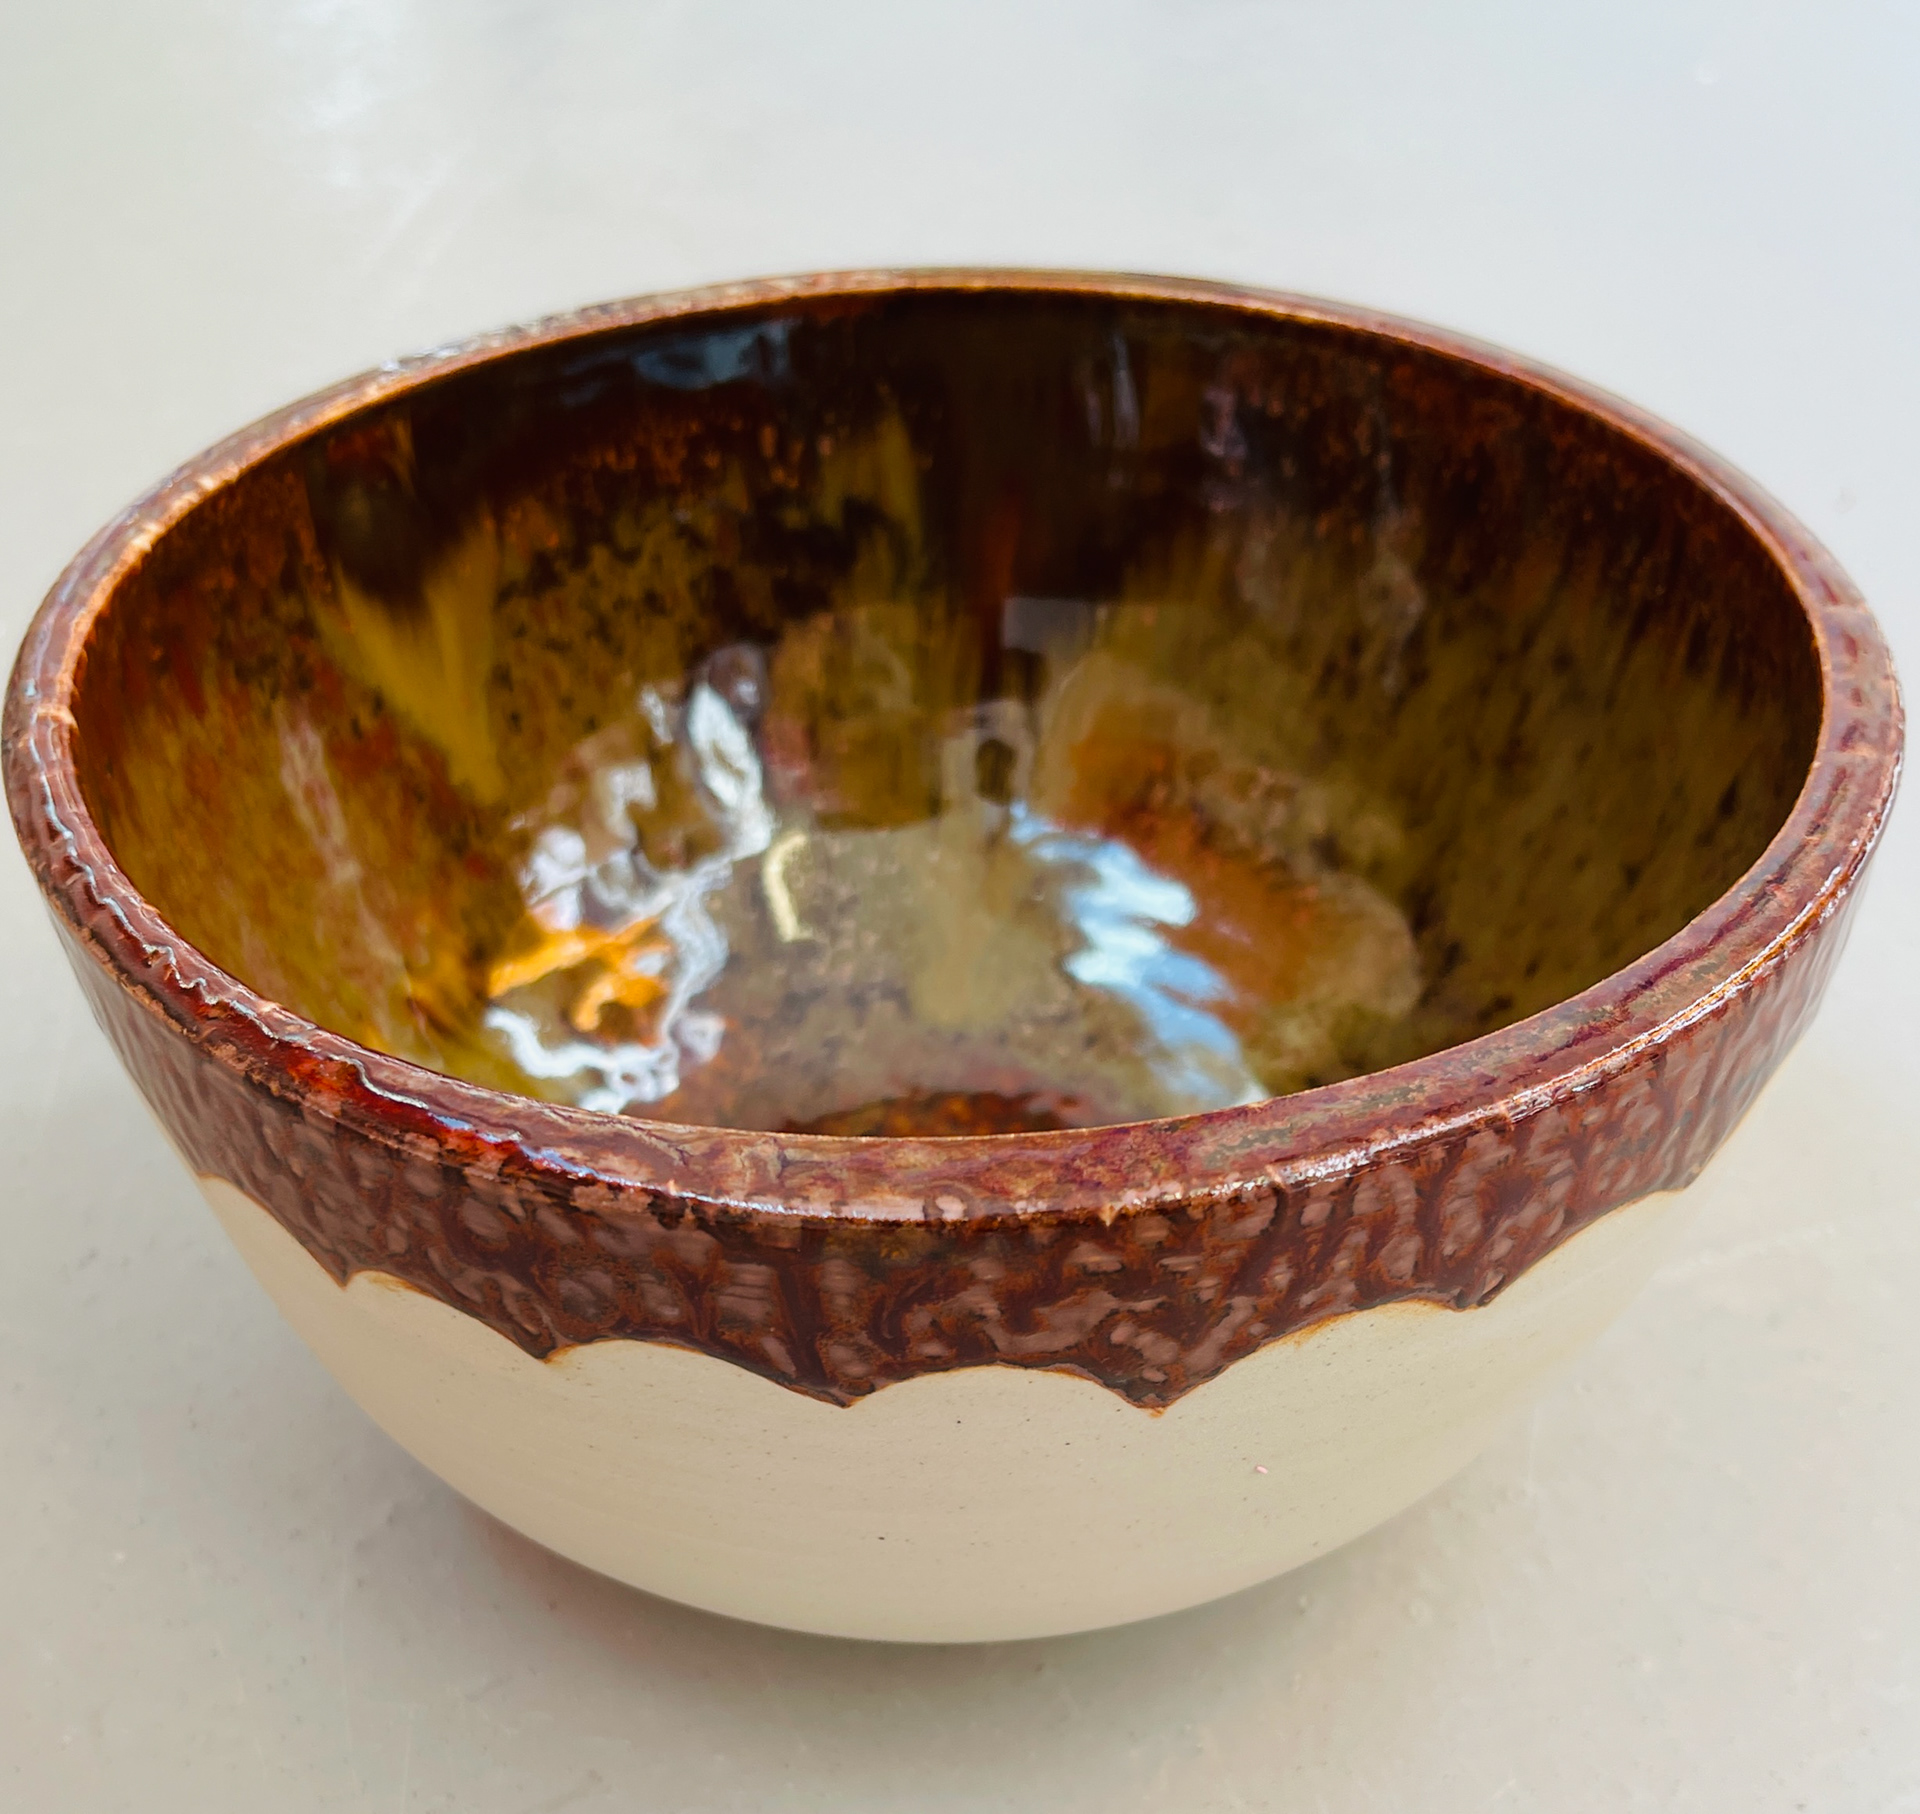
Right: The two glazes applied on the tests, i really like the dark brown on the ALM clay and the rusted brown with the paler glossy surface adds very interesting textural look. 

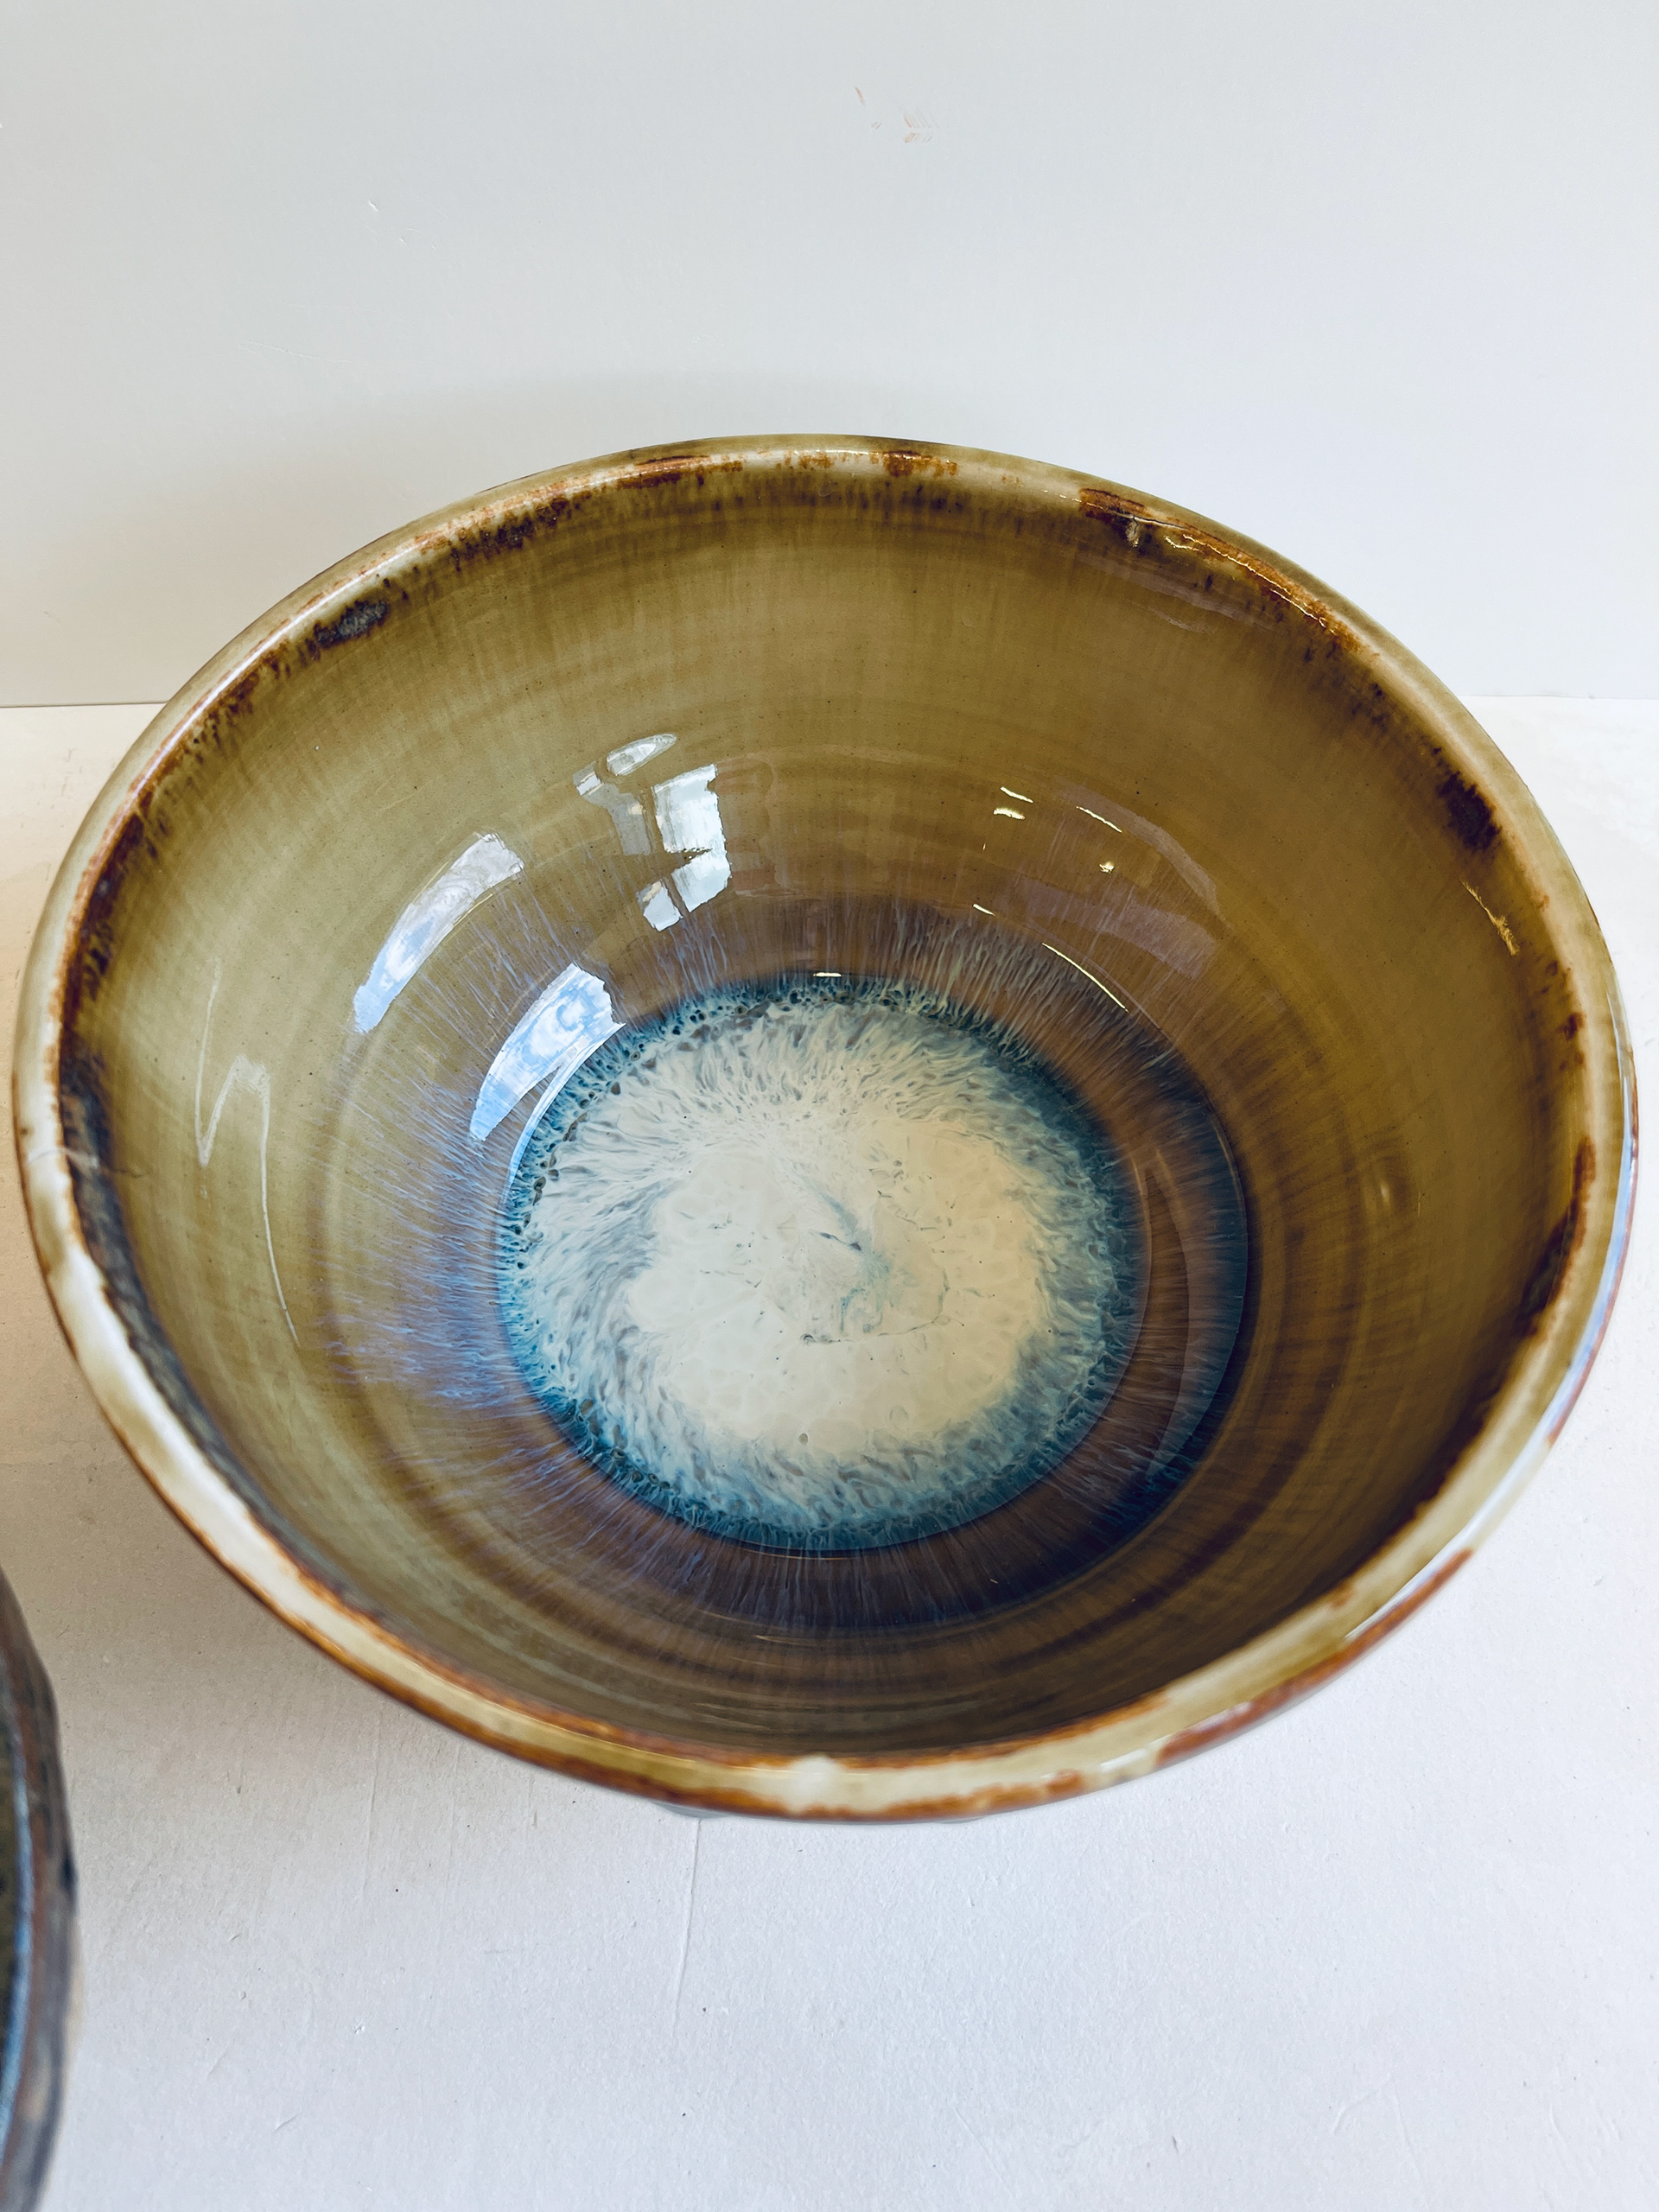
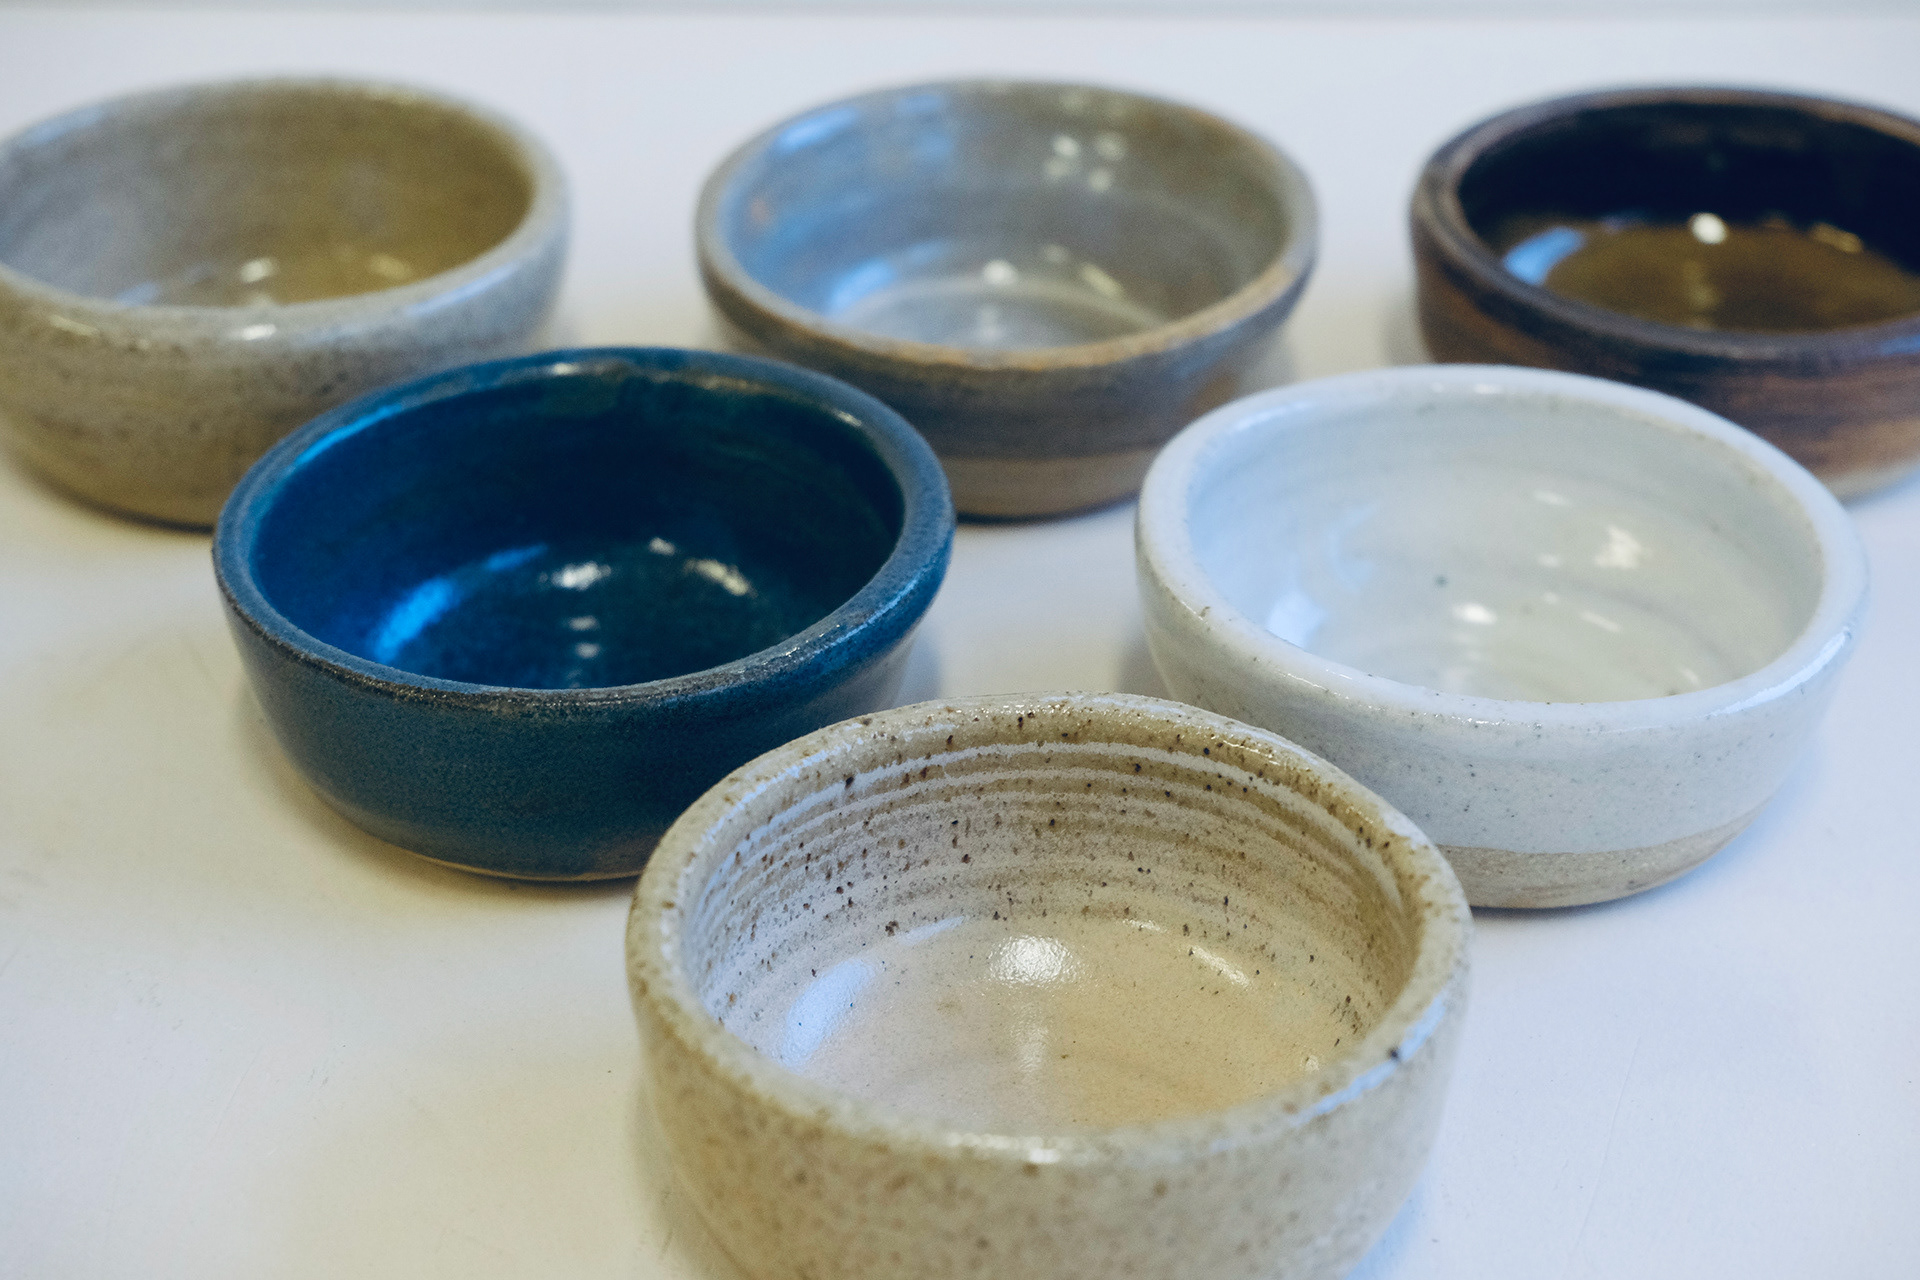
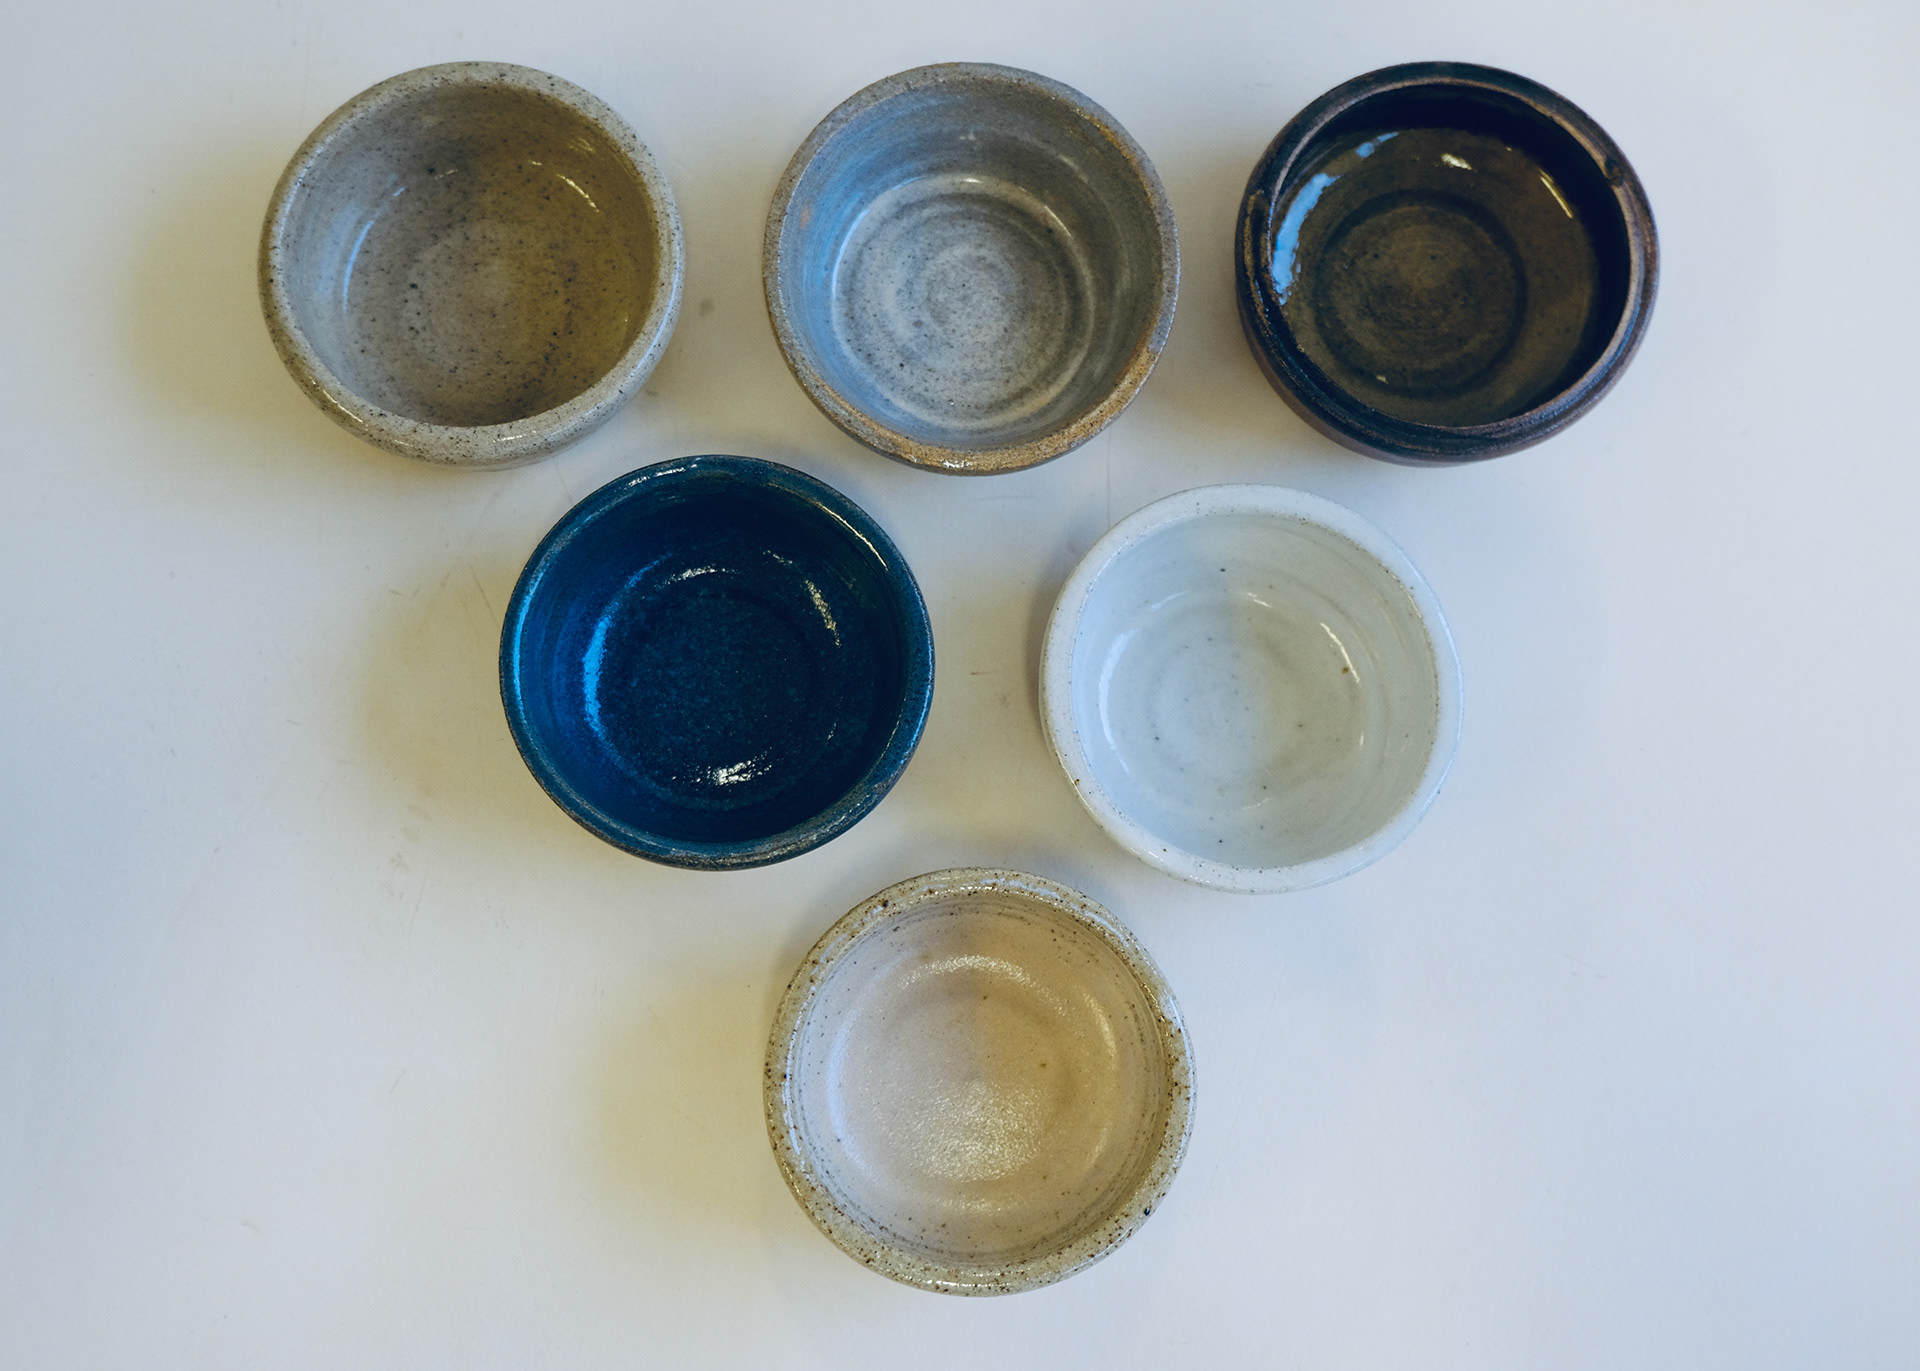
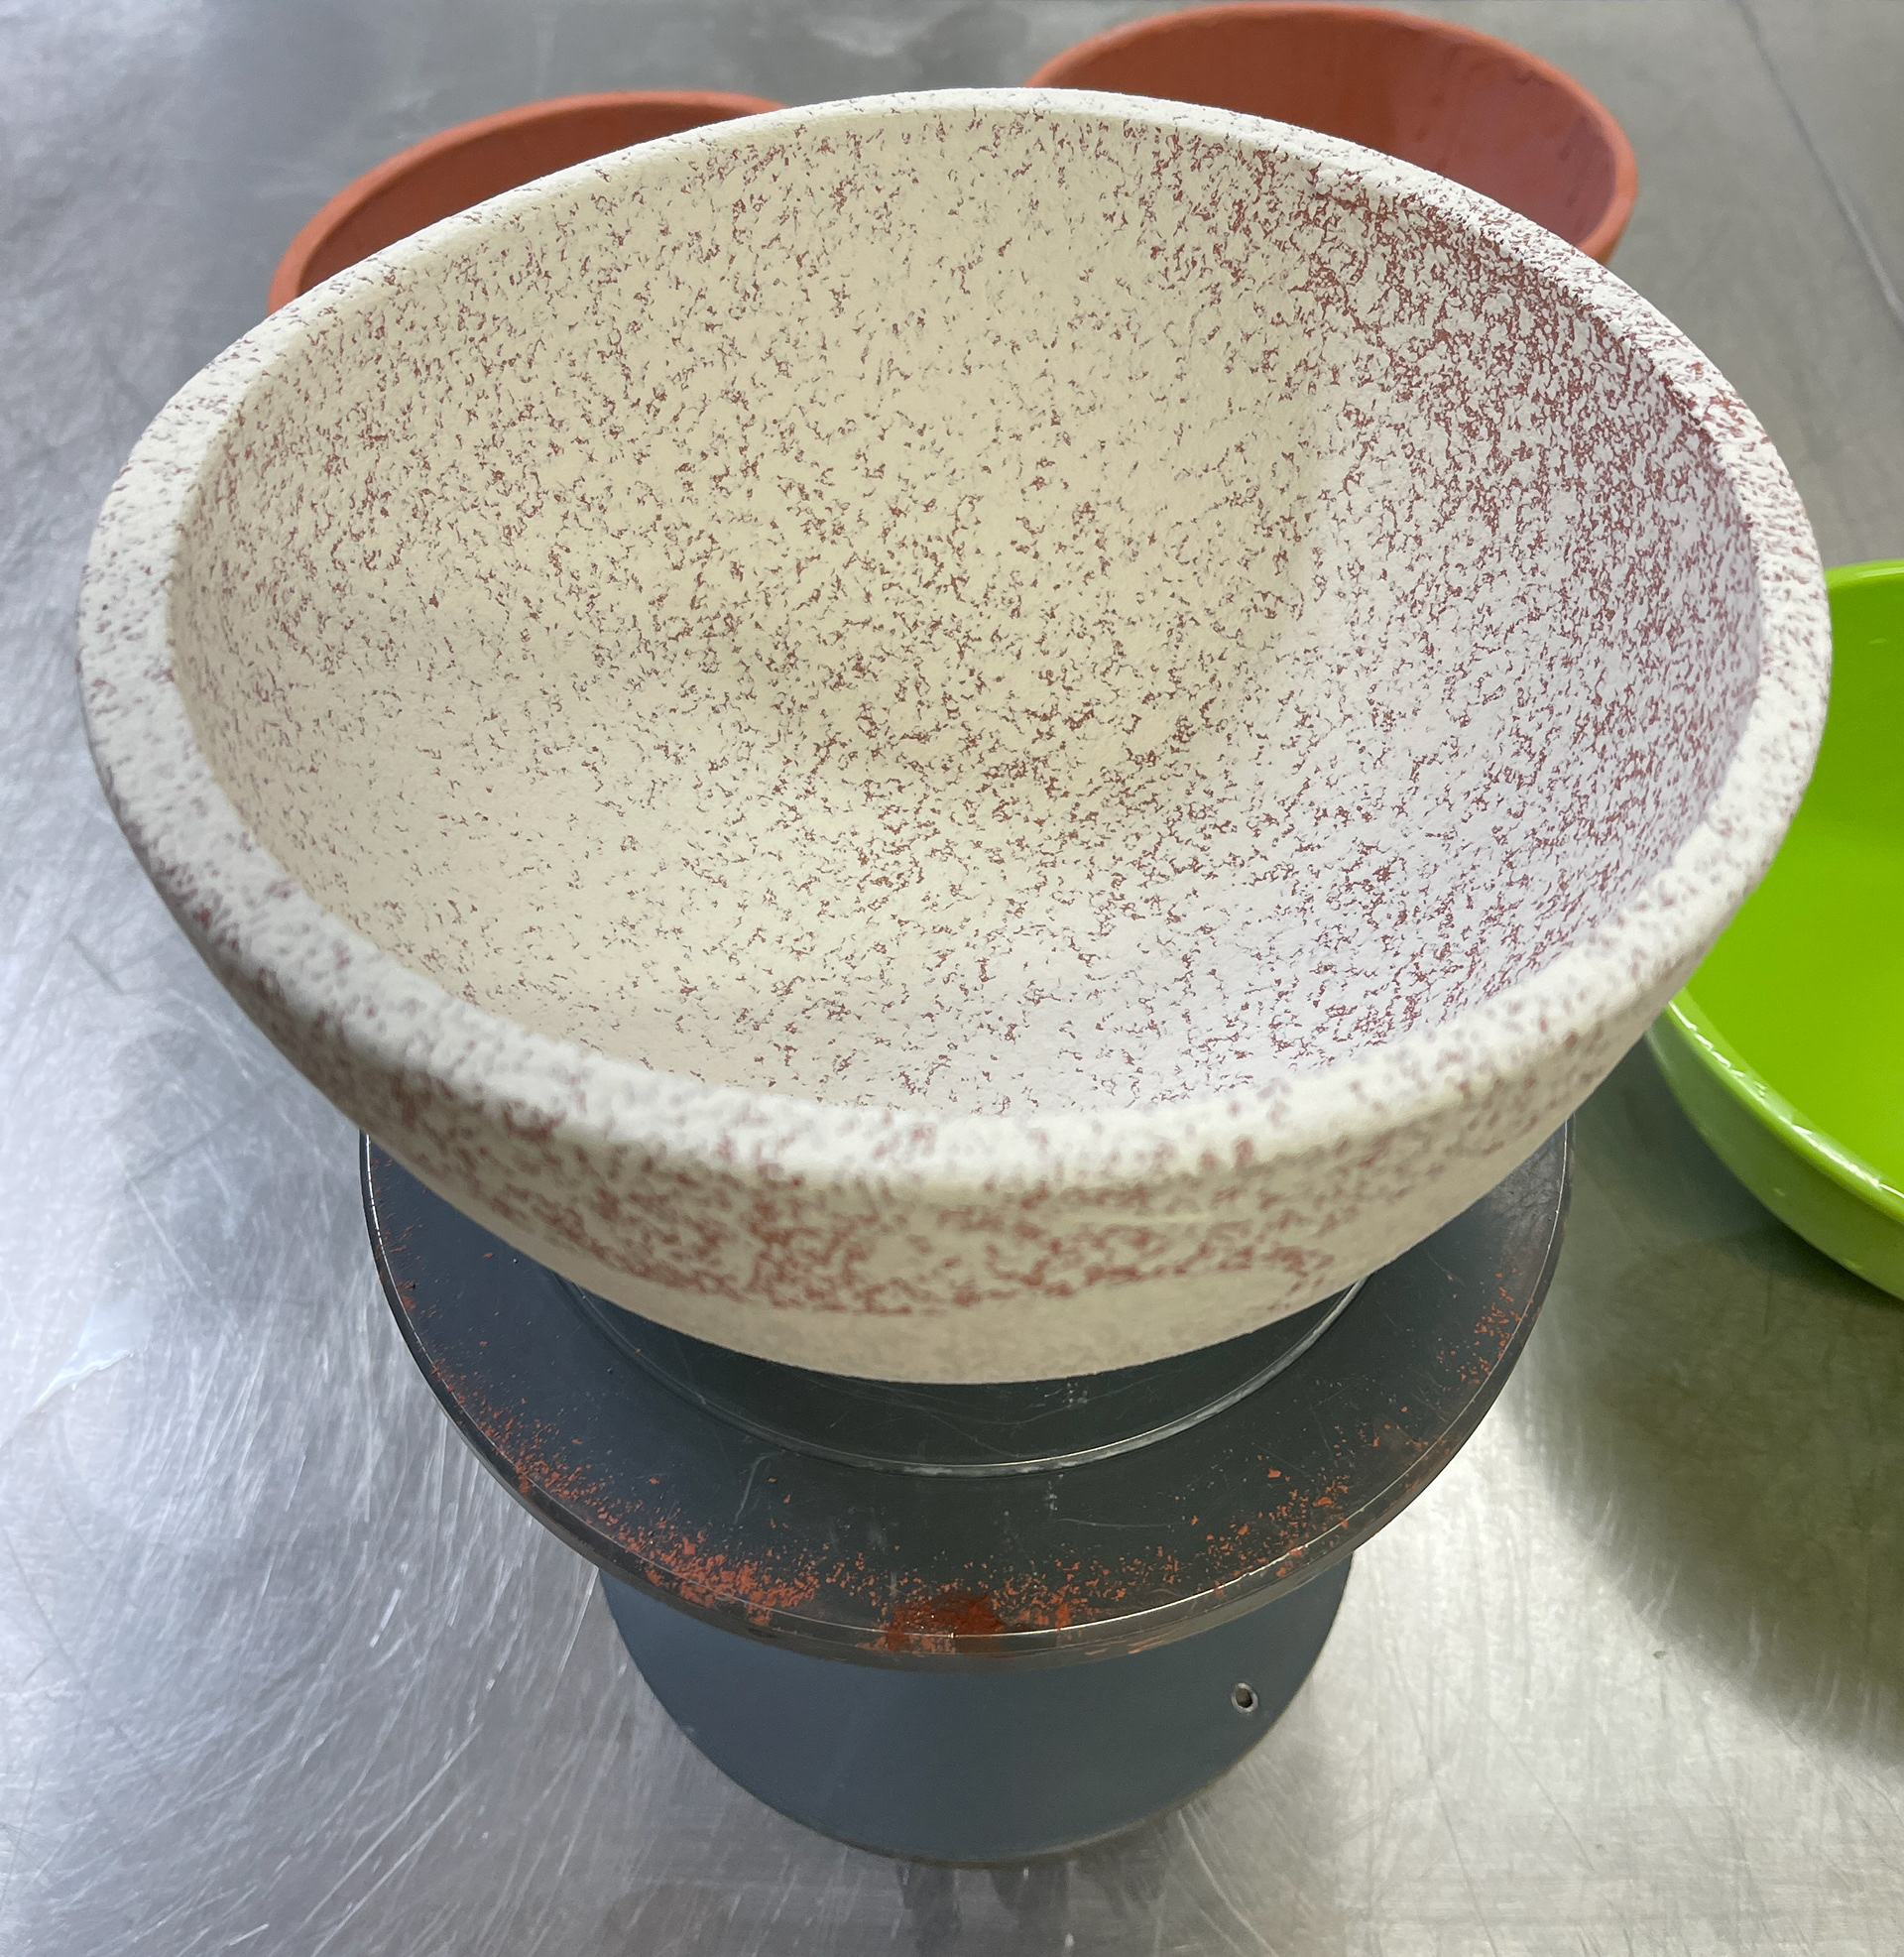
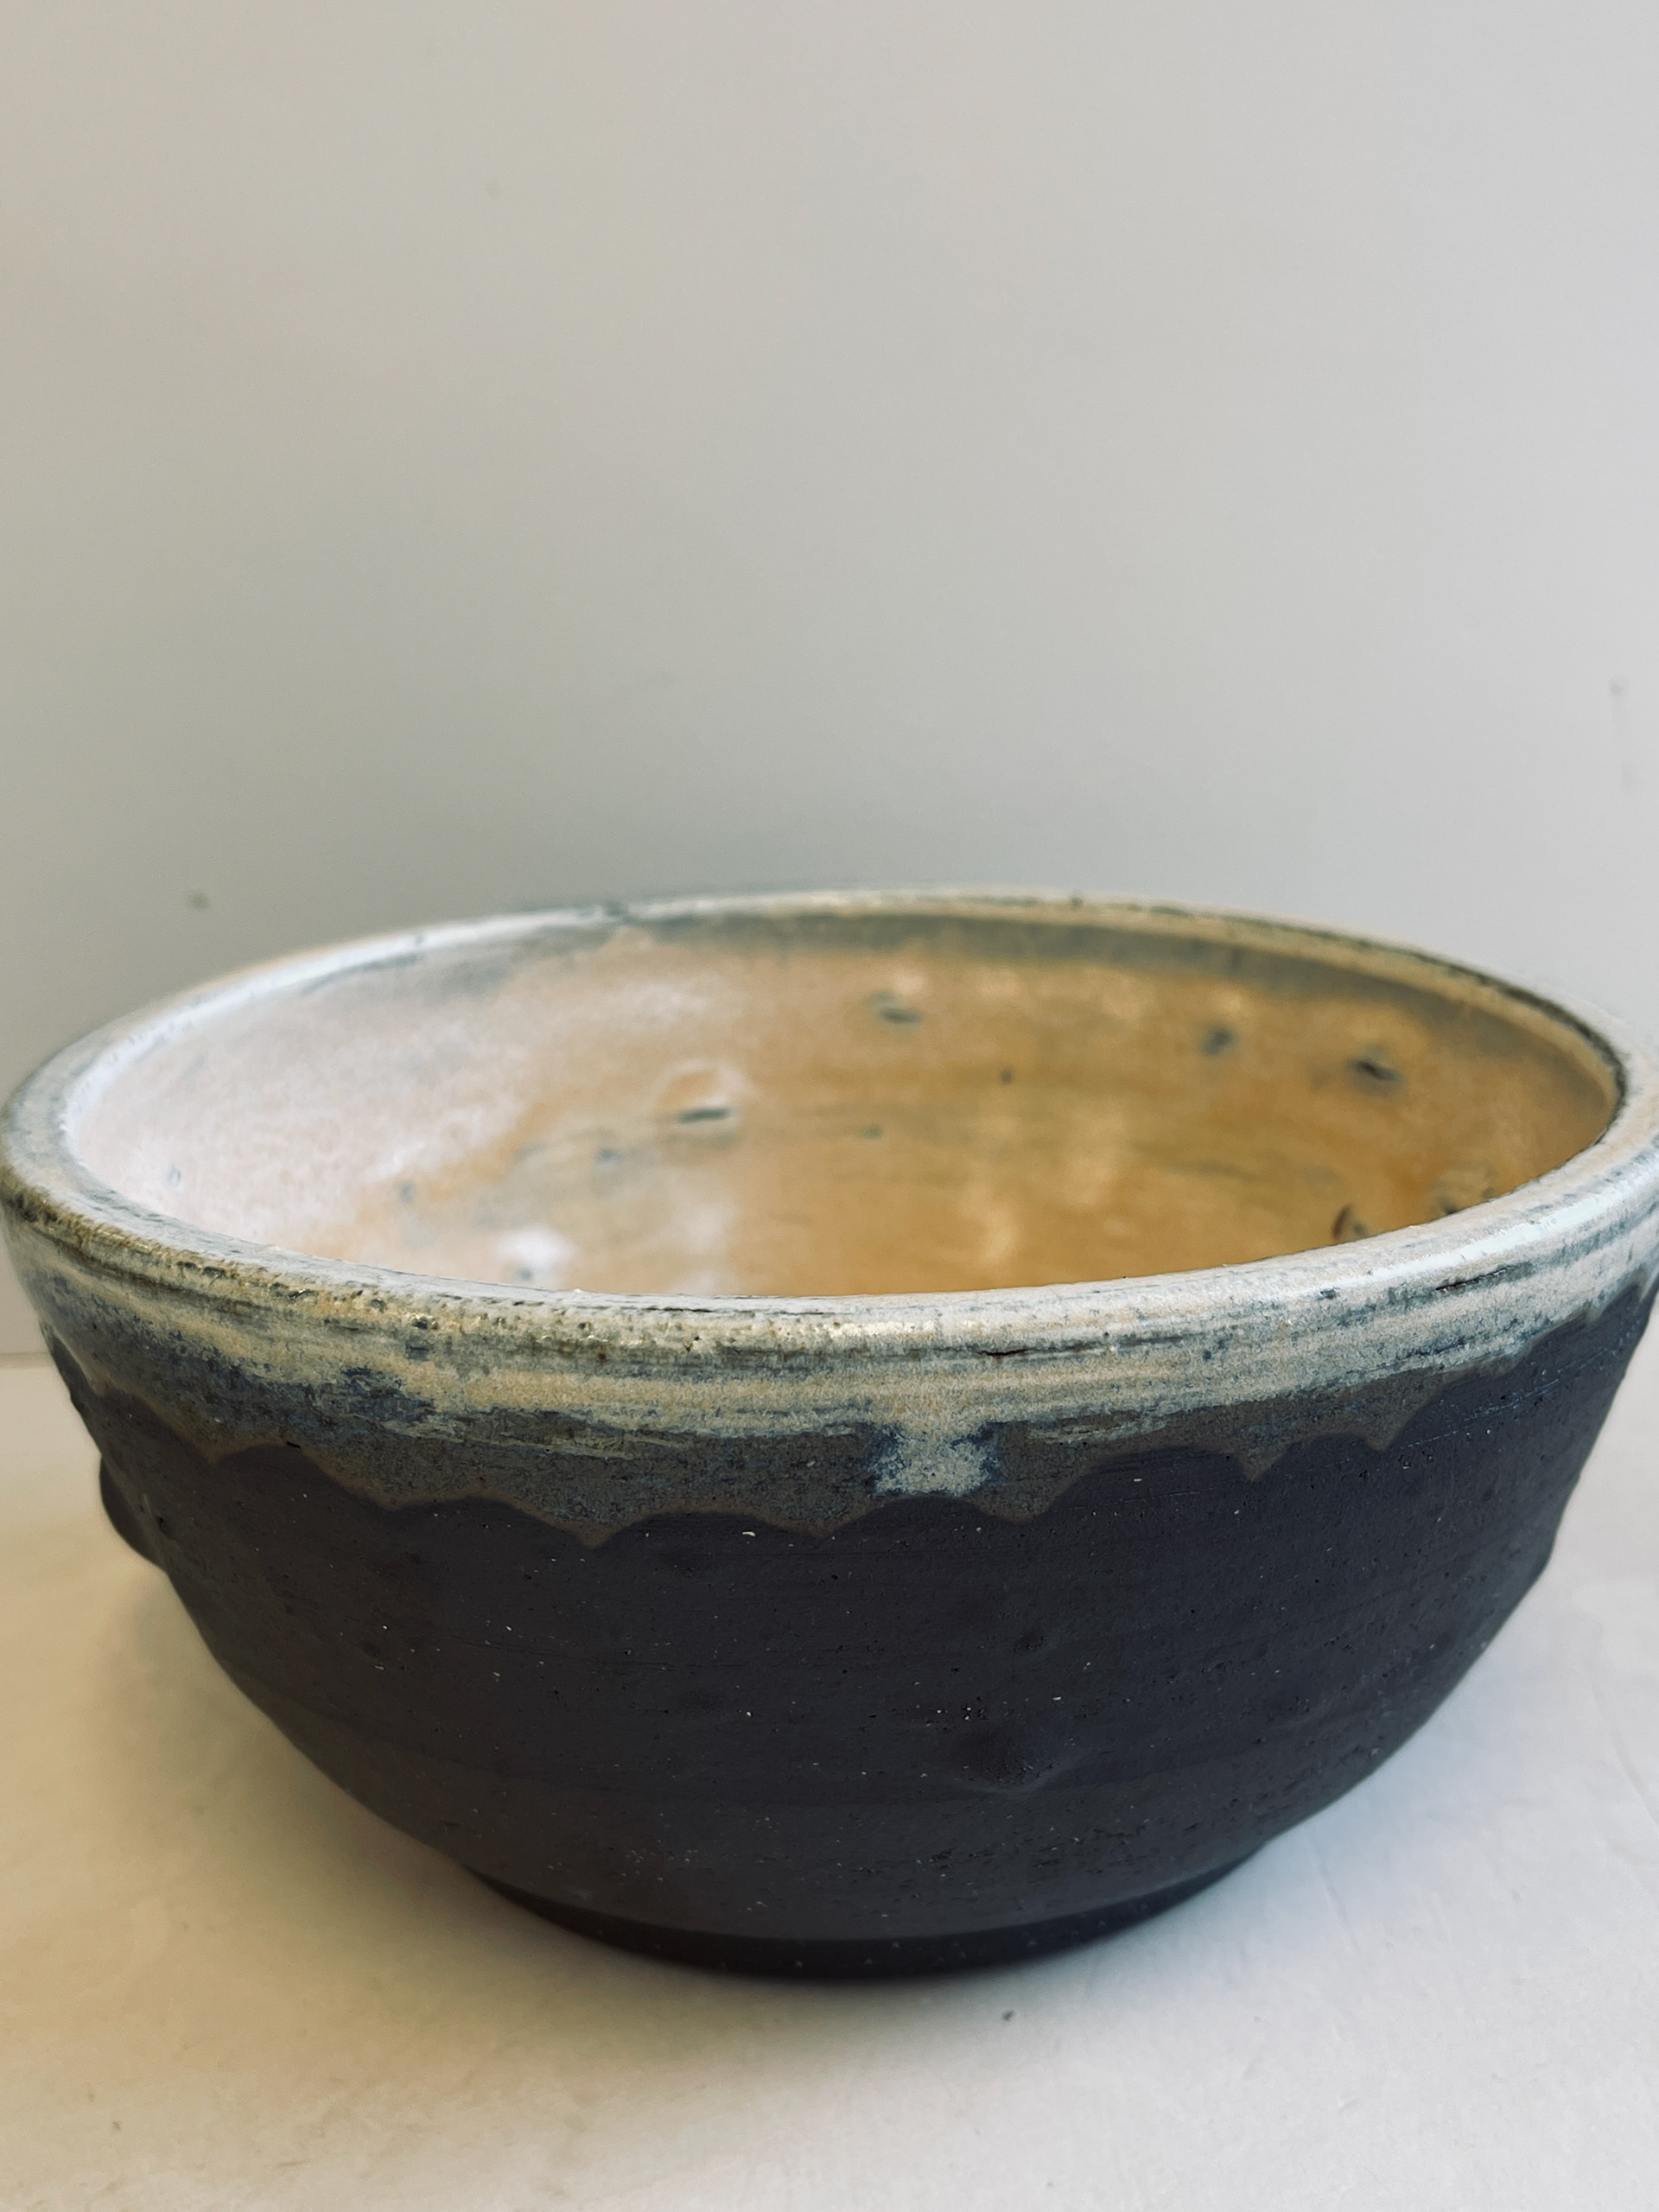
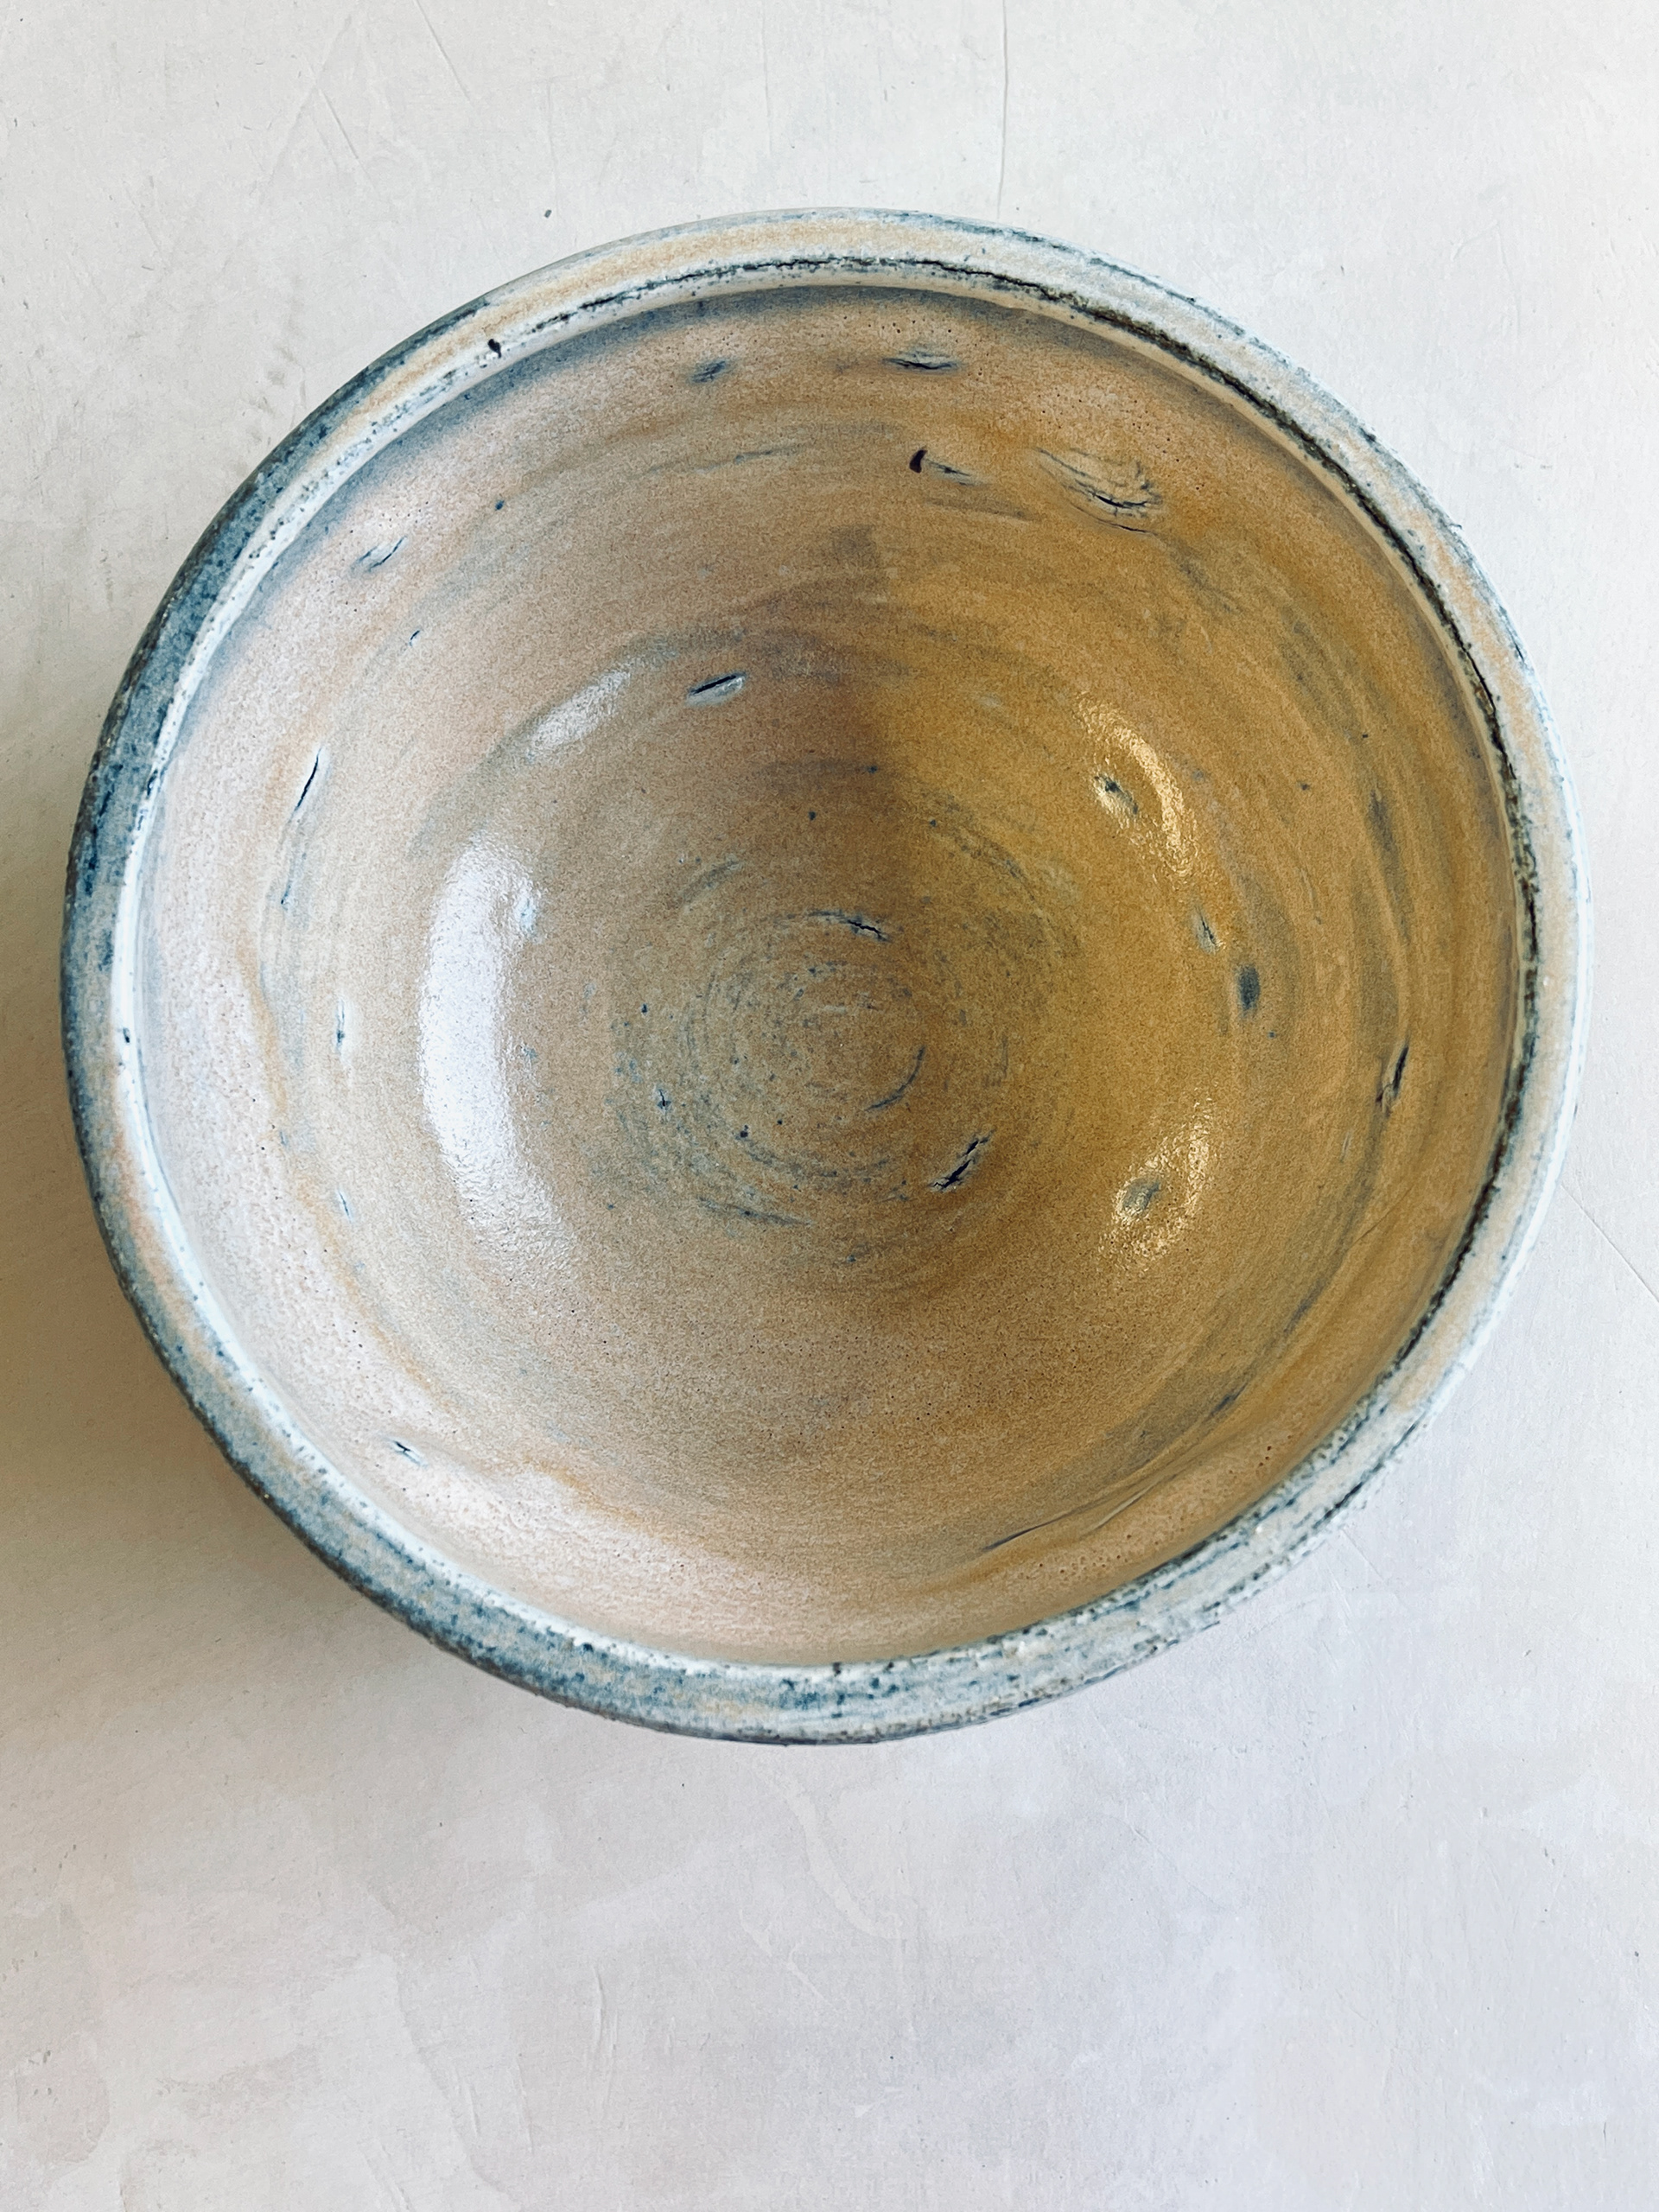
The above samples are a very small surface to actually see the reaction of the glaze. It's worth testing on a large bowl to see how it will appear. 
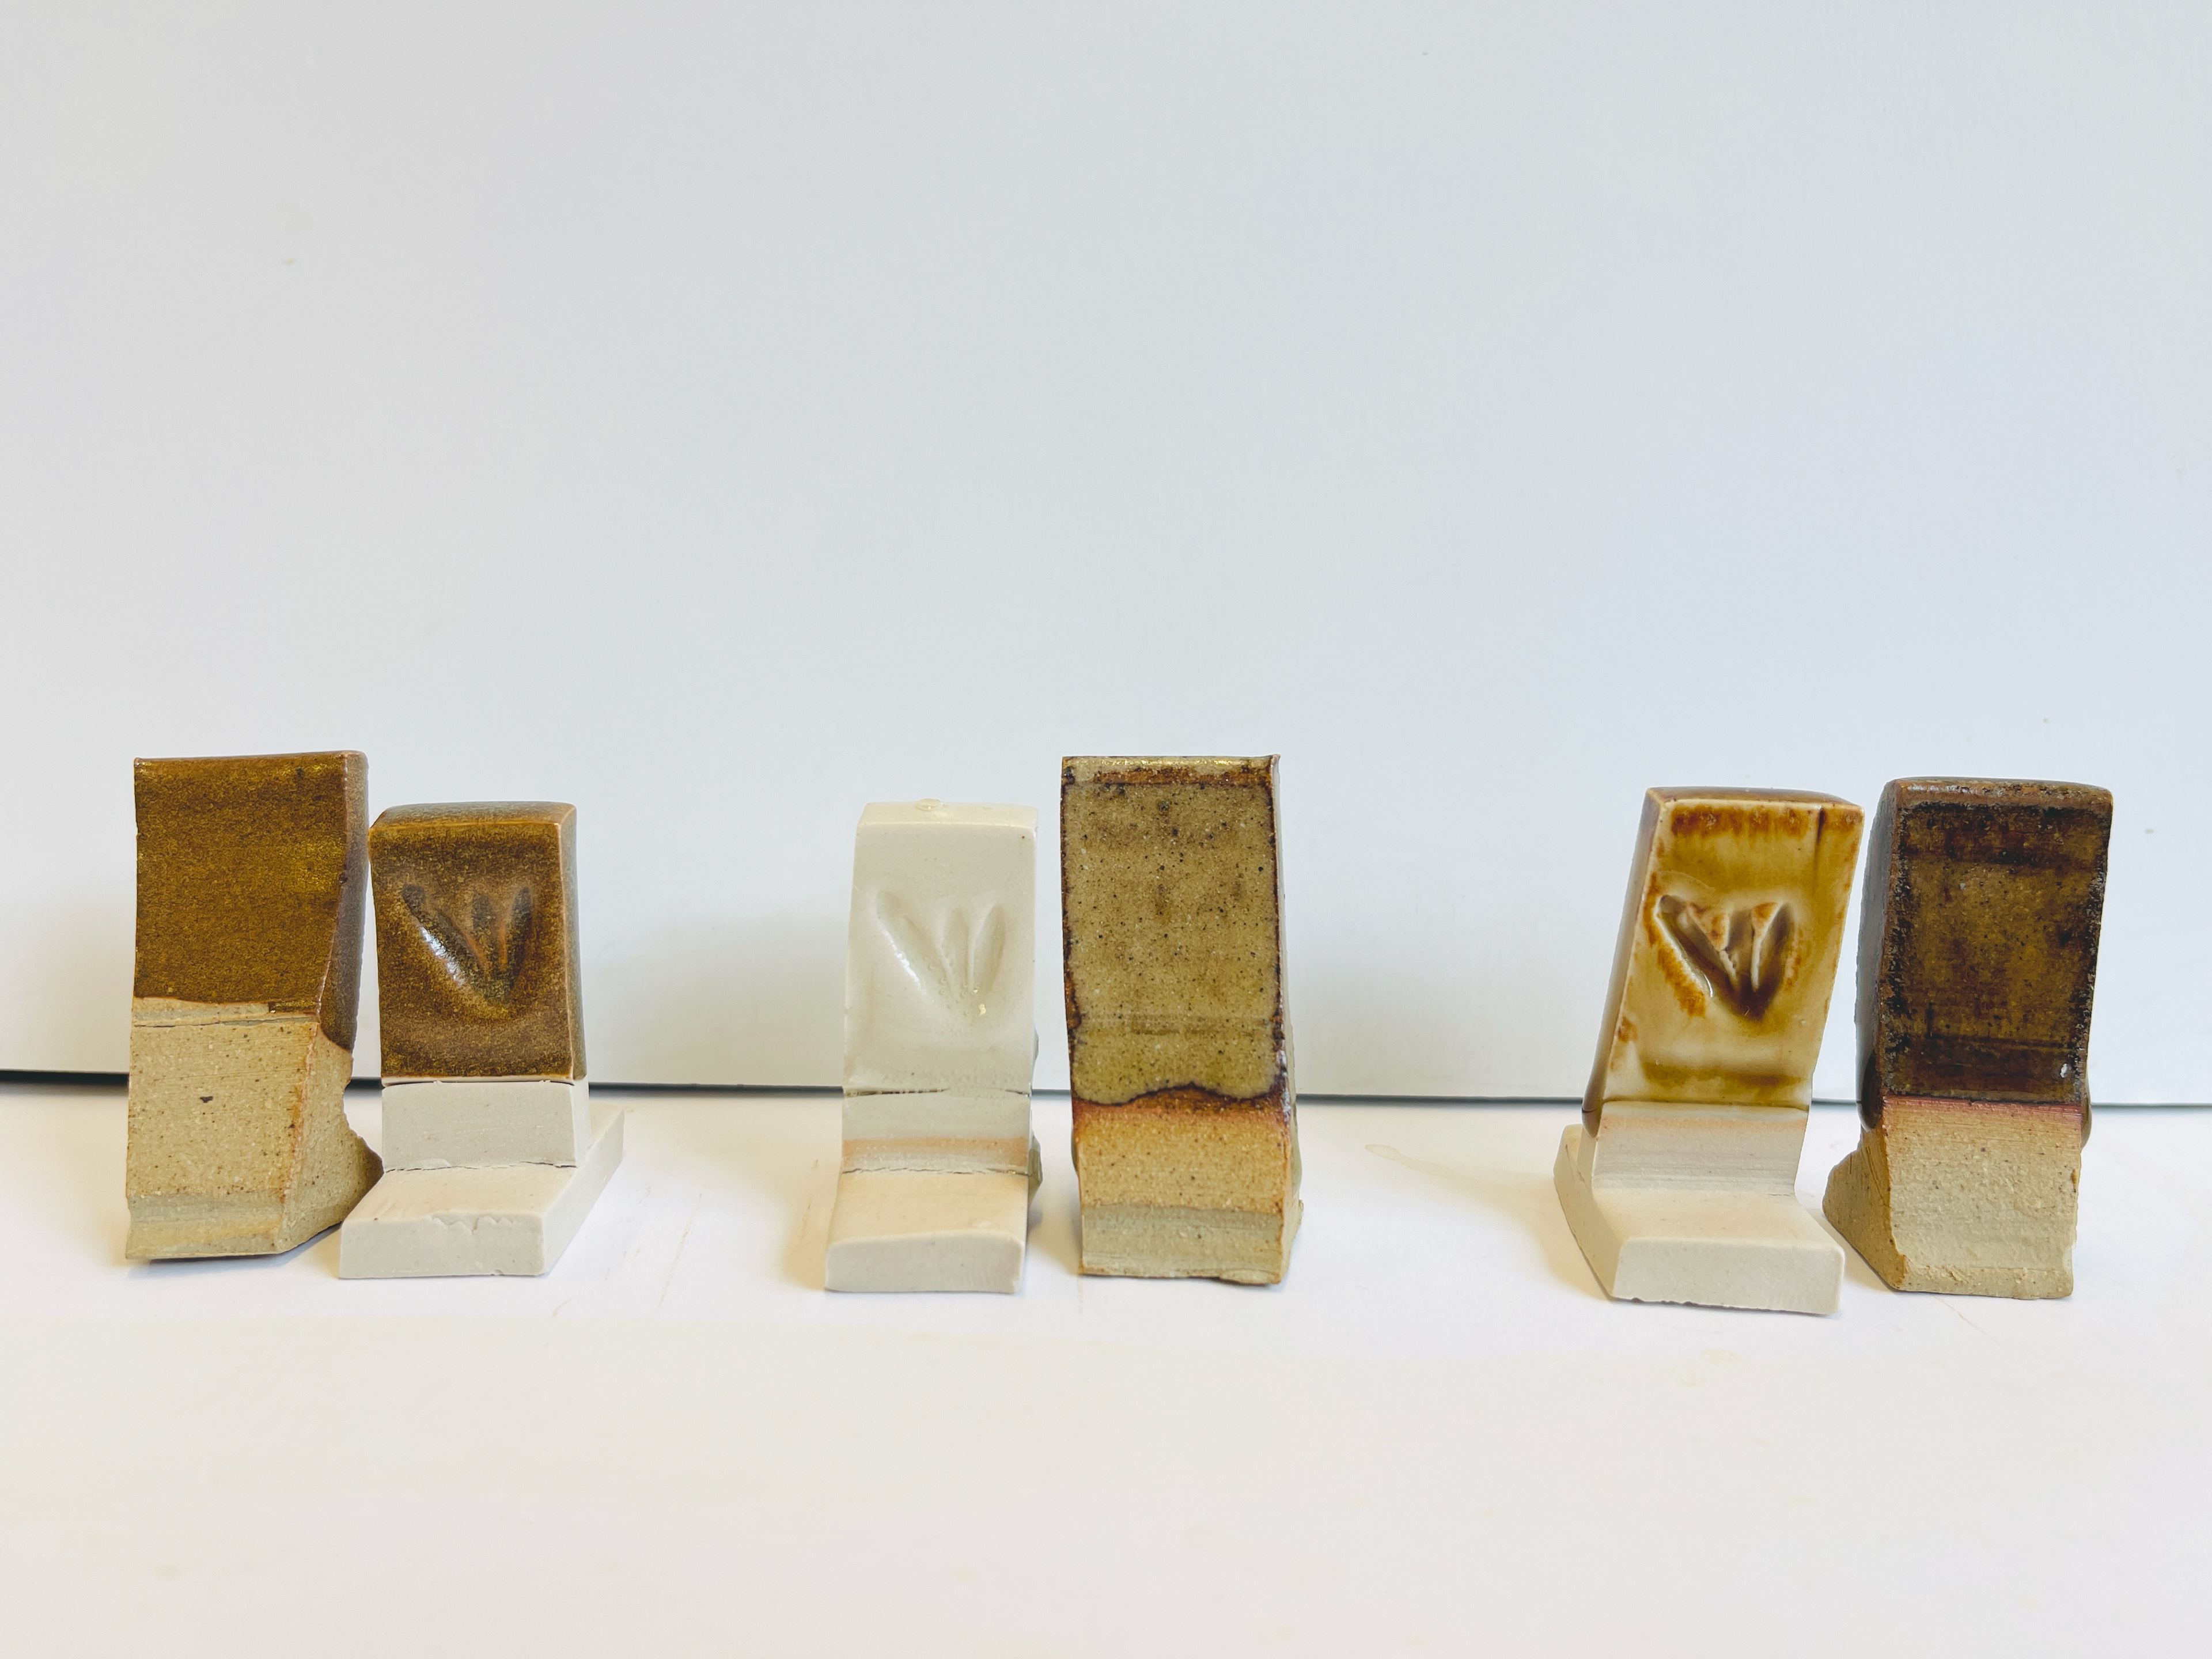
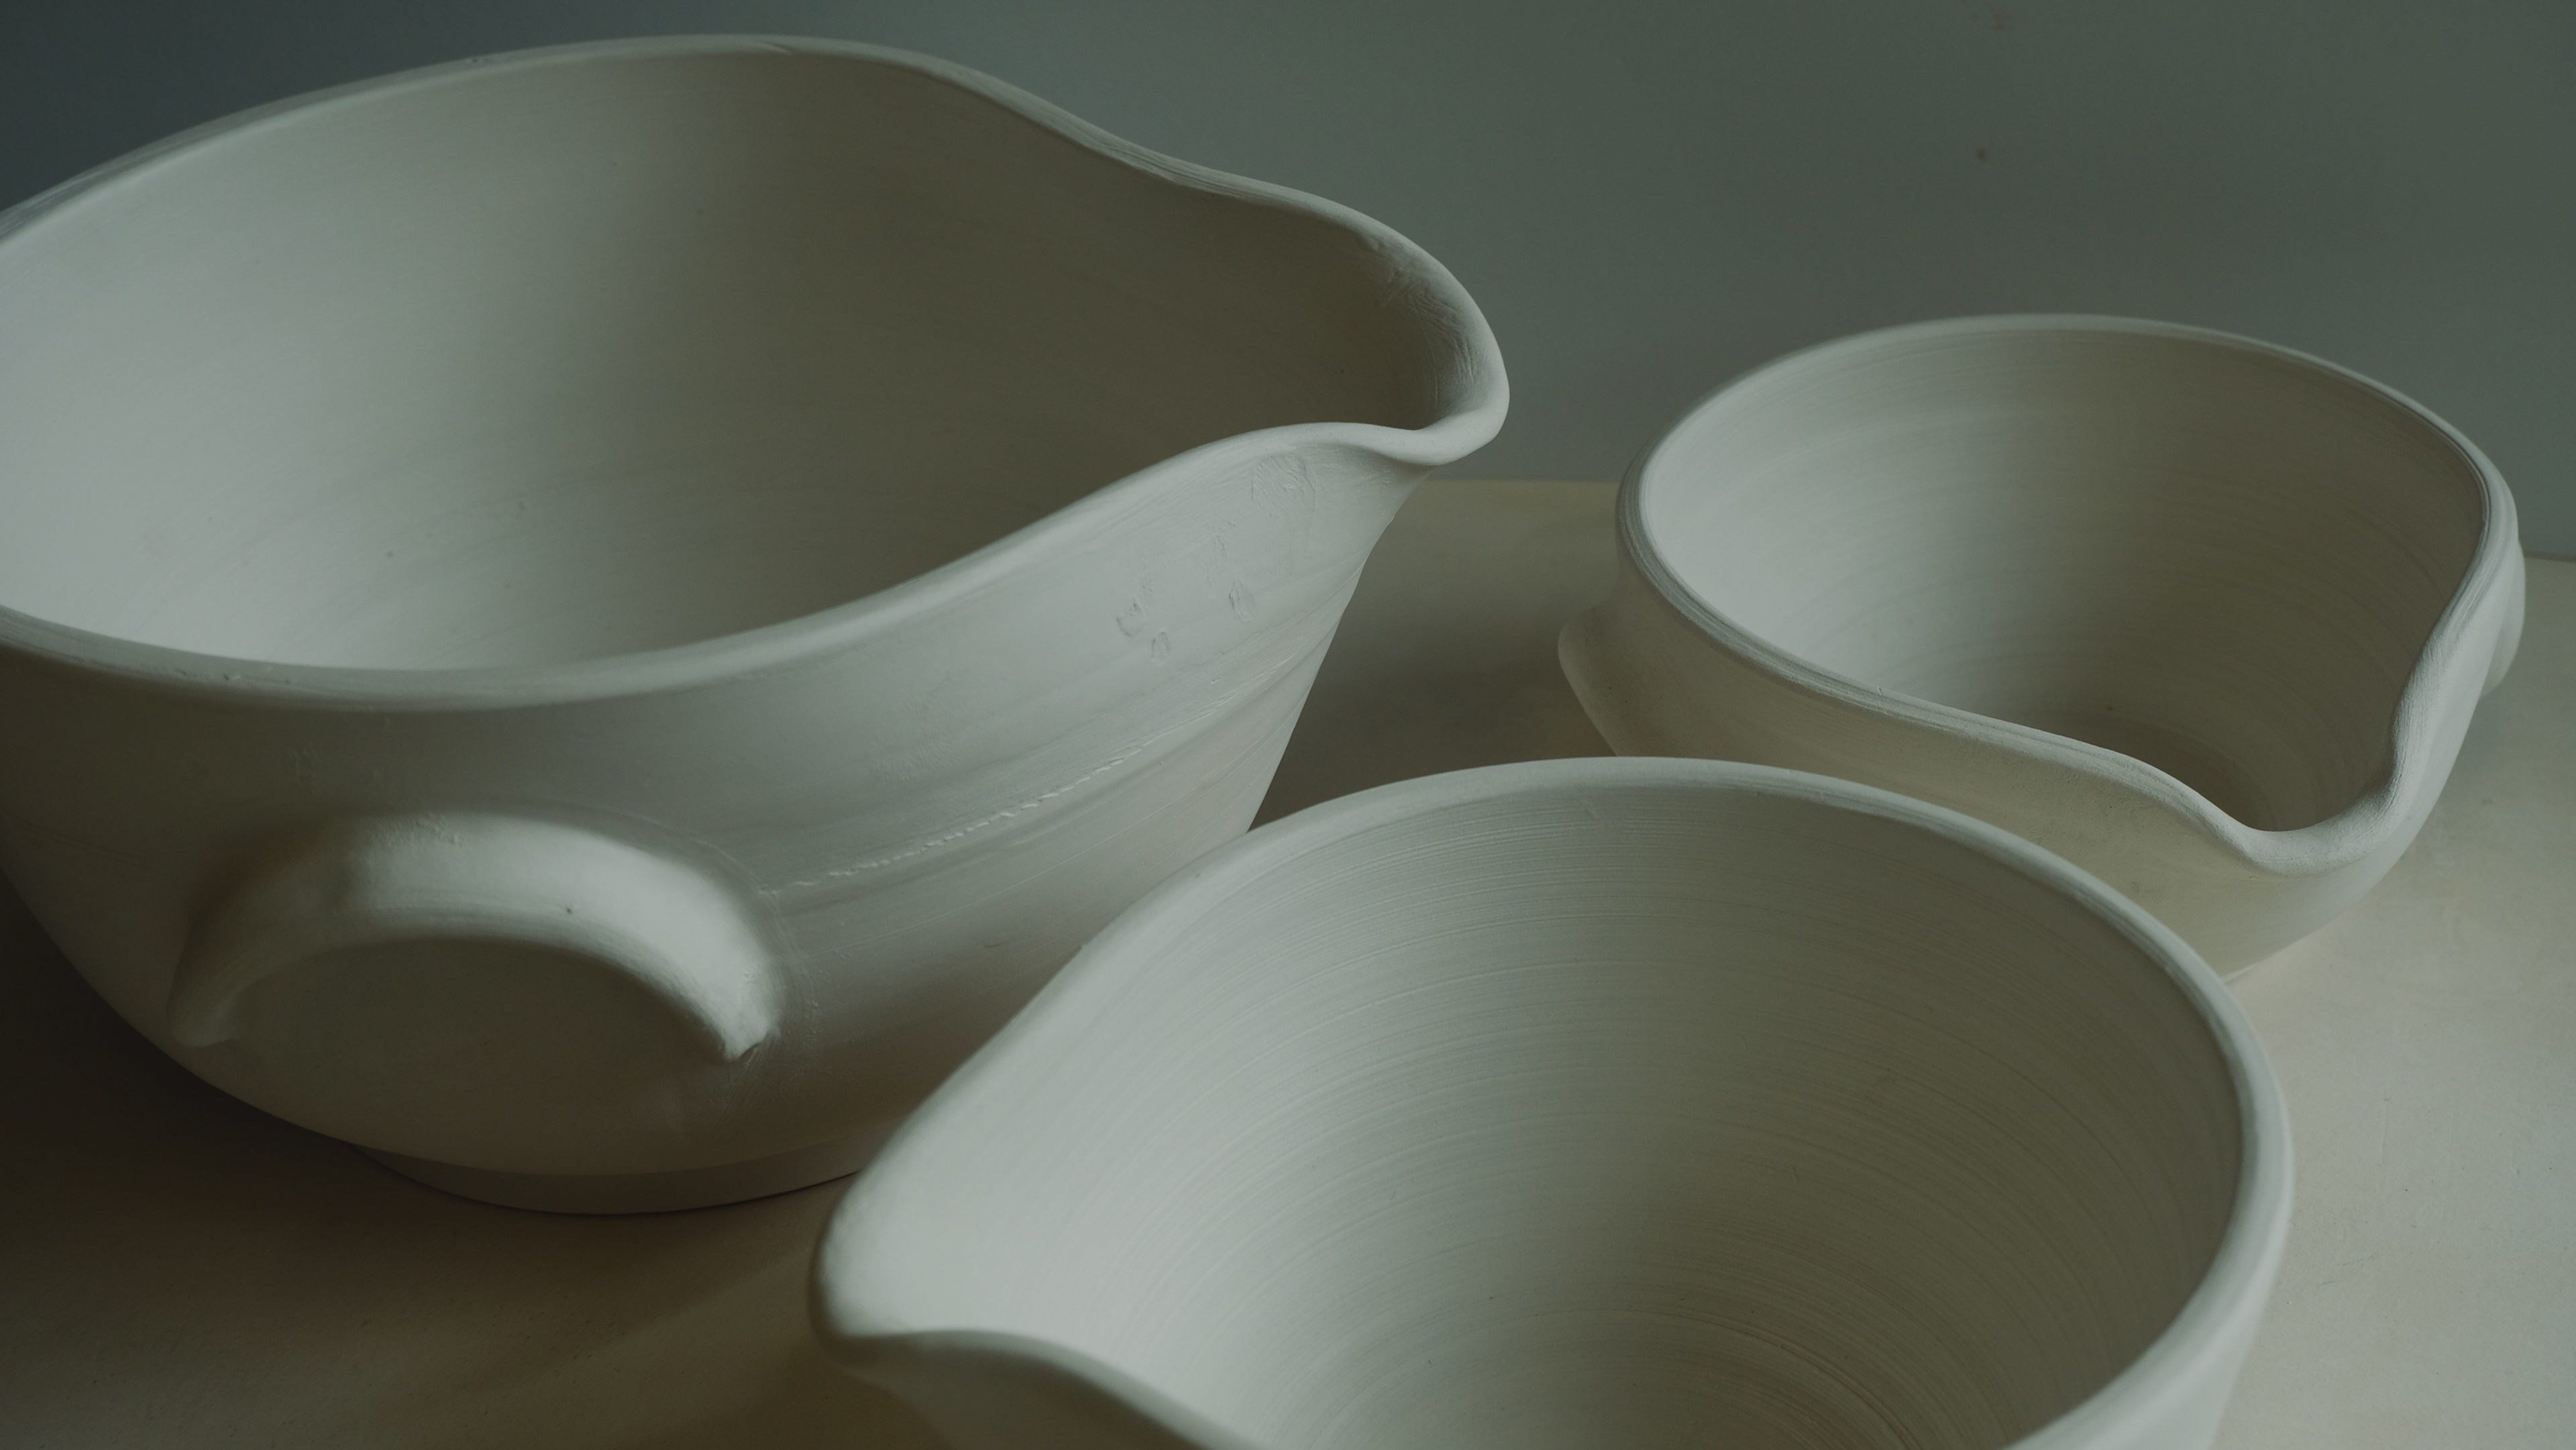
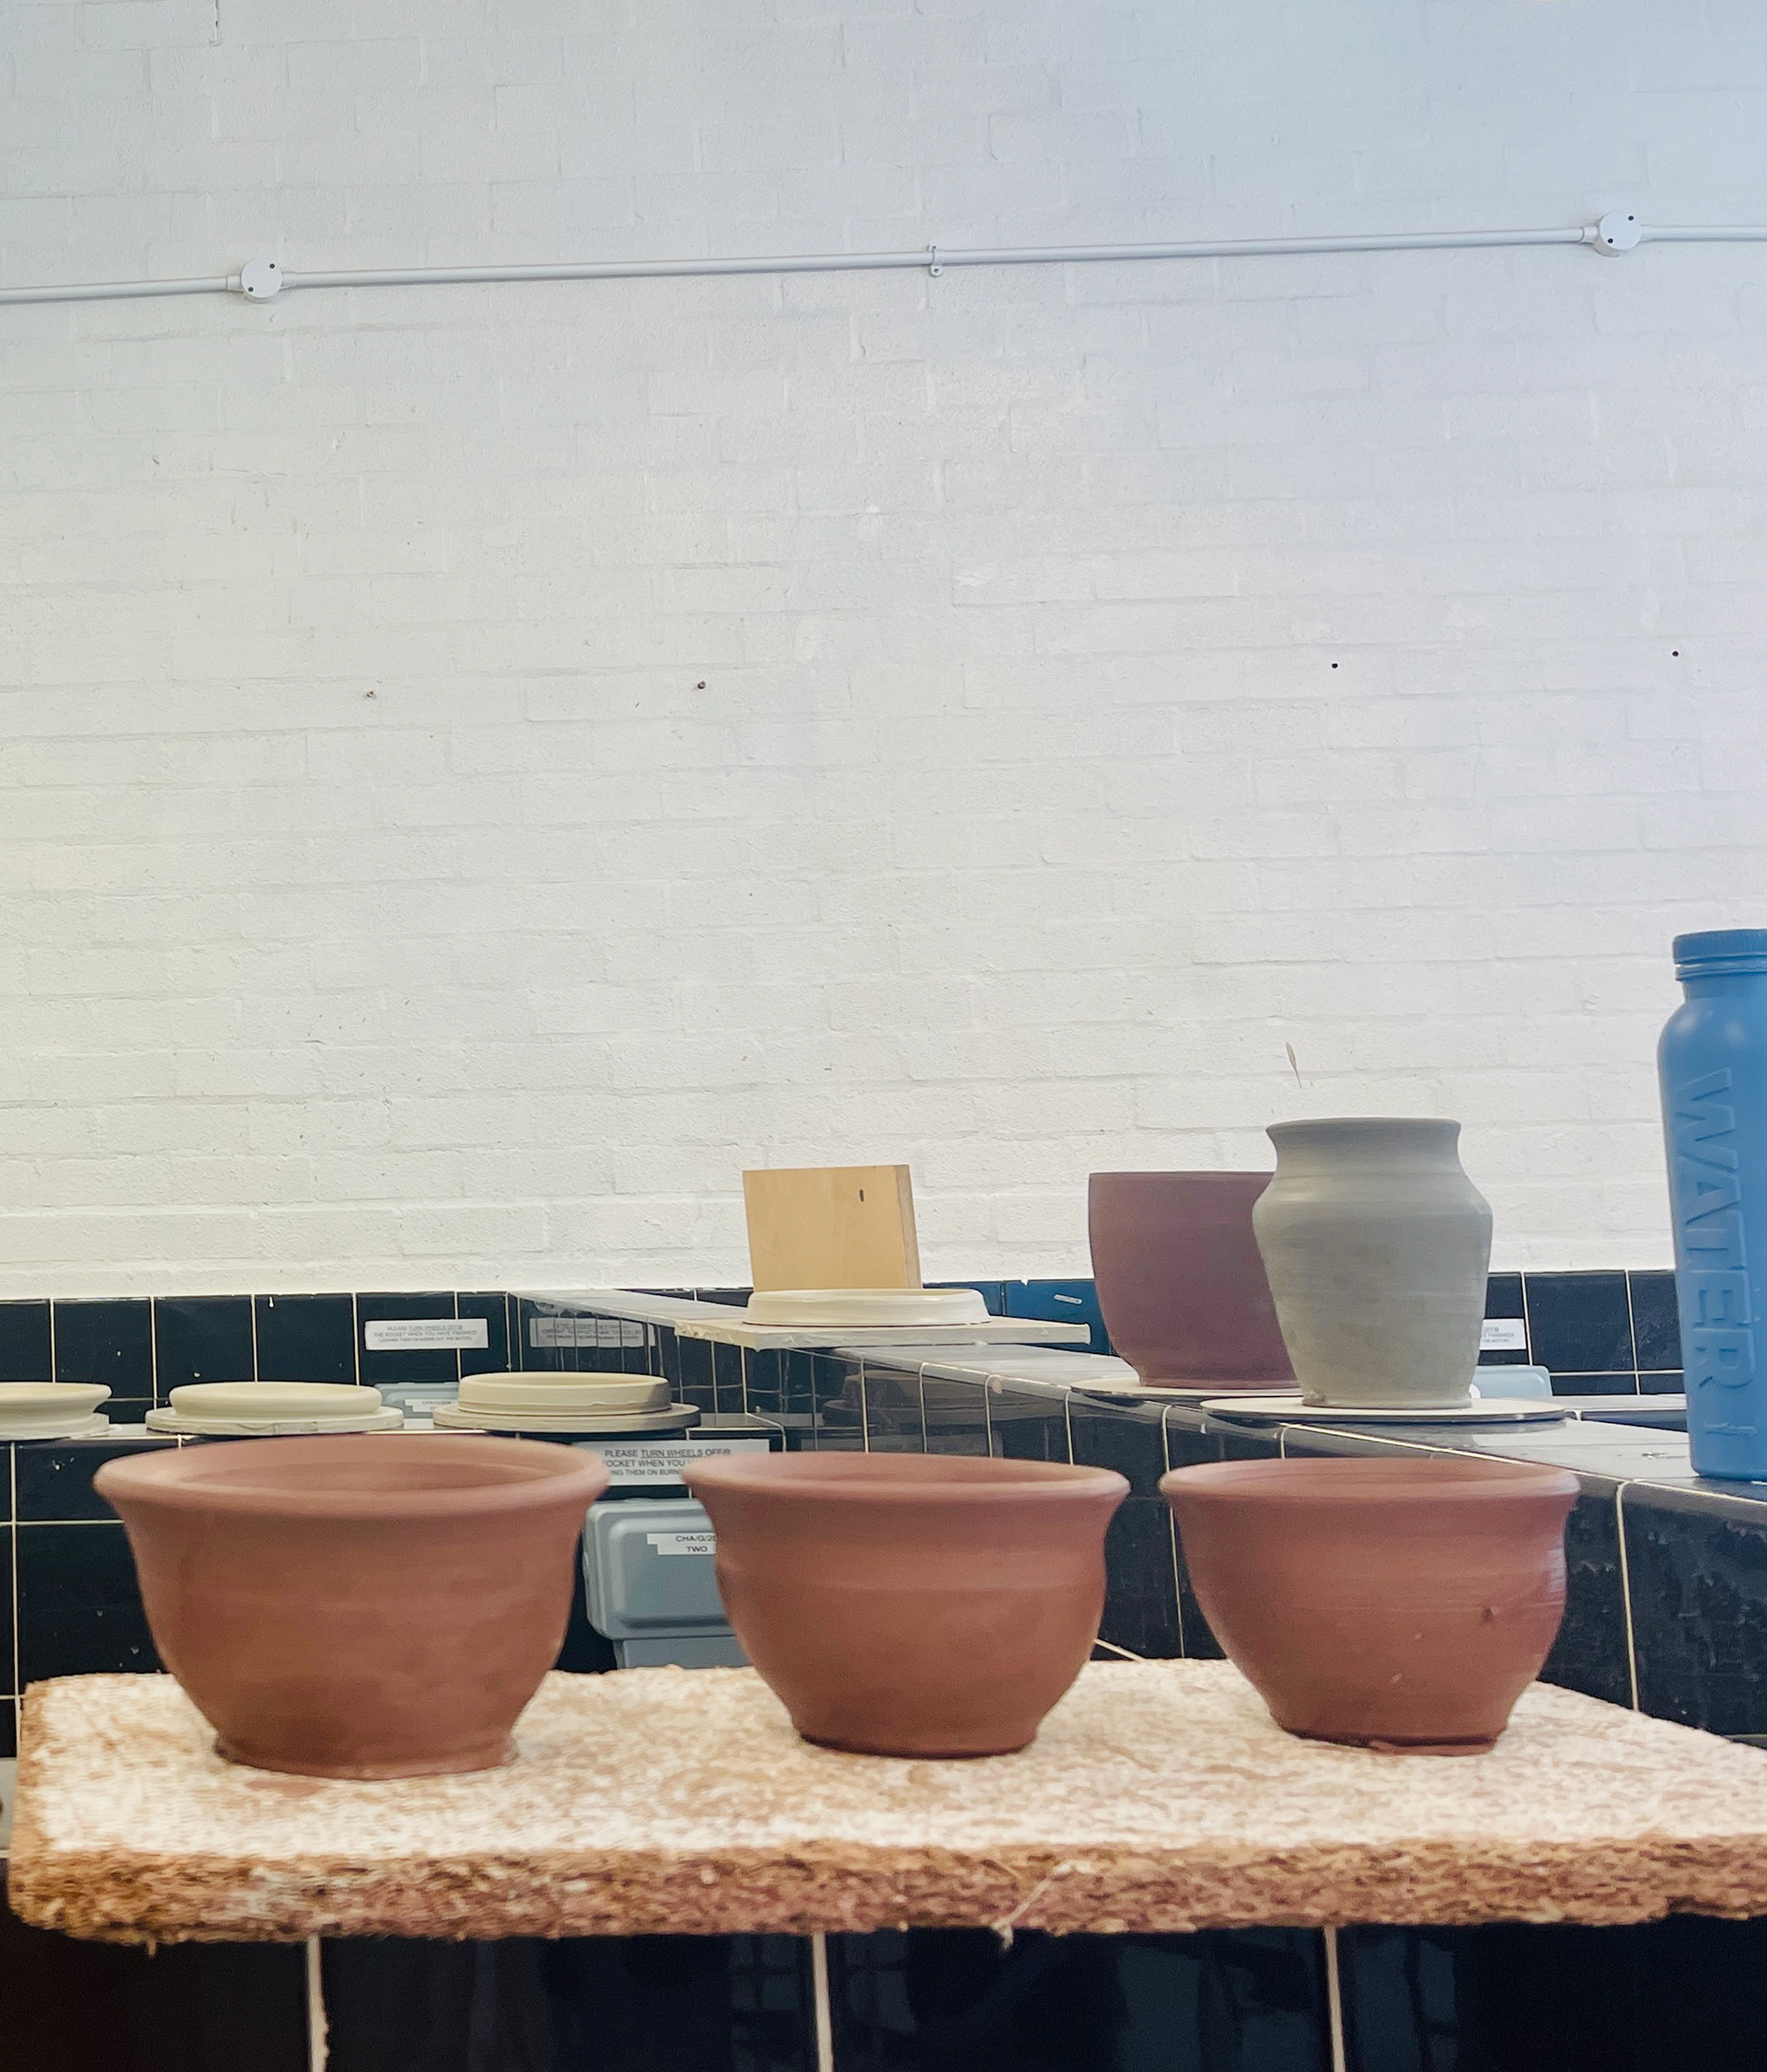
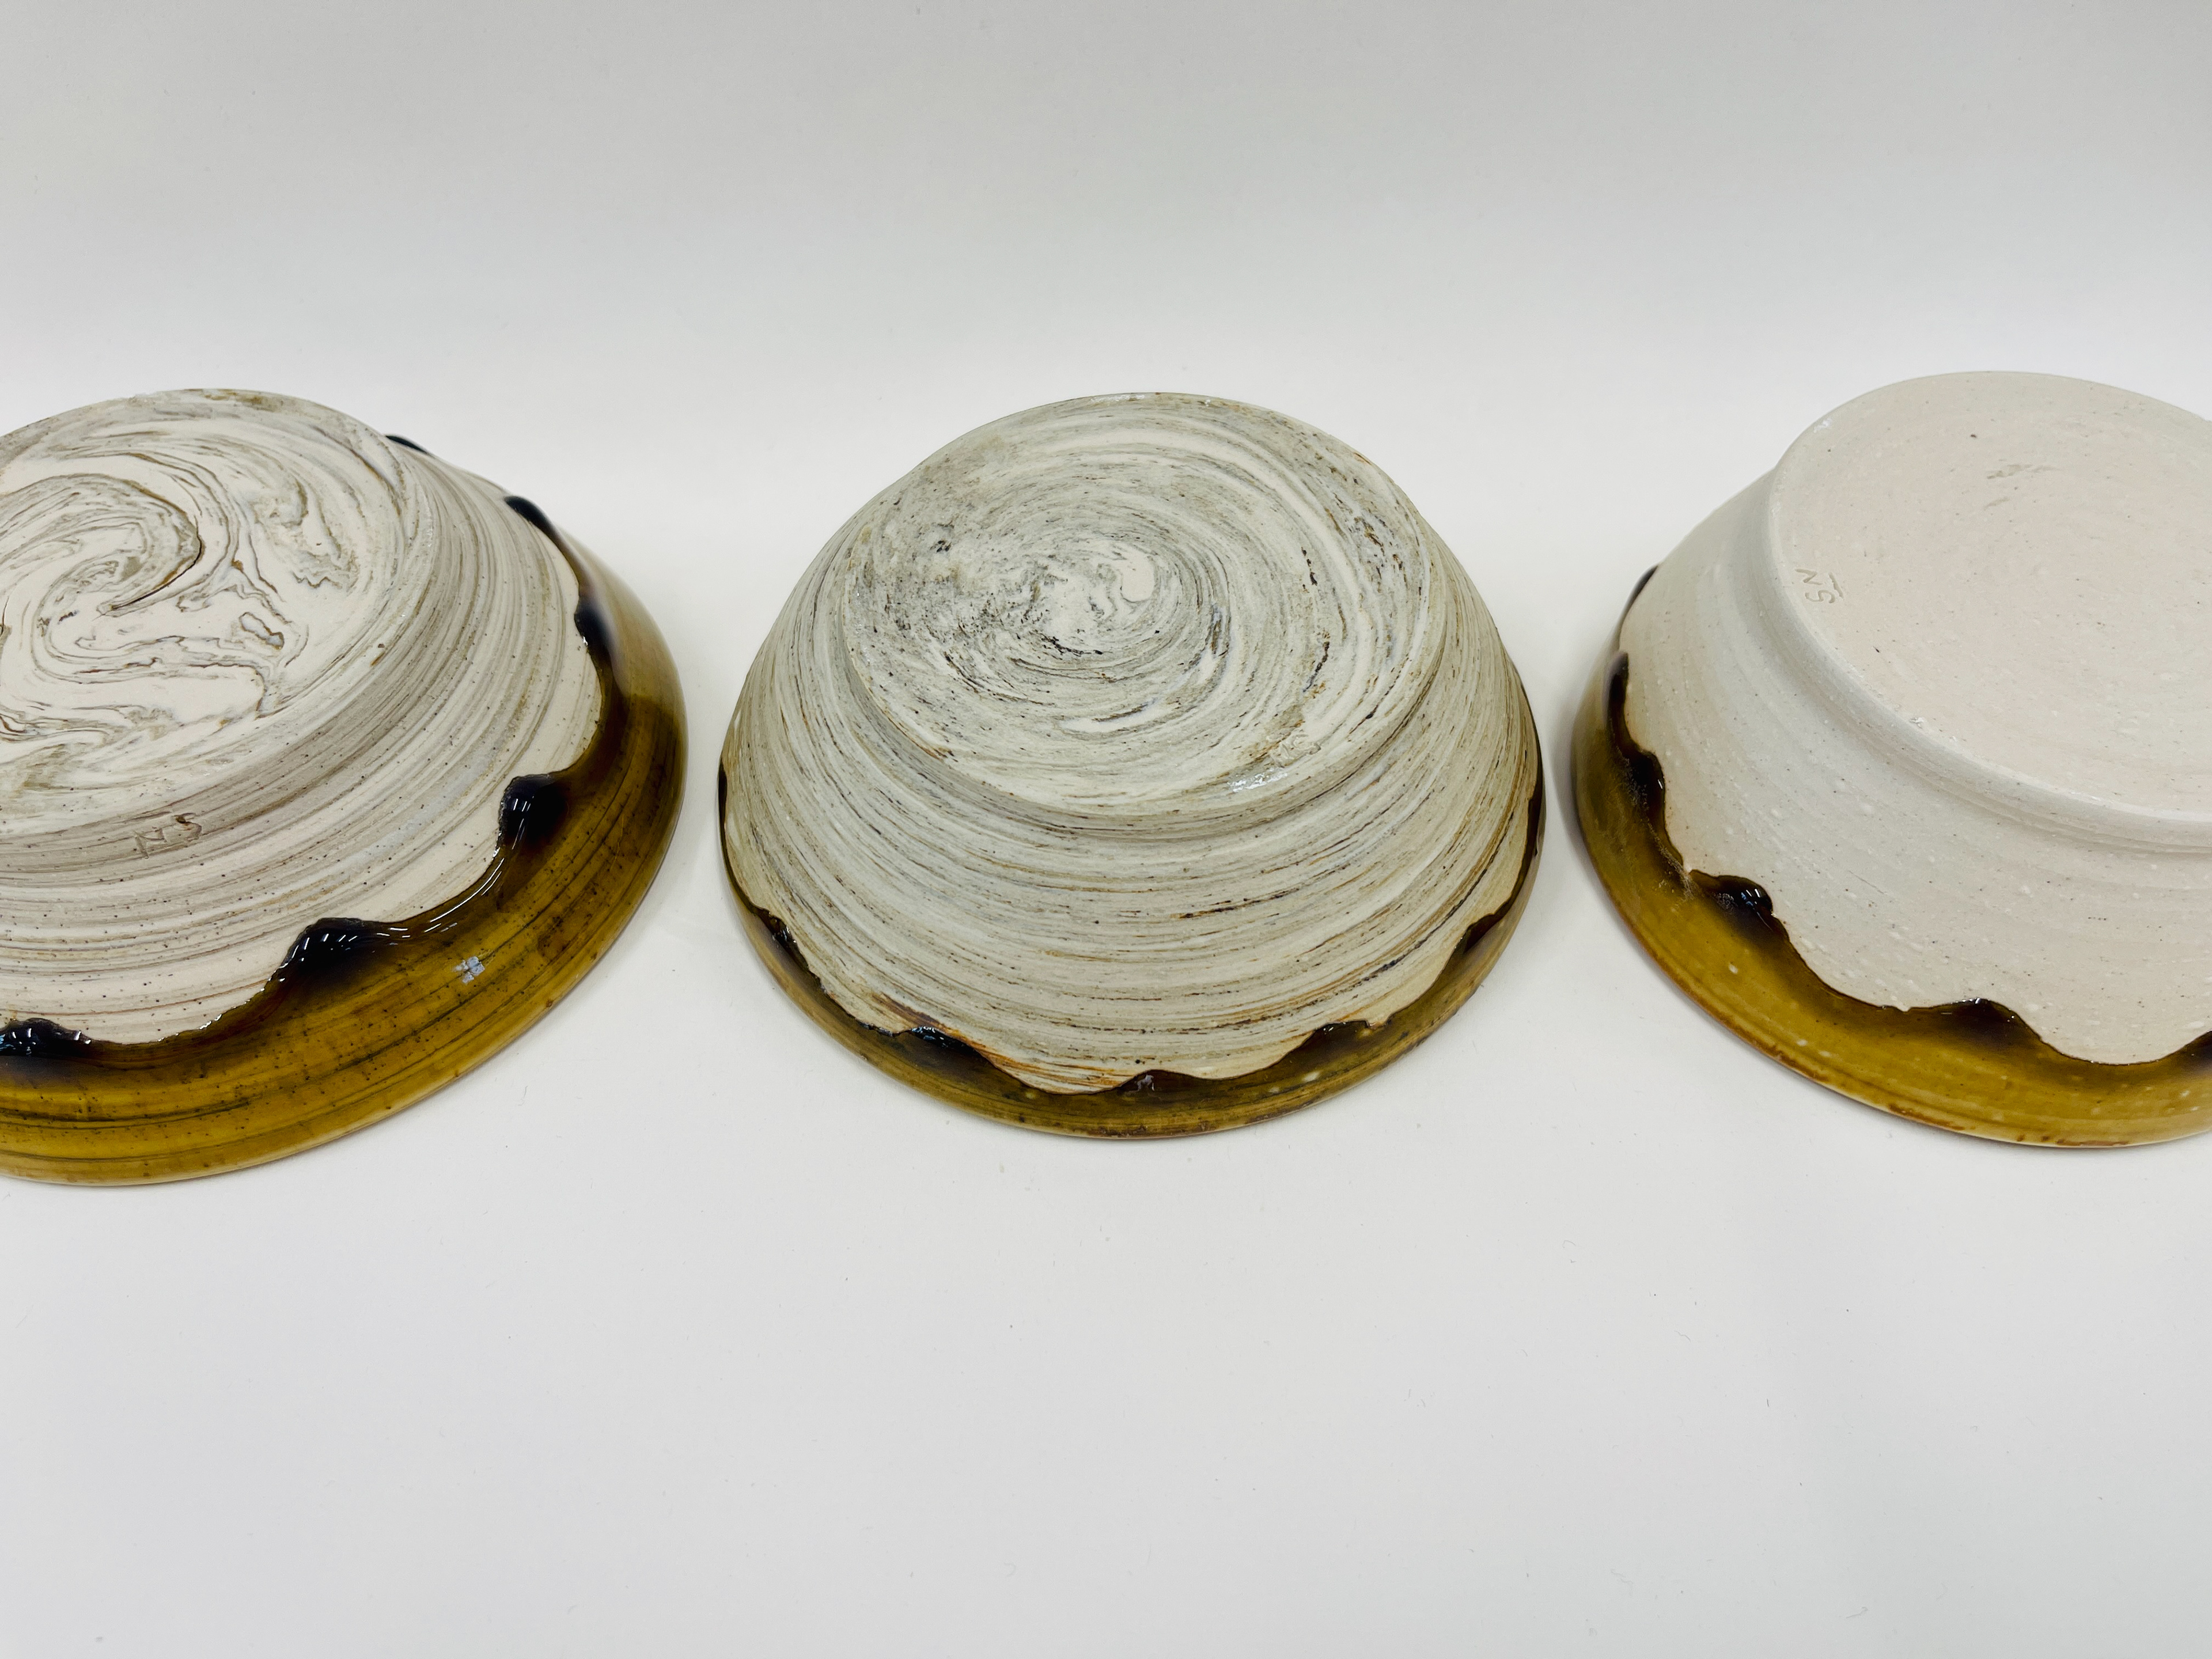
ALM clay
ALM clay
IVS clay
IVS clay
As expected from the tester the enhancing glaze does add much more interest on the first glaze. The above pieces are fired to 1280c temp, which is why there has been pooling at the base of bowl. it would be interesting to see the behaviour of the two glazes at a low temp. the blue around the base is from the rule present in the first glaze, possible applying a tin coat may allow the particle to adhere onto the walls evenly.  
Almington clay has been bloating for the past few attempts, needs to change either the firing temperature or add material to the clay to make sure its doesn't release gasses. 
Altering firing temperature
To make sure Almington clay doesn't bloat from being fired high and the released gas causing gas pockets within the clay body. i have made small bowls that will be fired to a low temperature with the cone 9/10 or 1280 glazes. The reason for this experiment is find if the clay still bloats and if not then, the glazes being applied are maturing at that temperature.  
Testing Almington clay at low Stoneware temperature/ 1240c: 
test one successful- the applied glazes have matured and no signs of gas pockets. 
However, these are very small vessels and it doesn’t full determine that this temp has proven to be the best. 
test two- will included larger forms to see if the results are consistent? 
Glaze application: Red Iron Glaze with white dry glaze over top:
Applied first layer first, leave over night. this allows the clay body to fully absorb moisture from the glaze leaving the layer smooth and dry. this also, makes it easier for the second glaze to adhere onto the glazed surface. Otherwise, the second glaze can start to peel off because the layer down is still wet and isn't absorbing moisture from the added, second glaze.

Low air pressure when using spraying gun- thick application by dribbled effect/ before. 

I am very happy with the above outcome, the strong bright red colour really is a stunning resemblance to spices like chilli powder or saffron. The cornish stone glaze(matt/stiff) in combination with the red turned yellow/green. This piece is truly what my project should invoke clear imagery of how the spices would react when cooking. 
Overlaying it with a white matt glaze but sprayed on with low pressure on the spraying booth, this causes the glaze to be applied really thick on the bowl forming the oil spot glaze apparent.  ​​​​​​​
Altering the Red Iron glaze:
Colour response with a different dry opaque glaze:
The colour response the above tester is really beautiful cardamum/cumin green.
Instead of using the cornish stone with tin 8%, used magnesium matt glaze. colour response green. I really find this glaze intriguing. A single glaze overlapped with different matt/stiff glazes will produce two colour responses. This green is a colour representation of masalas like cumin or cardamums. 
The breaking away from the edges are more towards yellow/paler green colour. 
Iron based glaze- expecting it to go blue/snowy white specks. 
This glaze is suppose to be a green background with snowy white specks appearing on the surface. But clearly visible from the above test, the glazes turned out to be leaf green on bot the clay bodies. The glaze itself holds no special effects, very still. Has a glossy surface that it. I am not a big fan of the glaze. 
Maybe I will add another glaze over the top to see if it looks nice paired in combination with another glaze.  
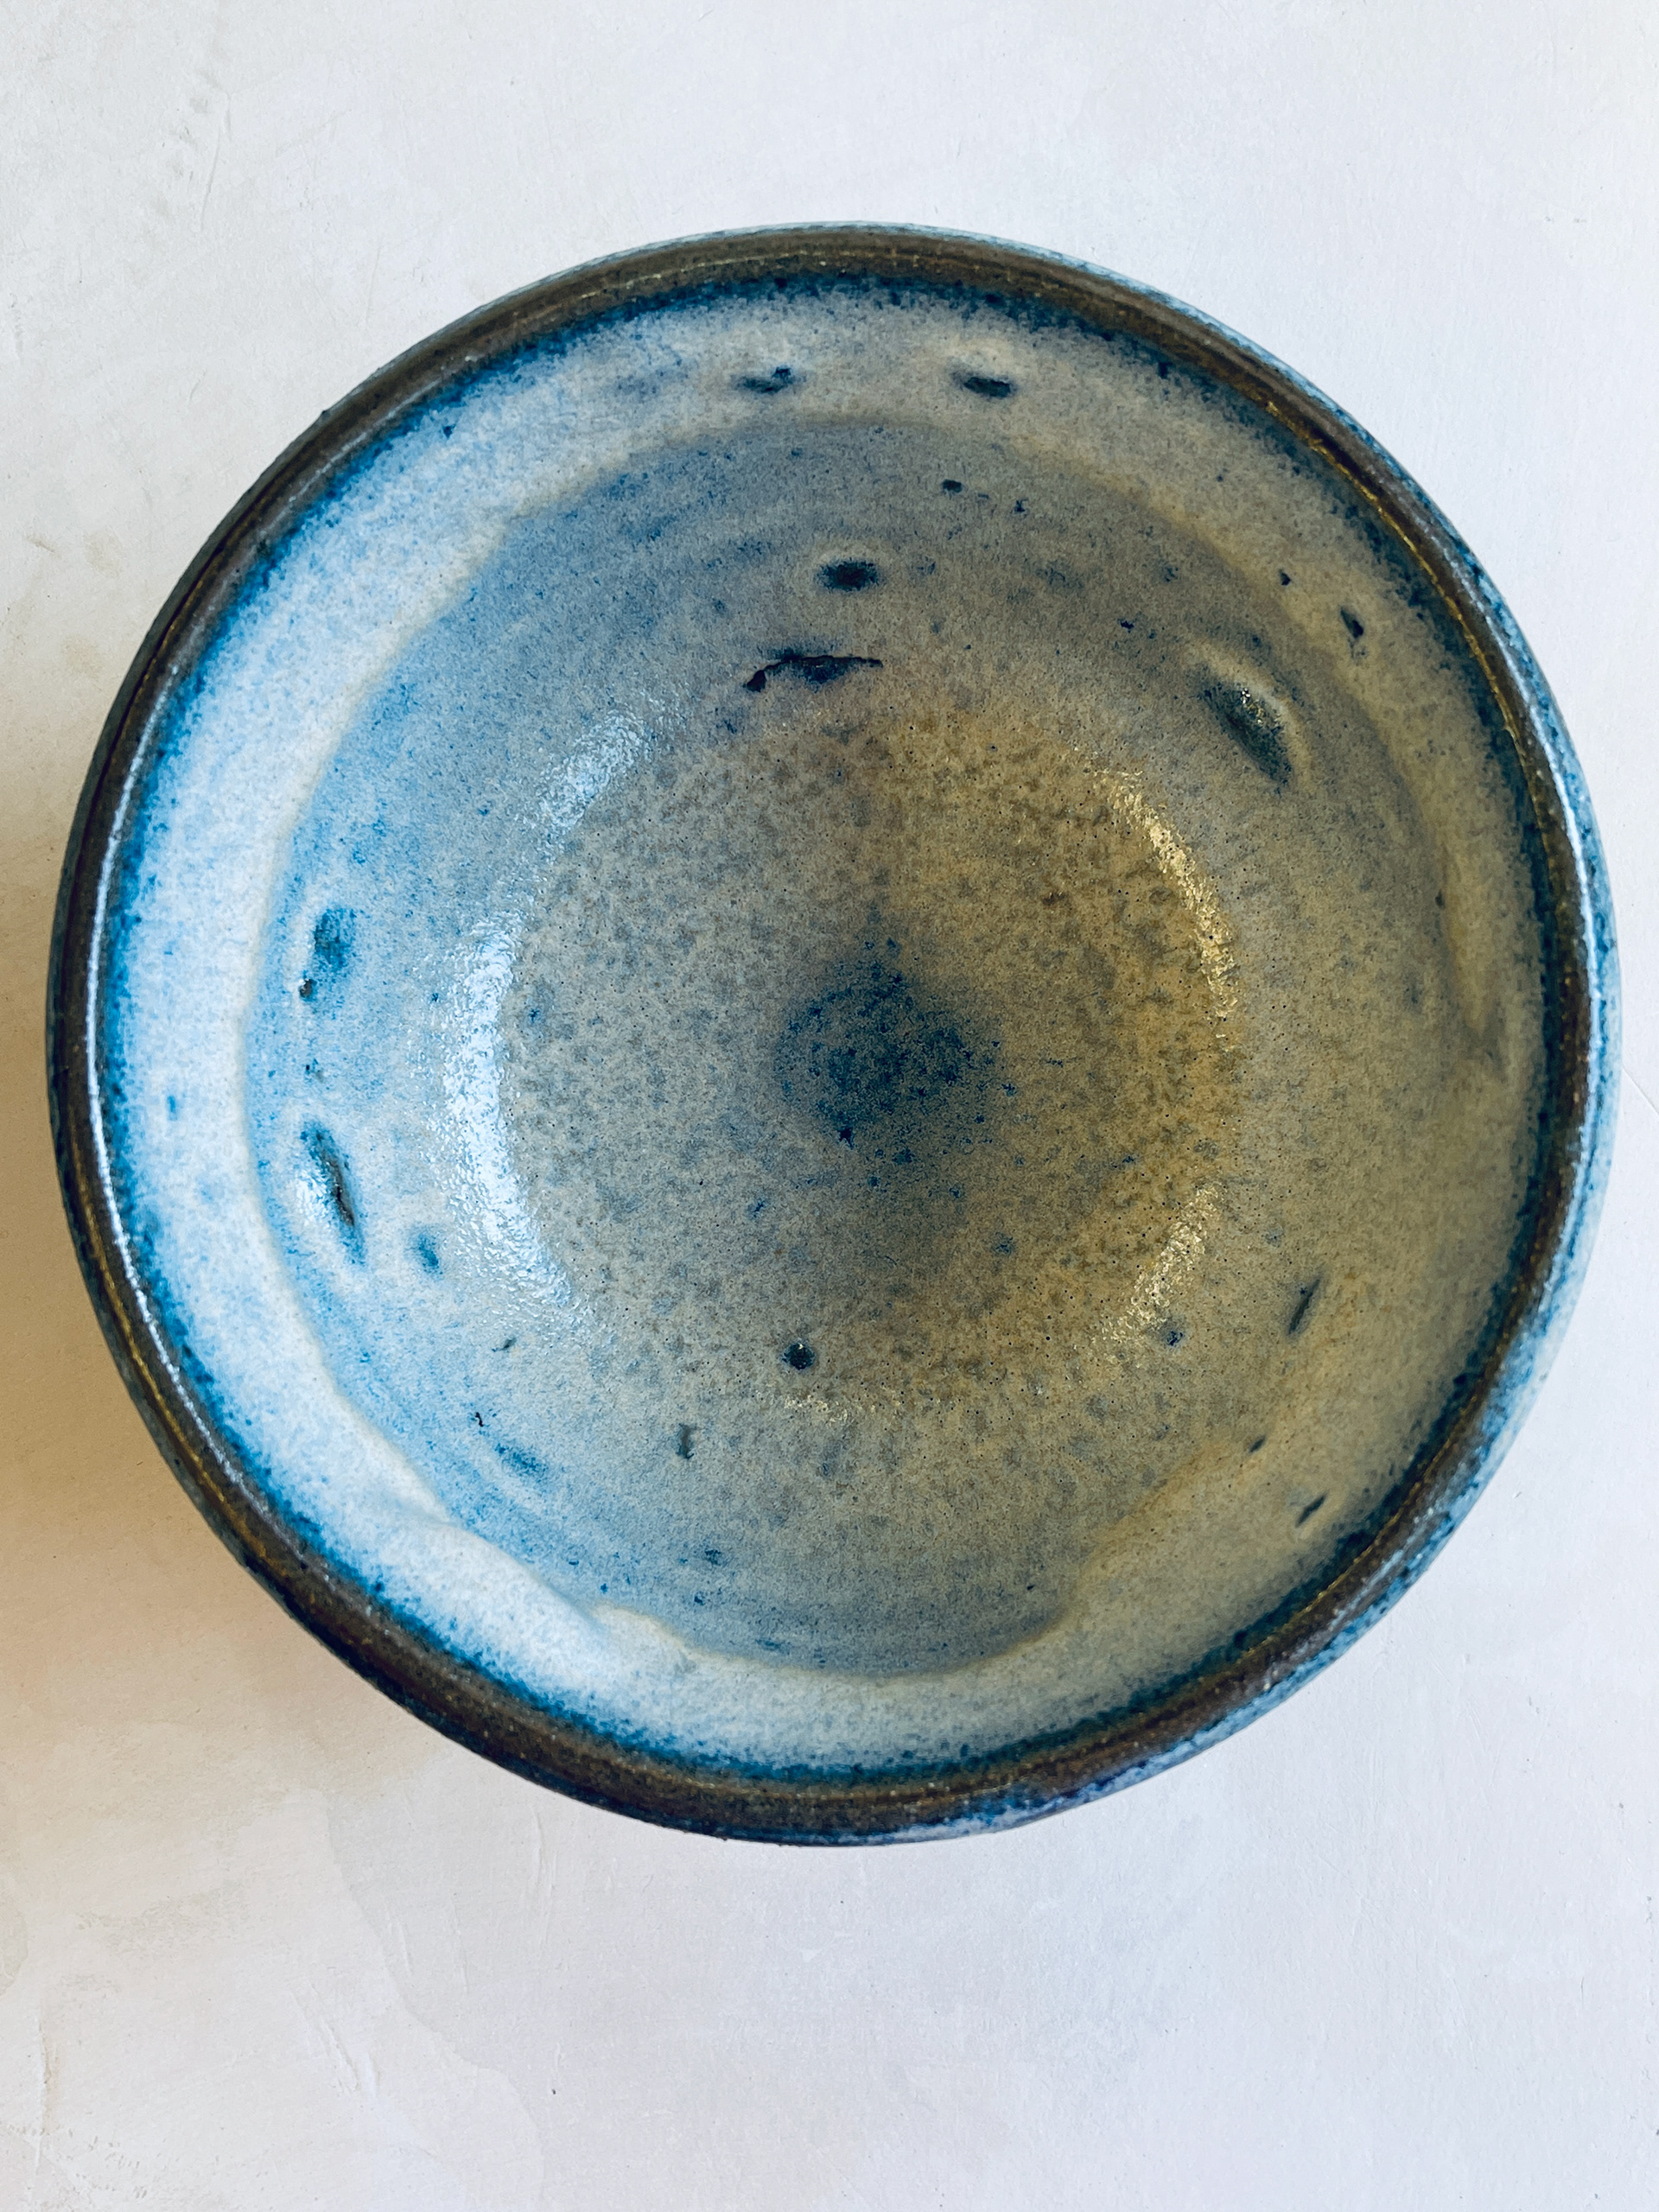
Above blue glaze plus, enhancing glaze to see if any effects are added?
Underfired piece:
applied blue glaze over the already fired piece, added black glaze (10%black iron) on the rim. Due to miss firing in the kiln and the temperature not reaching to 1280c the blue glaze hasn't matured producing a dry but very interesting surface.  
EXTRUDED HANDLES:

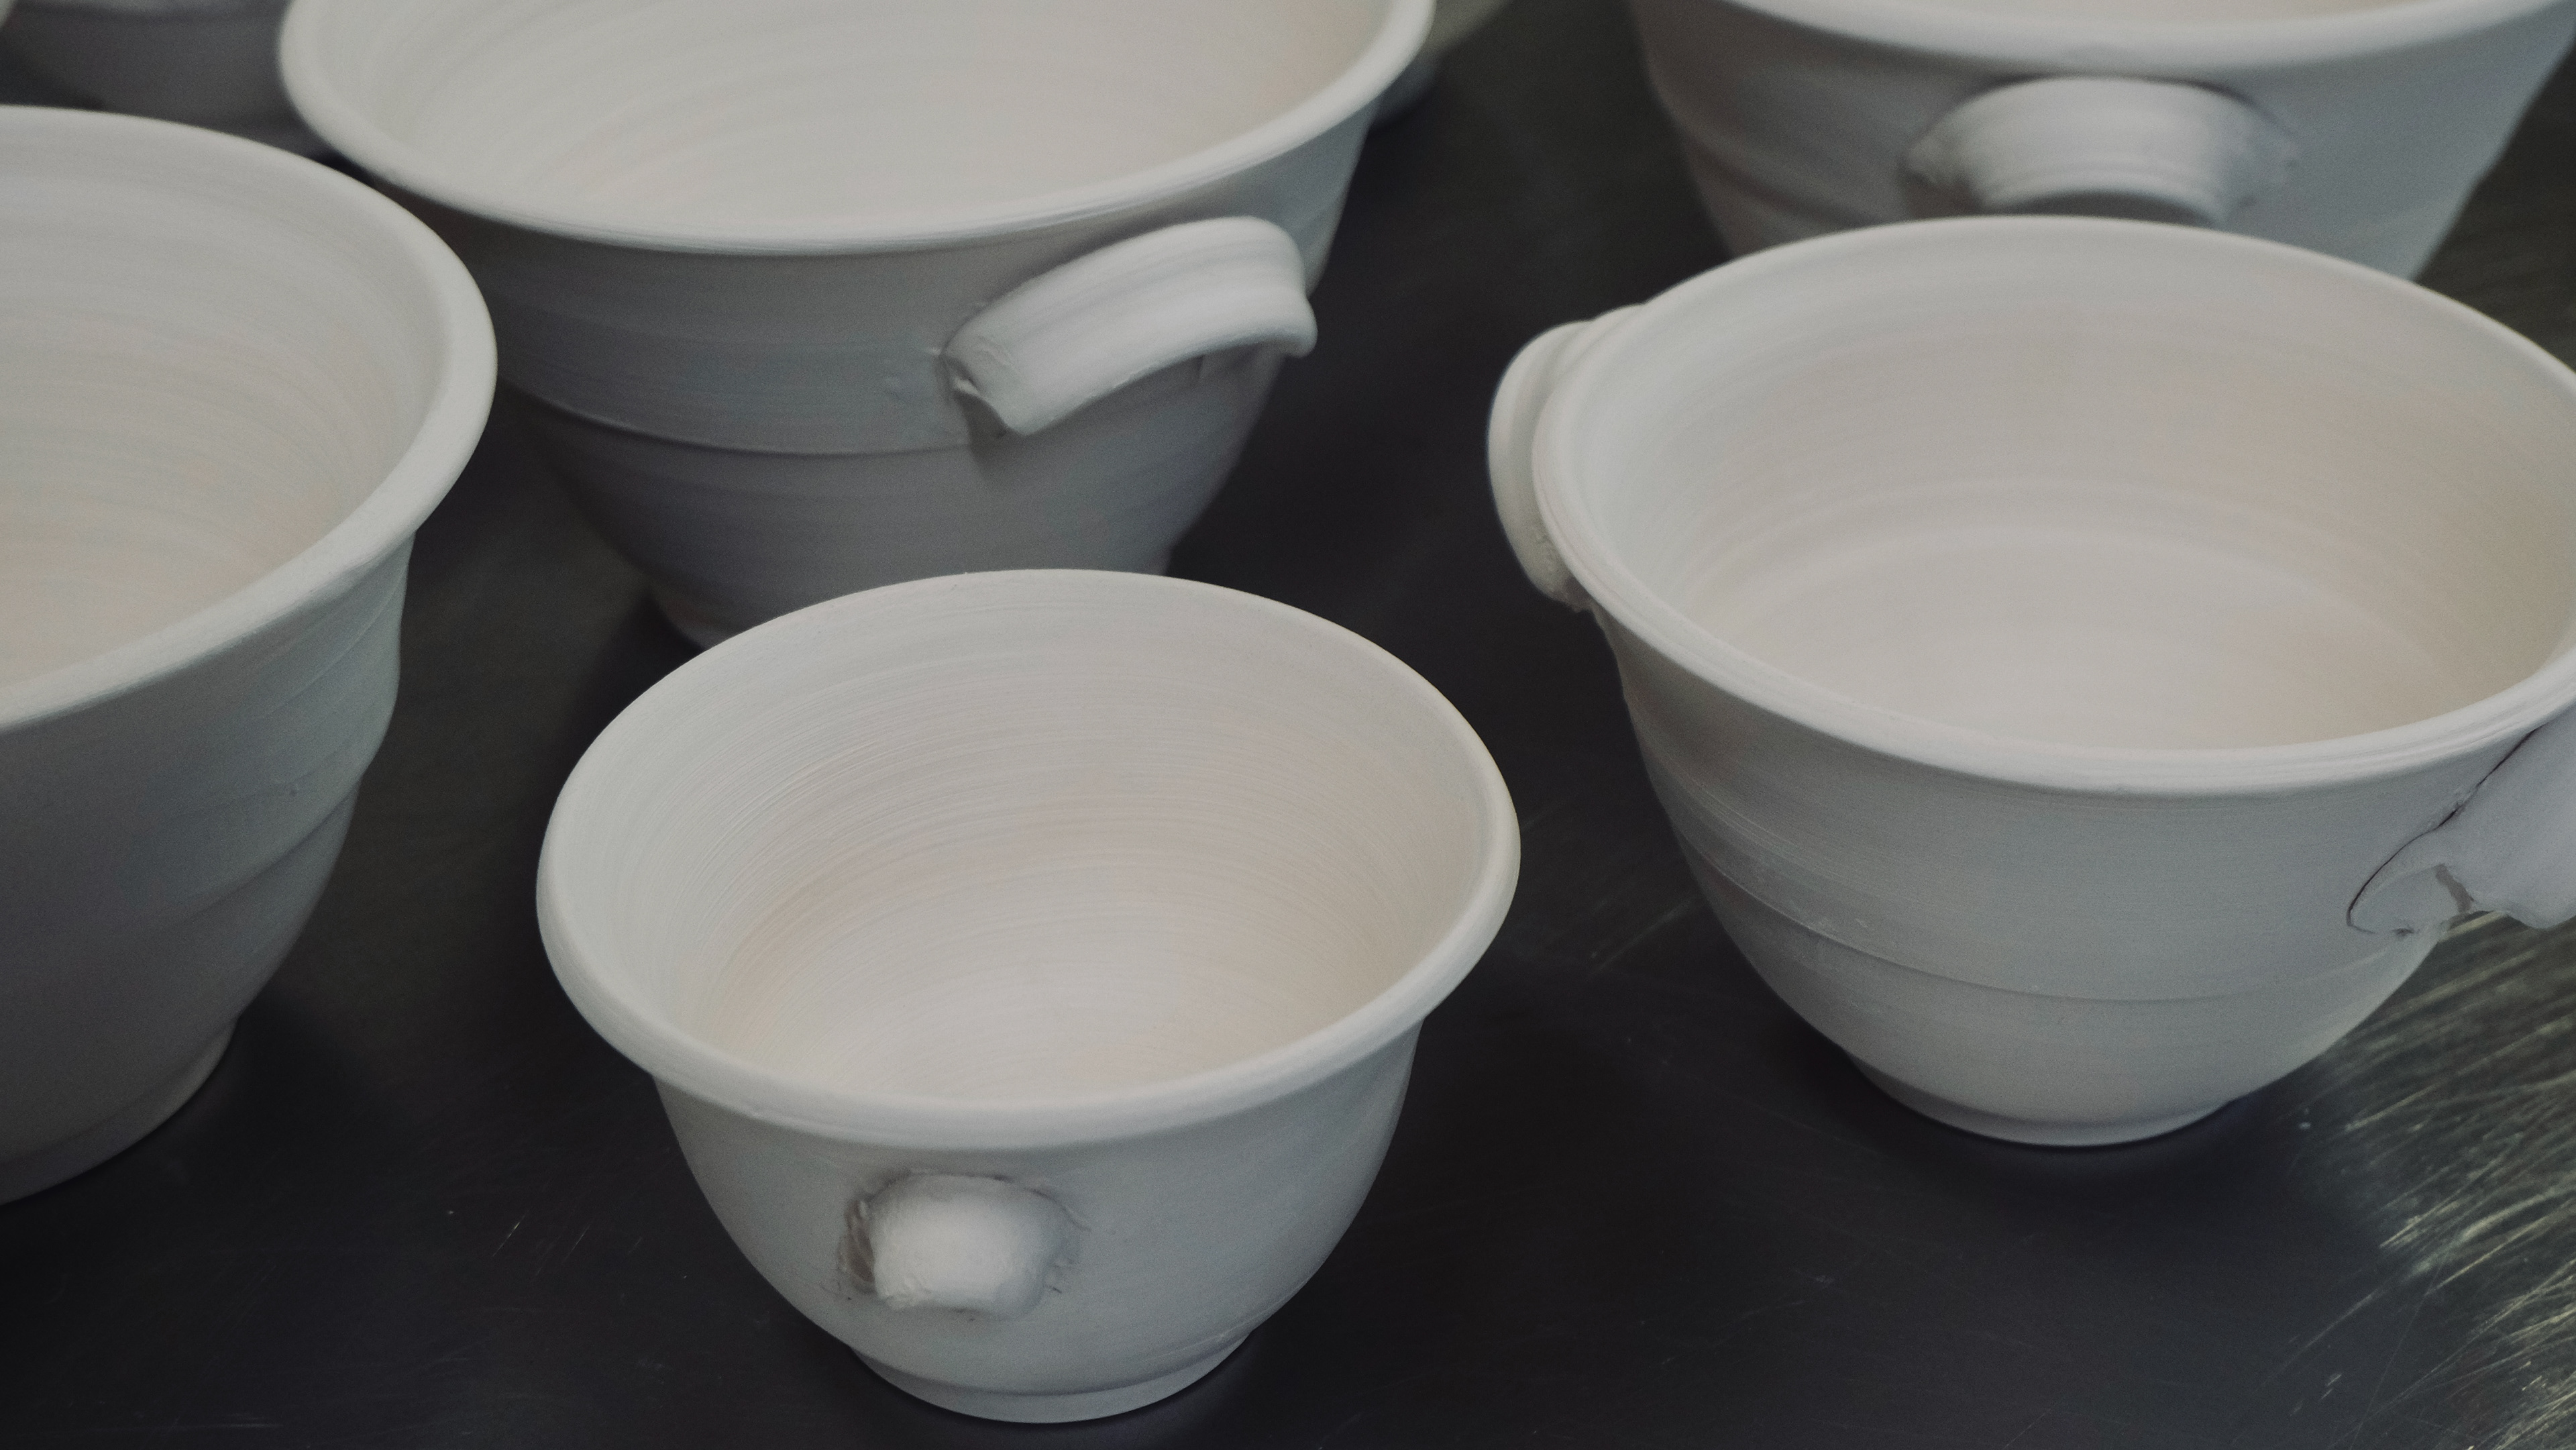
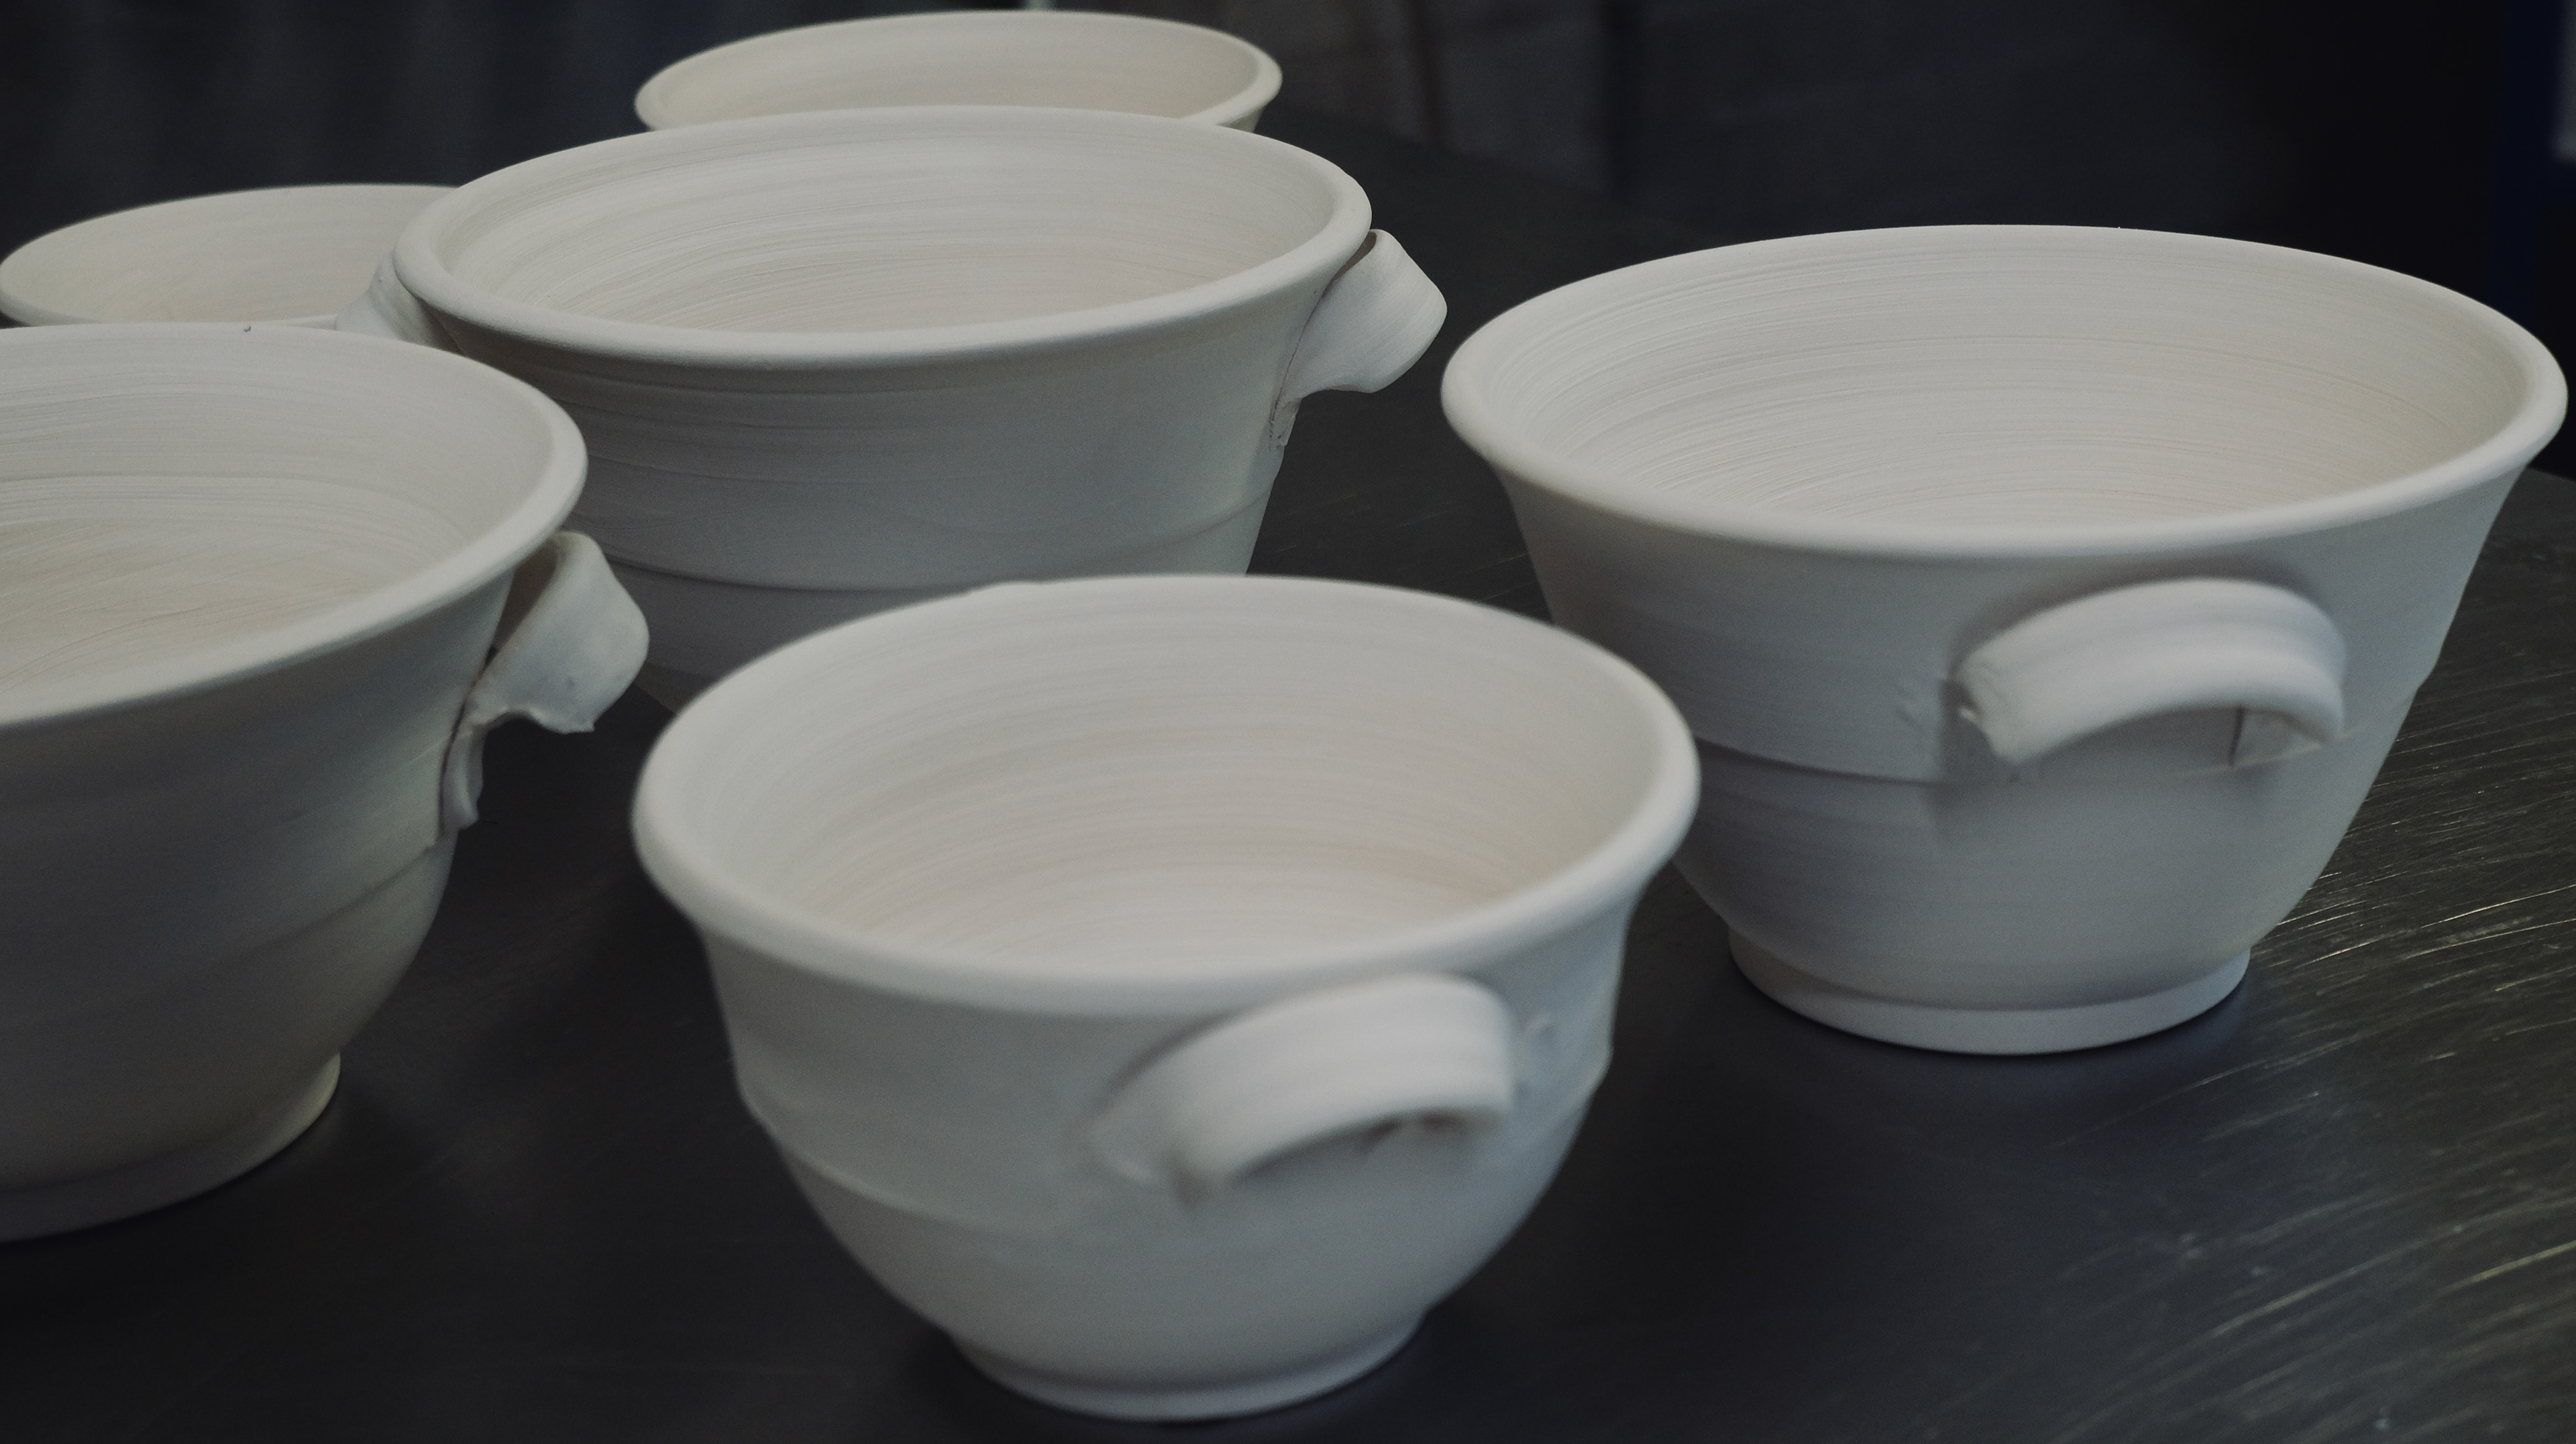
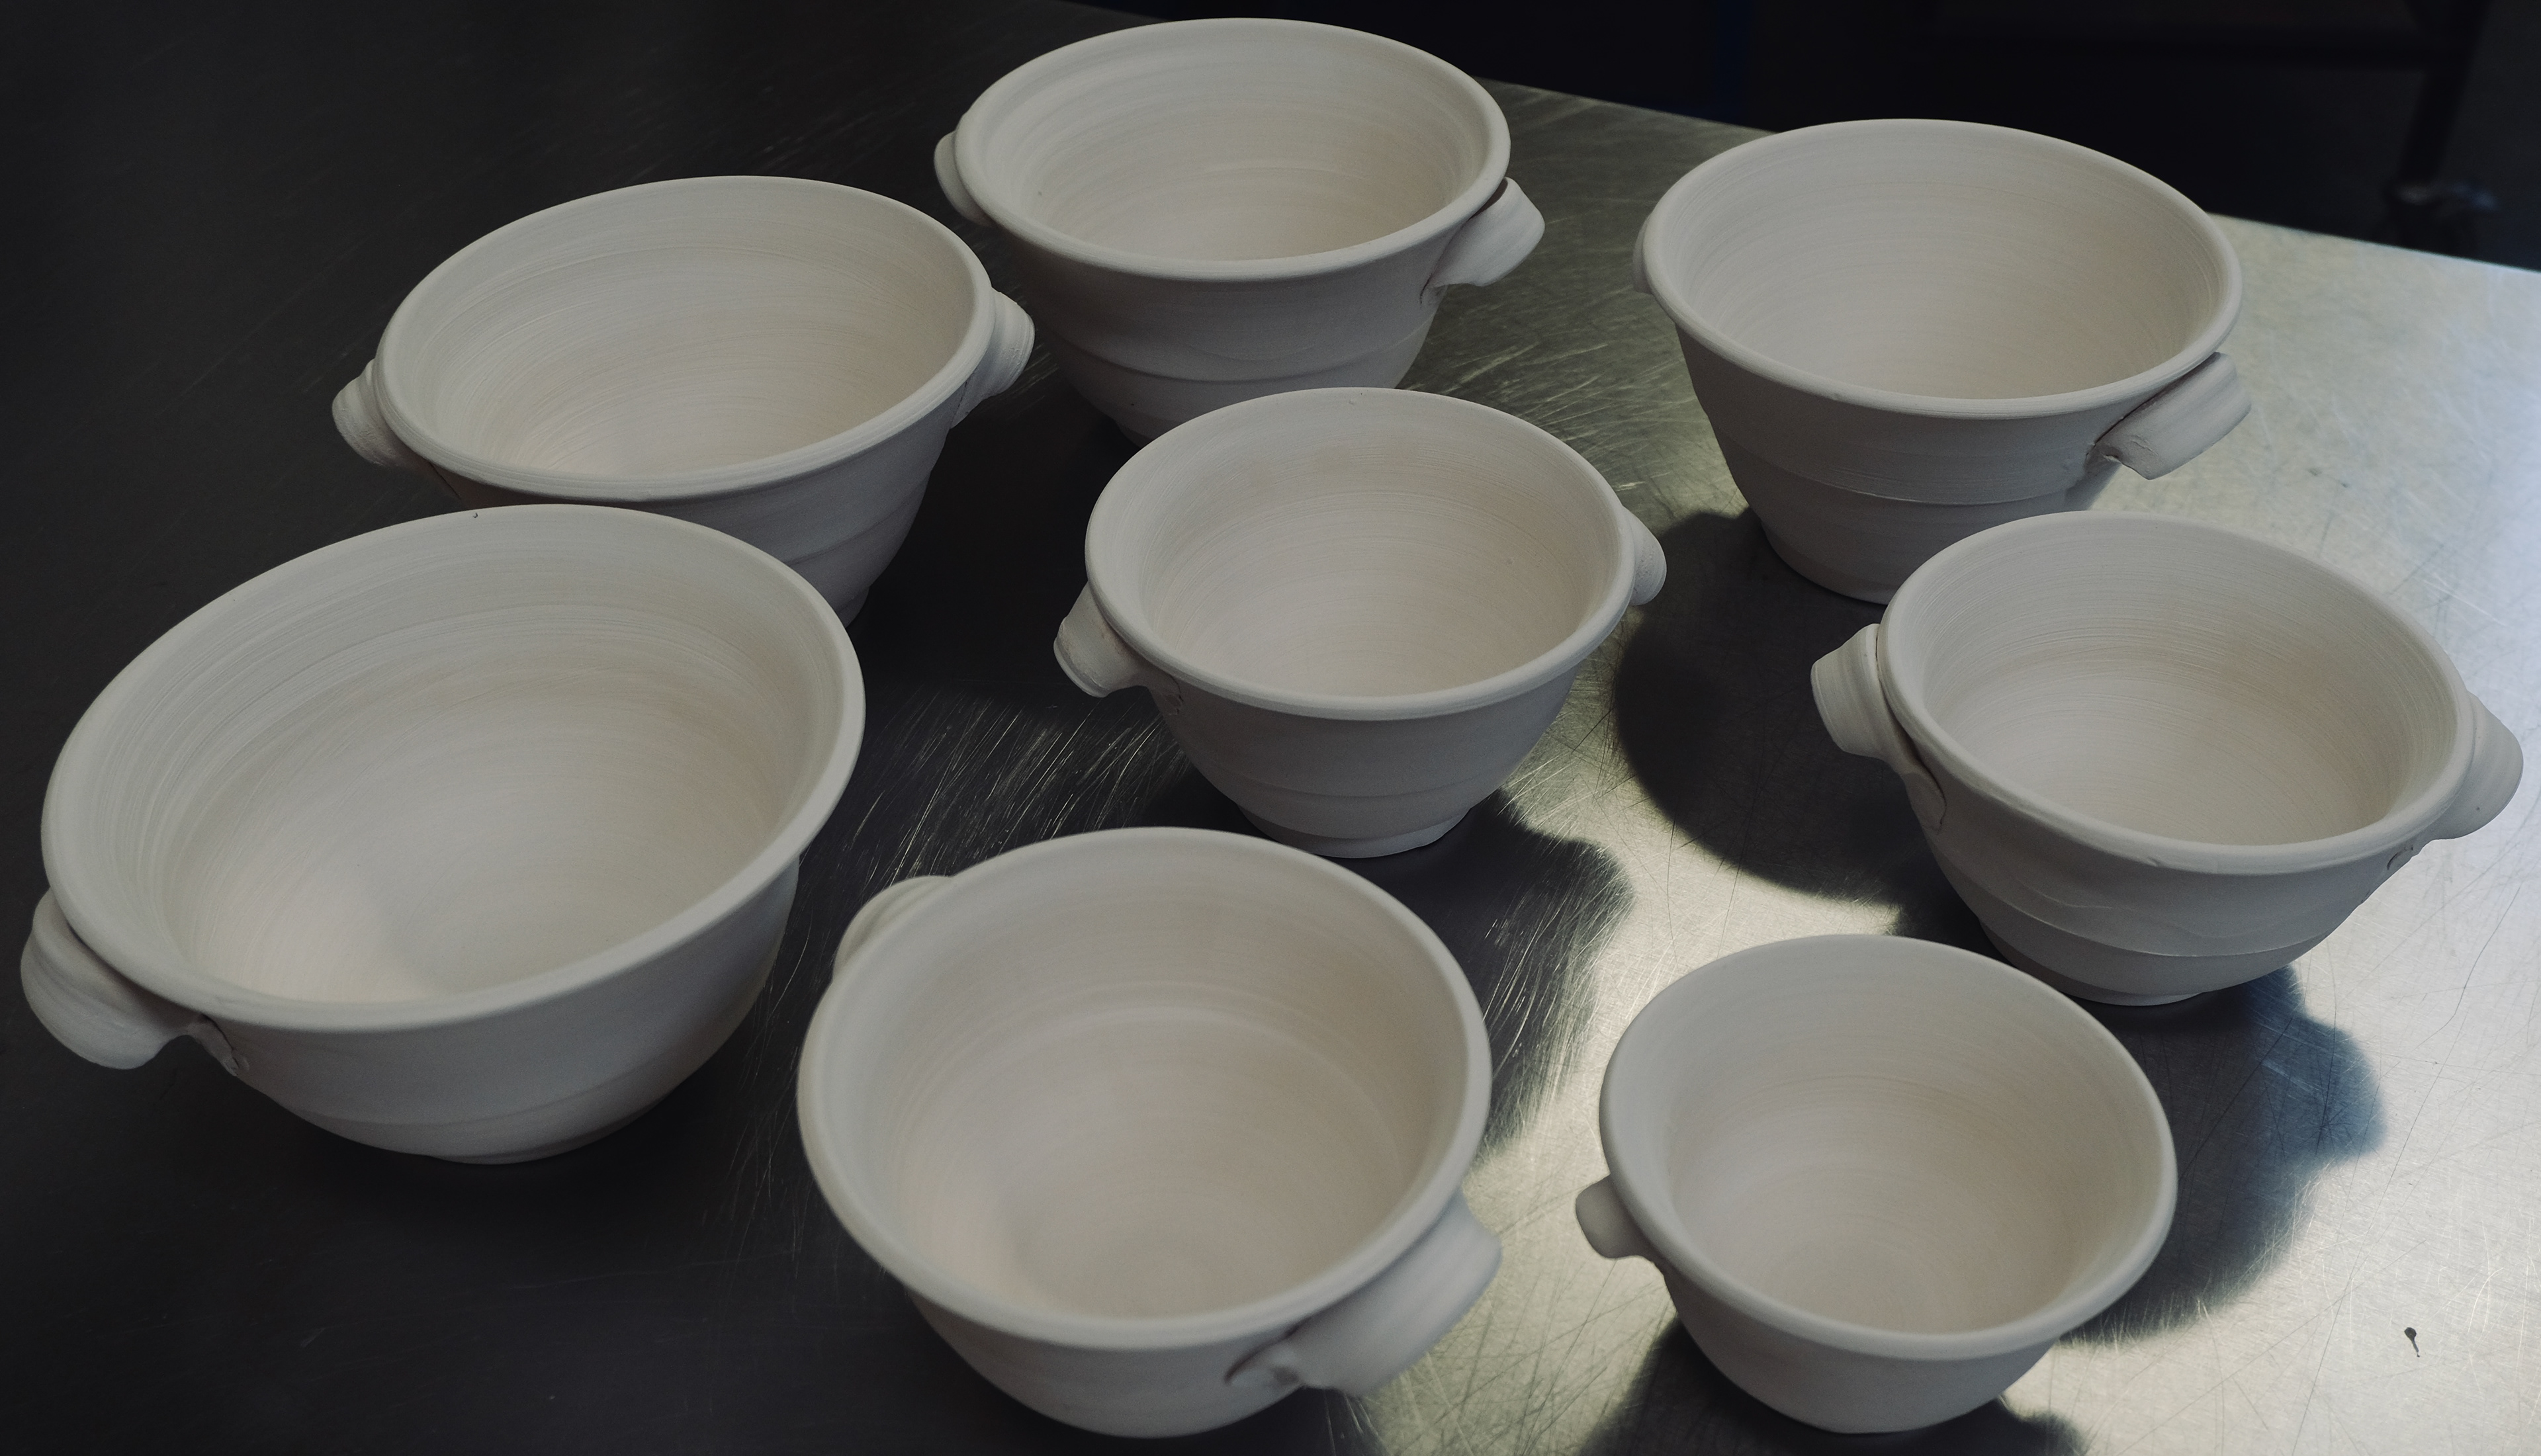
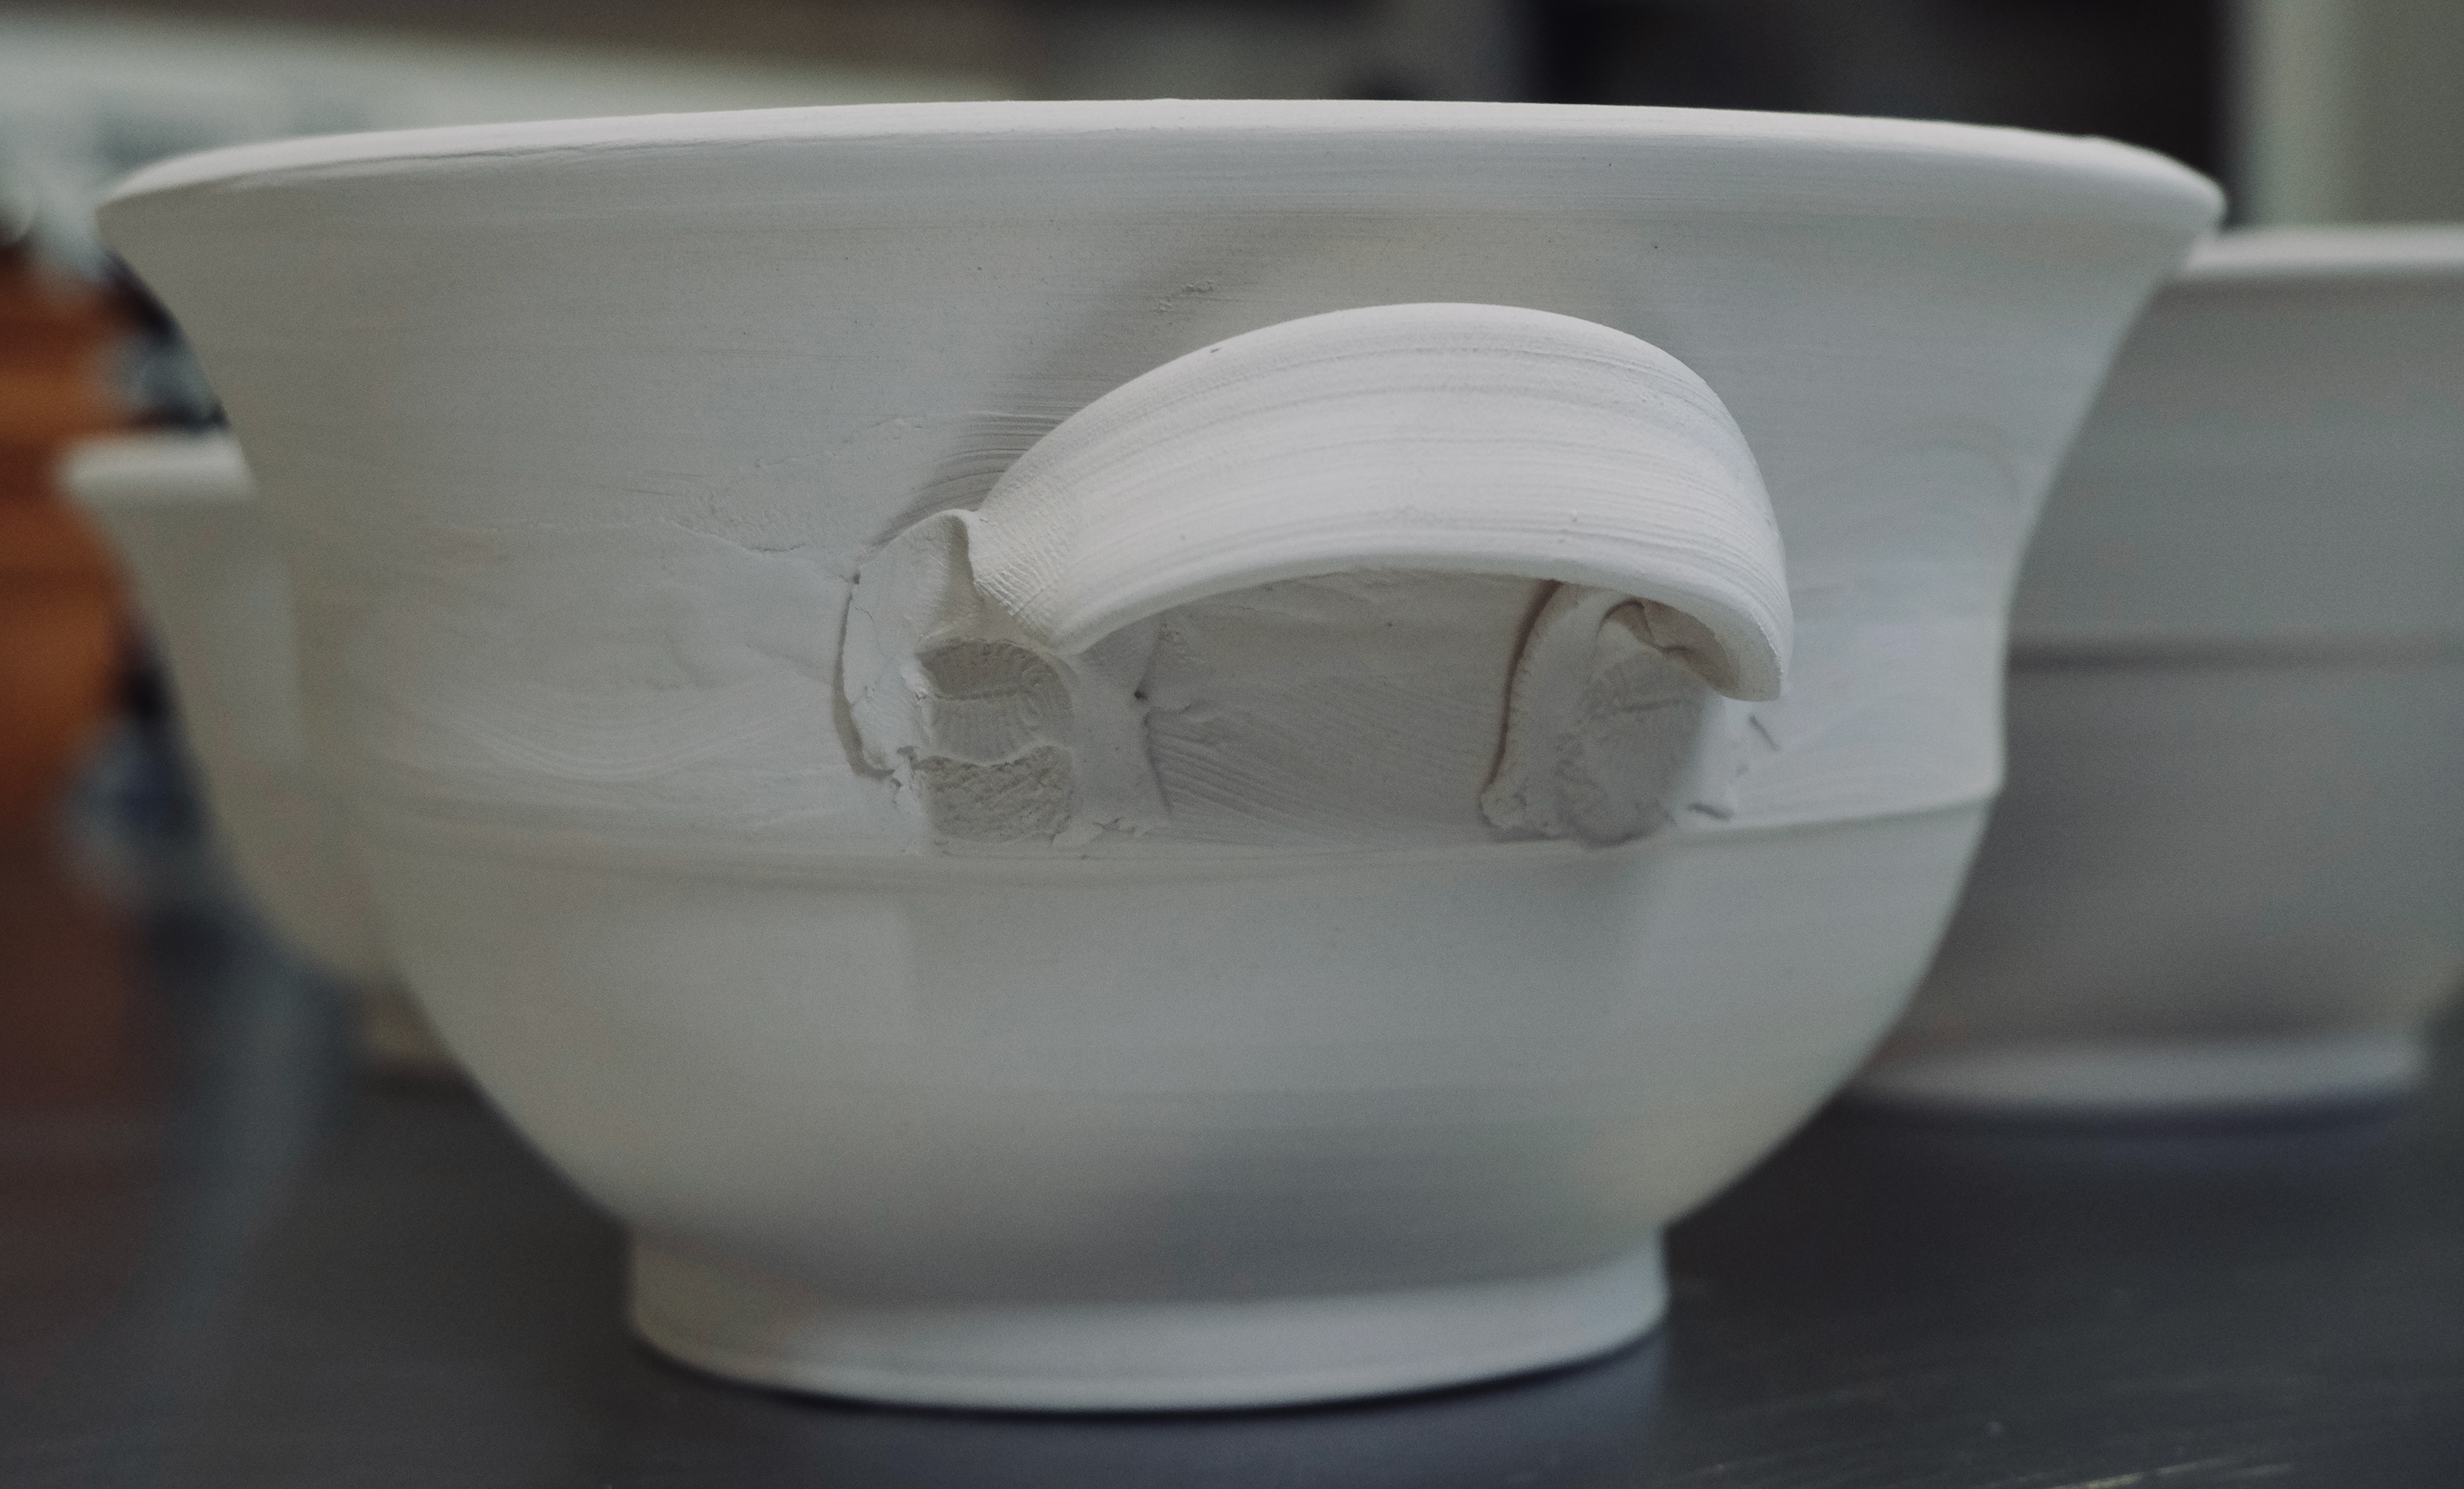
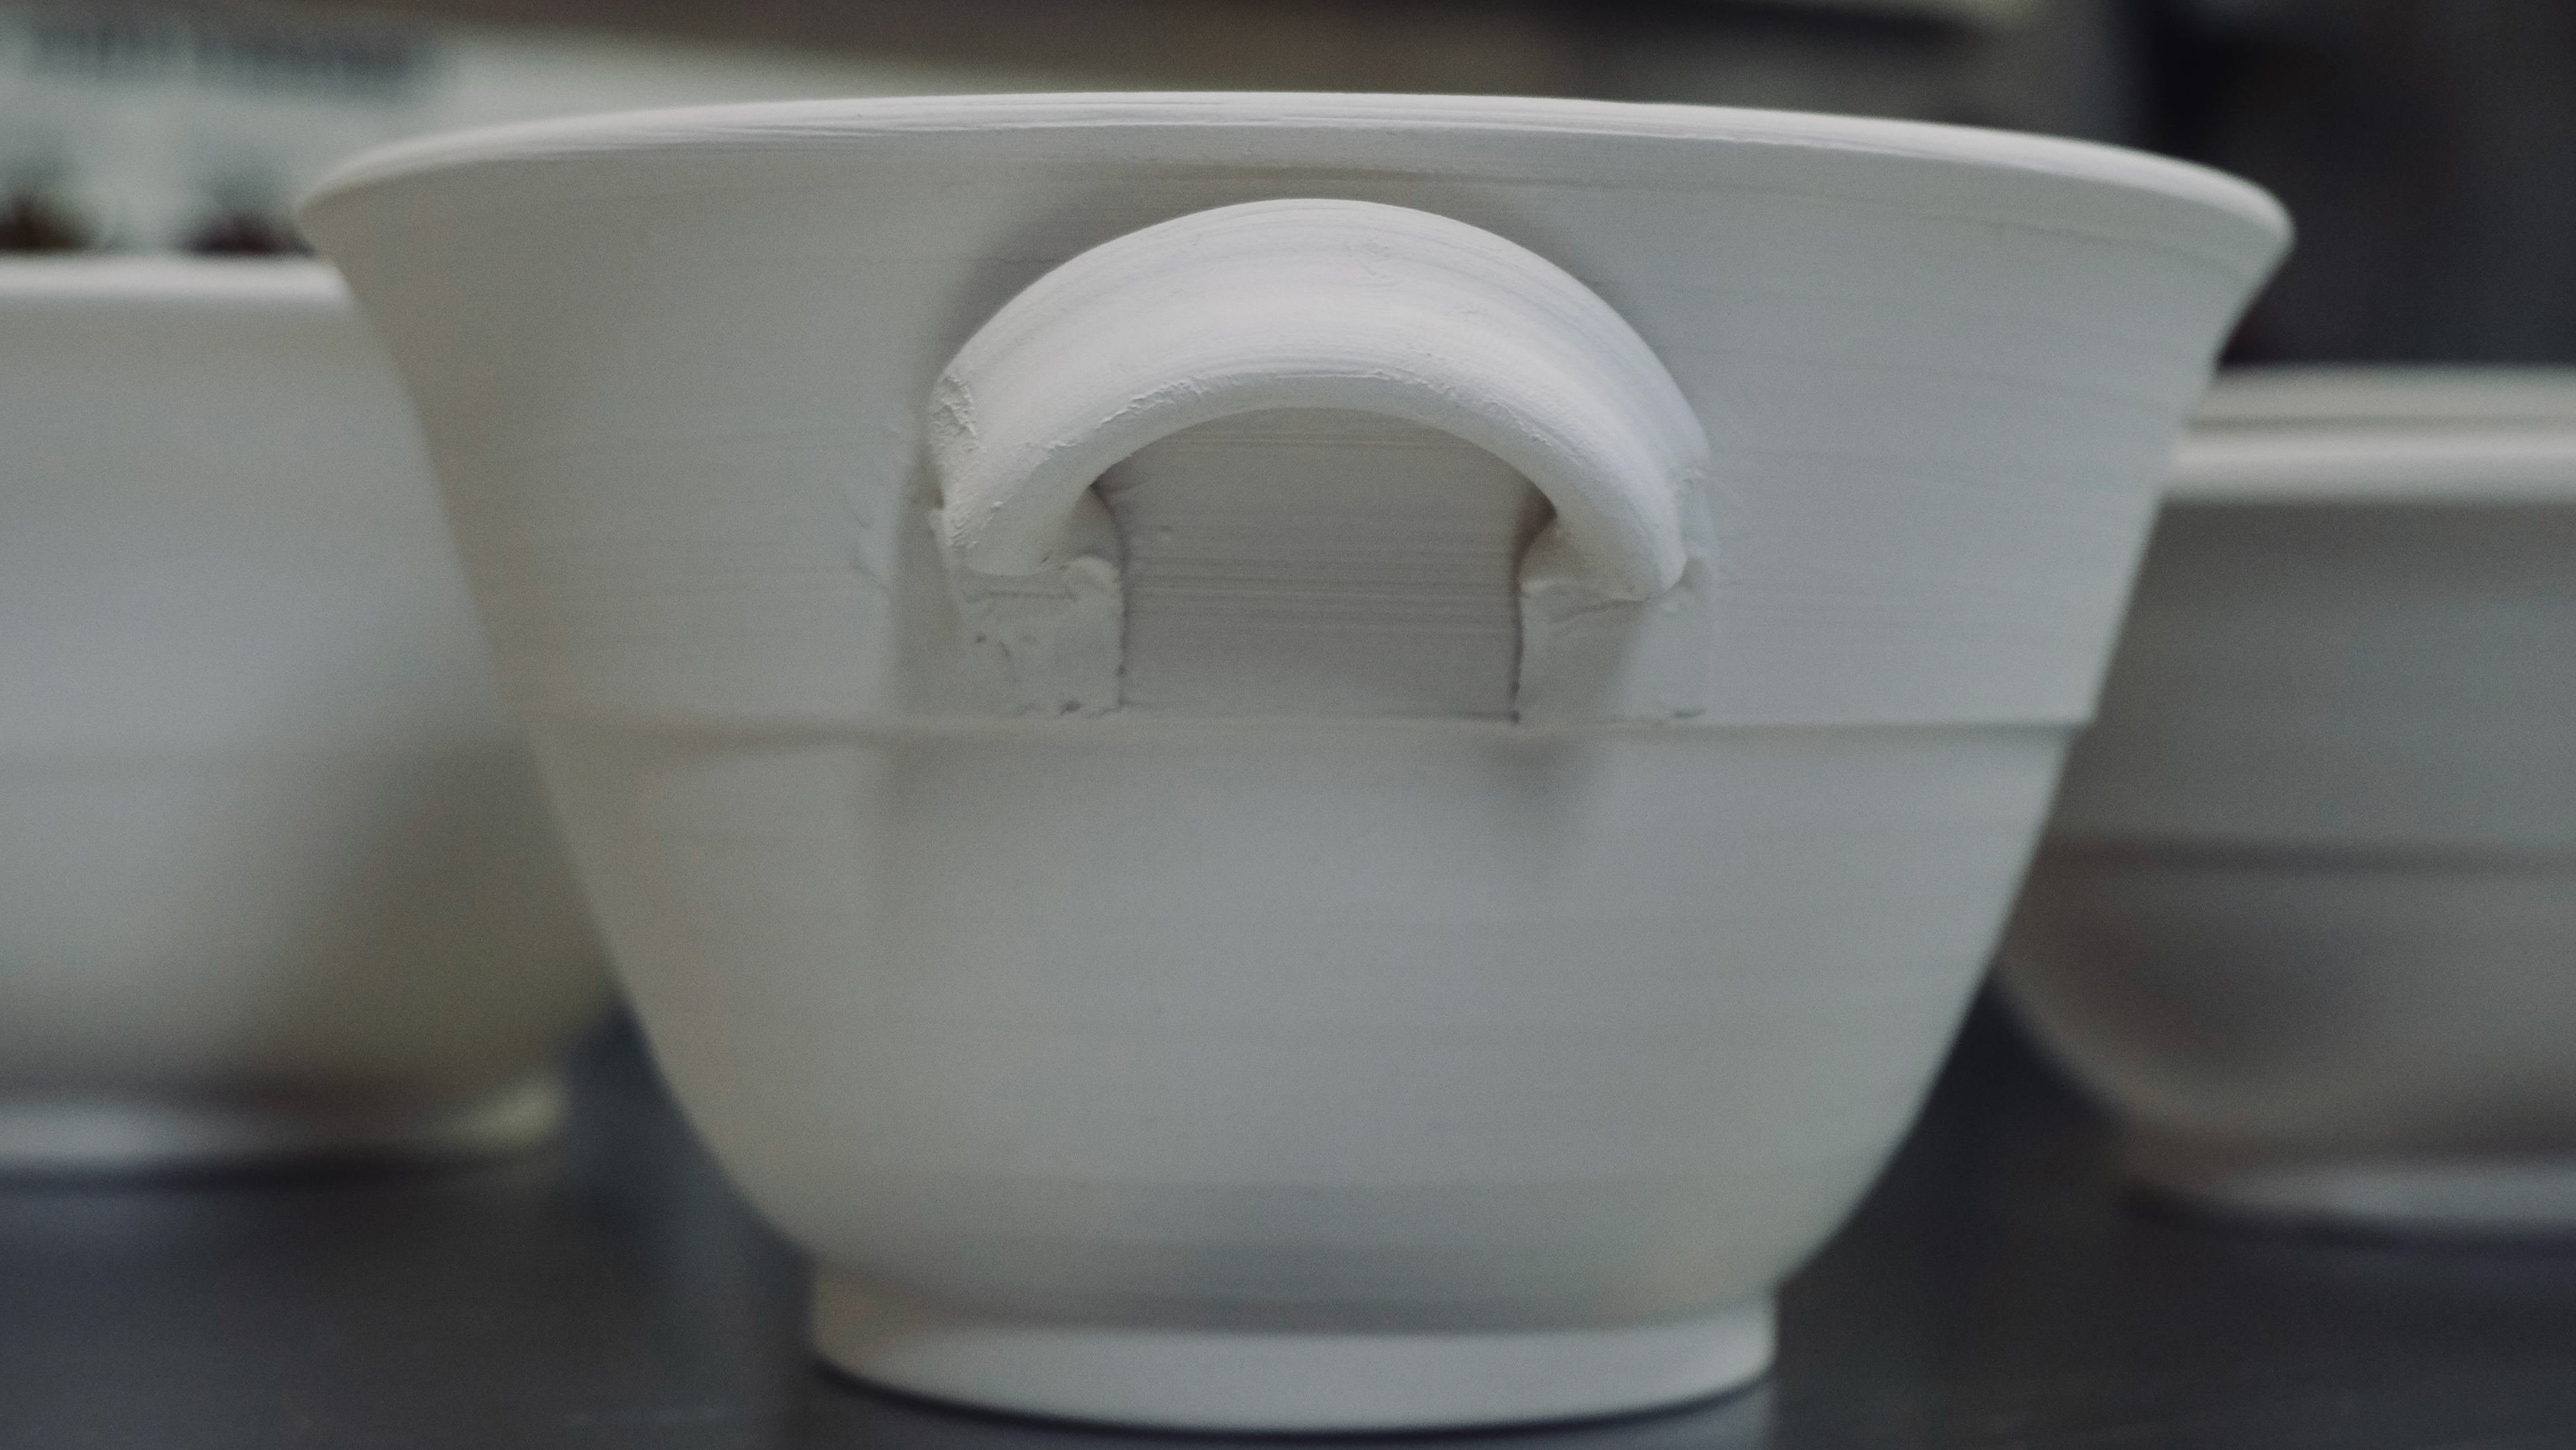
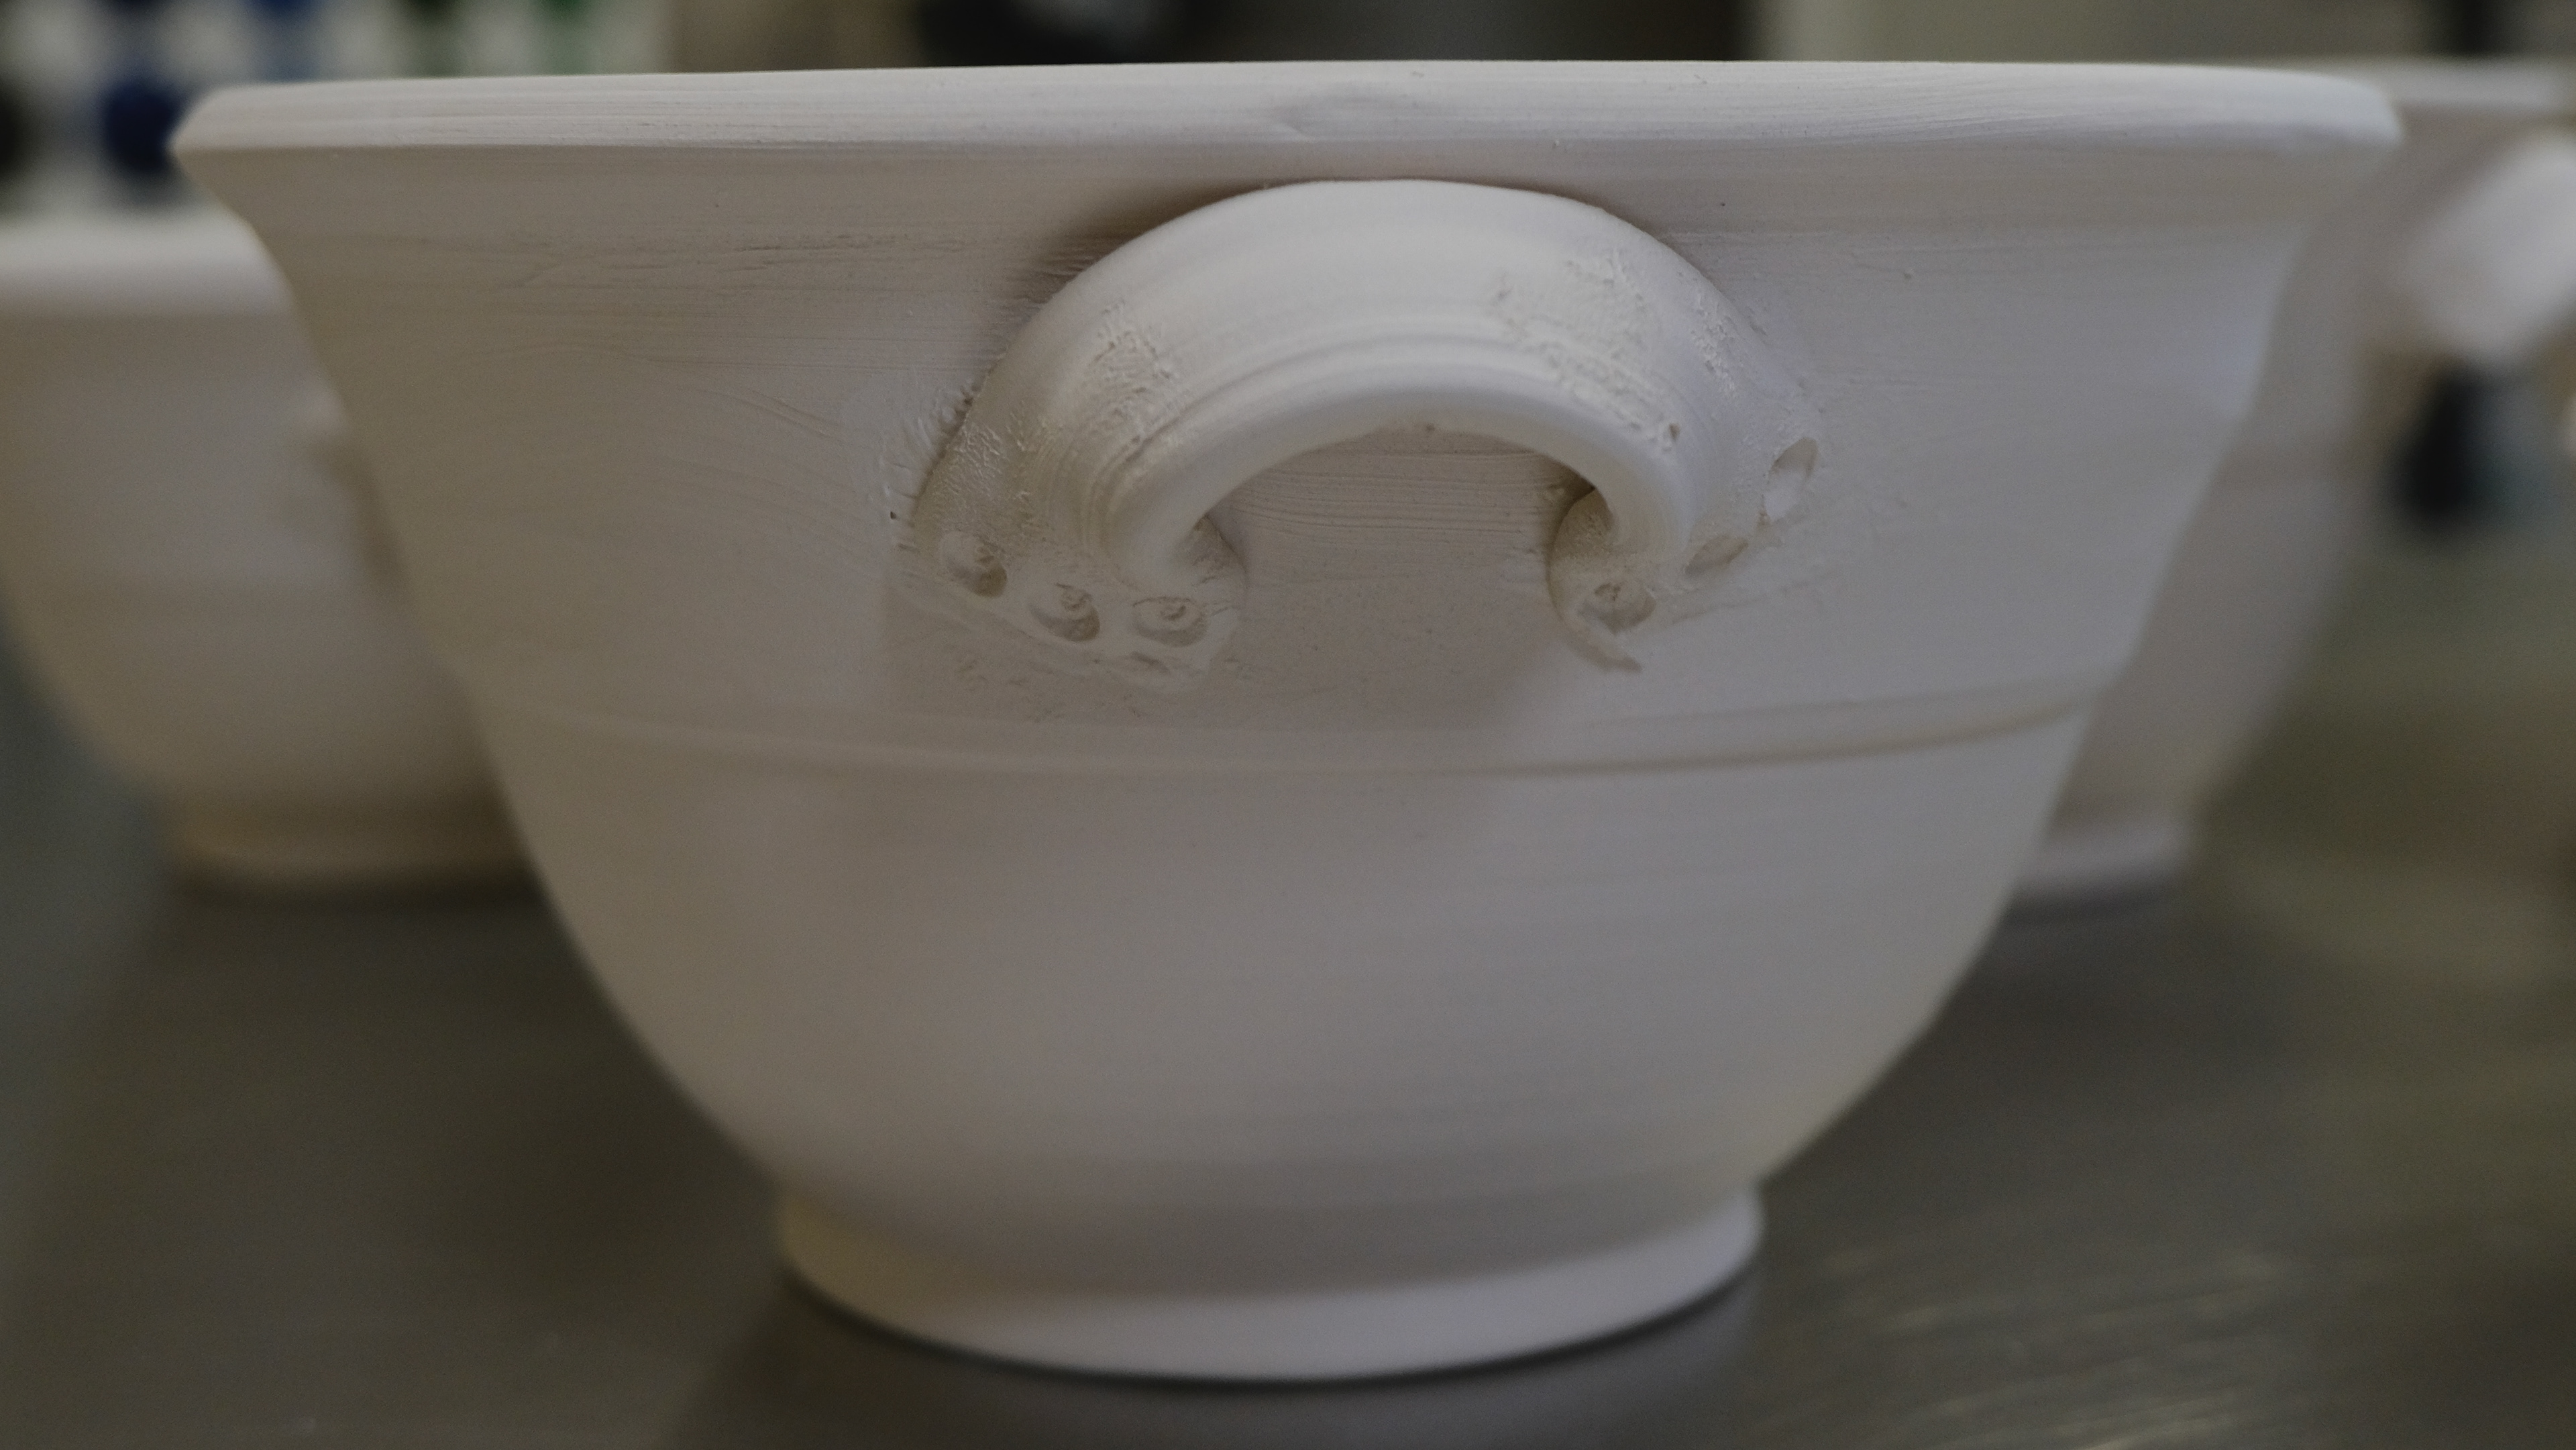
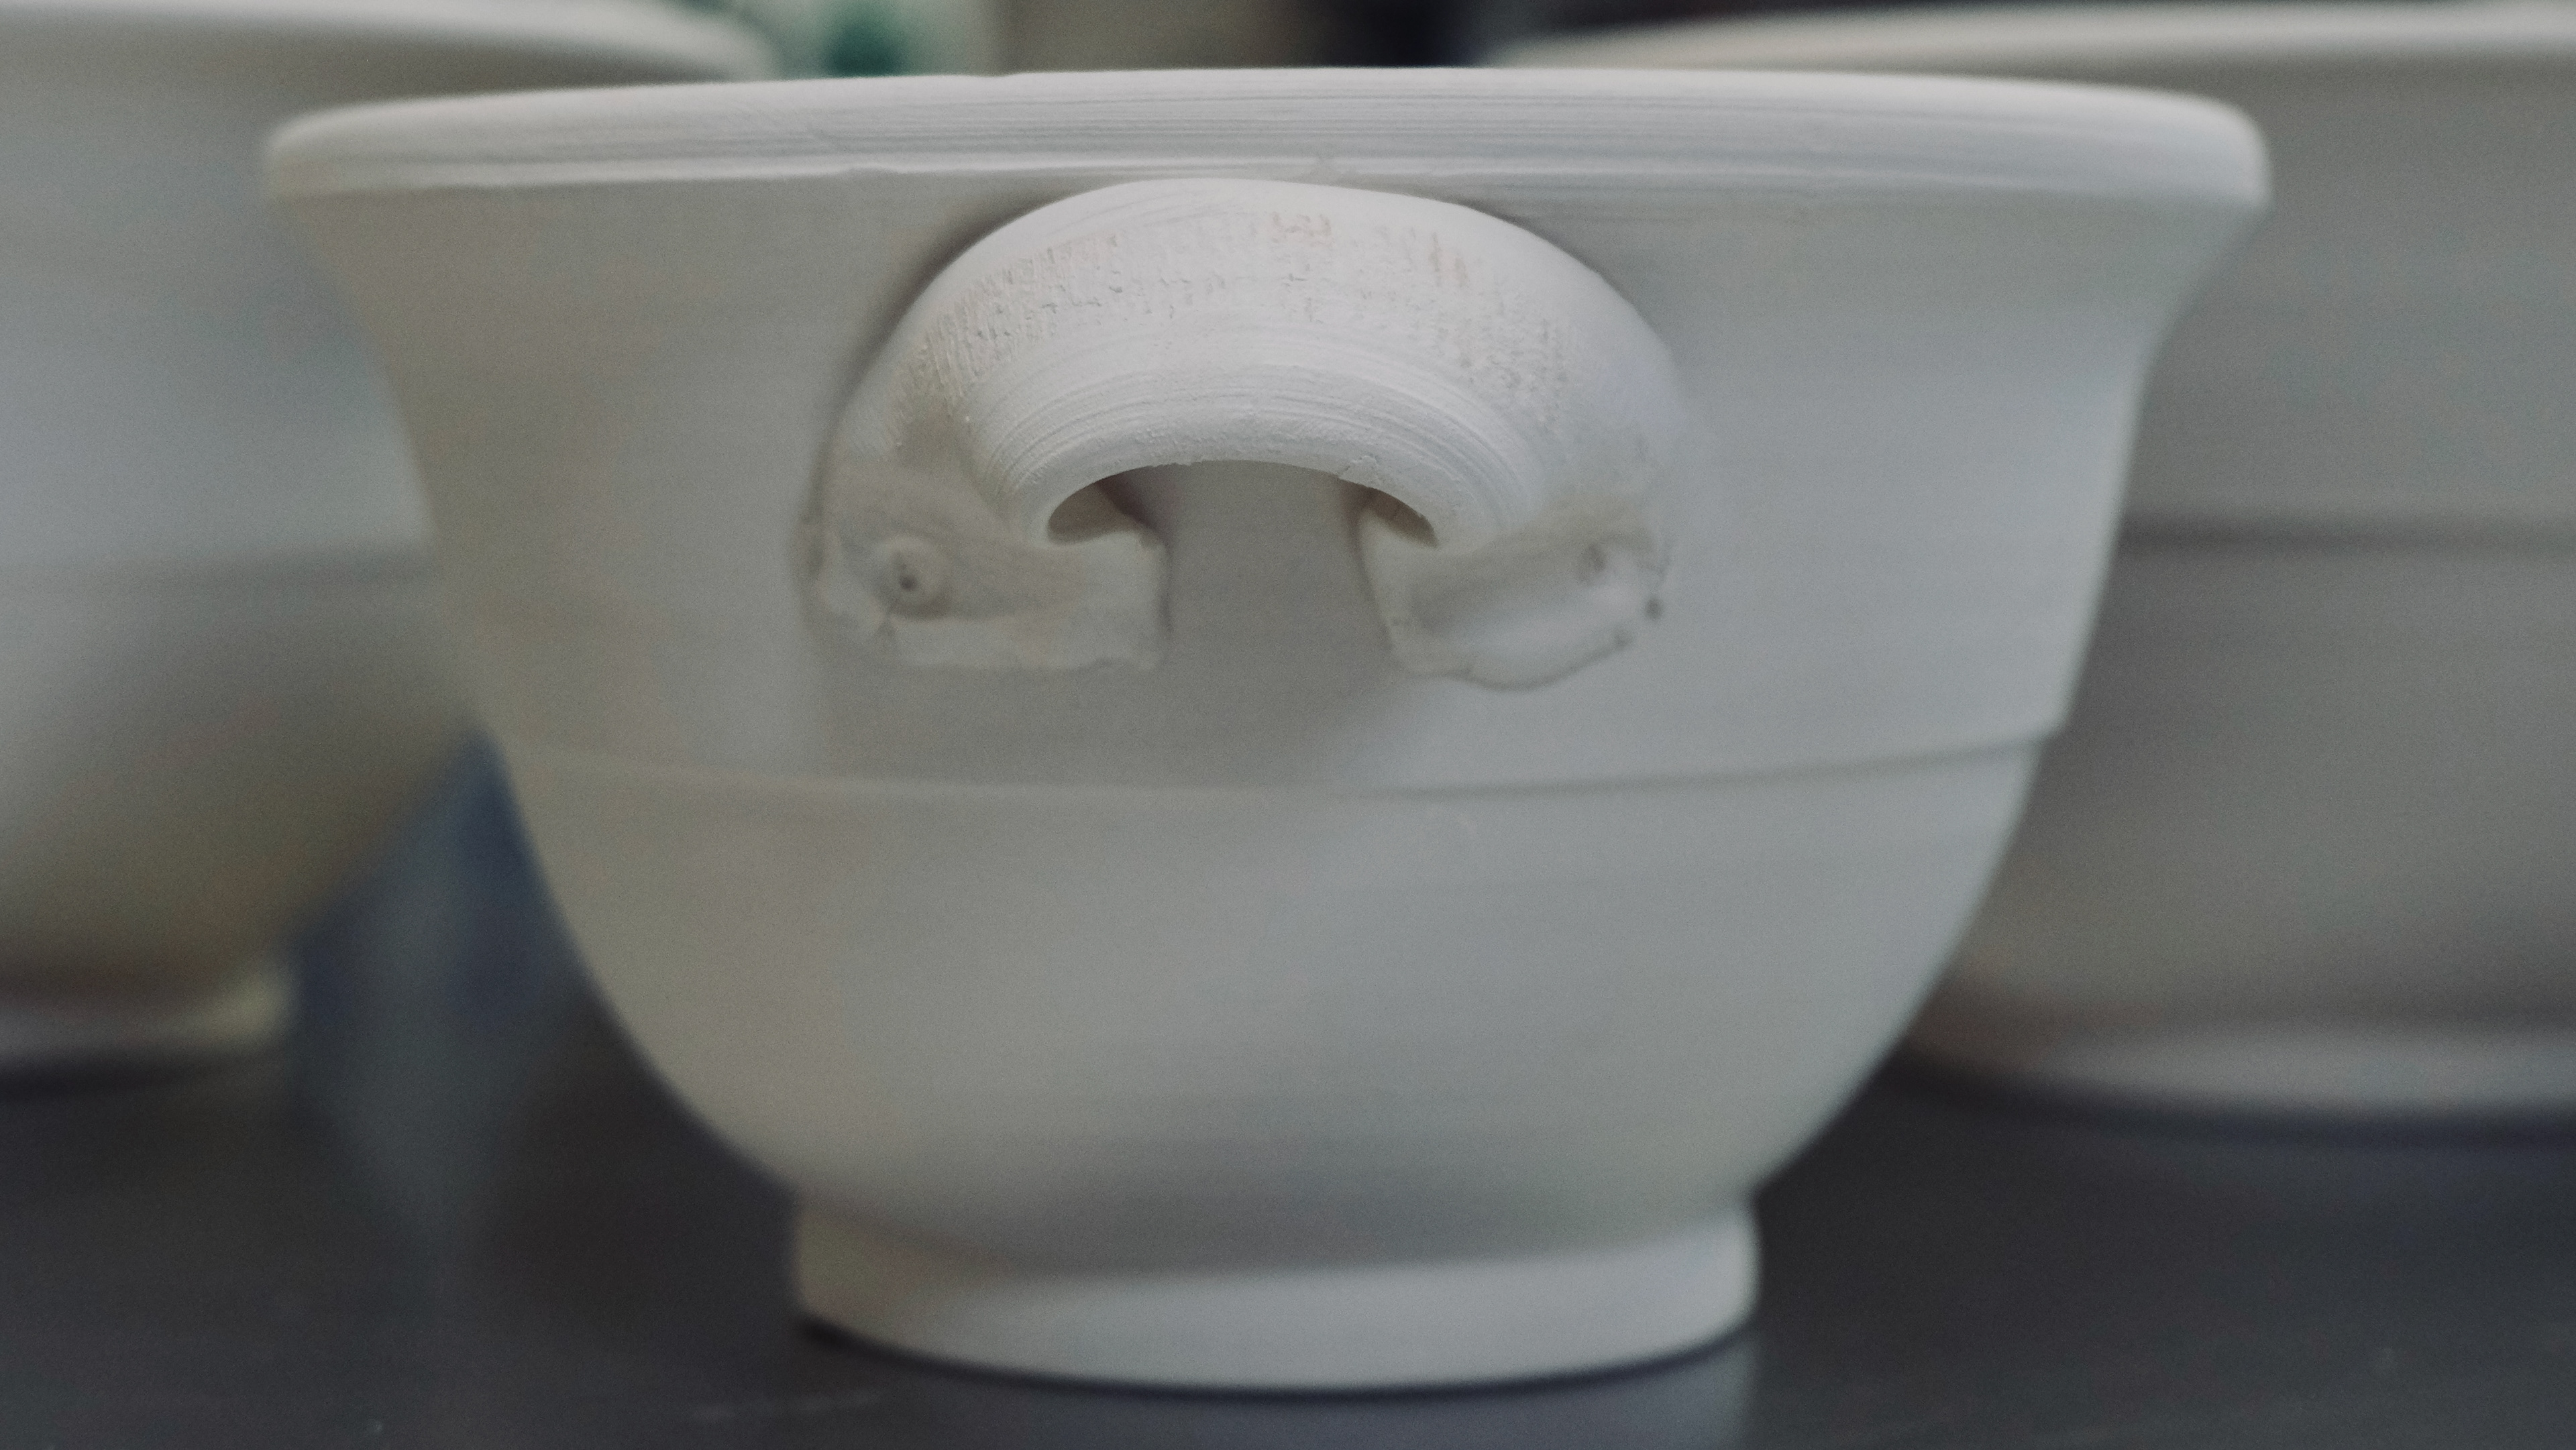
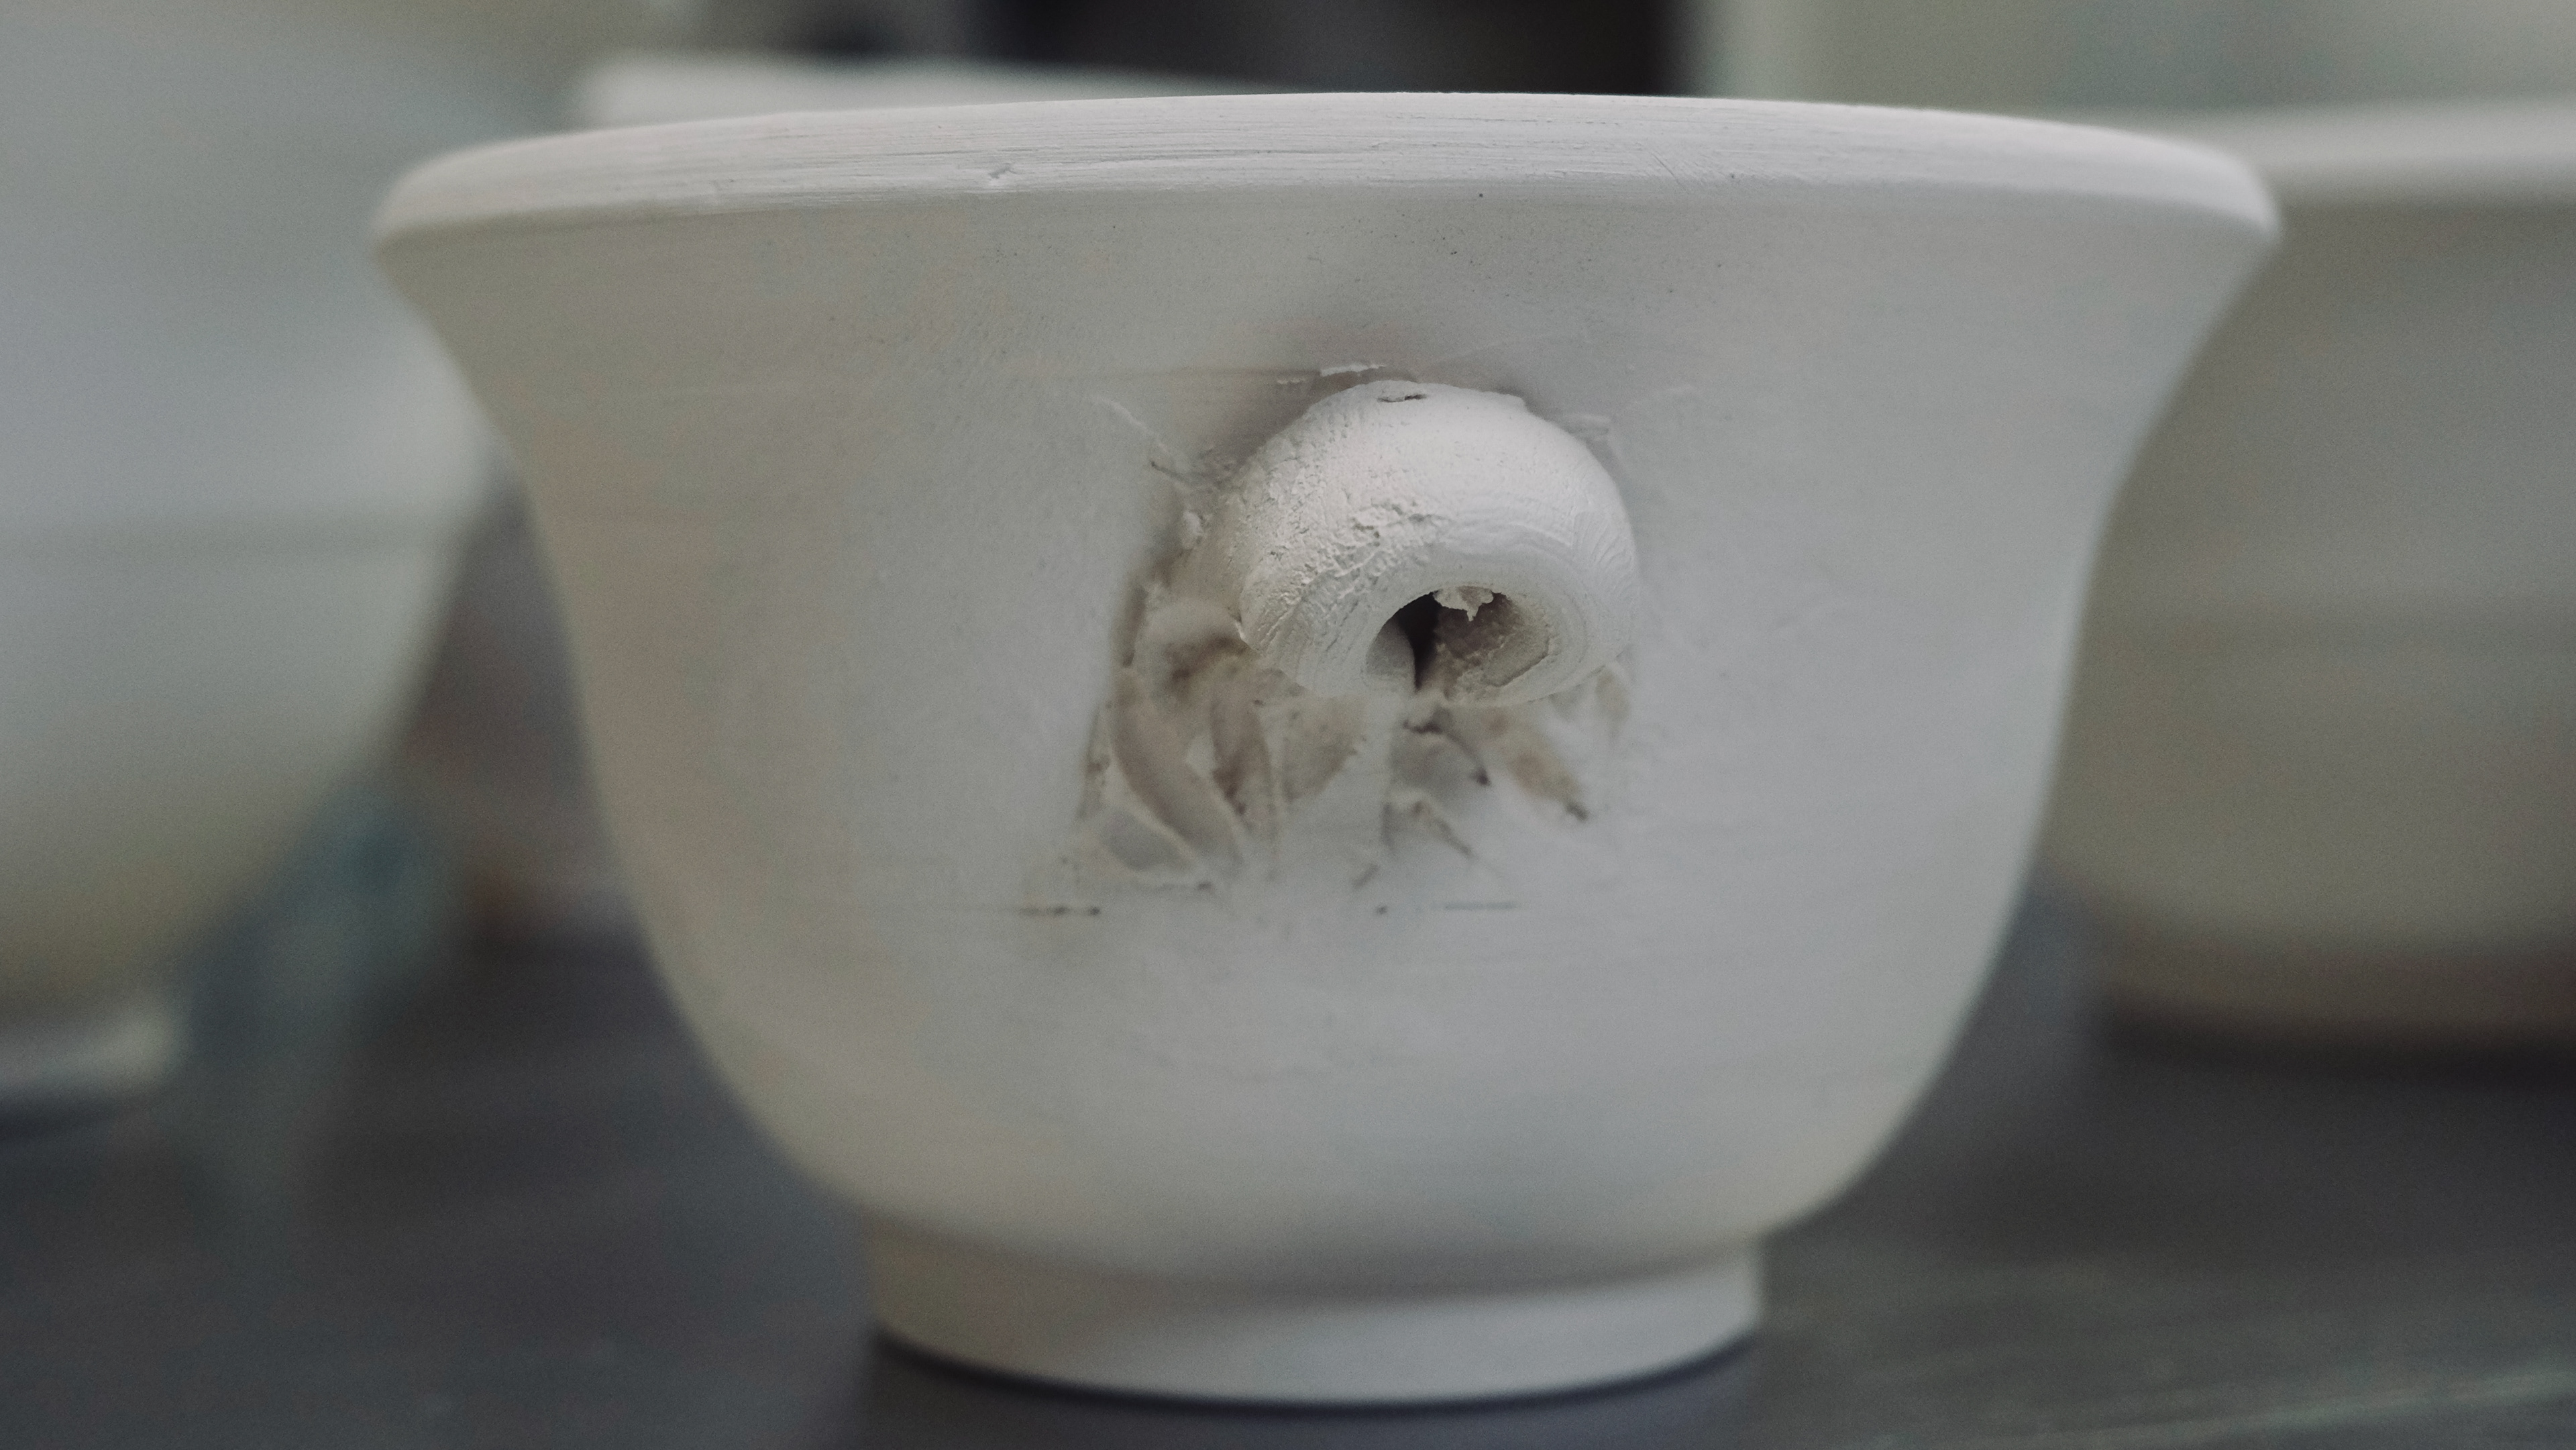
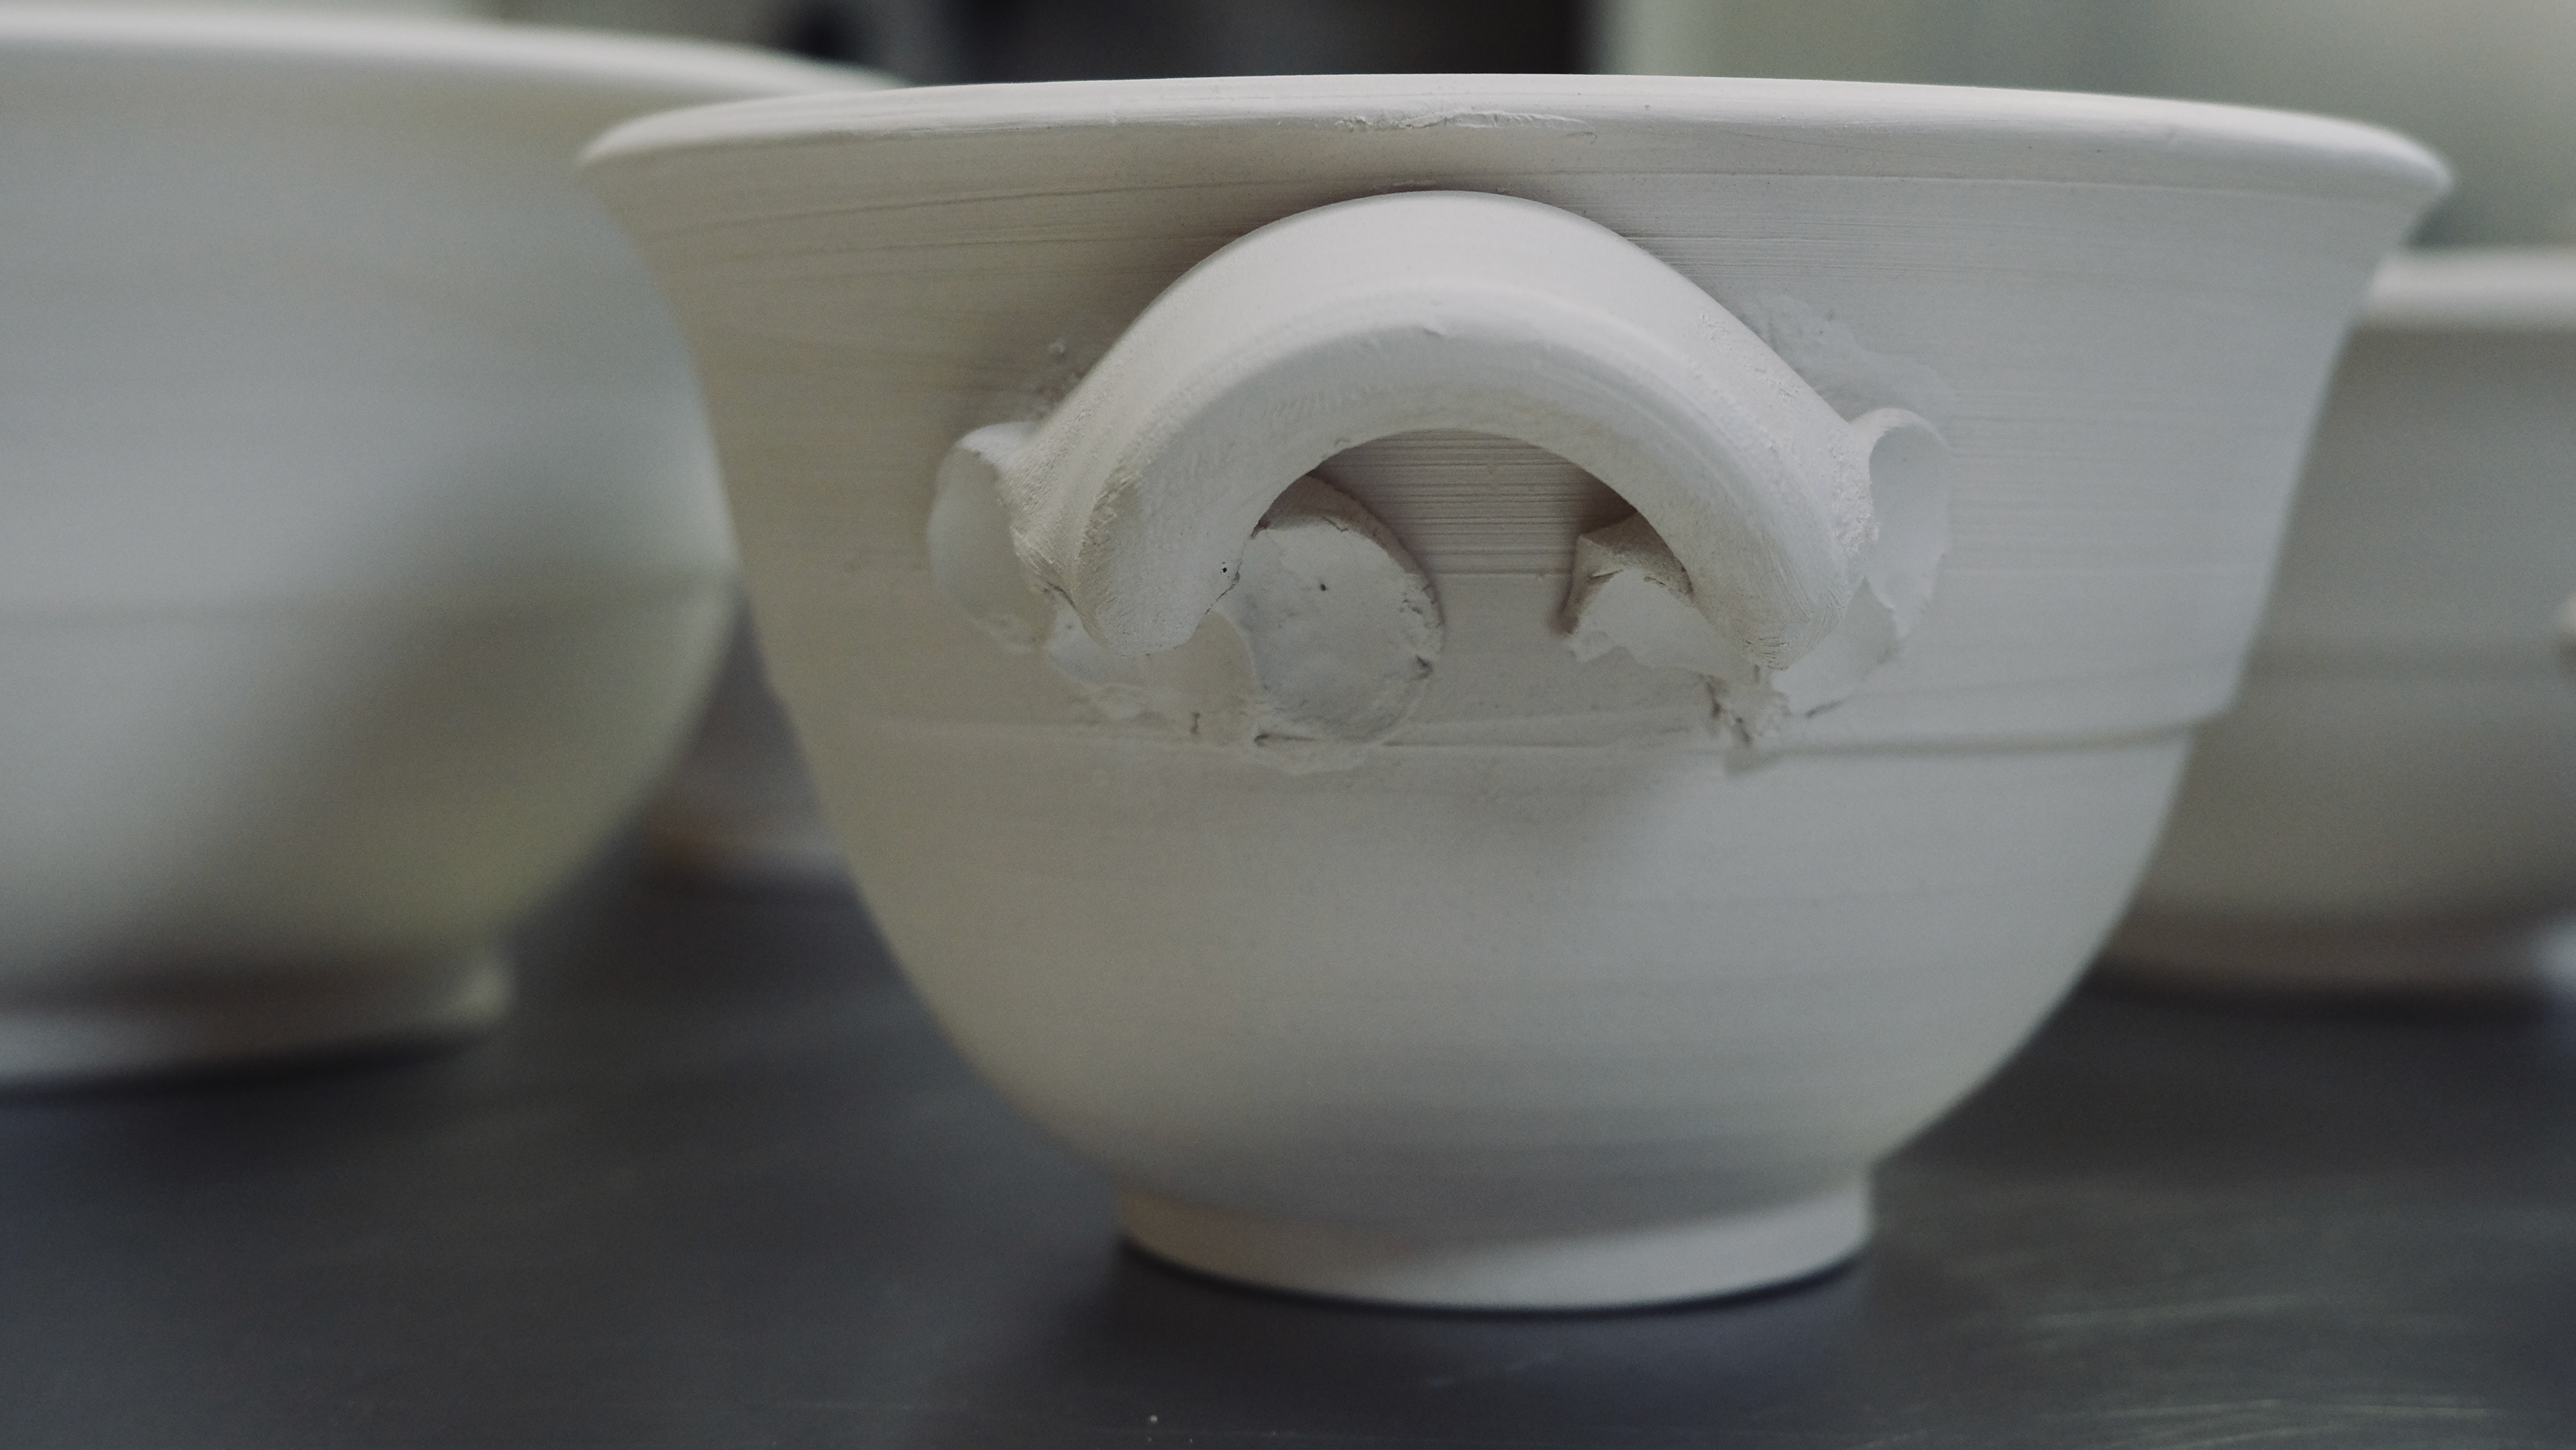
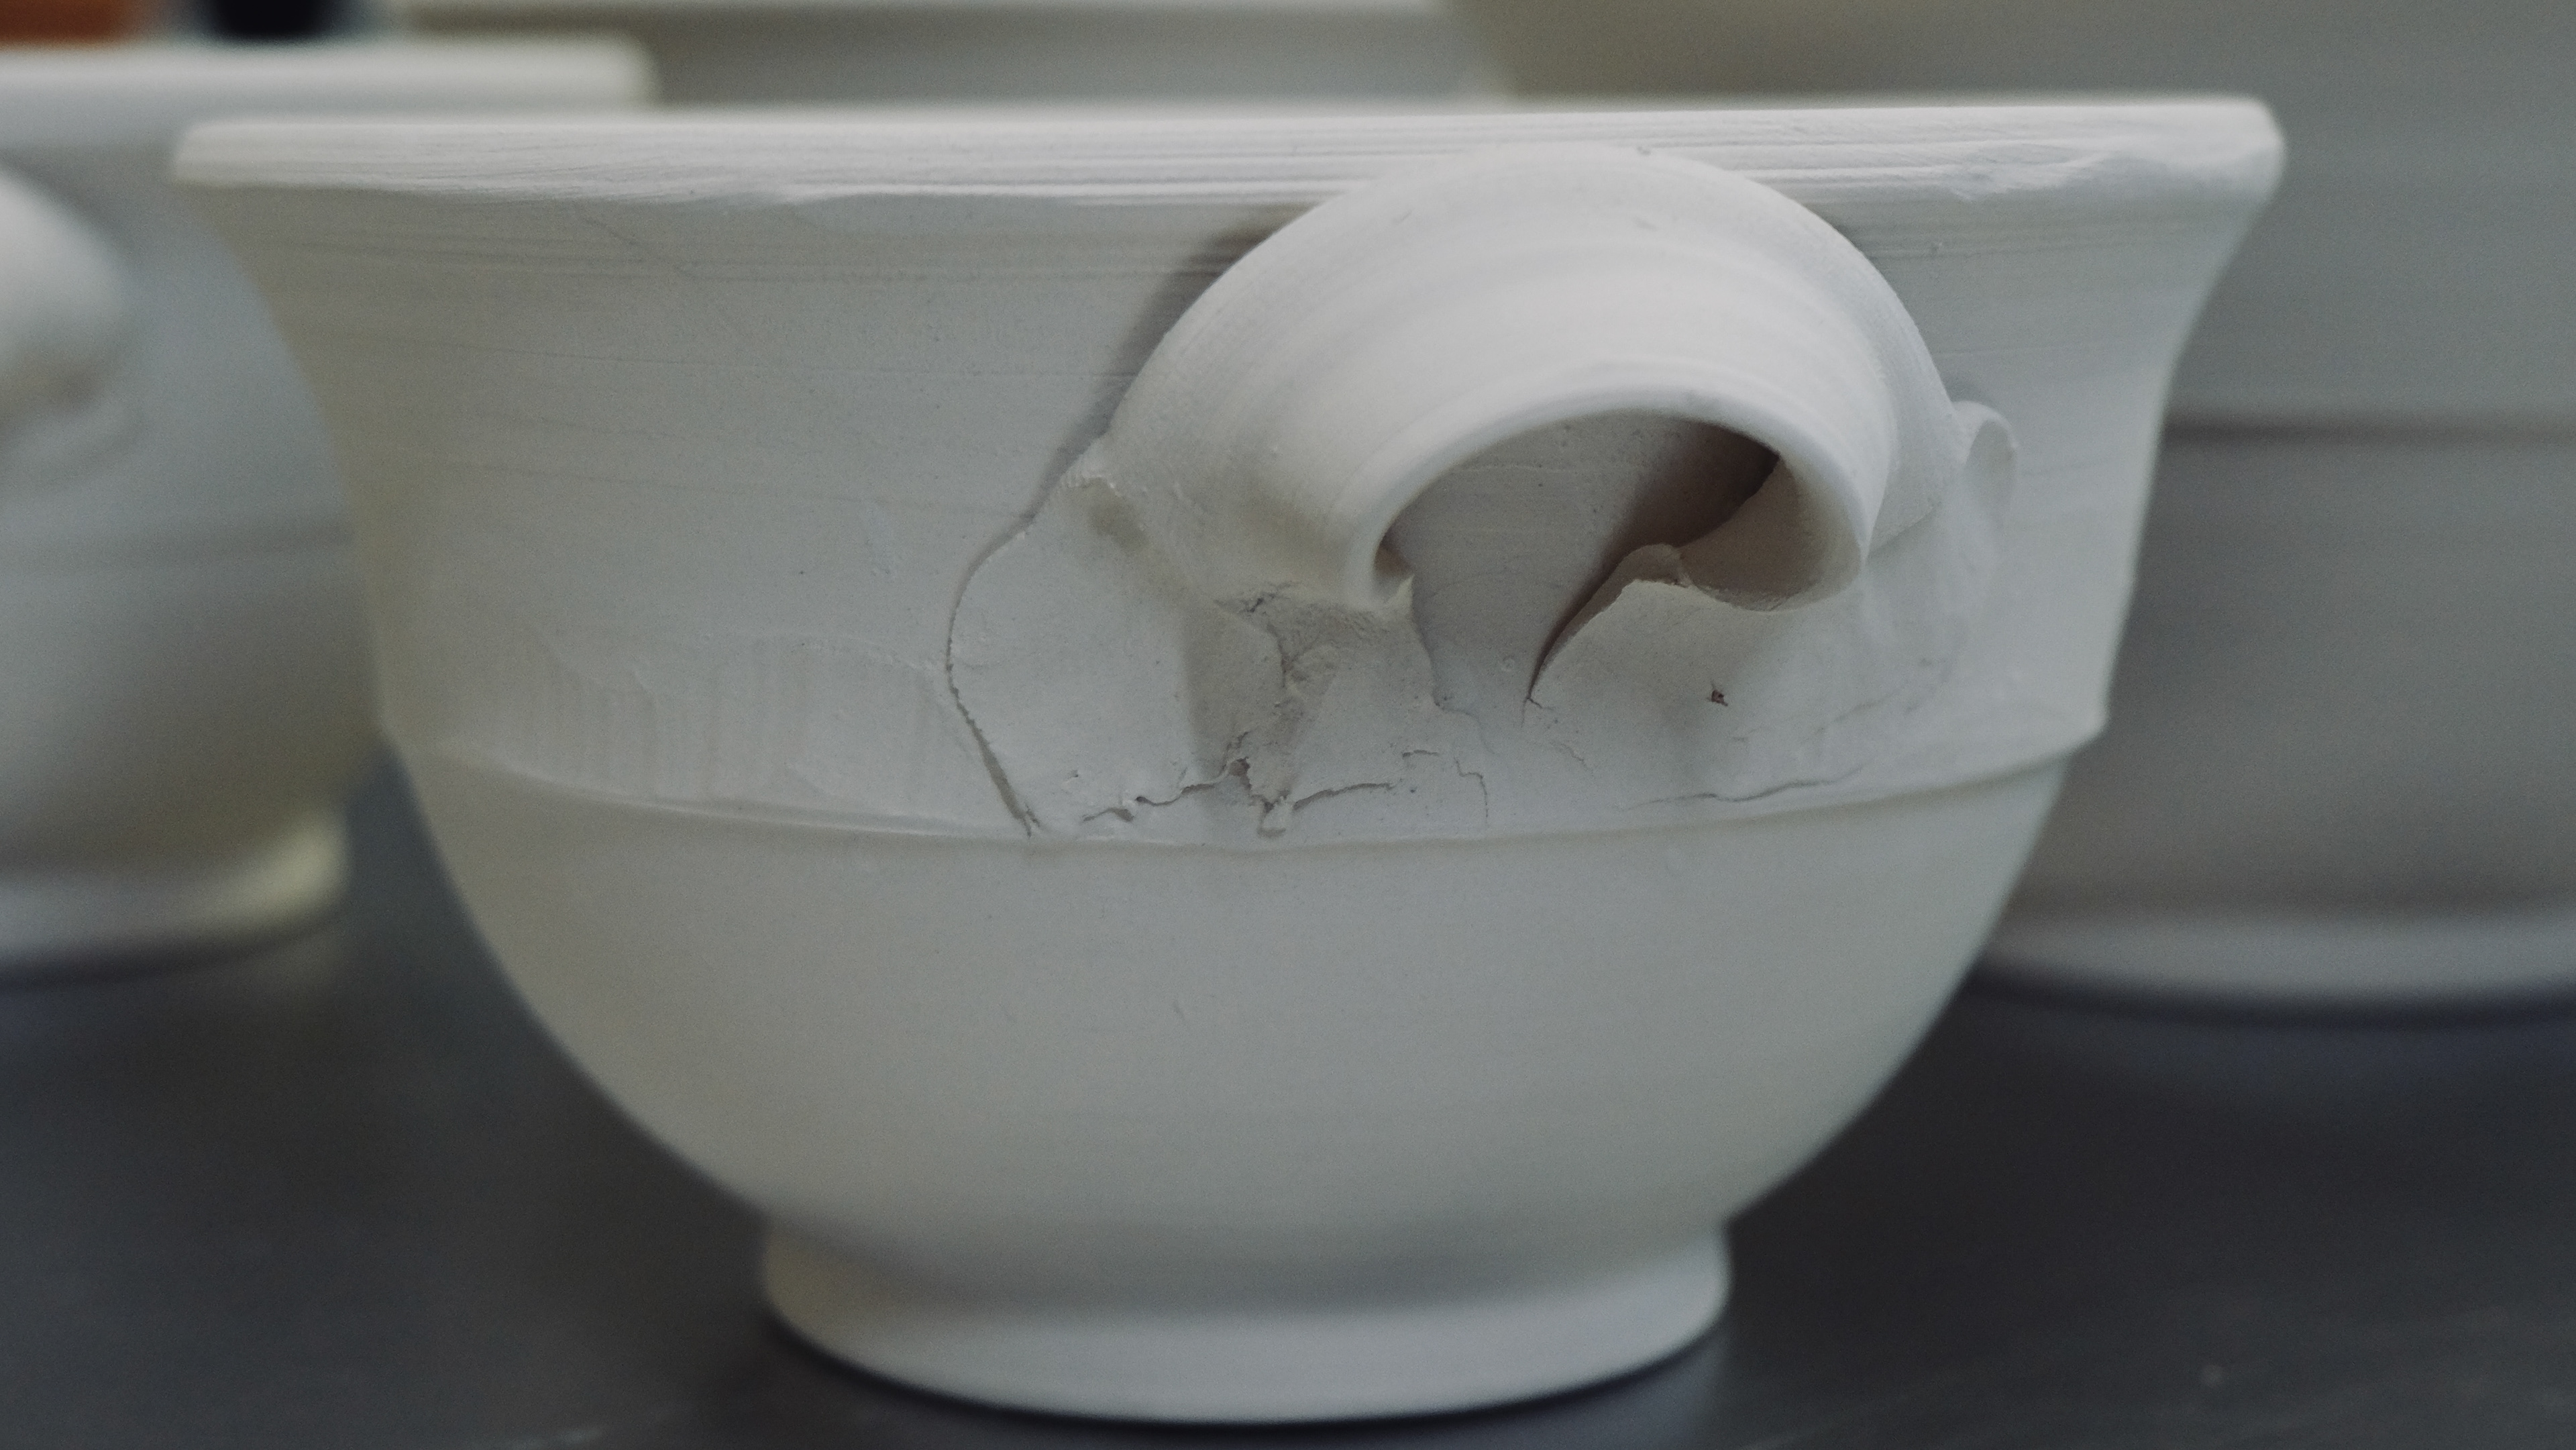
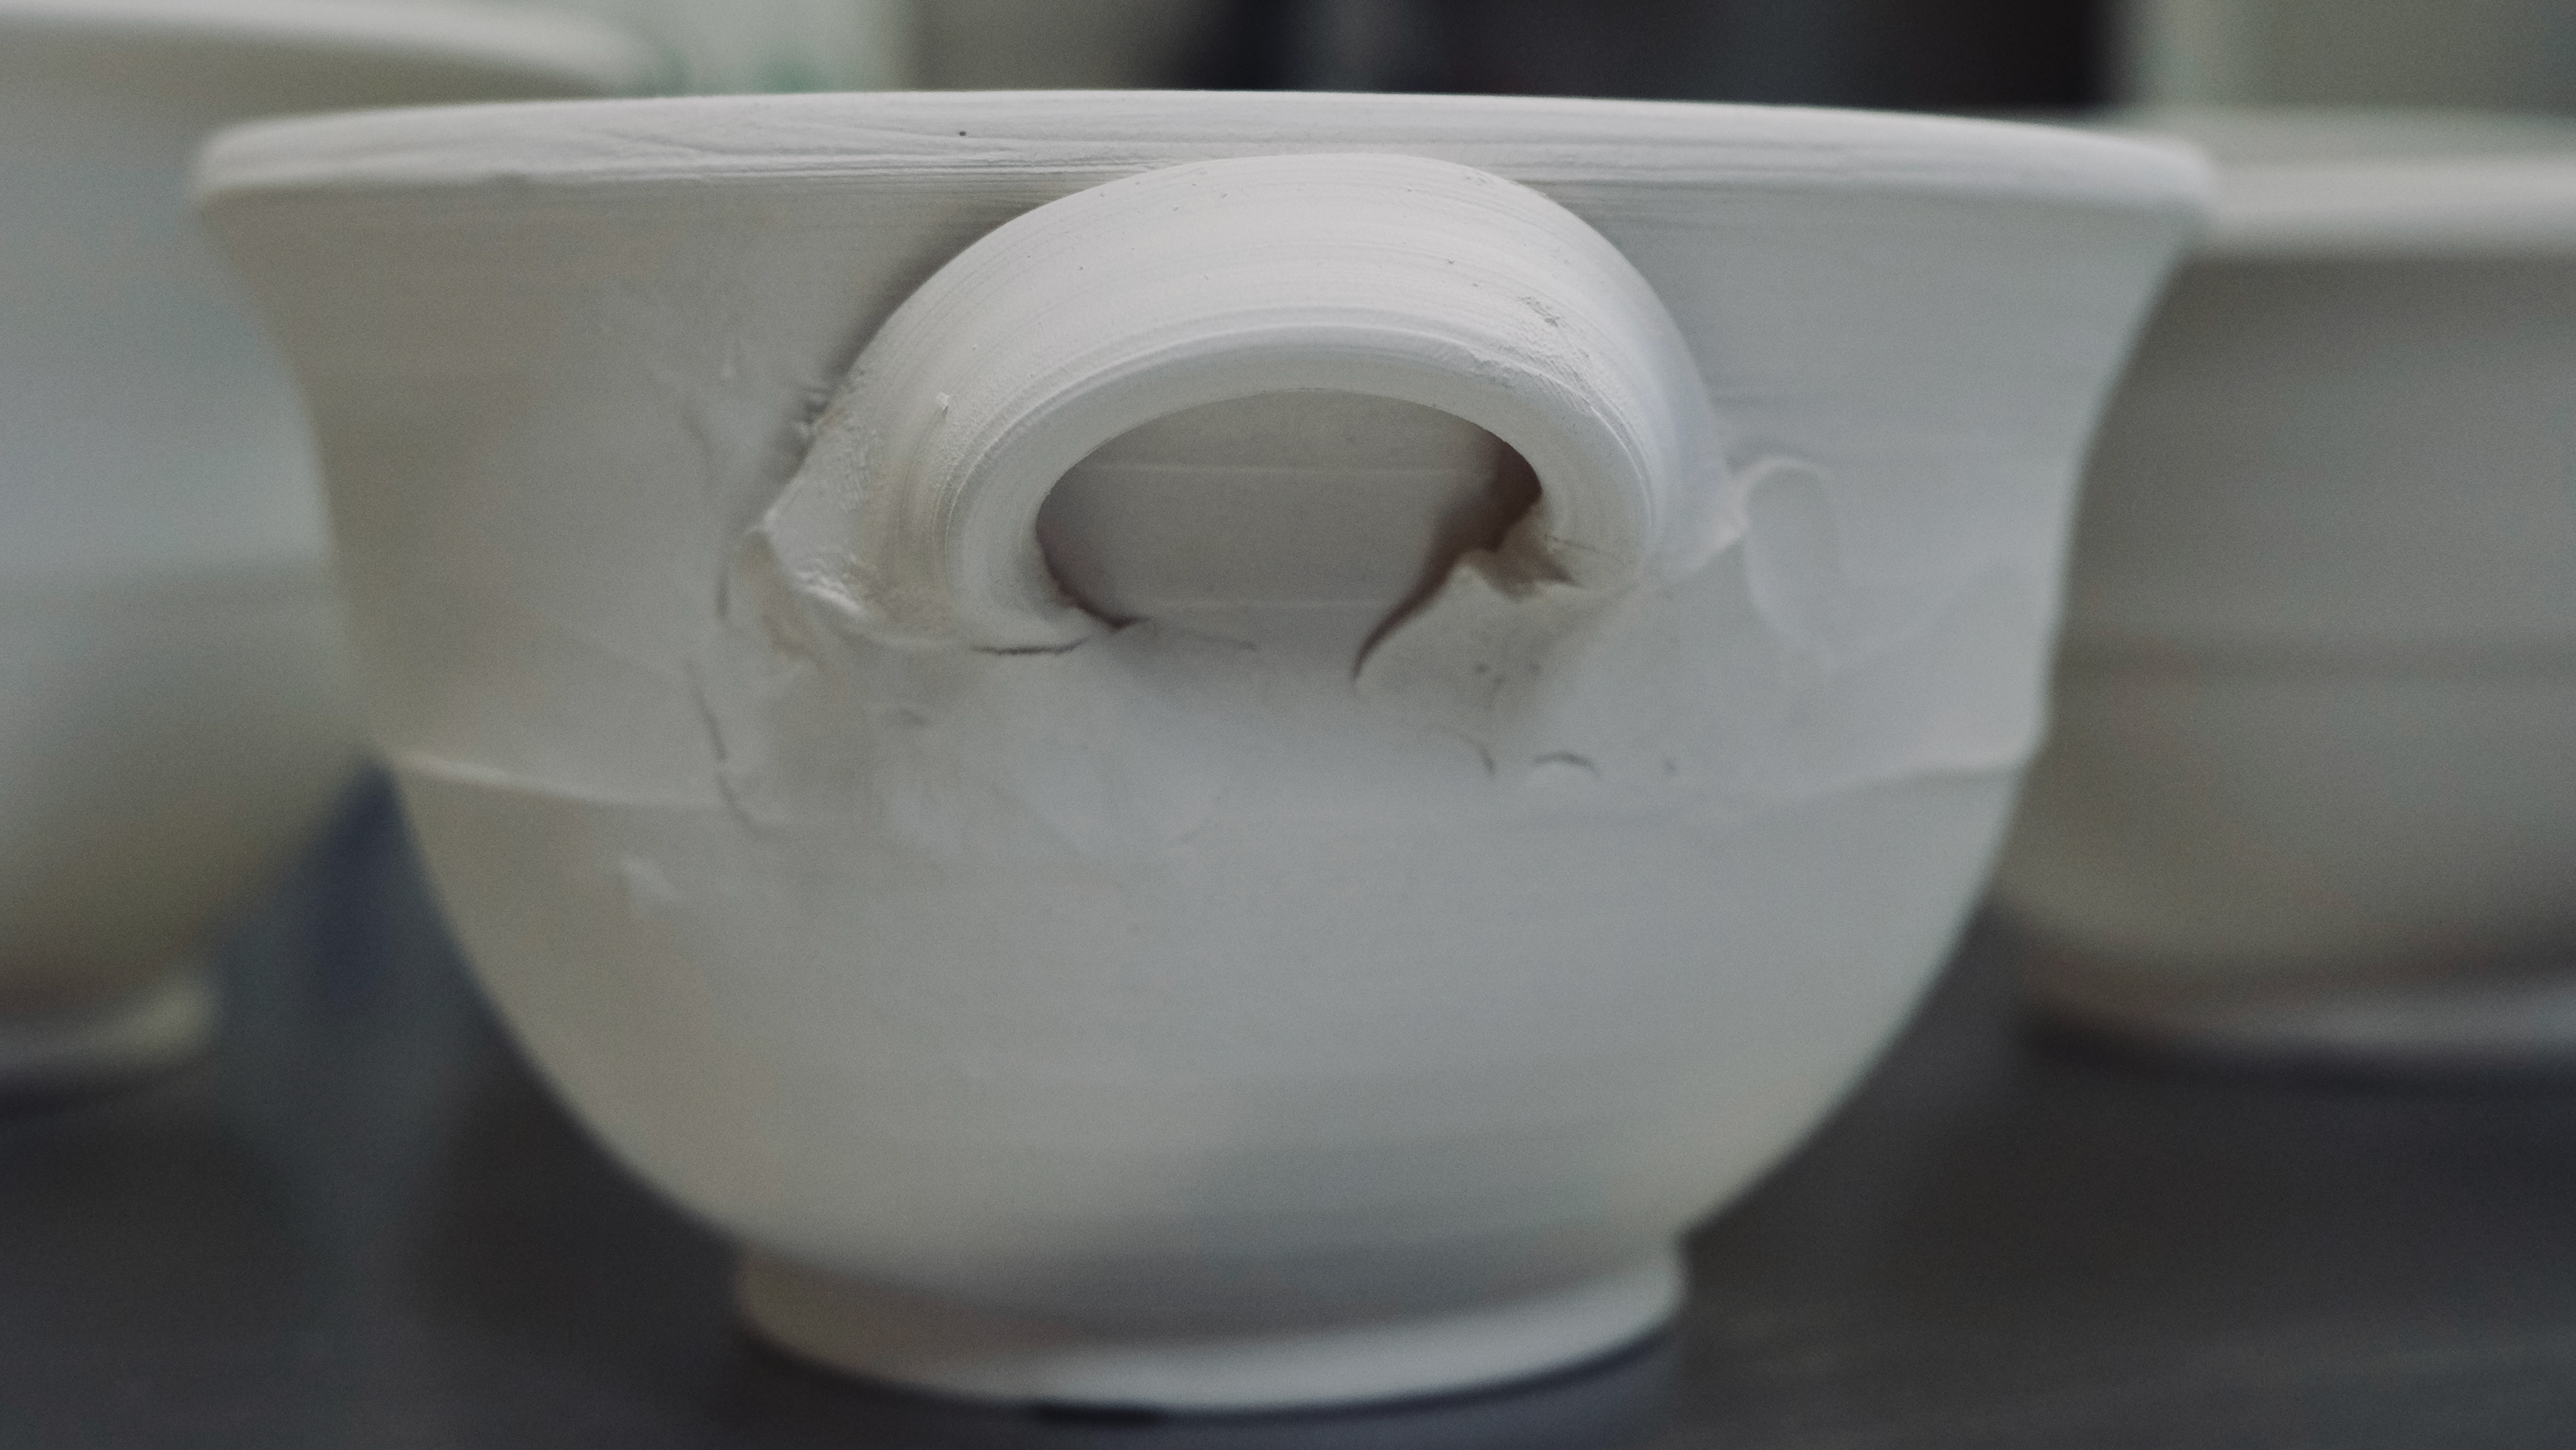
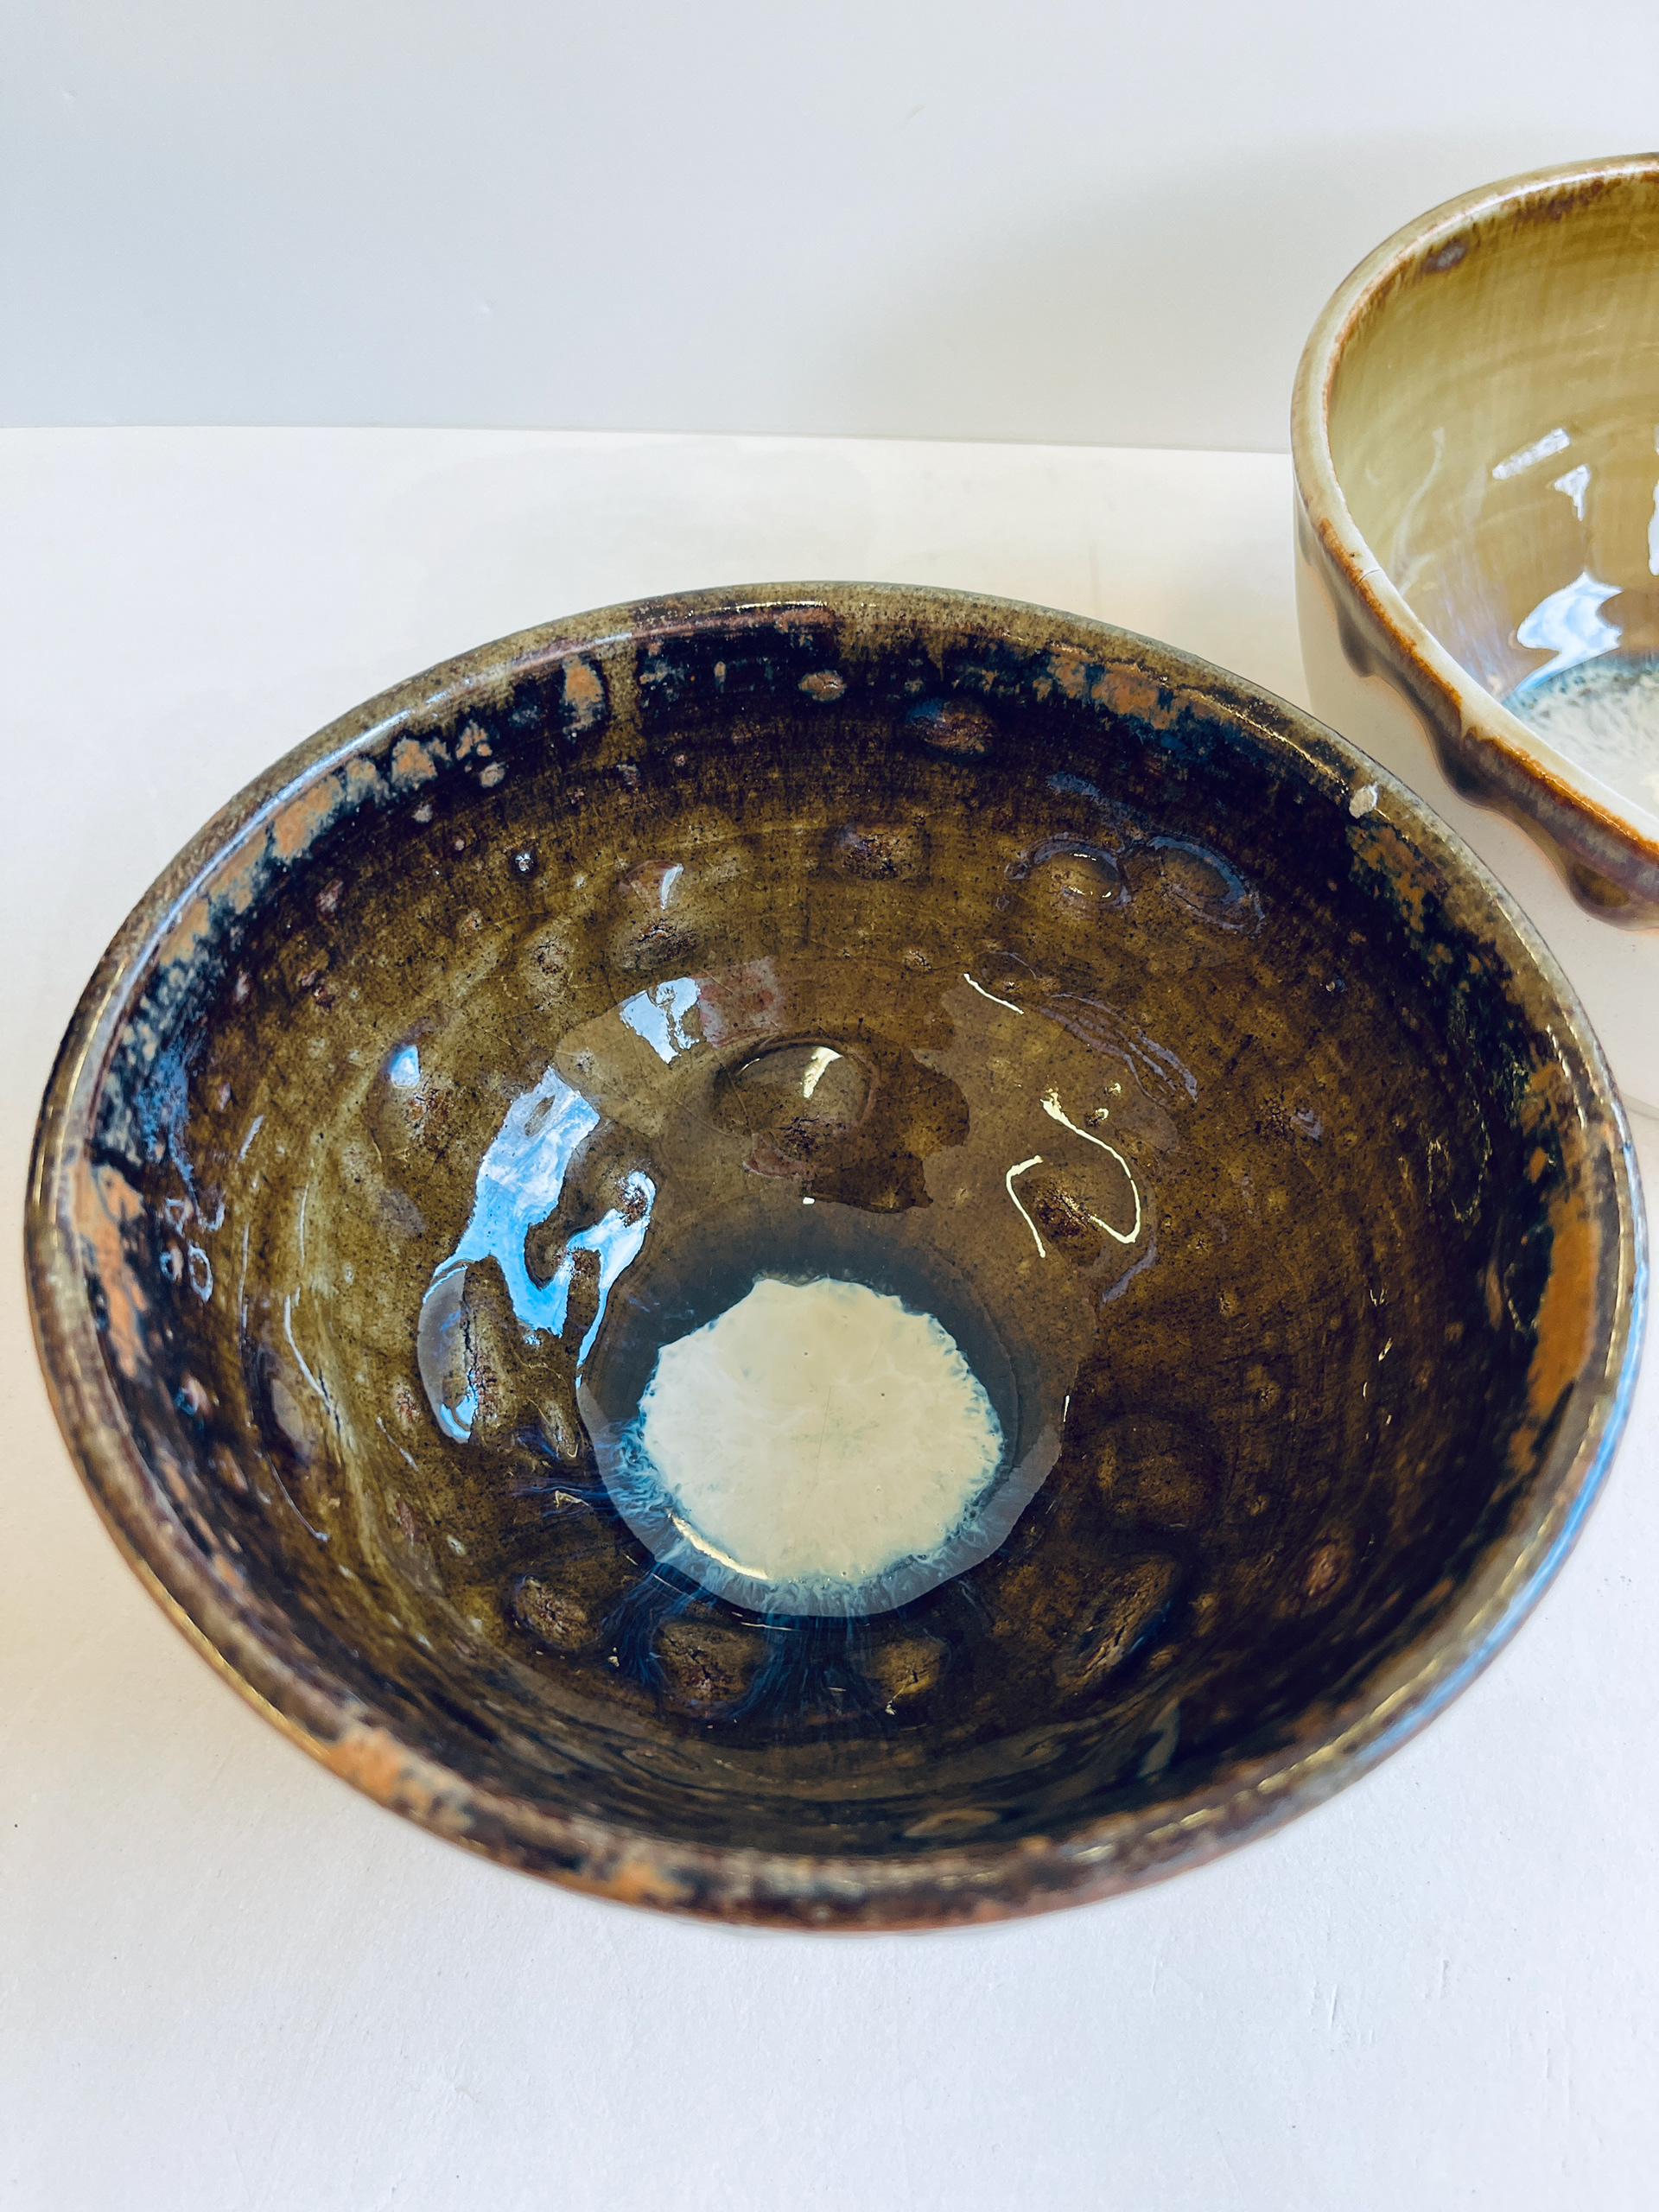
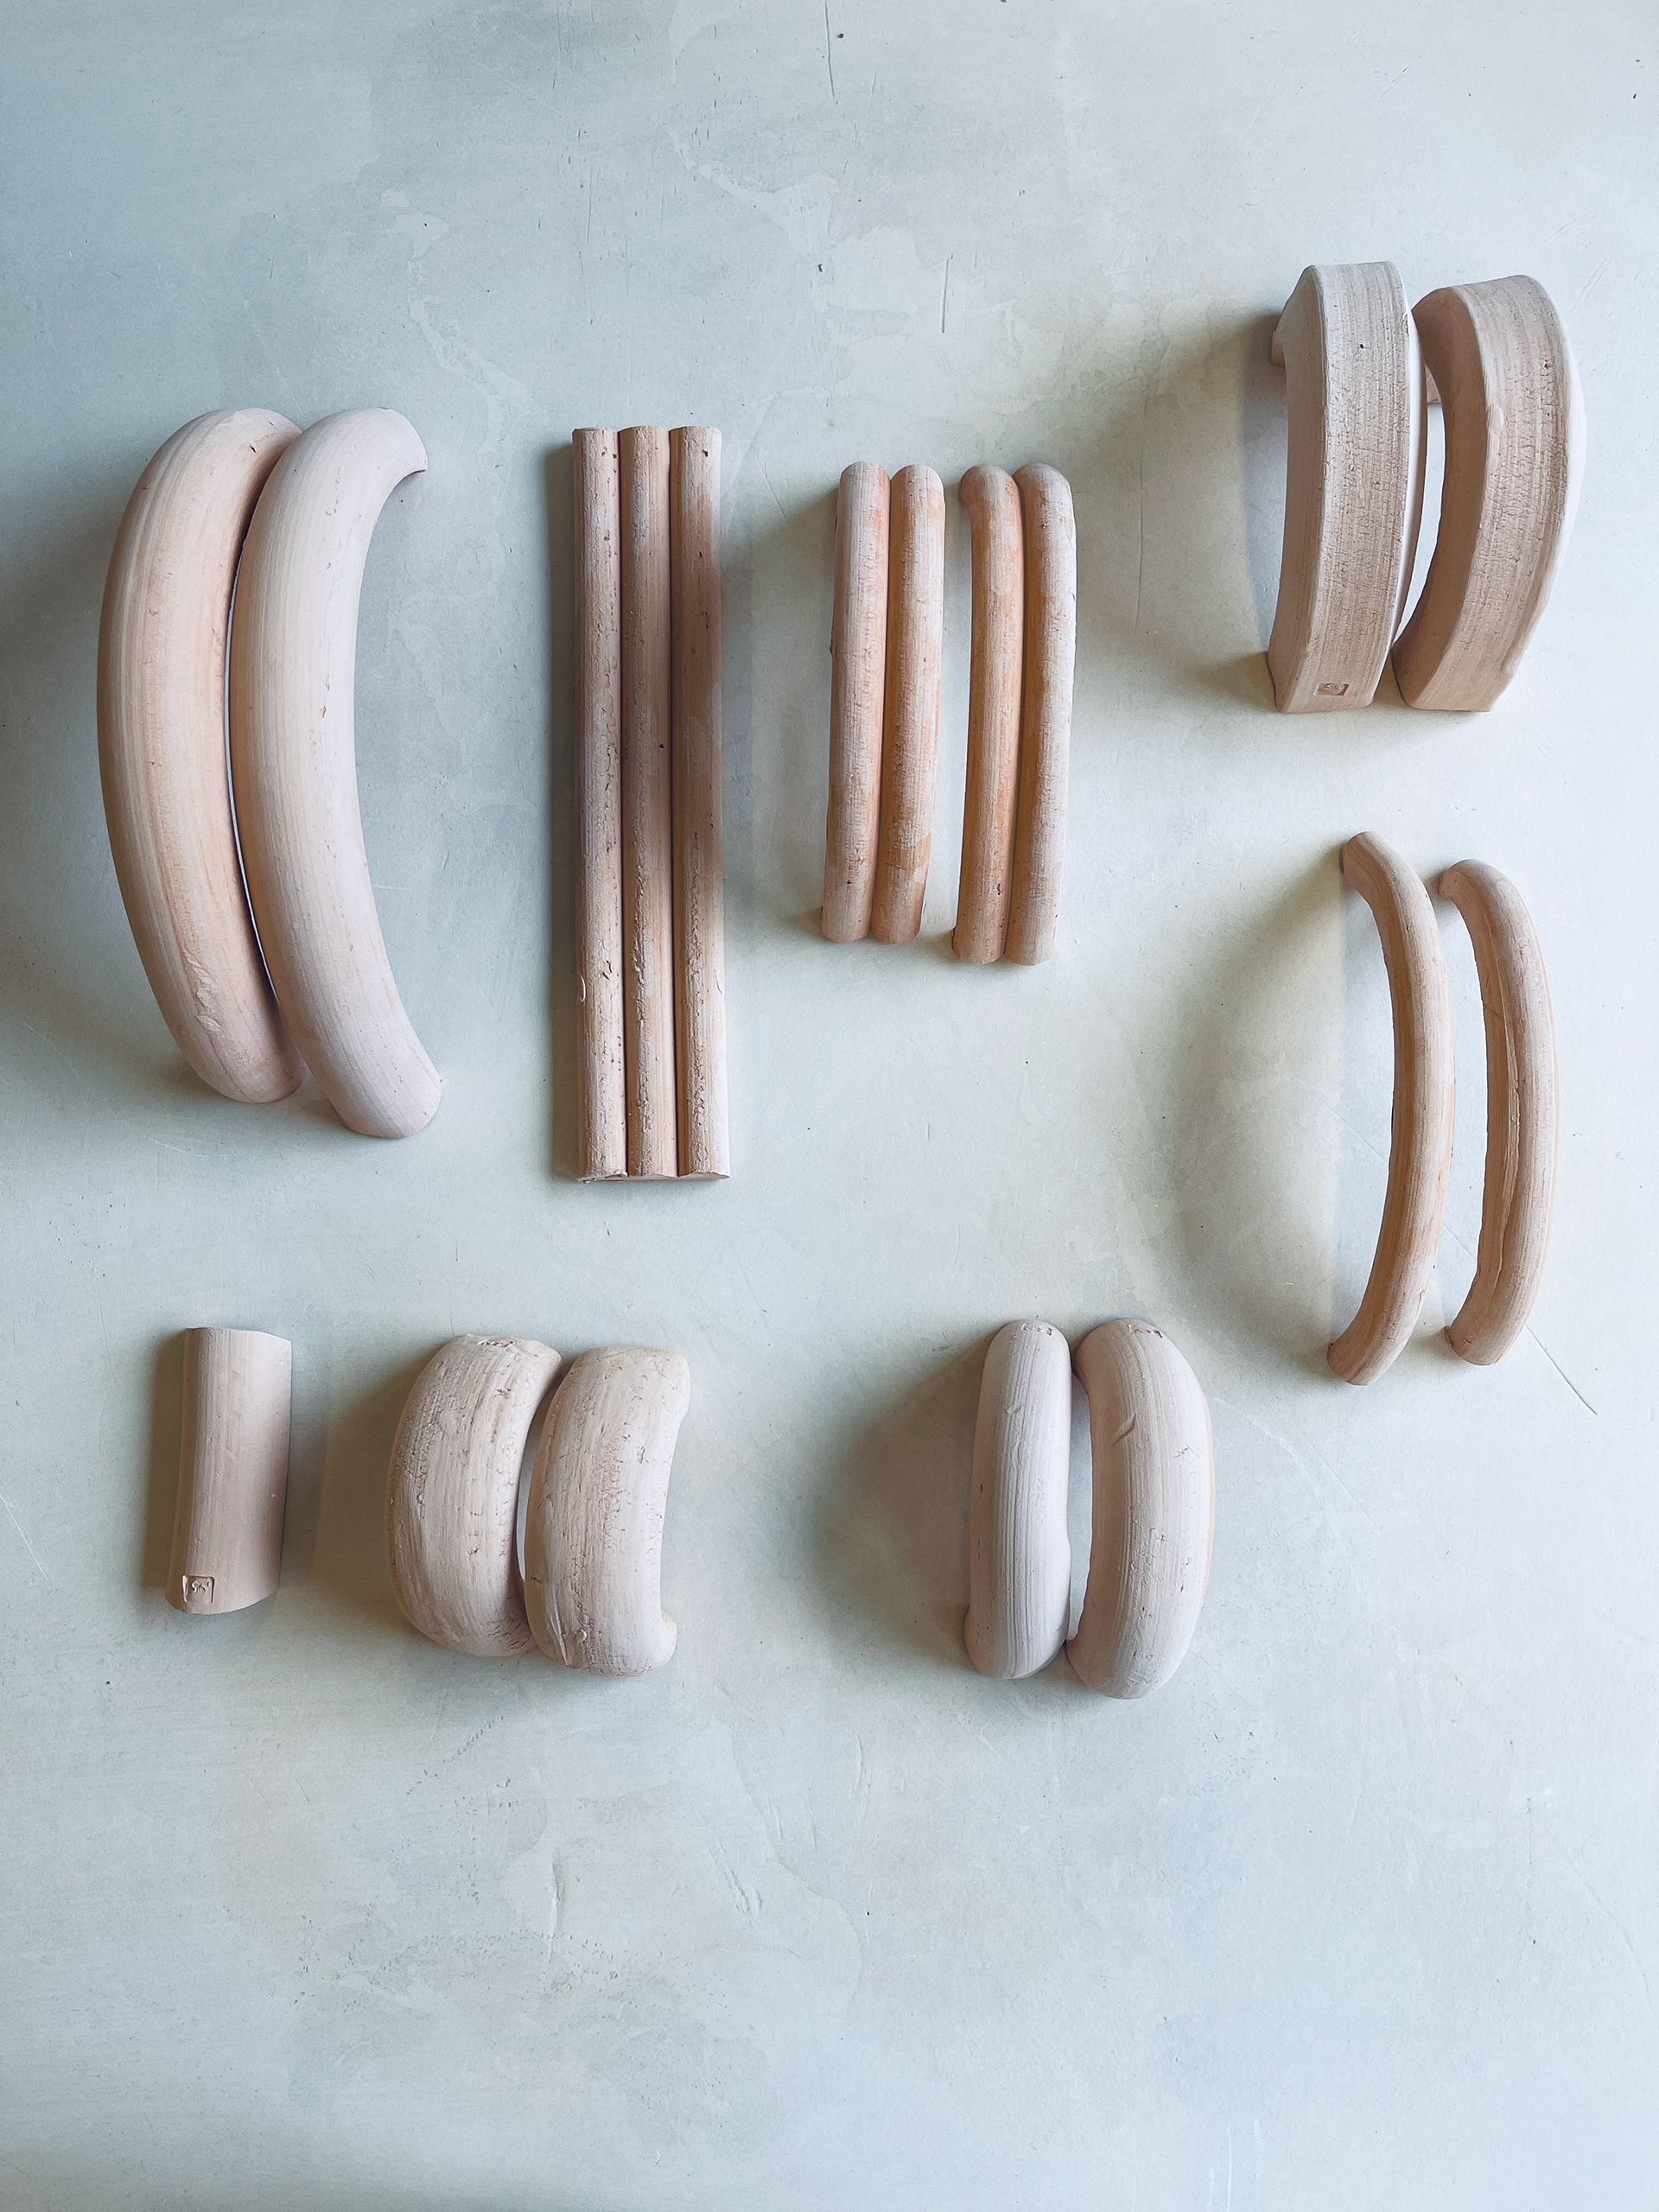
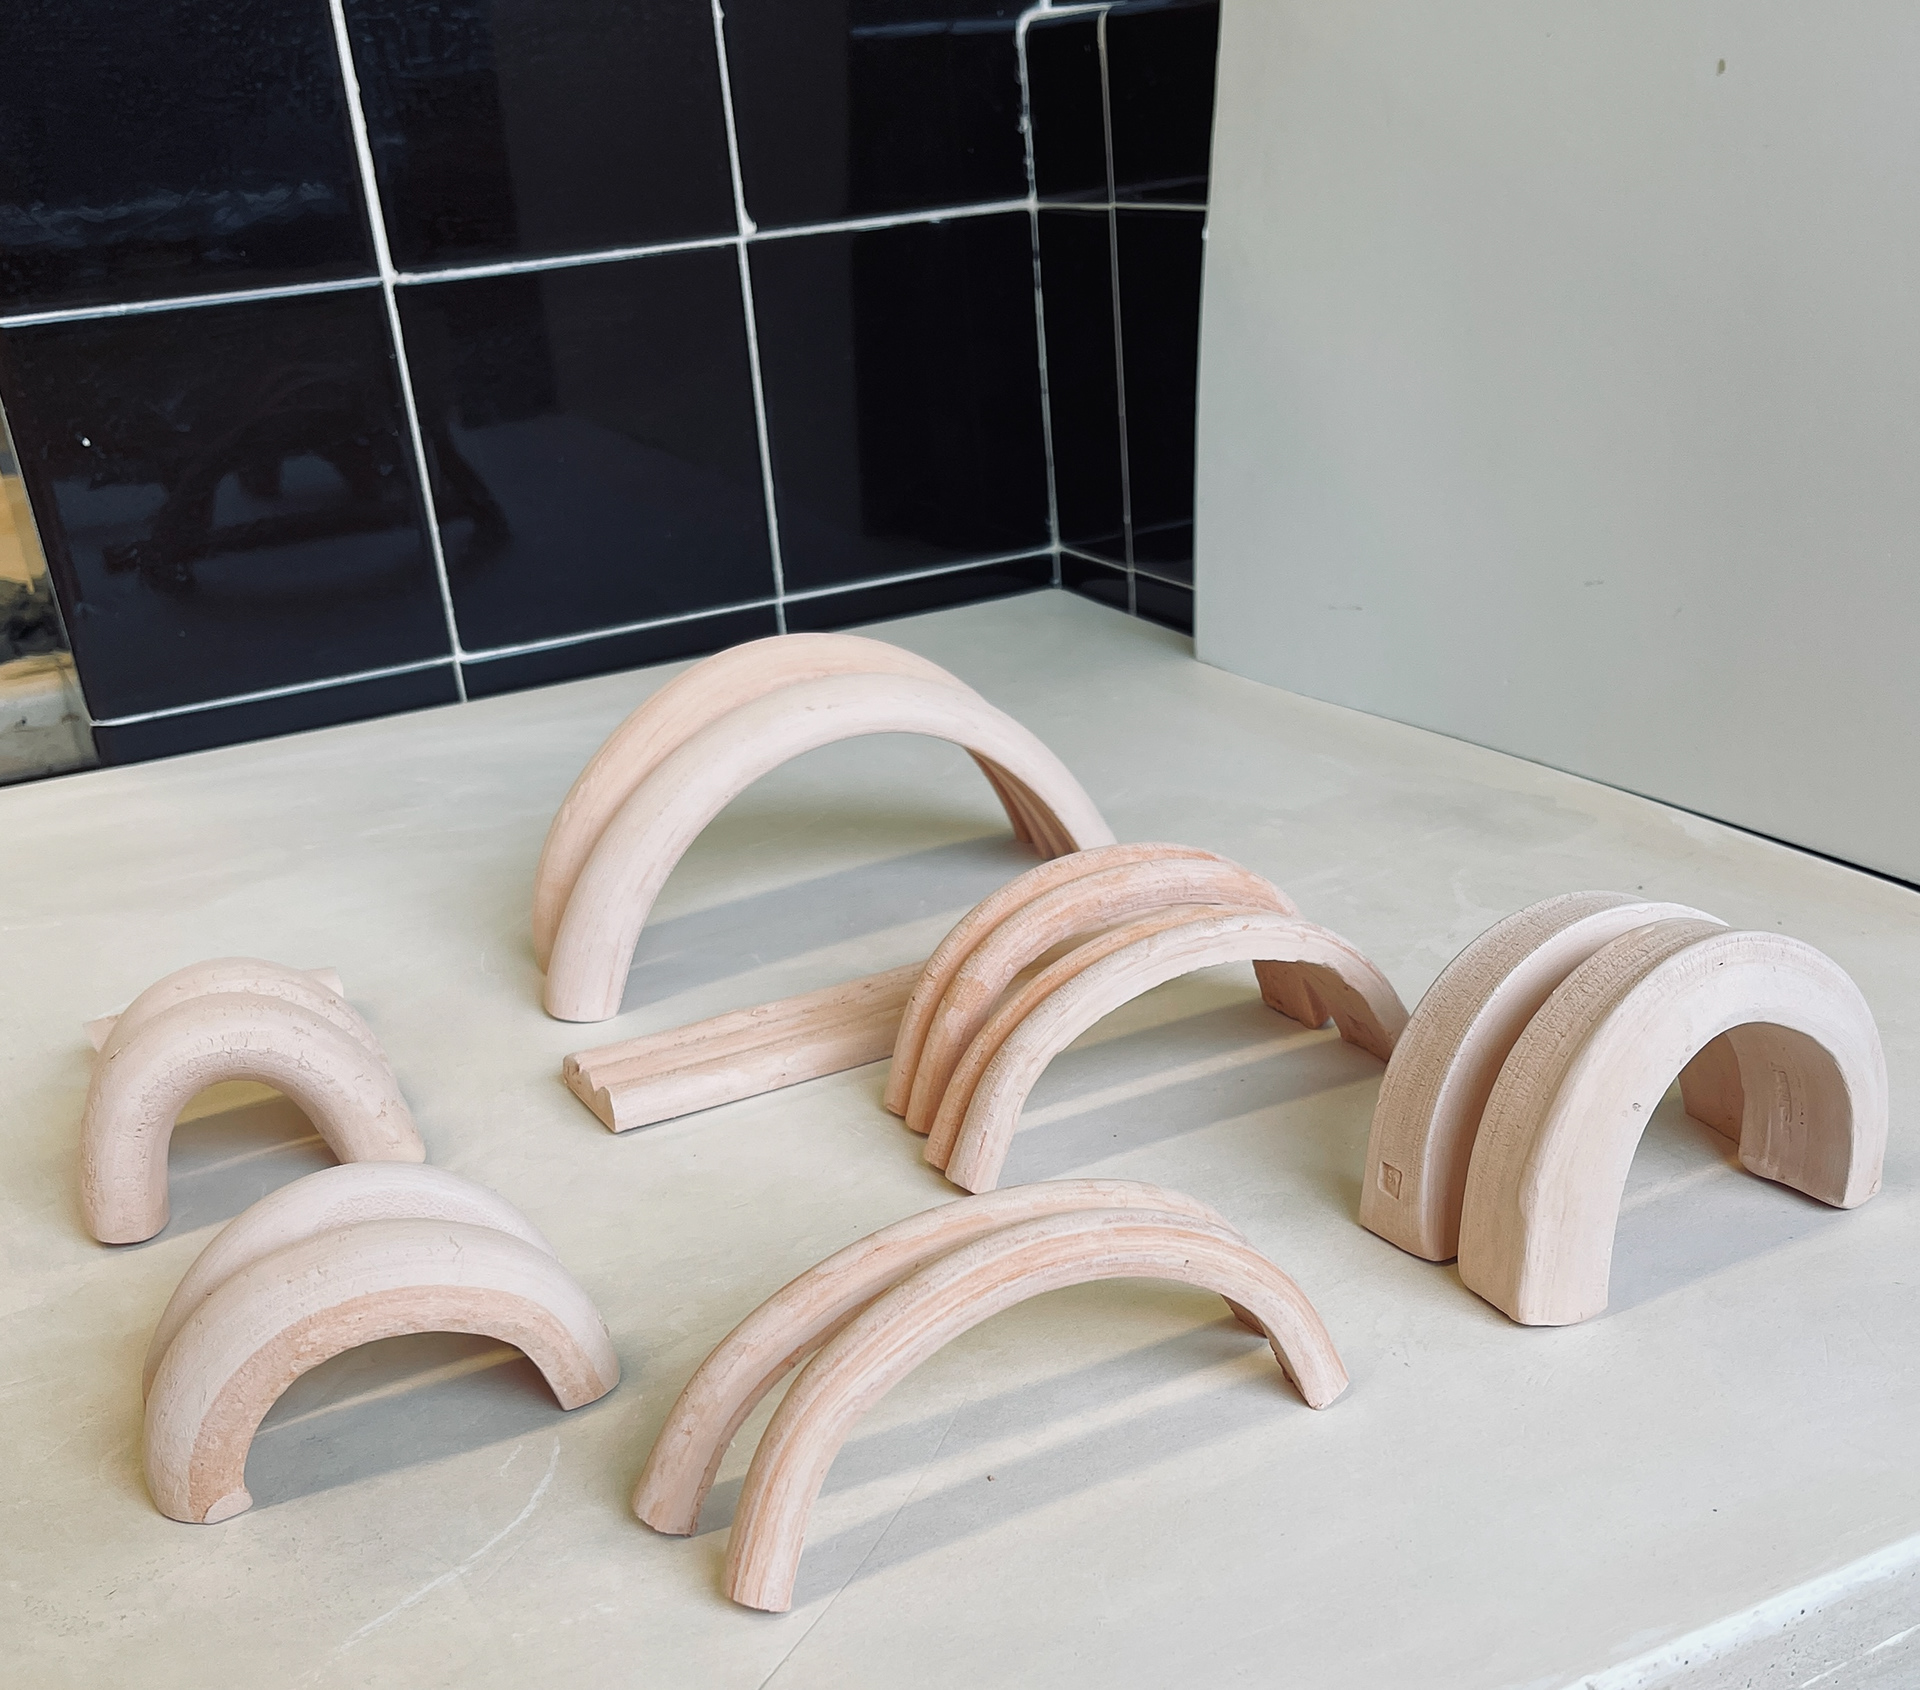
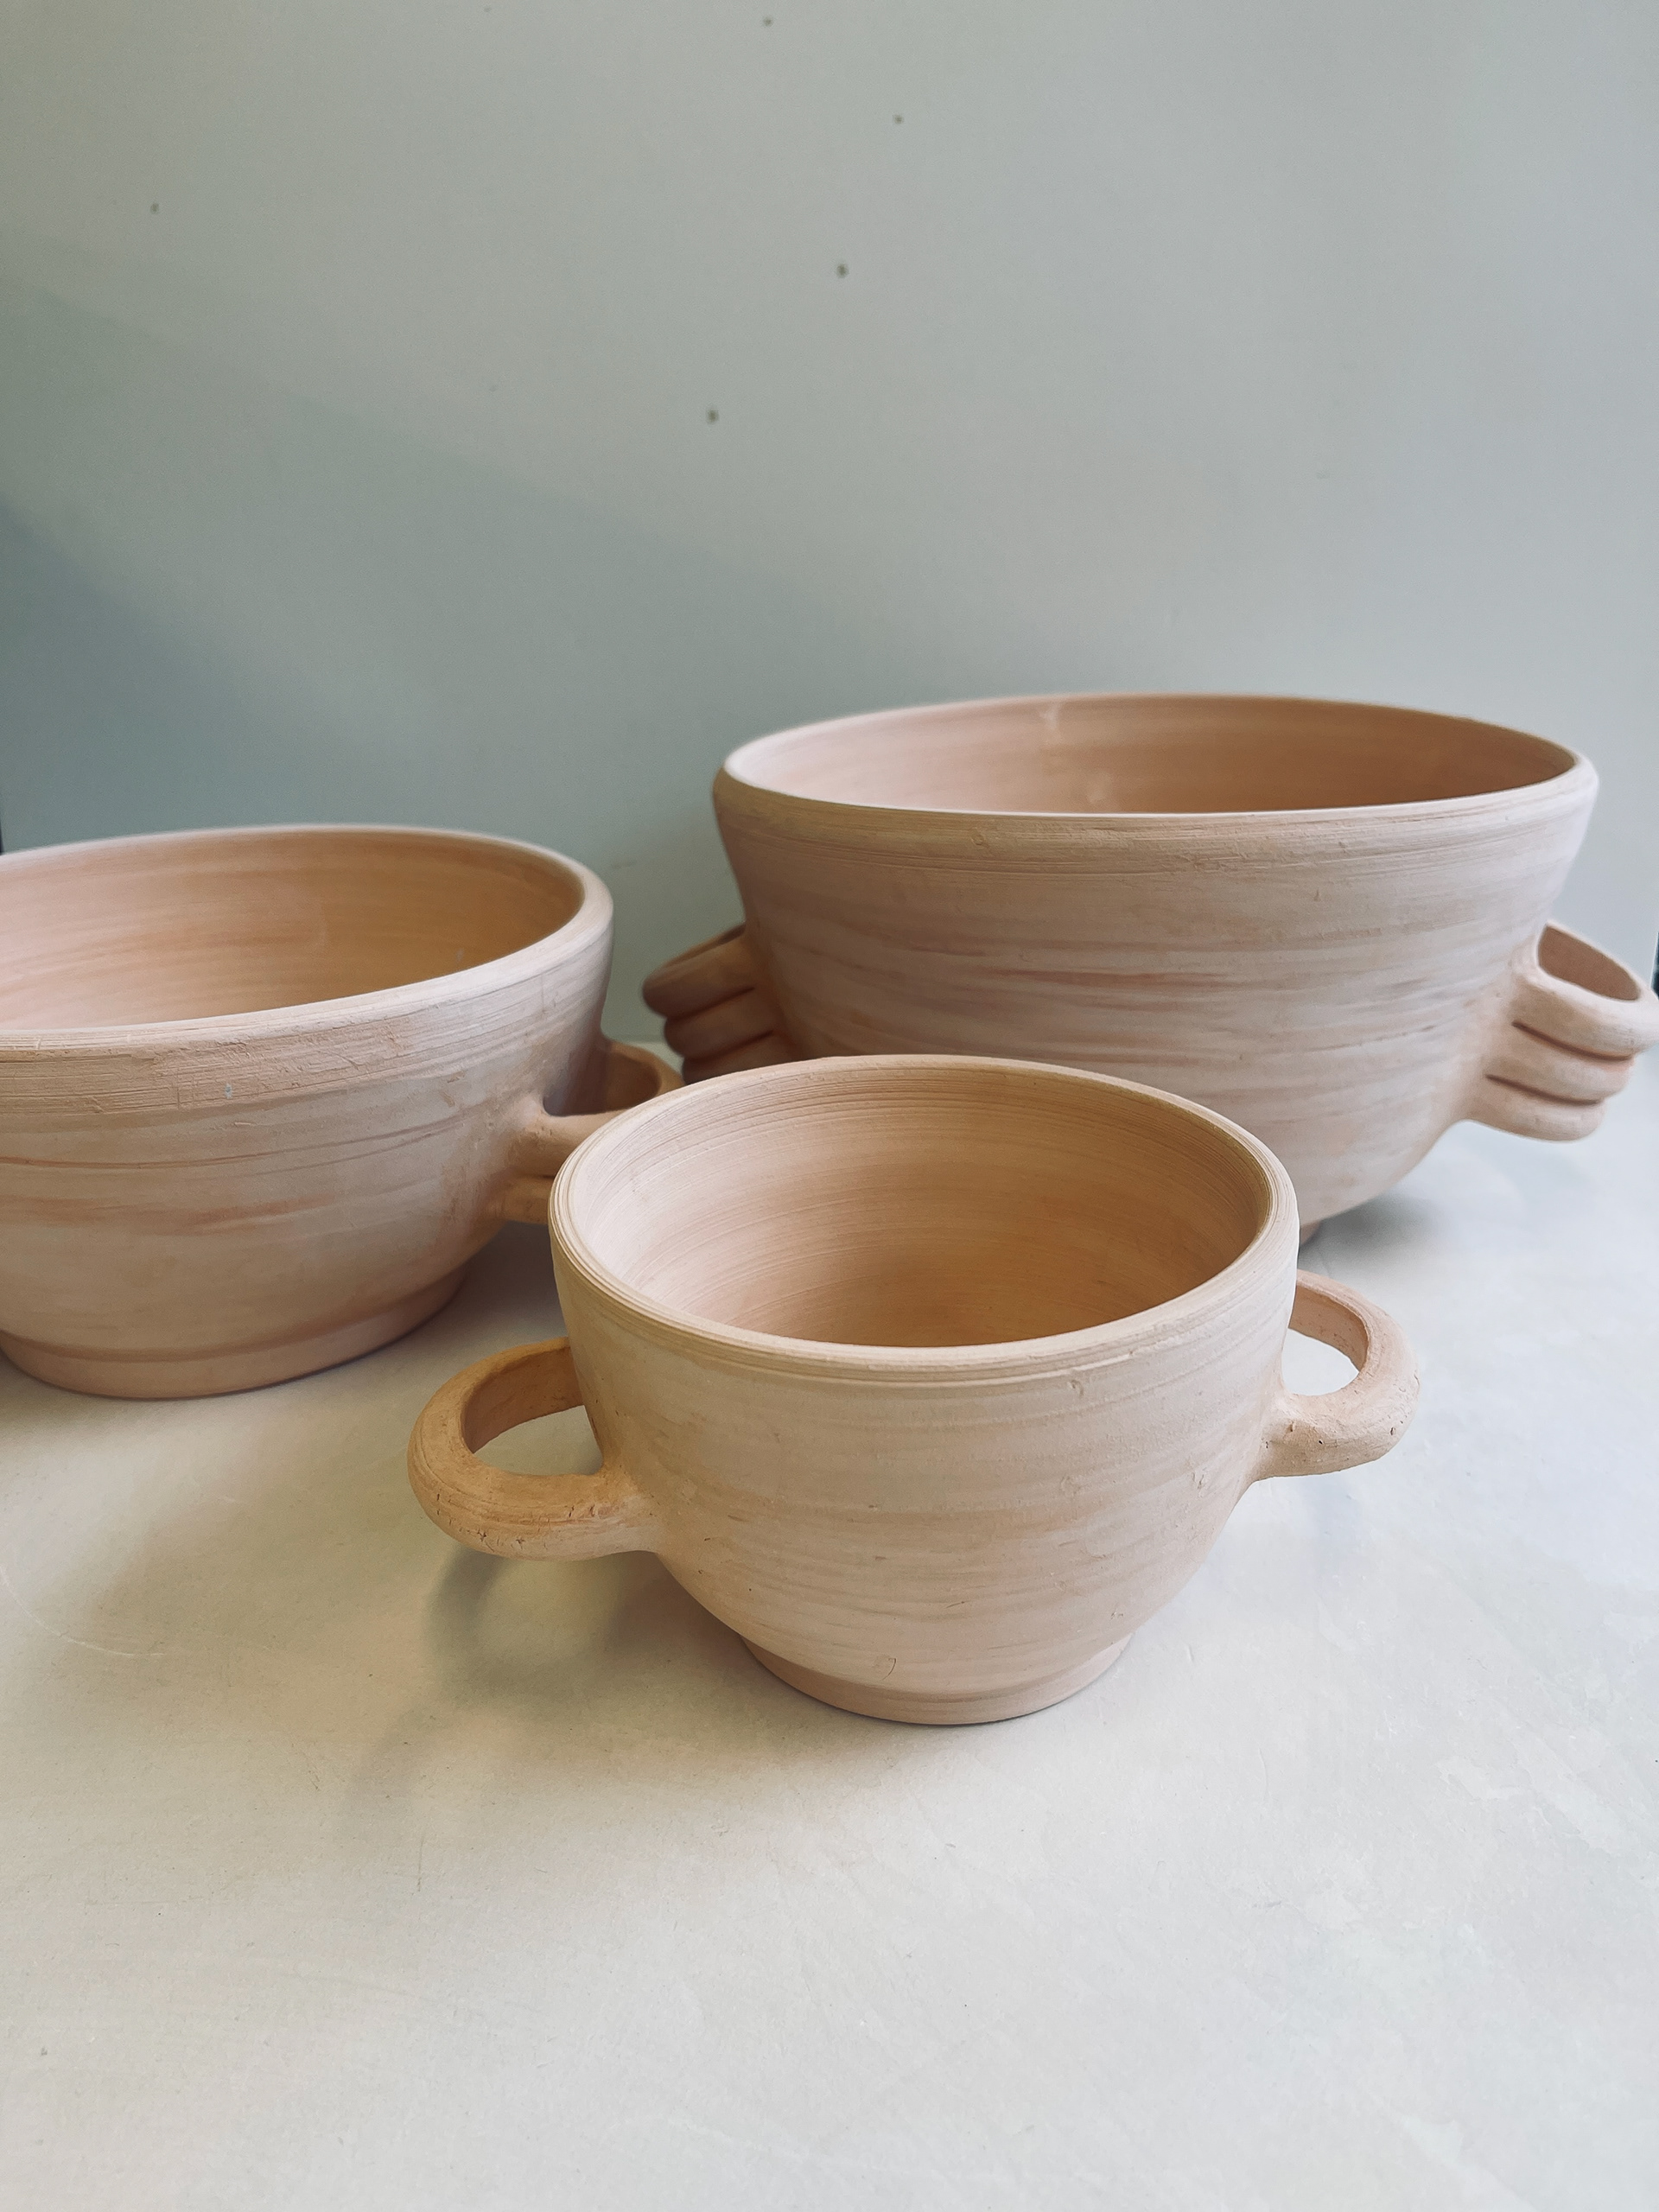
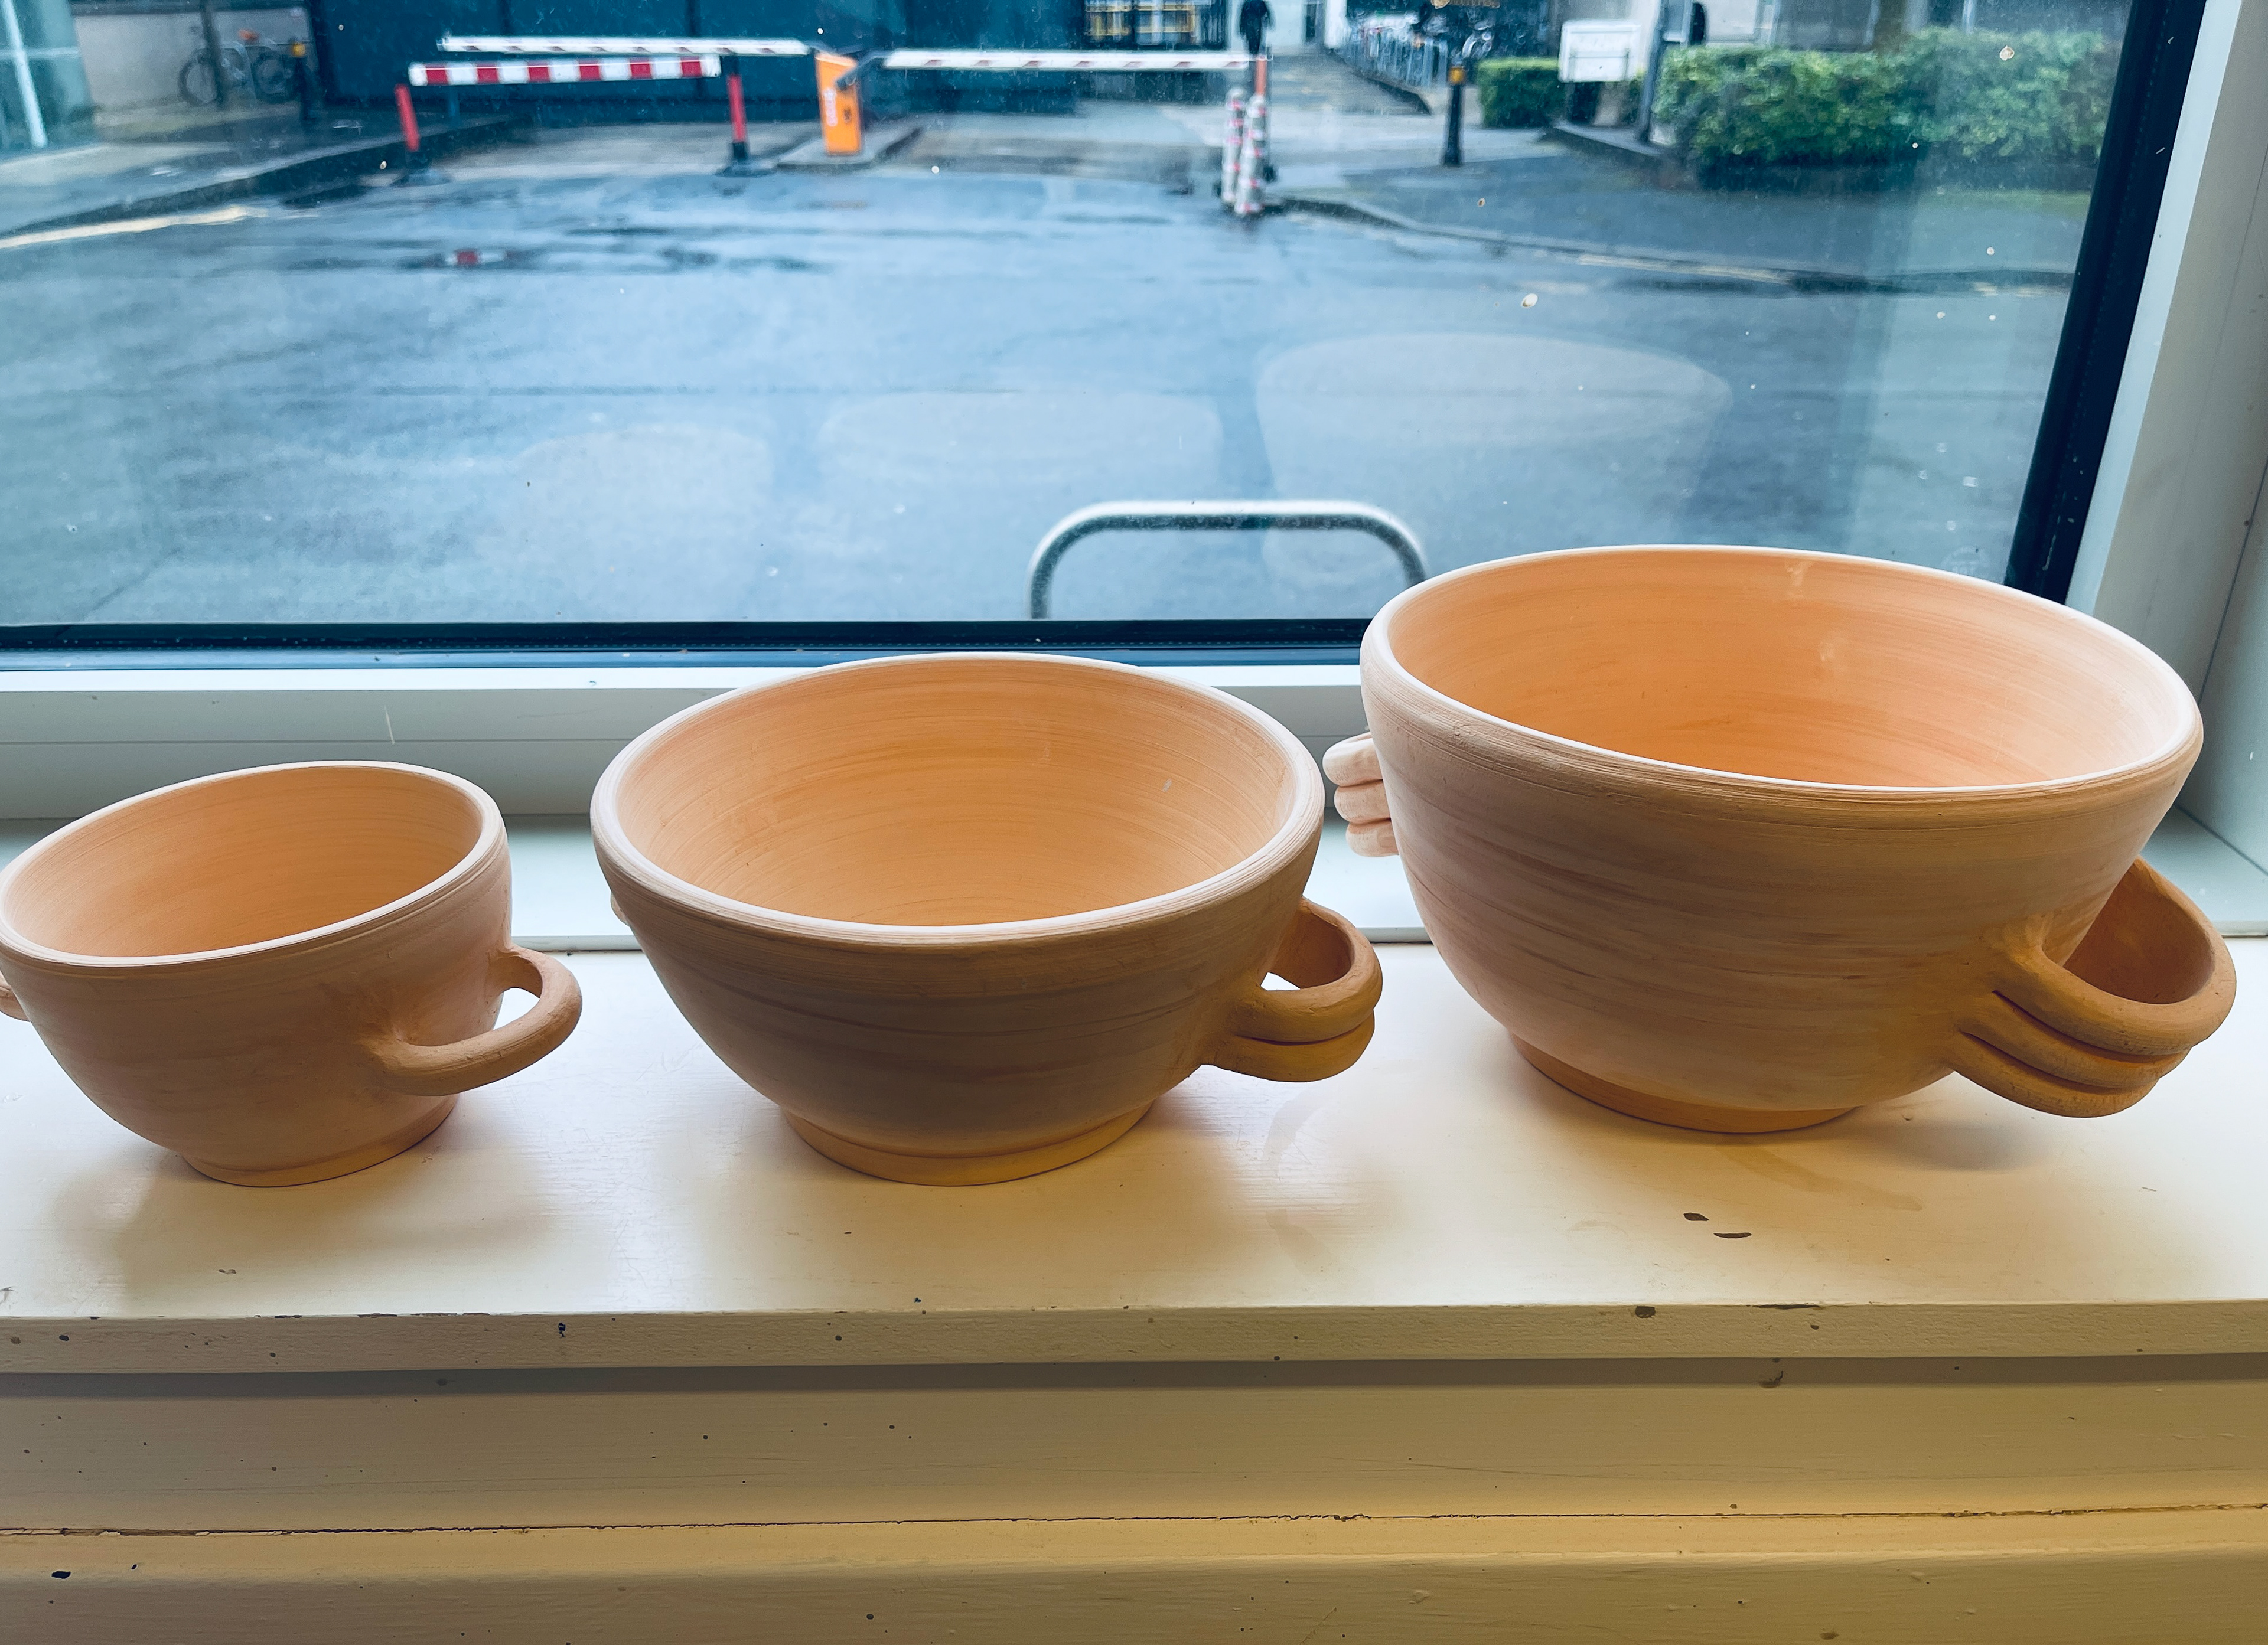
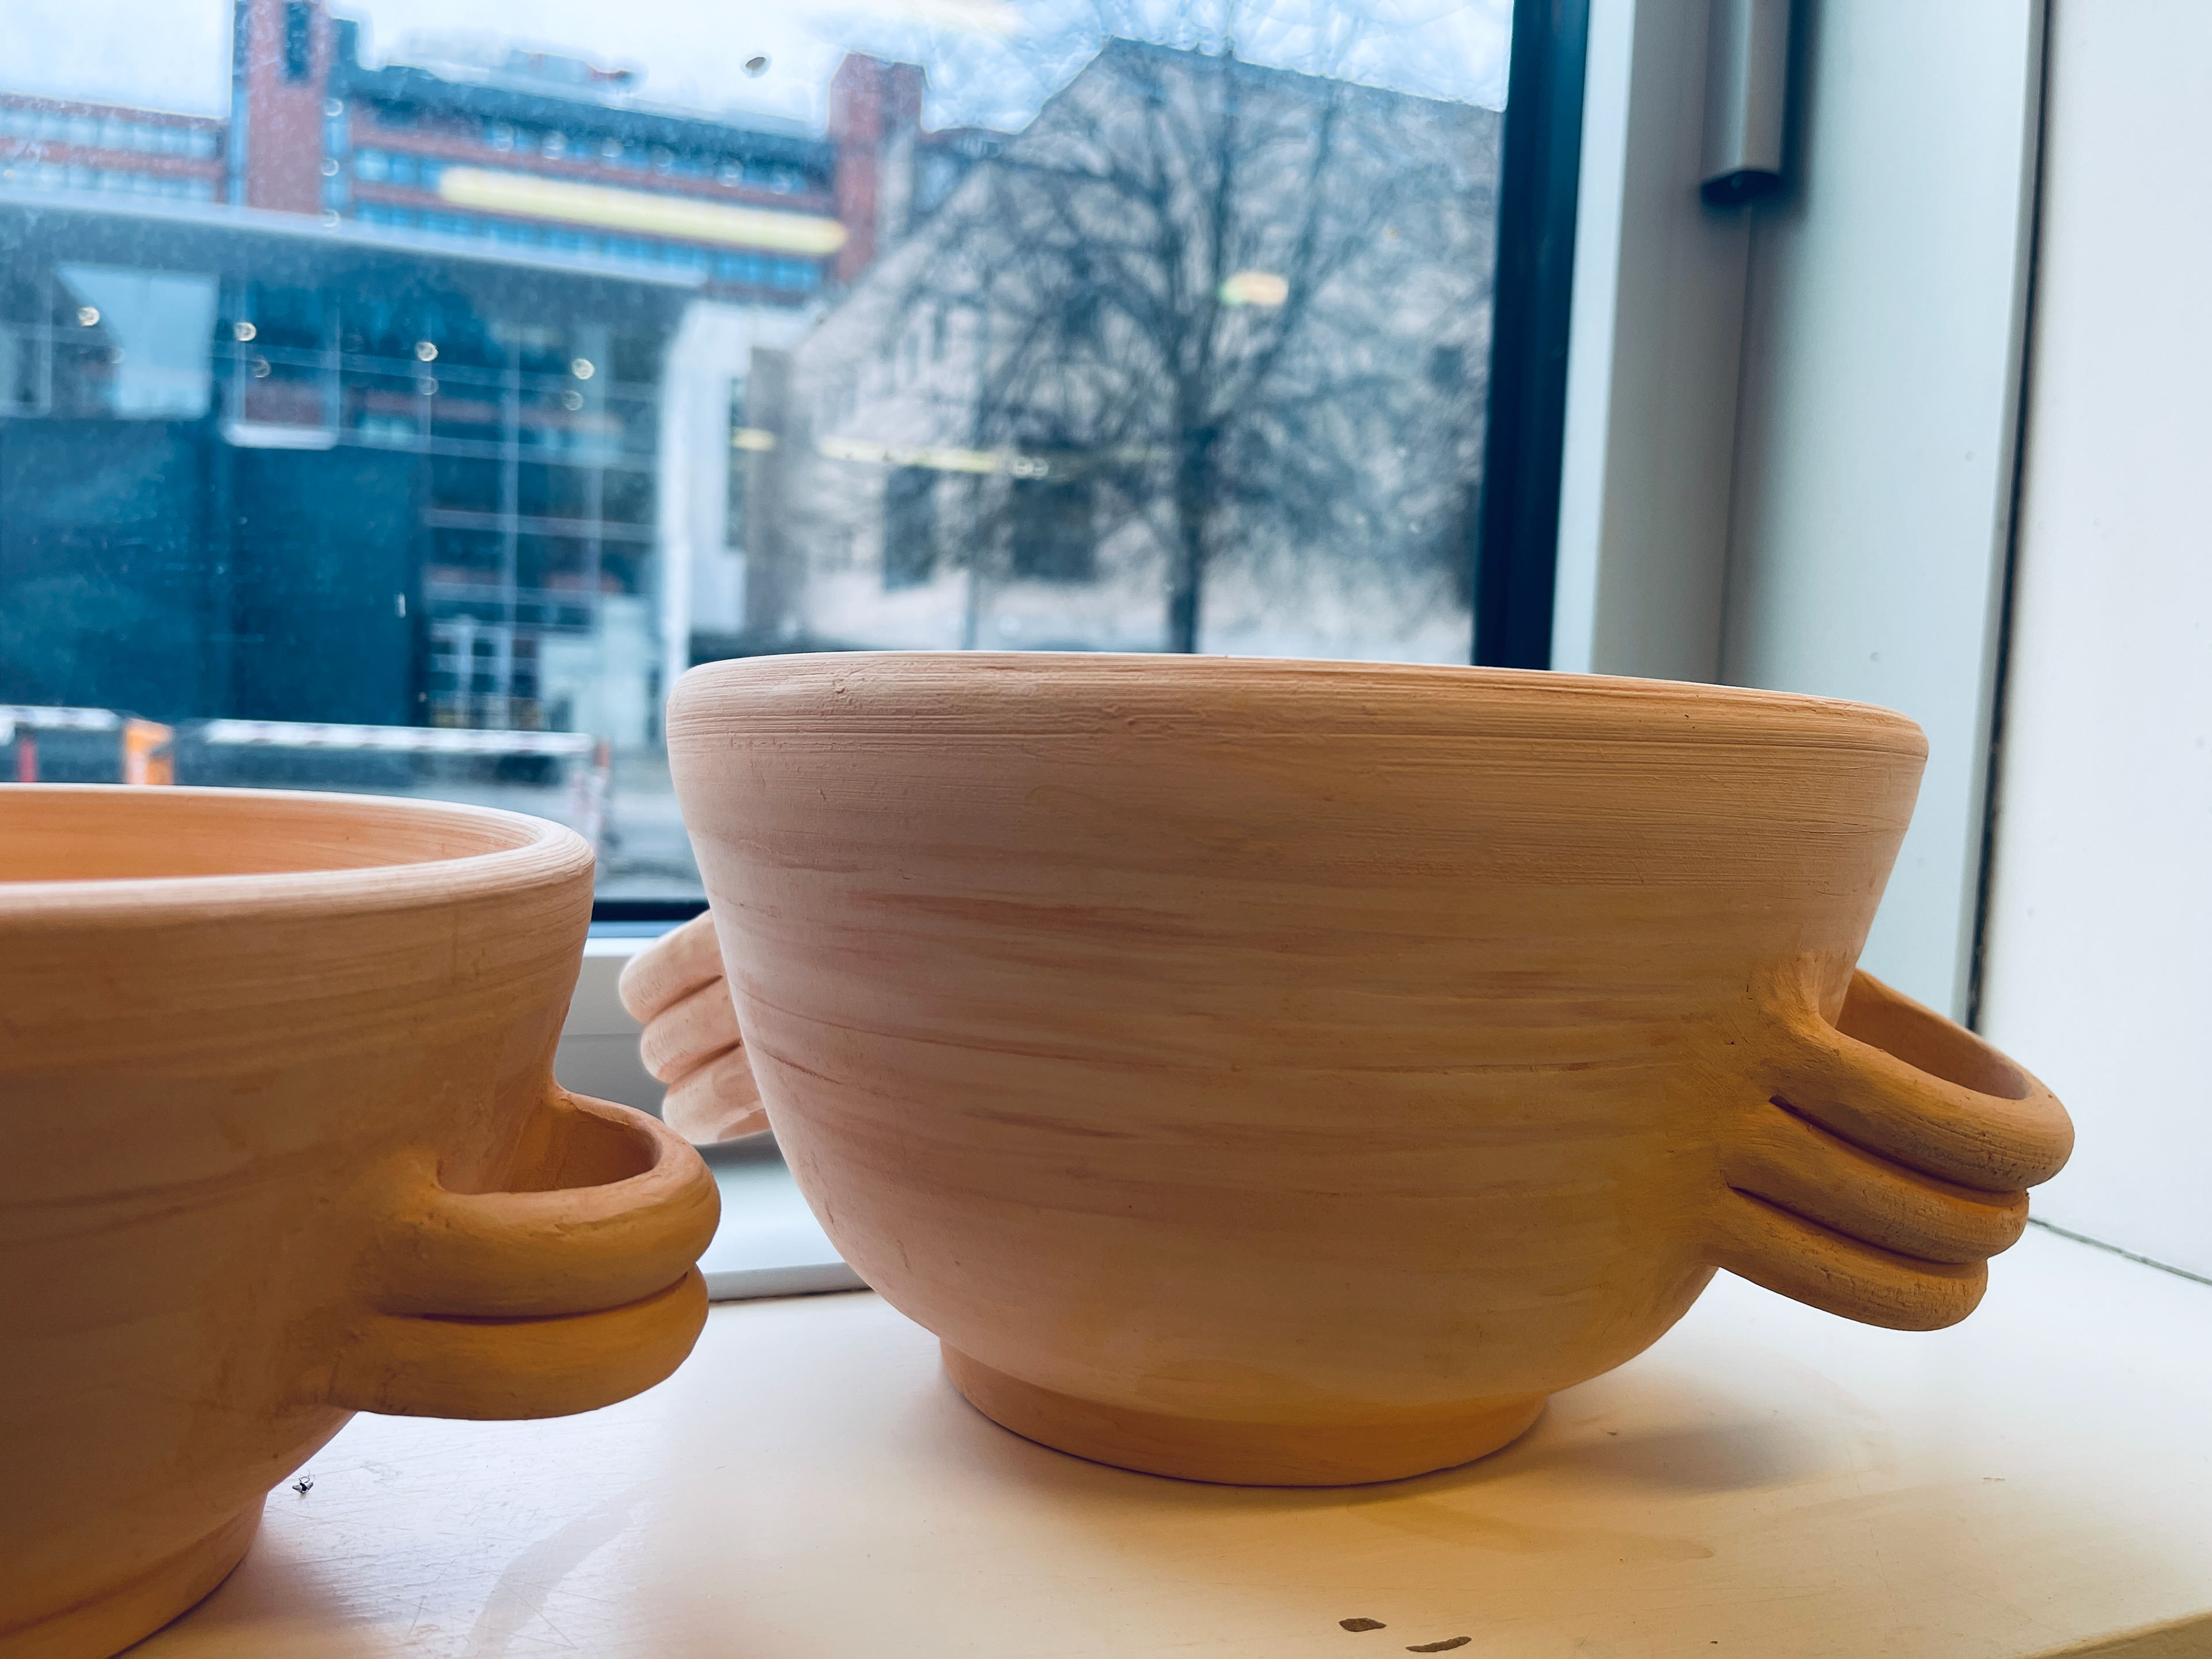
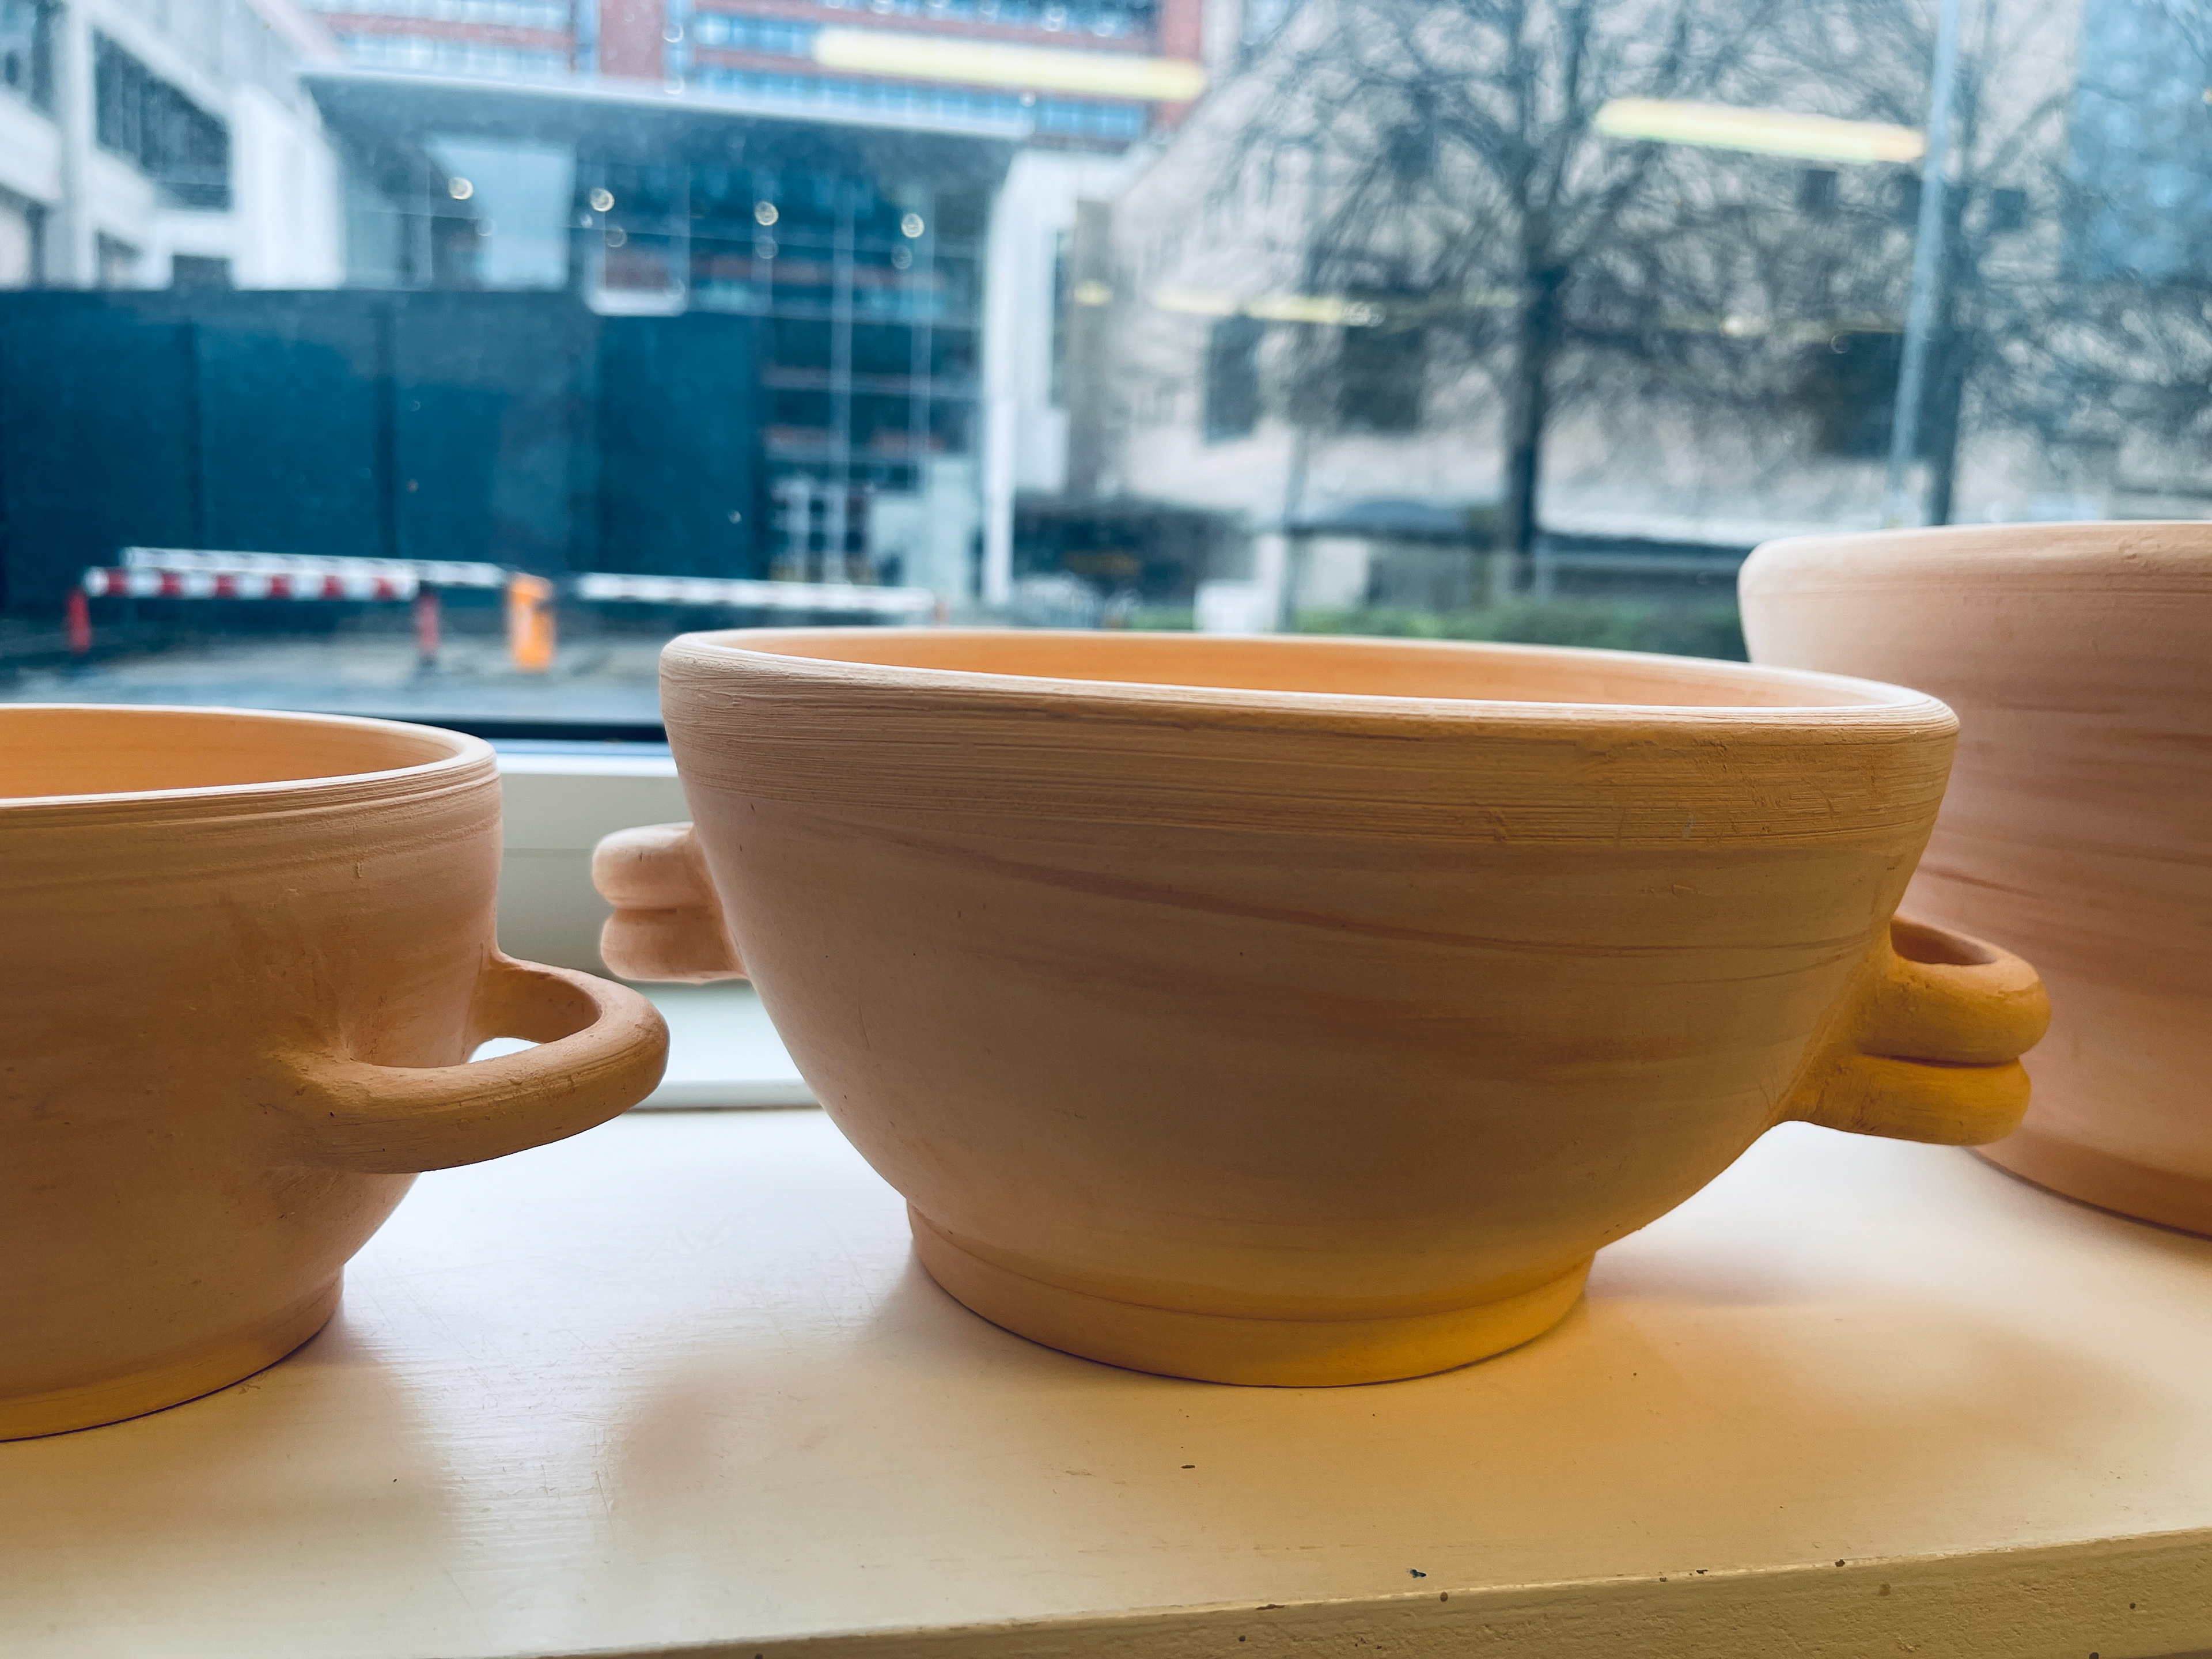
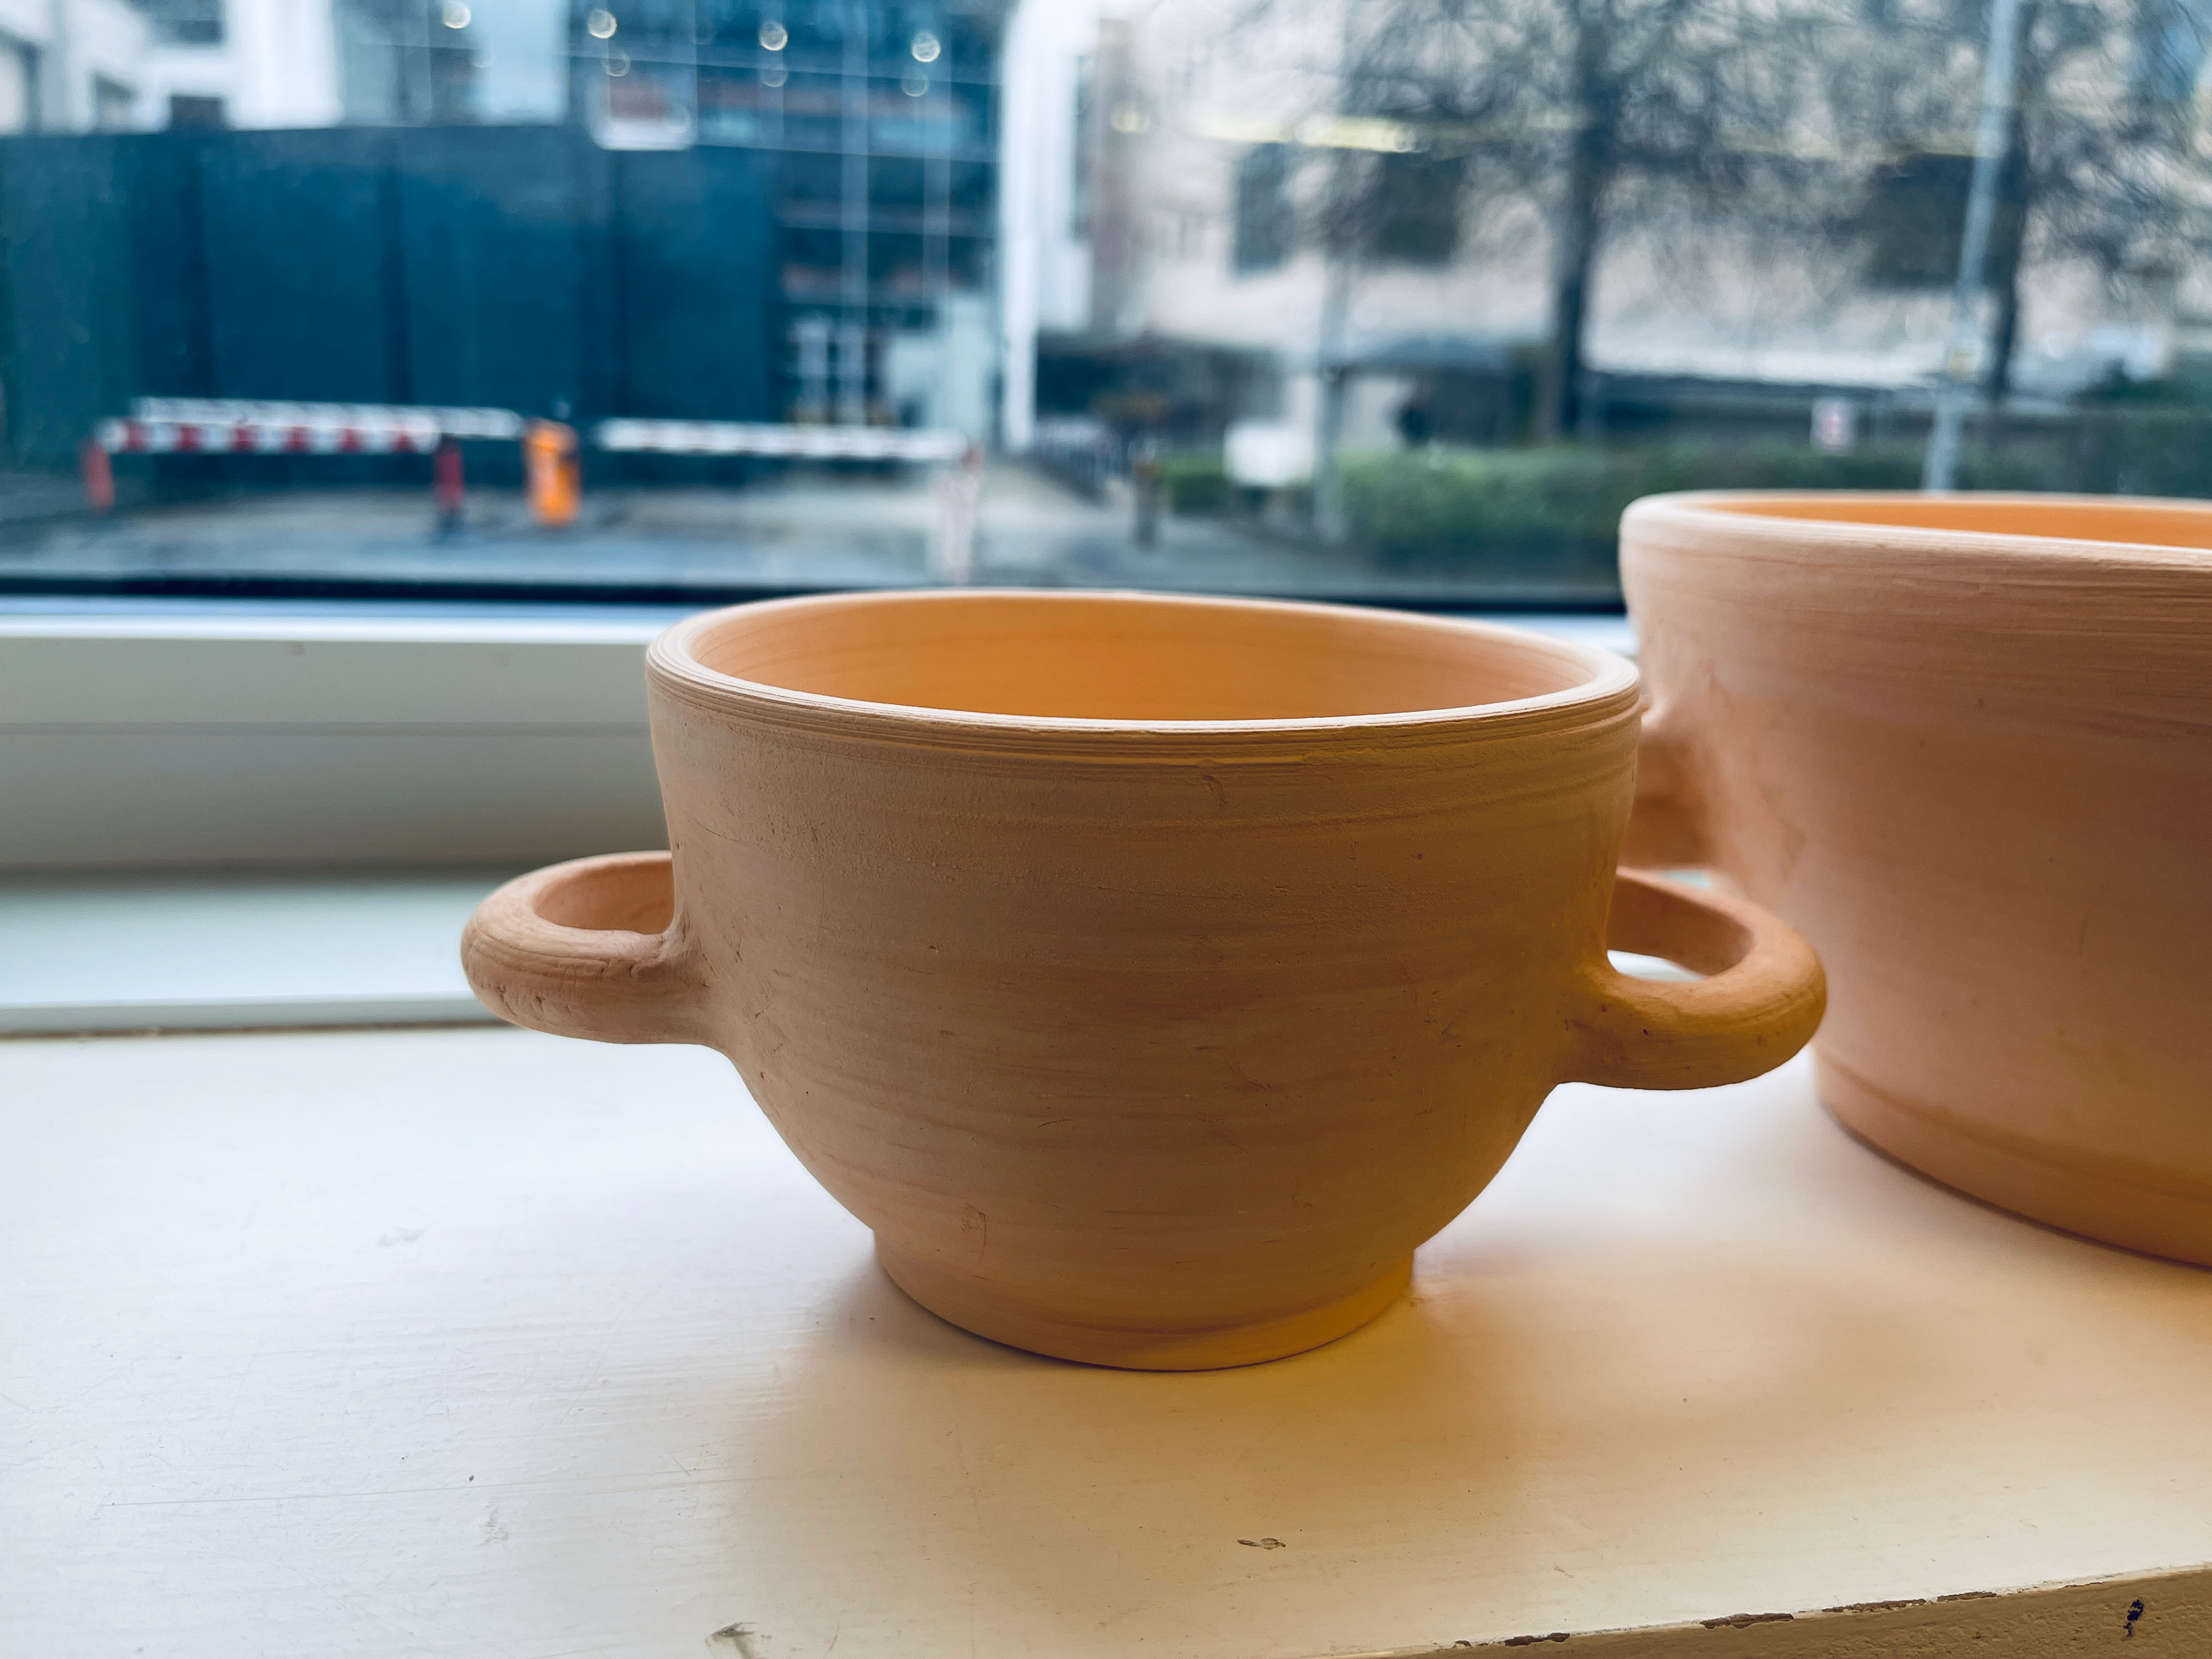
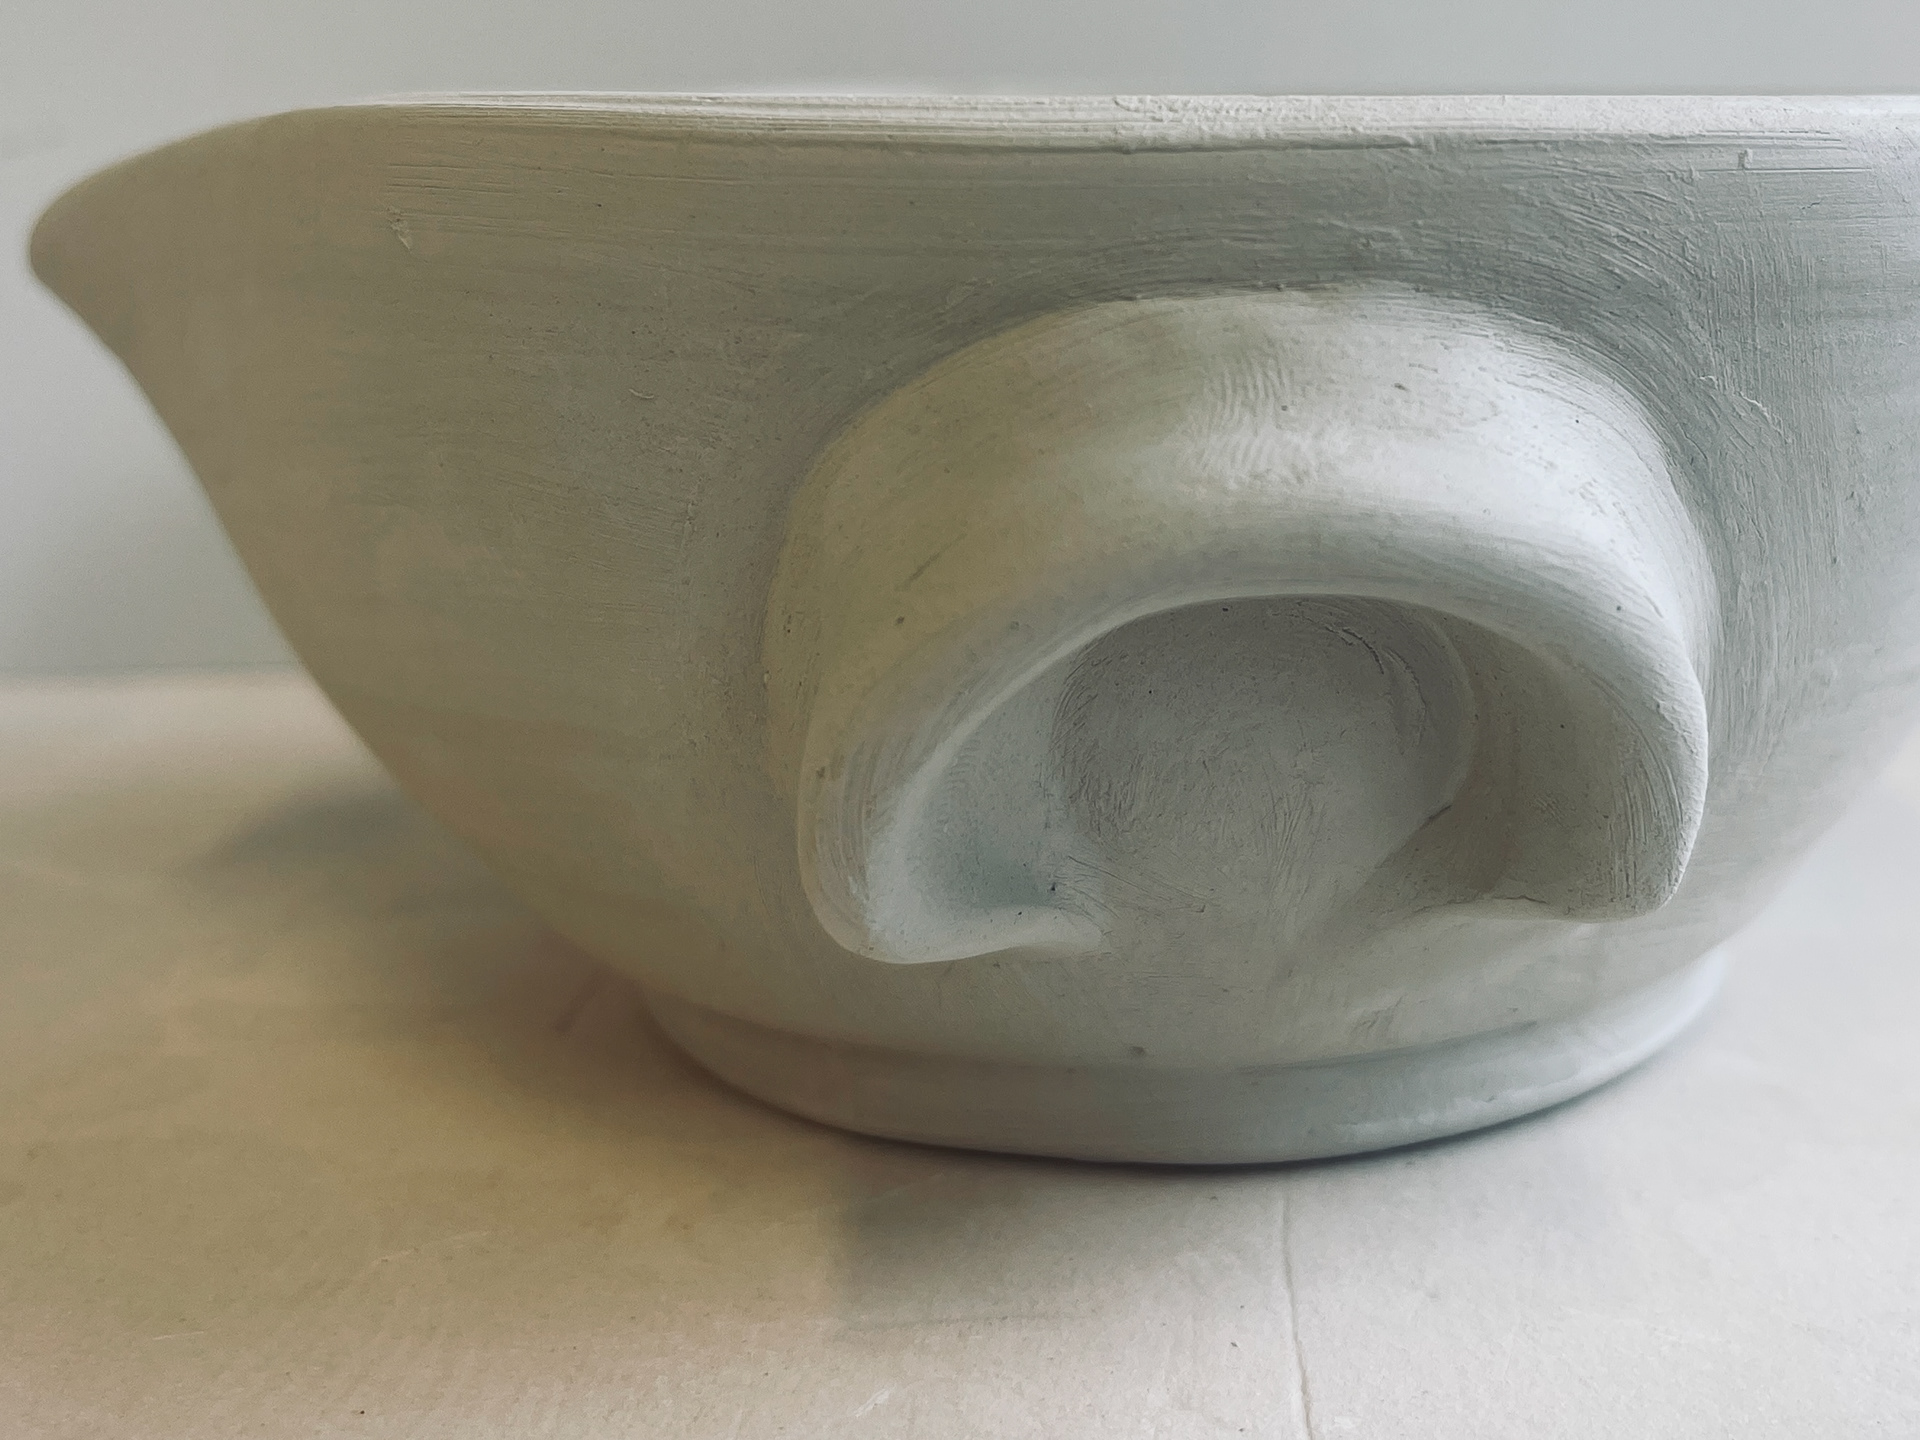
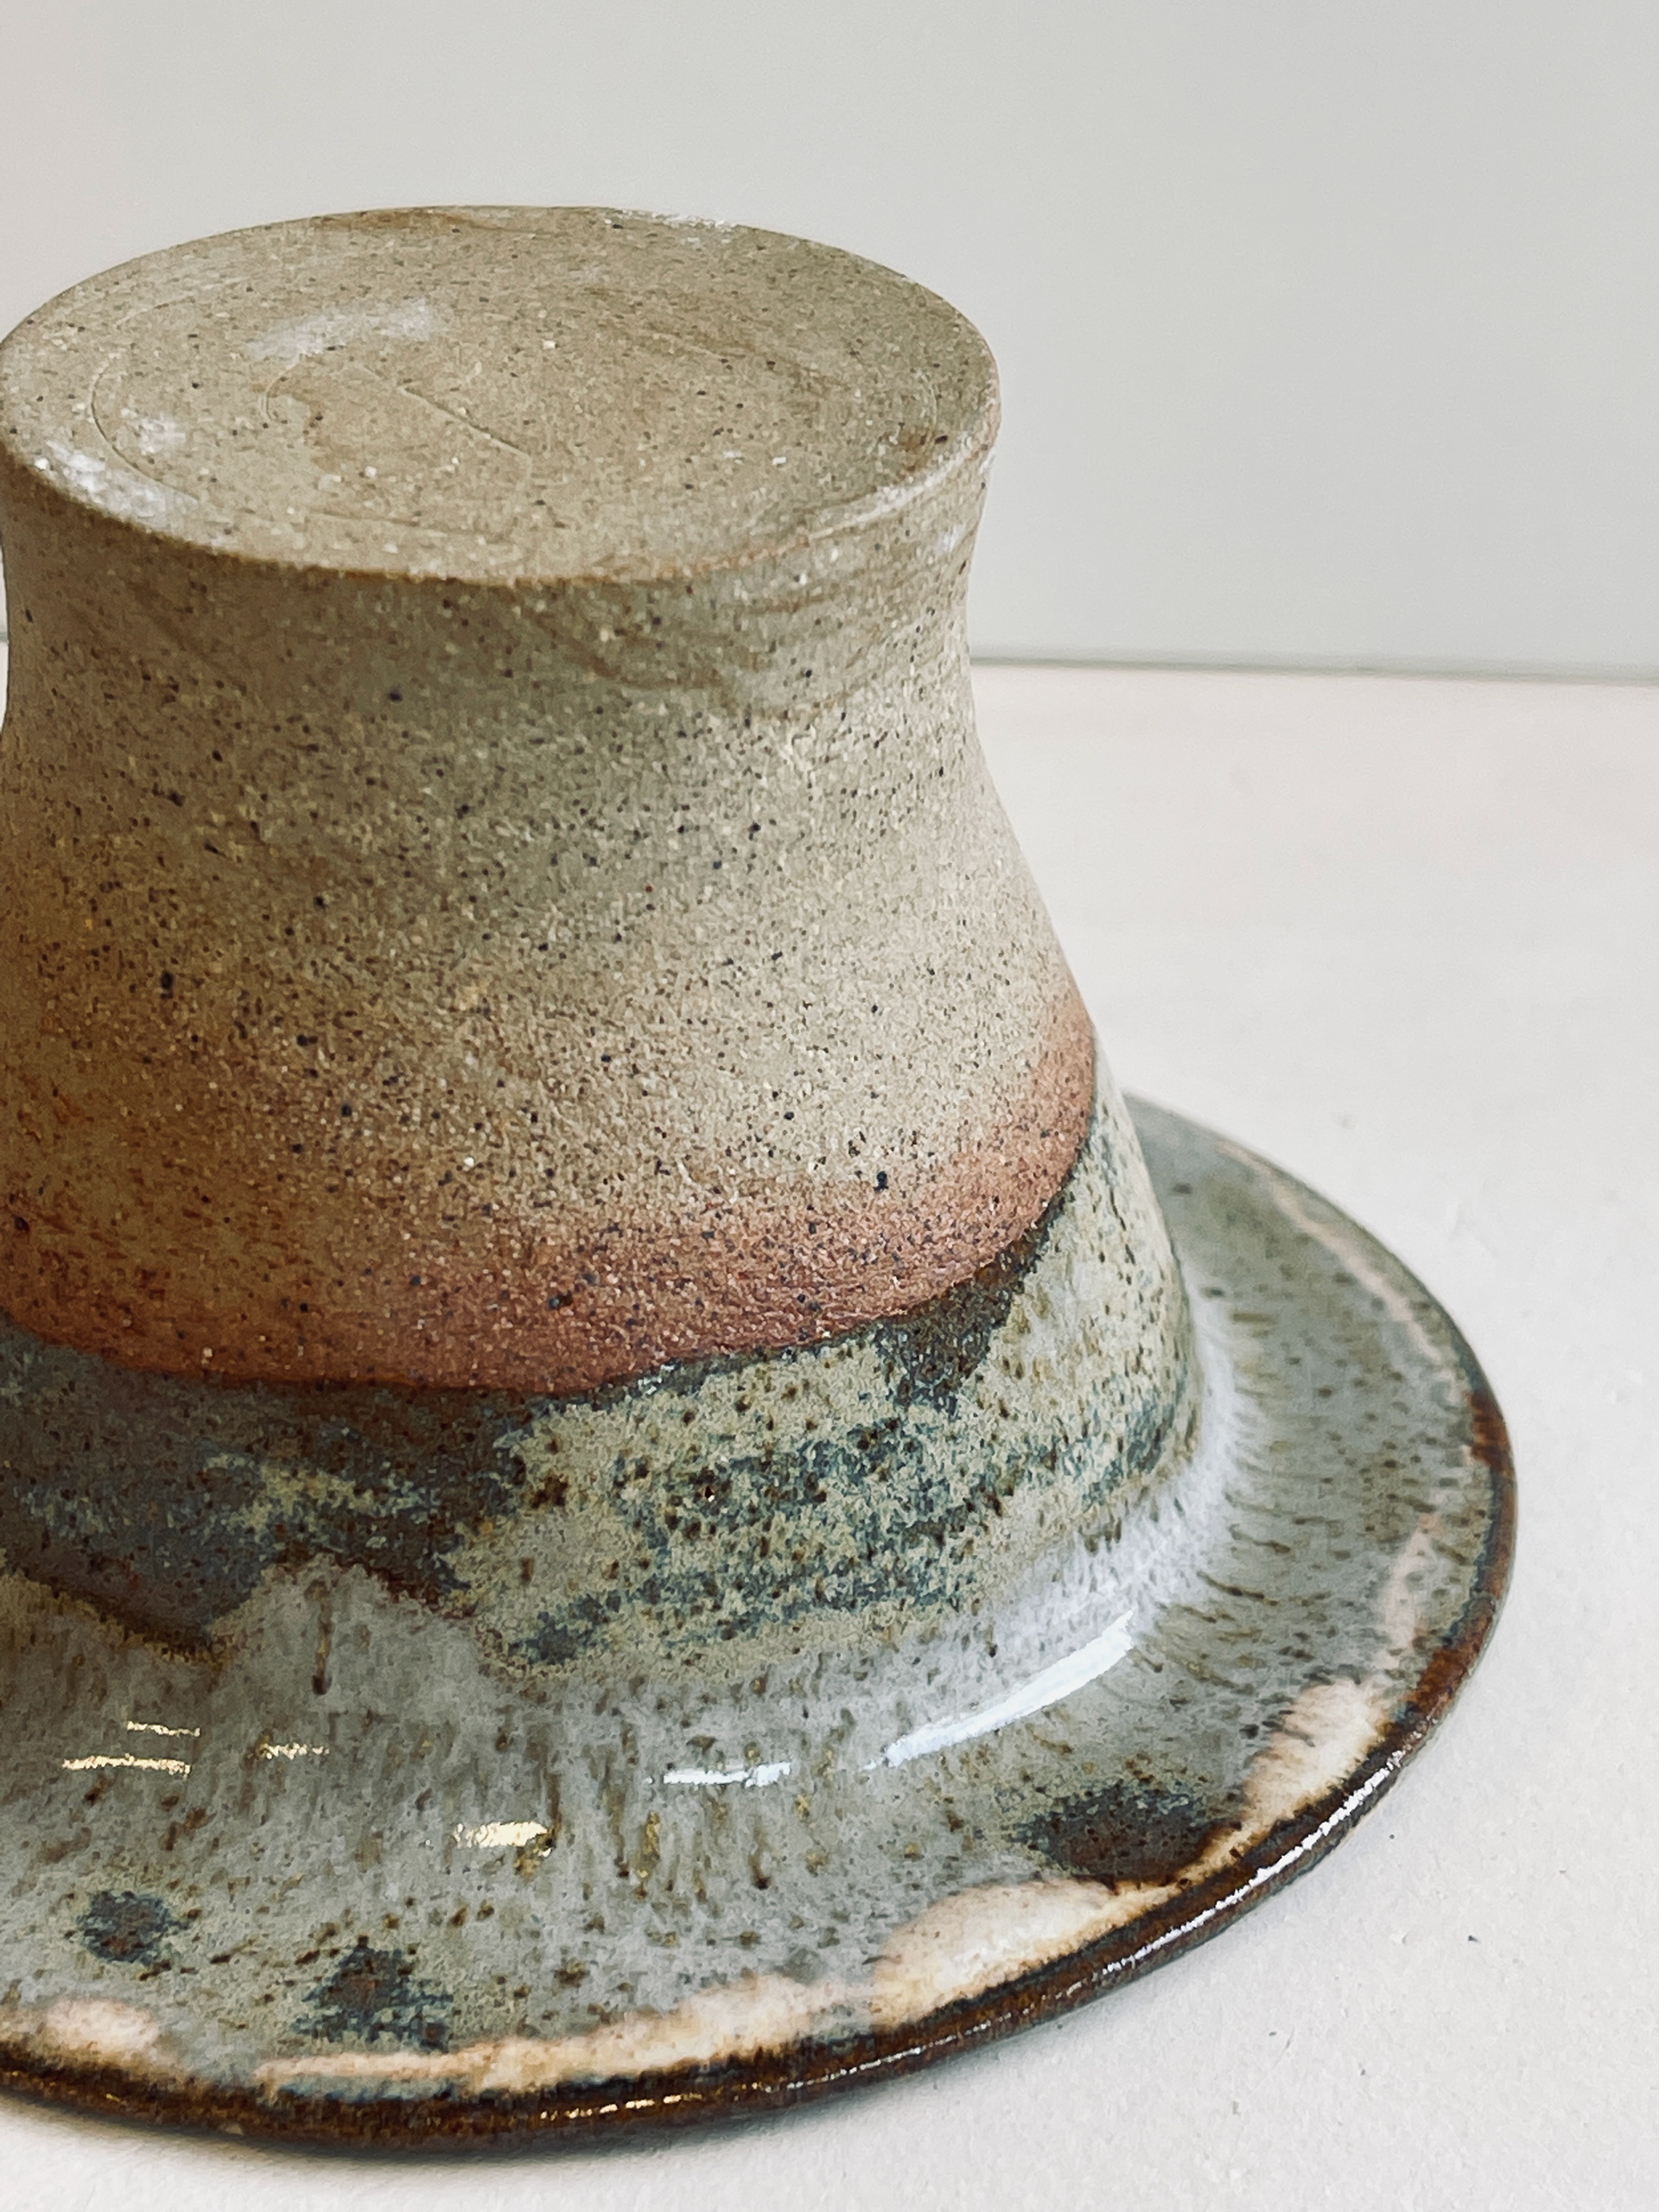
Bowls being the key form, how could i challenge it to allow handle and glaze enhance it?

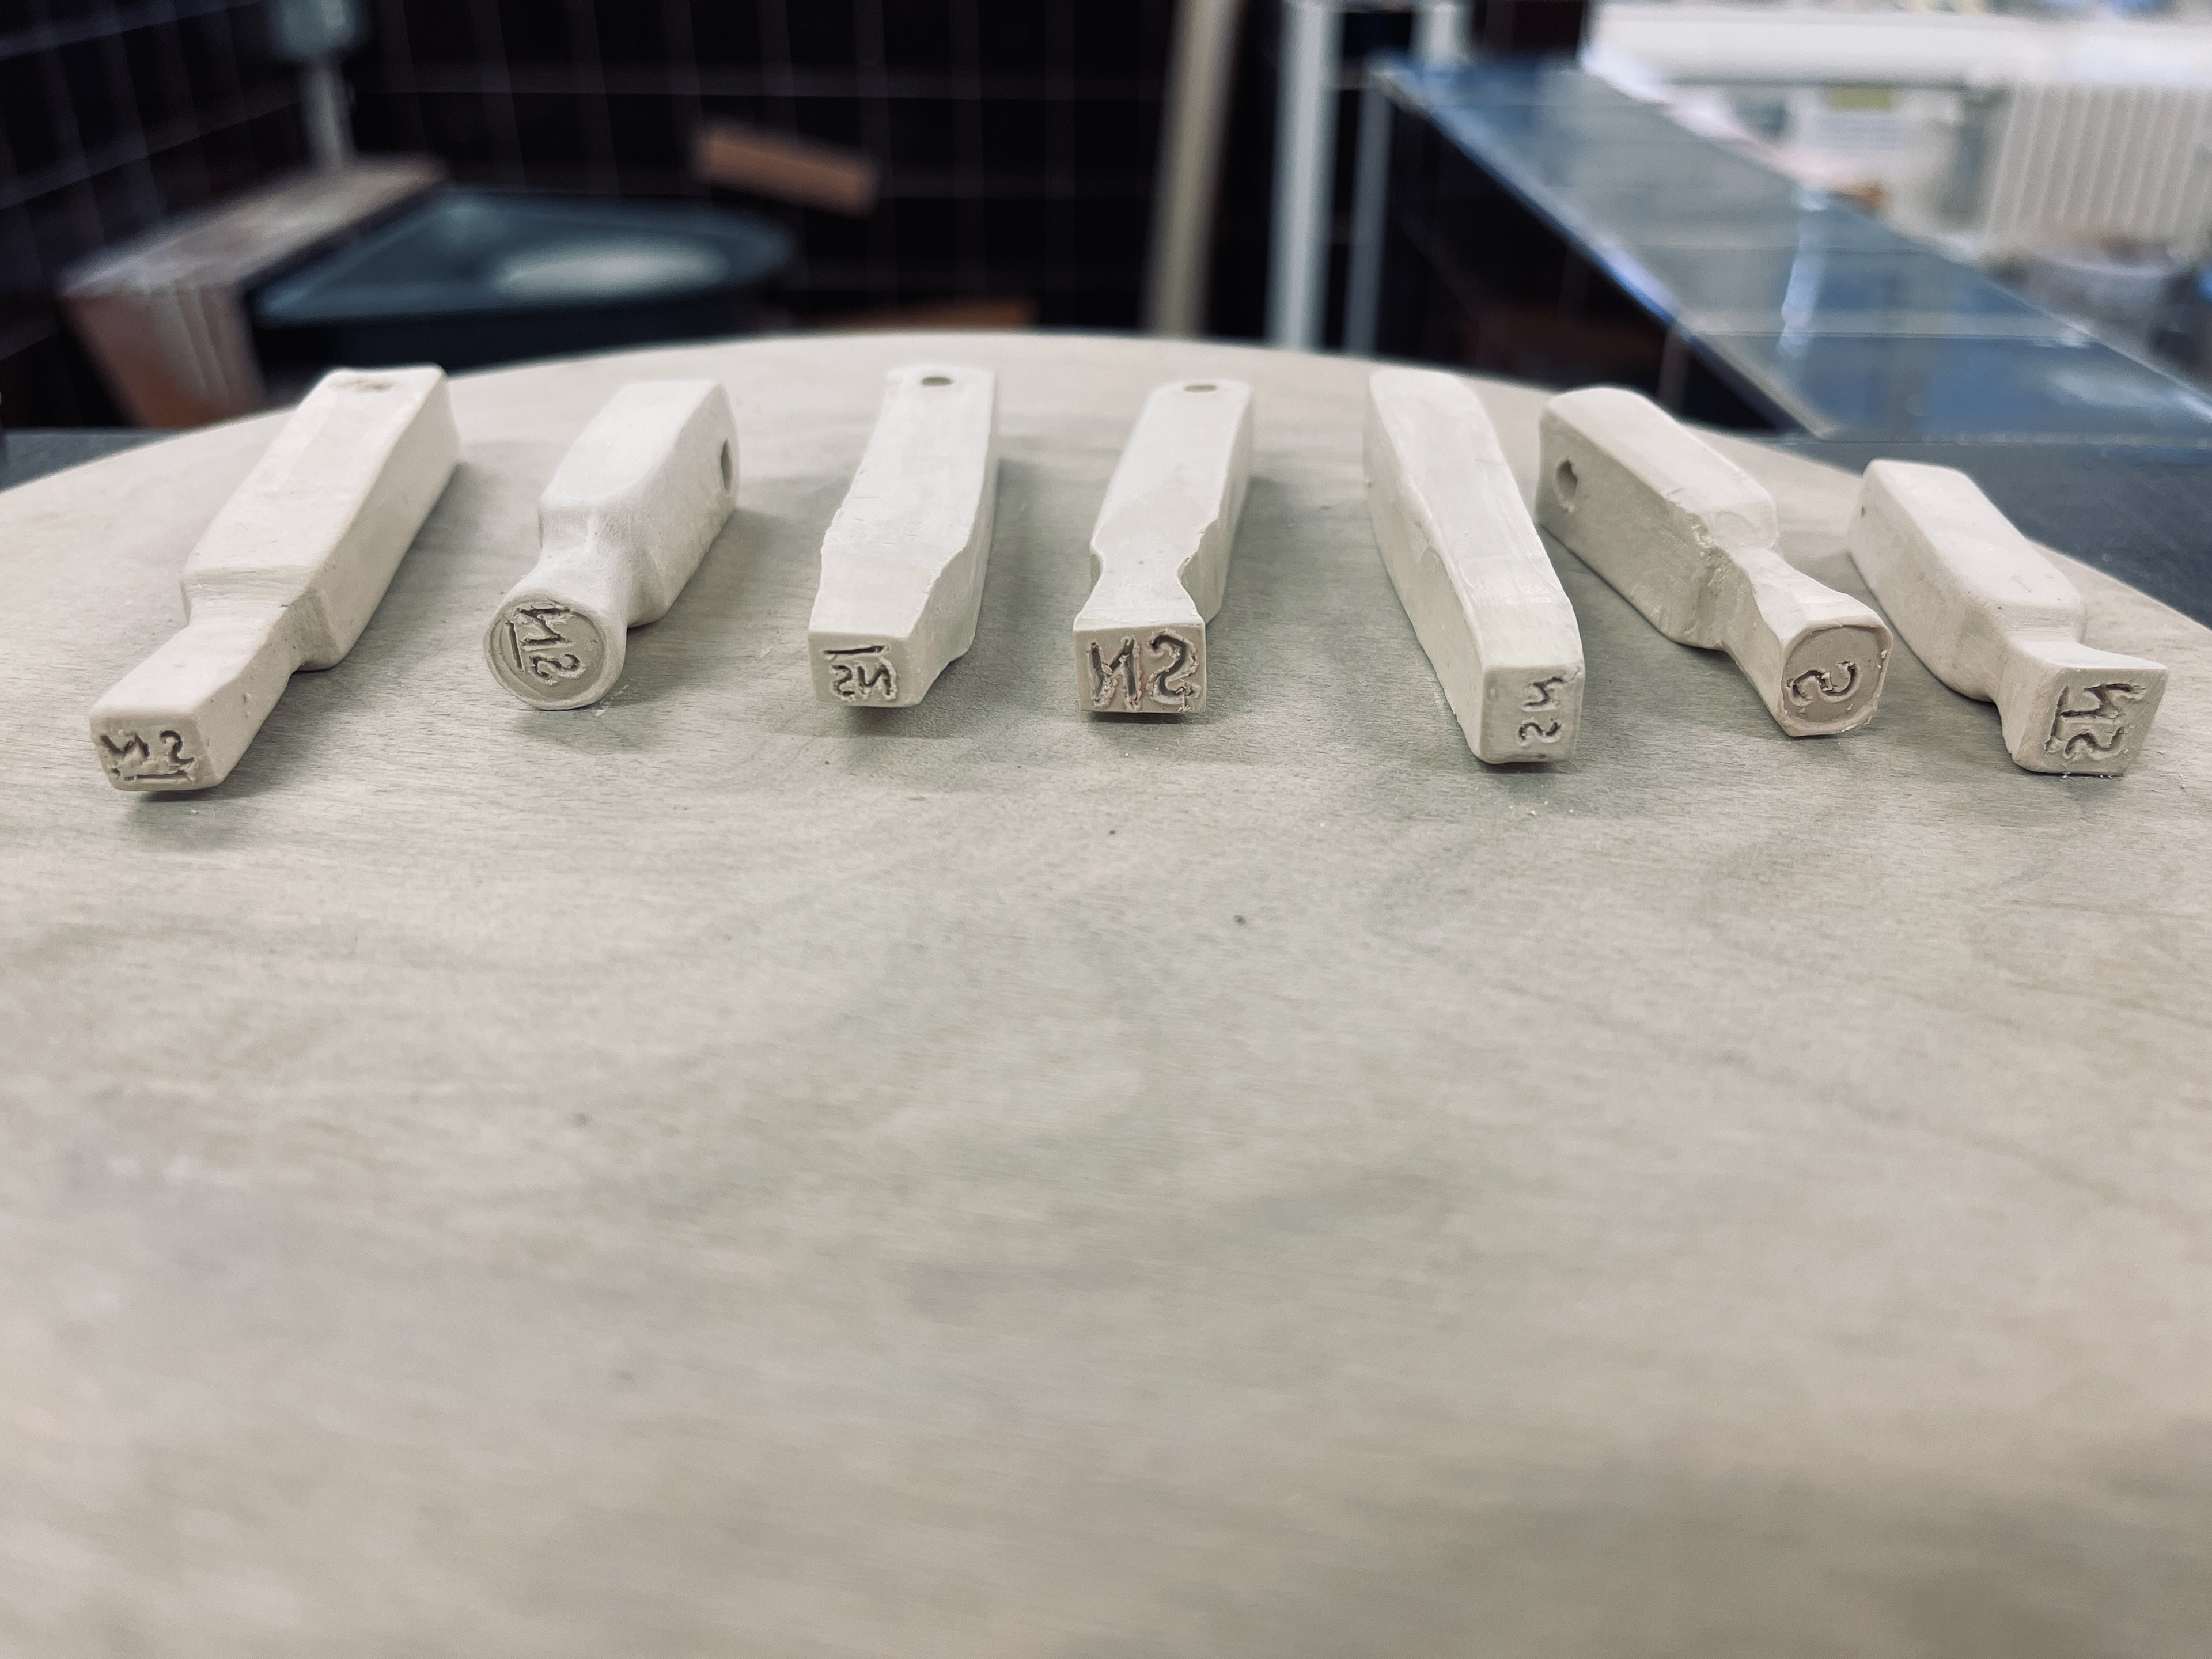
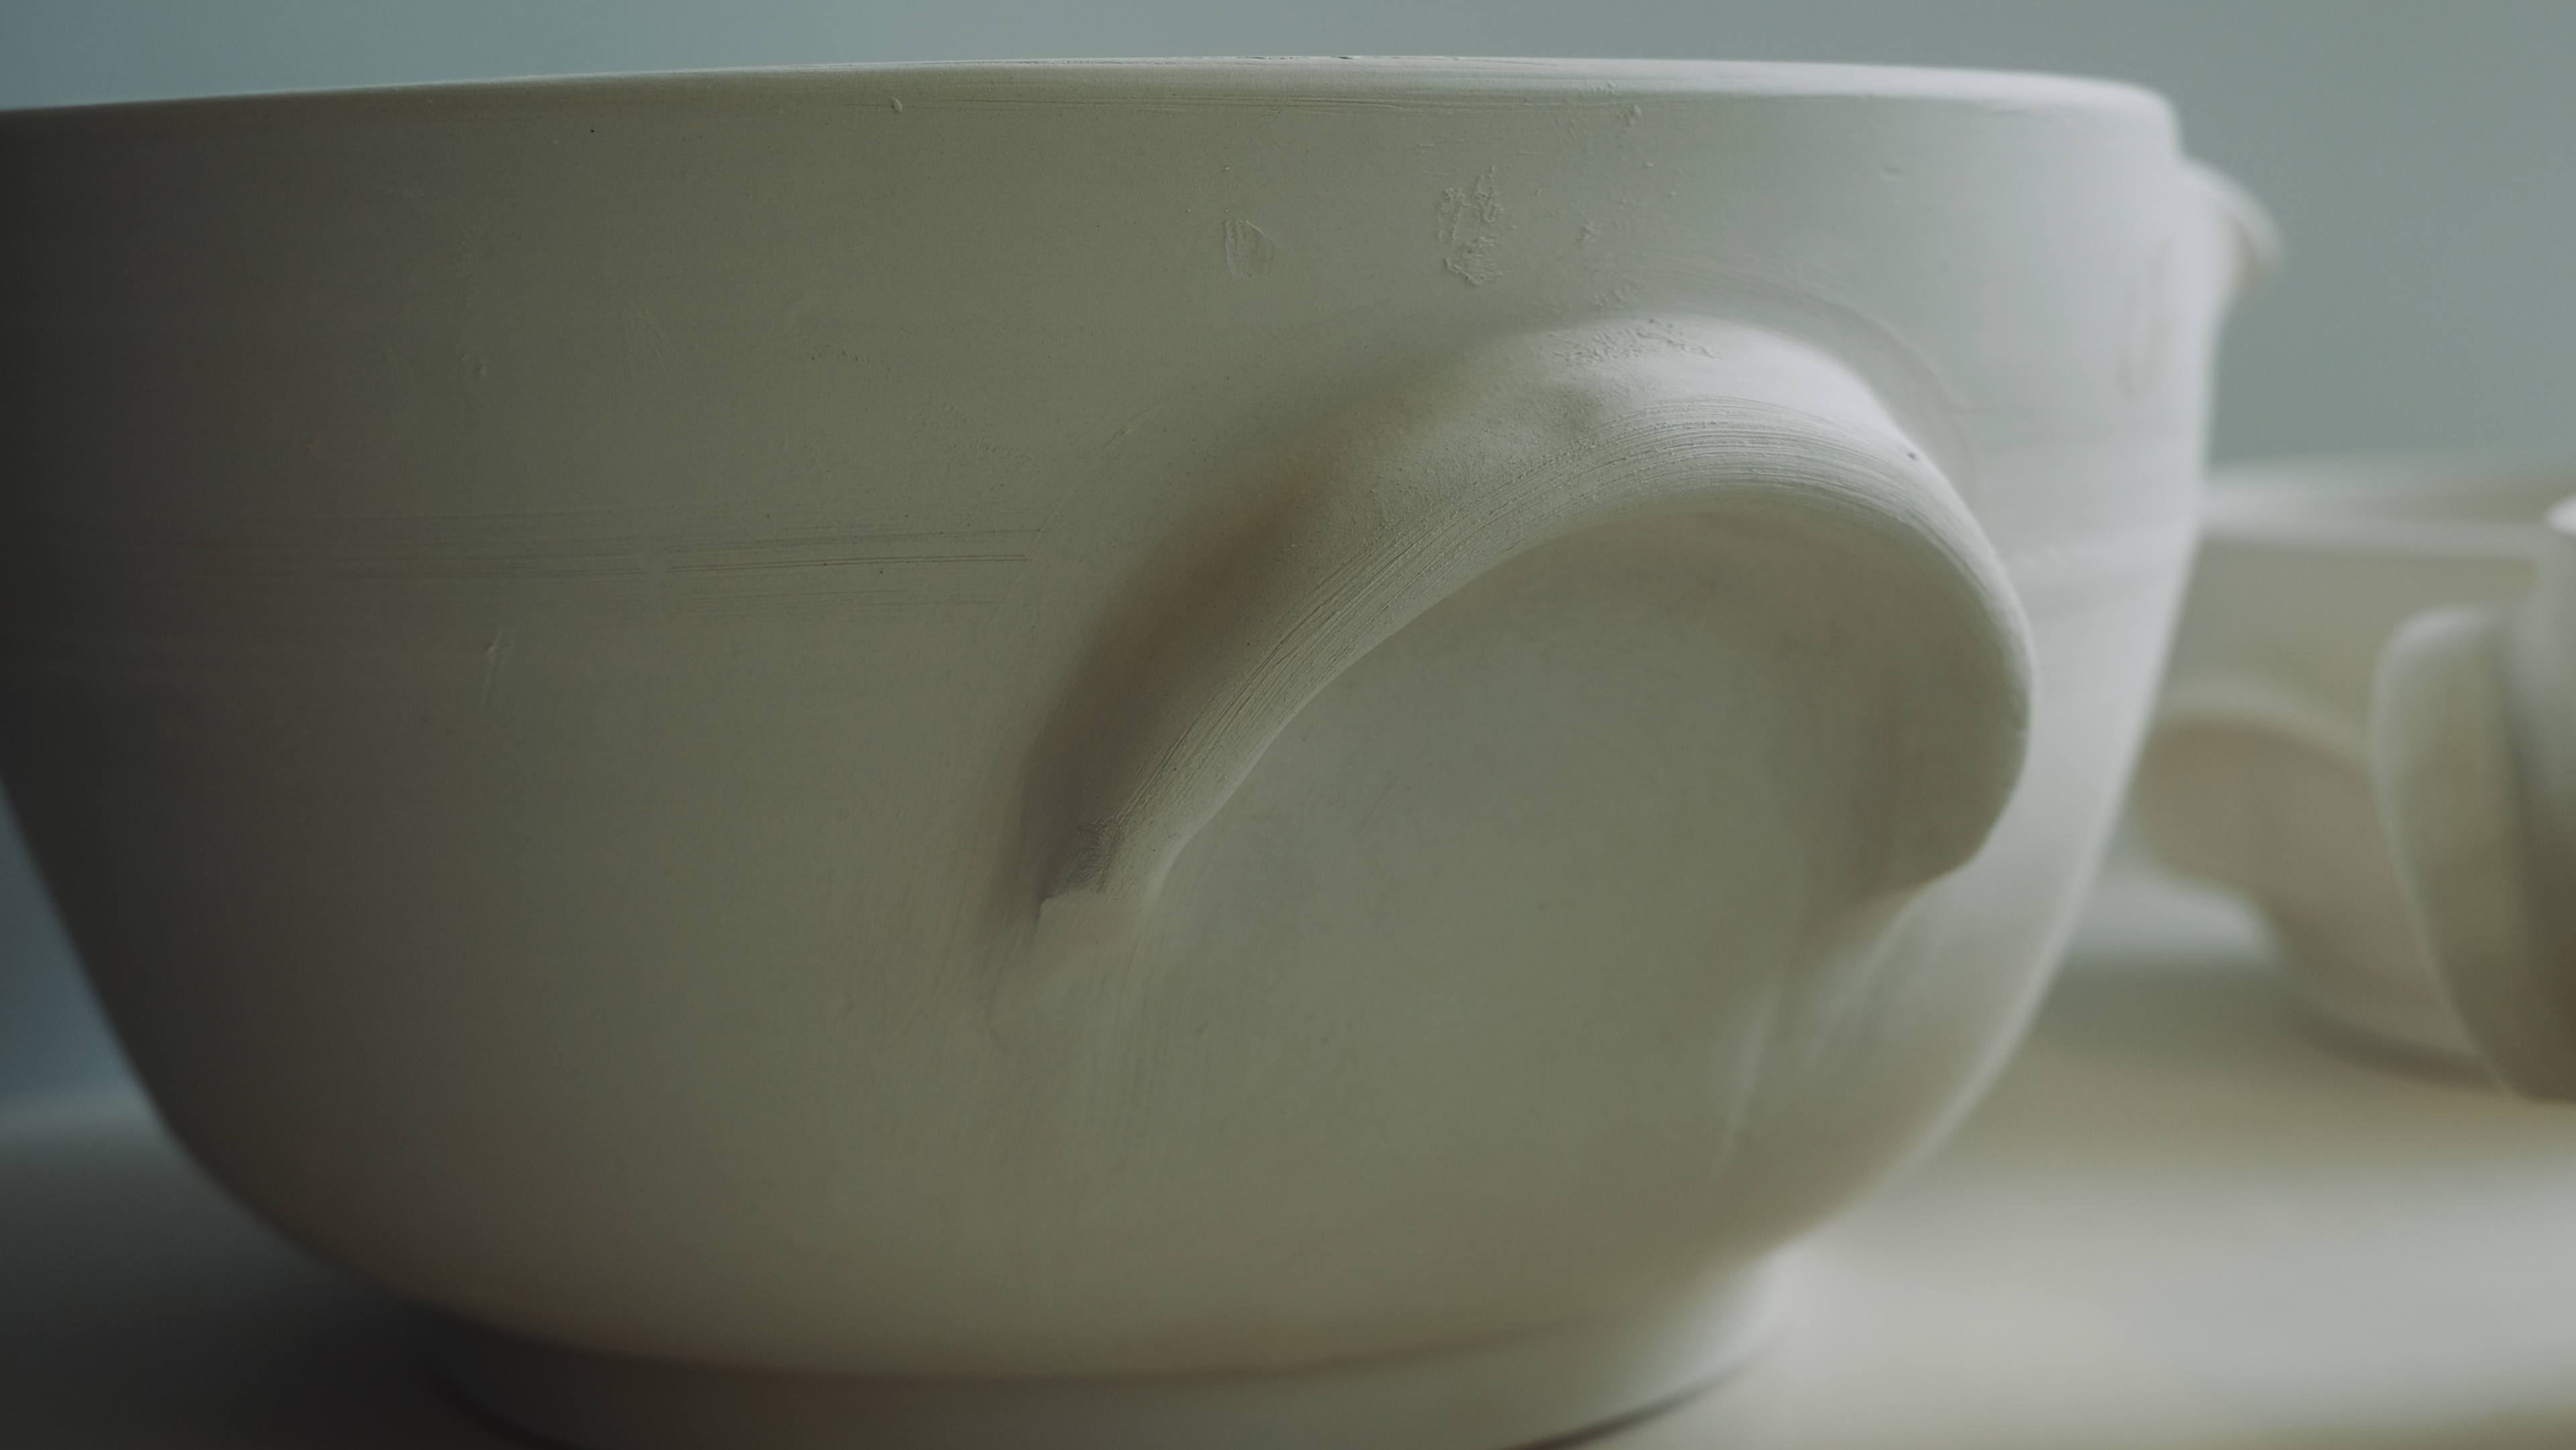
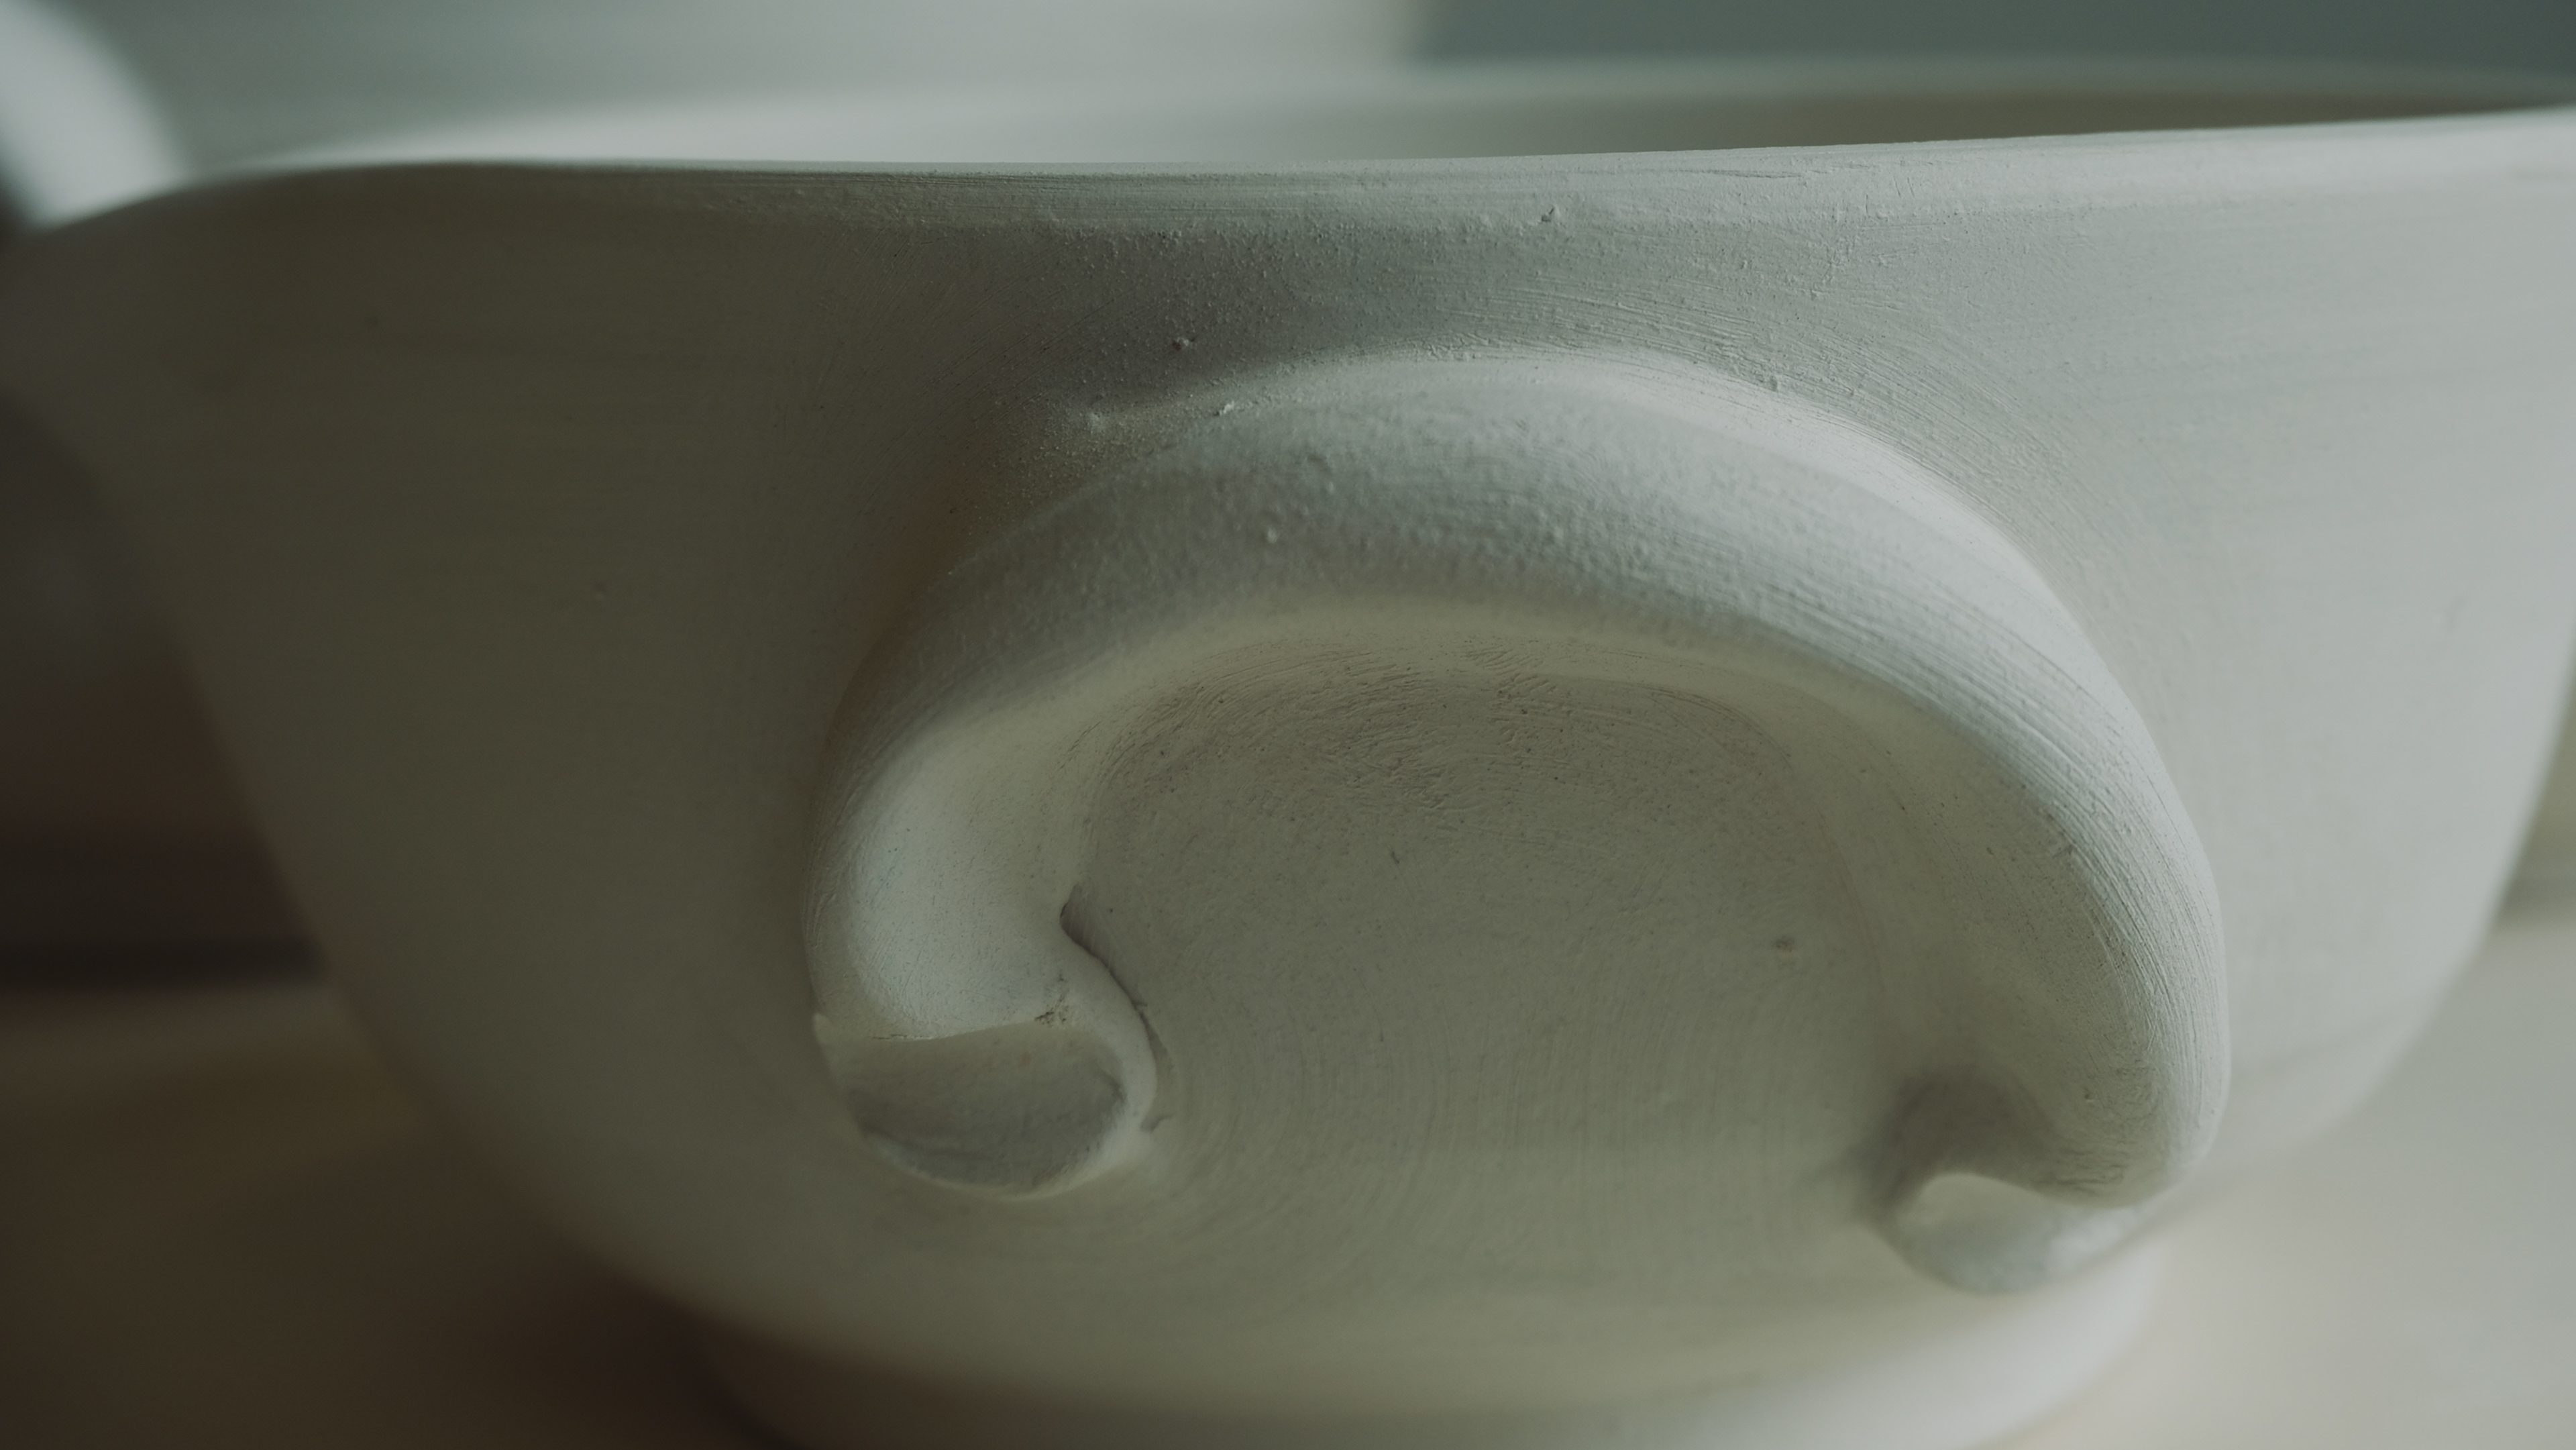
Extruding handles with different die plates for different styles. looking for something that fits the same aesthetics as the bowl. 

EXTRUDED HANDLES ARCHIVE: 
The purpose for these handles to be attached are because i am uncertain how the handles fit the bowl, weather they fit the style of handles-coiled, oval or squared. Having these single allows me to offer them to the bowl (without handles) to see if that handle works for that particular project BEFORE deciding. 
I aim to glaze them to see the flow of the glaze on these, this will also make the process of making my mind up weather i like that particular handle much easier. 
I did feel the chunkier handles were not a good fit for serving bowl. It would make is feel like it weighs a lot. similarly, a wide handle wasn't required on a large/medium bowl, it would be used a big, heavy storage vessels which hold large amounts of content and need that extra support when carrying. 
This leave me with the single, double and triple fine coils, which i feel will be a good fit, not distracting from the body but adding interest. The coil thickness is similar to the wall thickness of the bowl, this will give the entire object a seamless look. 
These handles are very clean and definitely look pleasing to the eye. The pattern of 1,2,3 on the handle adds a element of interest. The '3 coils' bowl is interesting, the lower placement i feel makes is more inviting. The set together are good look but i am still not feeling these convey the cooking vessel quality. 
FEEDBACK:
Adding the handles on the top? will be glazed along with the rim. 
Handles at the moment being placed at mid-level is interrupting the drippy effect and also functionally makes the bowl, when filled with food top heavy. NOT A COMFORTABLE EXPERIENCE1
small bowl- does it need handles? such a small vessel for sure the above handles are too big. 
Play with handle size, style, placement, glaze reaction ? 

Looking into other handle making techniques: 
Cut out handles:
This particular style was a style that I experimented with, very simple cutting out the from the form, aesthetically pleasing but it is functionally not convincing. cutting the negatives out of the actual bowl, reduces the volume of the bowl. 
Lugs as handles:
Attempt 1:
Lugs are found to be a steadier/ stronger handle, they provide even distribution of weight making the handling of the object as easier as possible. usually seen on storage jars and typically carries tradition look to it. 
Making lugs can be again explored broadly, the chosen method for the above bowls are extruded forms-coils, which are scored and slurried to attach onto the surface. 
The bowl itself was a spout inclusion, which makes a great mixing bowl. the idea behind this was to allow the user to interact with the bowls directly, no need for cutlery. 
However, is pouring your food onto ones plate, a good choice?
Since the extruded coil isn't shaped by hand this gives it a contracting look to the bowl, which holding the 'handmade touch' feel too them. The above examples are a great test for size and proportion, it is ideal to have handles that are balanced with the overall design of the bowl. otherwise, everything just looks off and out of proportion. As mentioned in feedback from Sabine Nemet. 
Left- blended into the form, giving it a more of a seamless design. 
Middle- ends have been stamped to add embellishment to the handle, this style is inspired by the metal cooking vessel. After stamping, the ends after to be smoothed because the squashed clay if left unclean will have sharp edges, which will not be great experience of interacting with and the glaze may break away from the edges. 
Right- the blend of the above two designs- curved design along with cooking vessel handle style.  
FEEDBACK from Kevin Wilson- using traditional colour clay. 
Terracotta clay- changing the clay body+ firing to 1240c 
Carving out key hole into the back of the bowl. which allows the fixing onto the wall easily. Conveniently allowing me to display the bowls onto the wall making it very inside of the bowl visible to the audience. This technique at the beginning seems to be really straightforward however, there are few downsides with this process. Firstly, carving into the base of the bowls weakens the the structure of the bowl especially when drying because some areas are drying quicker compared to the others and due to uneven shrinking rate allows cracks. Moving forward the shrinkage rate will be something i must be mindful of. 
The carved out area over time is going to collect bacteria and maintenance will be a issue in the long run. 
Terracotta clay body- inspired by the traditional serving bowls of Goa, India.  
Adding interest to the exterior surface:
Adding tactile feel to the exterior surface- adding spirals around the form i feel removes the plain element from the piece, I would like to keep the bottom section unglazed allowing the user the appreciate the earthy clay body but at the same time be amazed by the special glaze. 
however, i am encouraging myself to make these vessels unique that celebrates traditions. Traditional serving vessels are made from metal and have their own character such as the beaten effect, metallic with smooth and shiny finish. I would like to bring these through ceramics. being able to get hints of the original onto a surface completely different.  
Going back traditional method of making ceramic objects in India:
My attempt at the start of the year to throw off the hump, conducting a blind throwing to try Camilla Groth and how our senses are important but one (touch) always is first. This throwing technique at the beginning seem stressful and not efficient. The thoughts of making consistent vessels, all looking identical and what makes me worry is not knowing how much clay to centre every time, but with practice i have observed that mussel memory has a important part in the technique. To be able to make quick, uniformed pieces is to use the hand itself as a guide to measure the width, walls on the clay. The results are always going to be one-off's because thats the essence of this technique but theres a sense of familiarity and close link, they seem like their all part of the same family. 
I prefer throwing one piece, one at a time that is because i have control over the amount of clay, from working with this method for the longest it is the process that allows me to throw well- consistently.    
Black Clay- includes manganese and cobalt oxide additions.
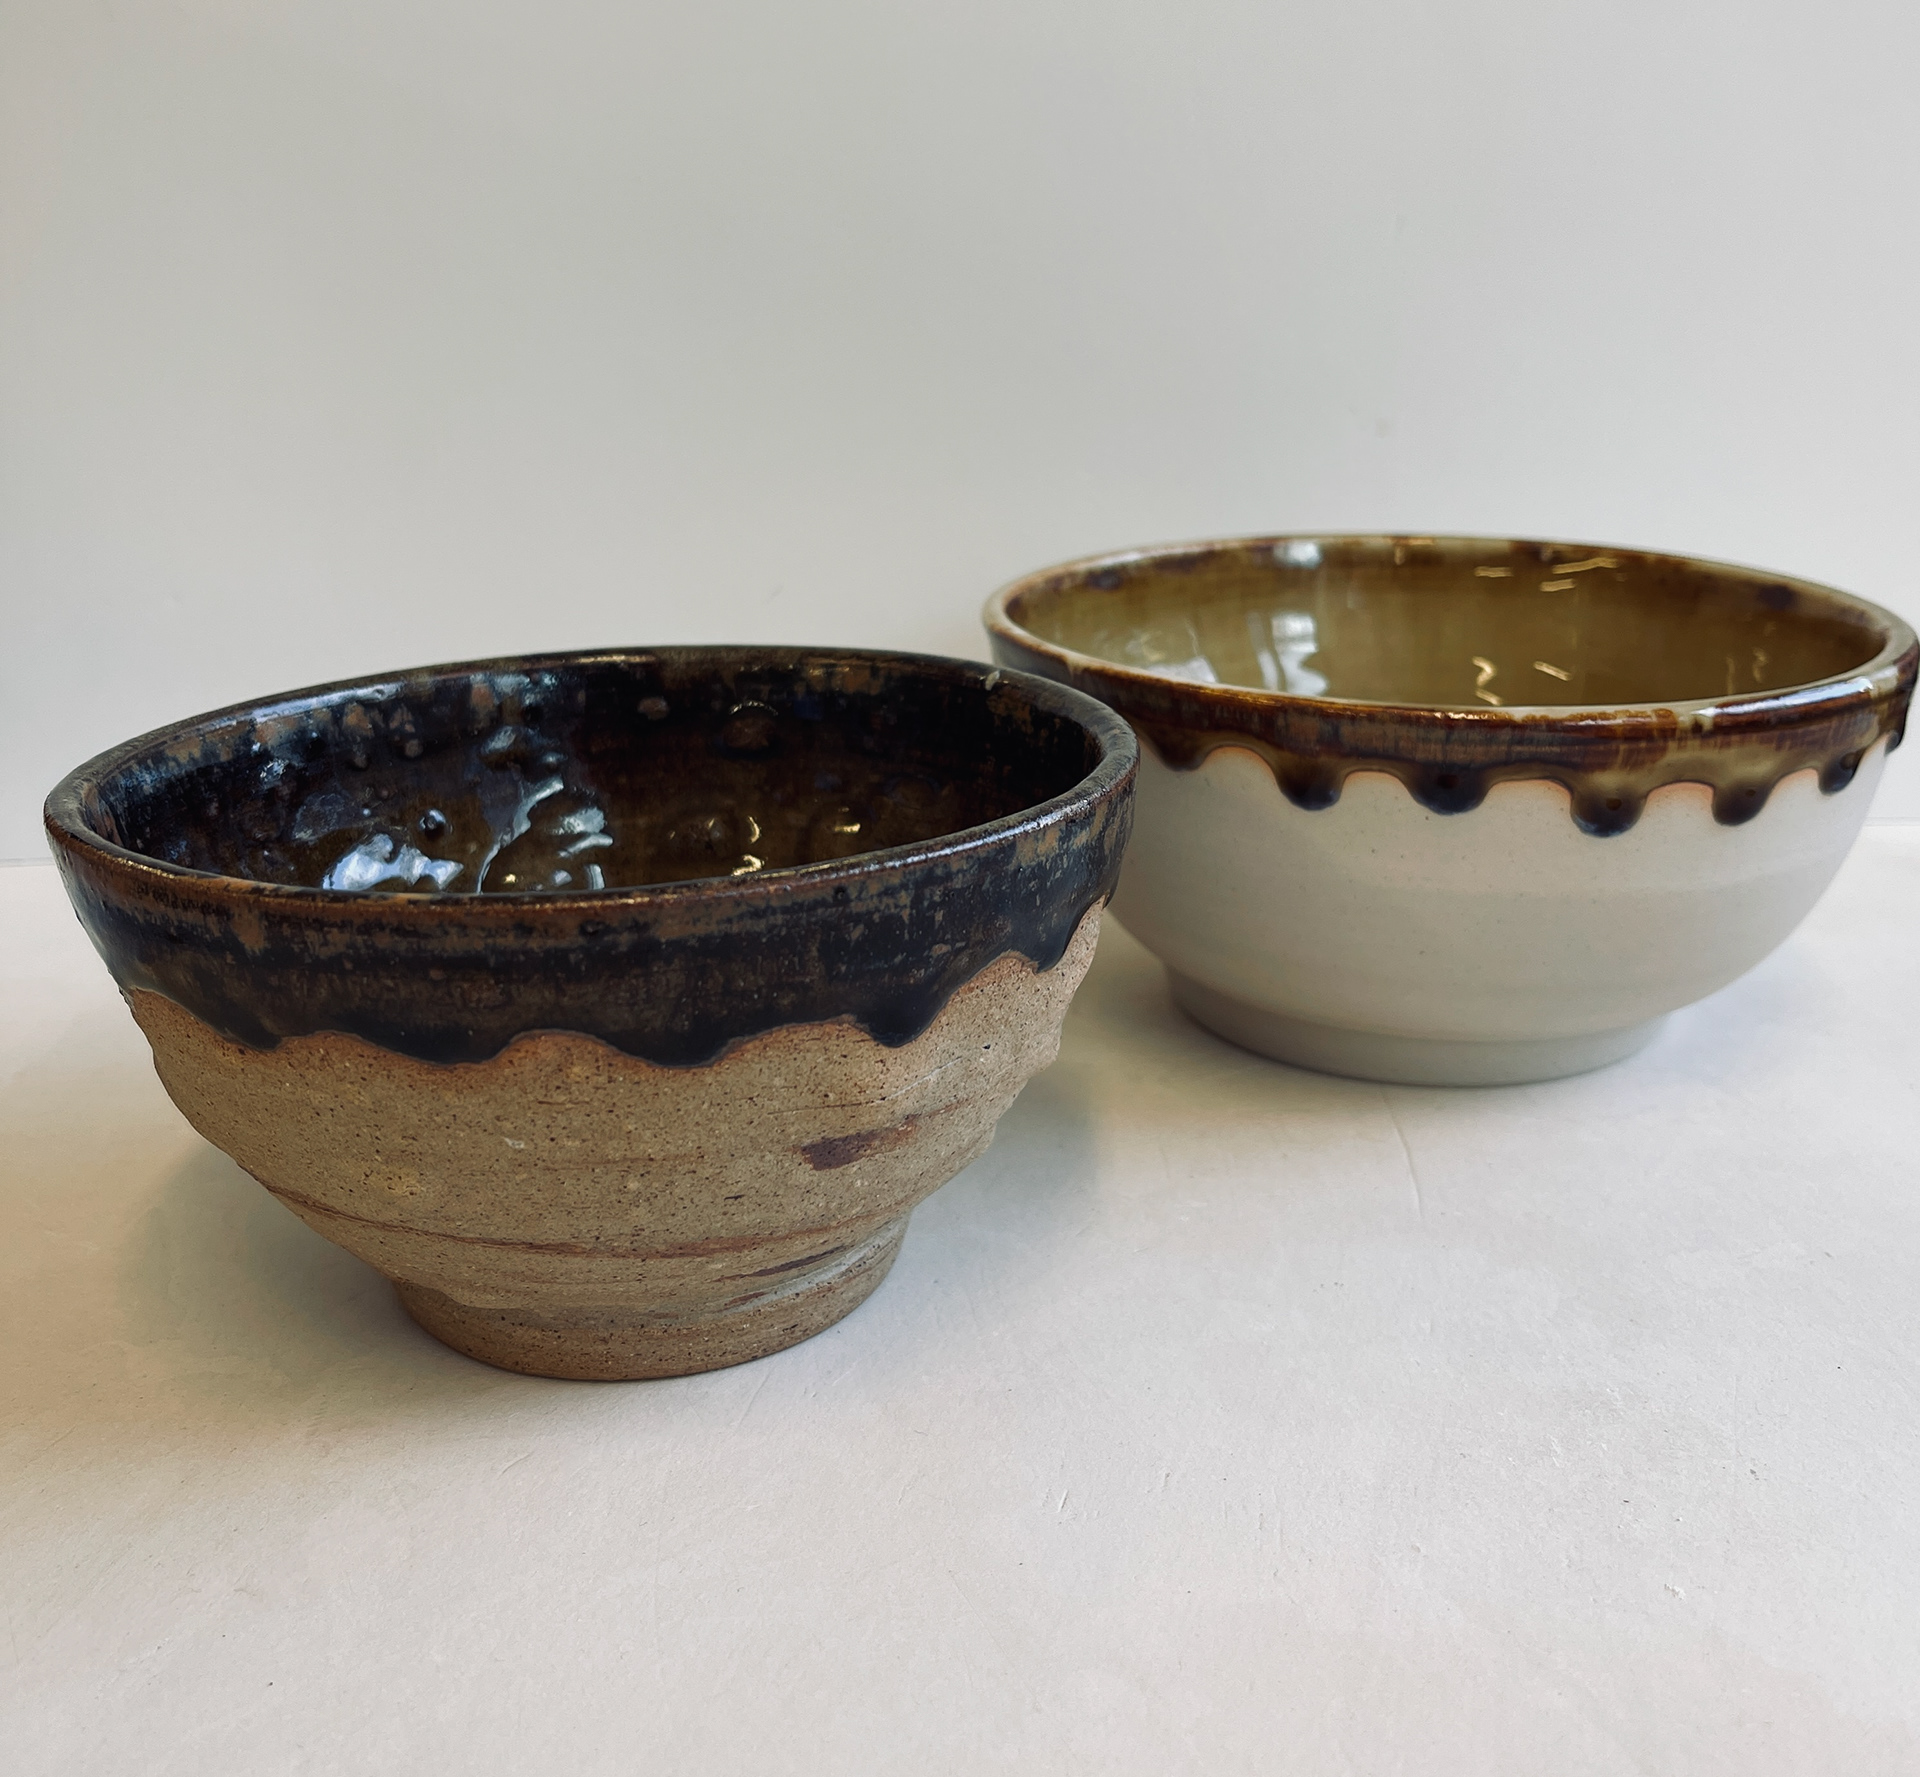
no slip, directly applied glaze.
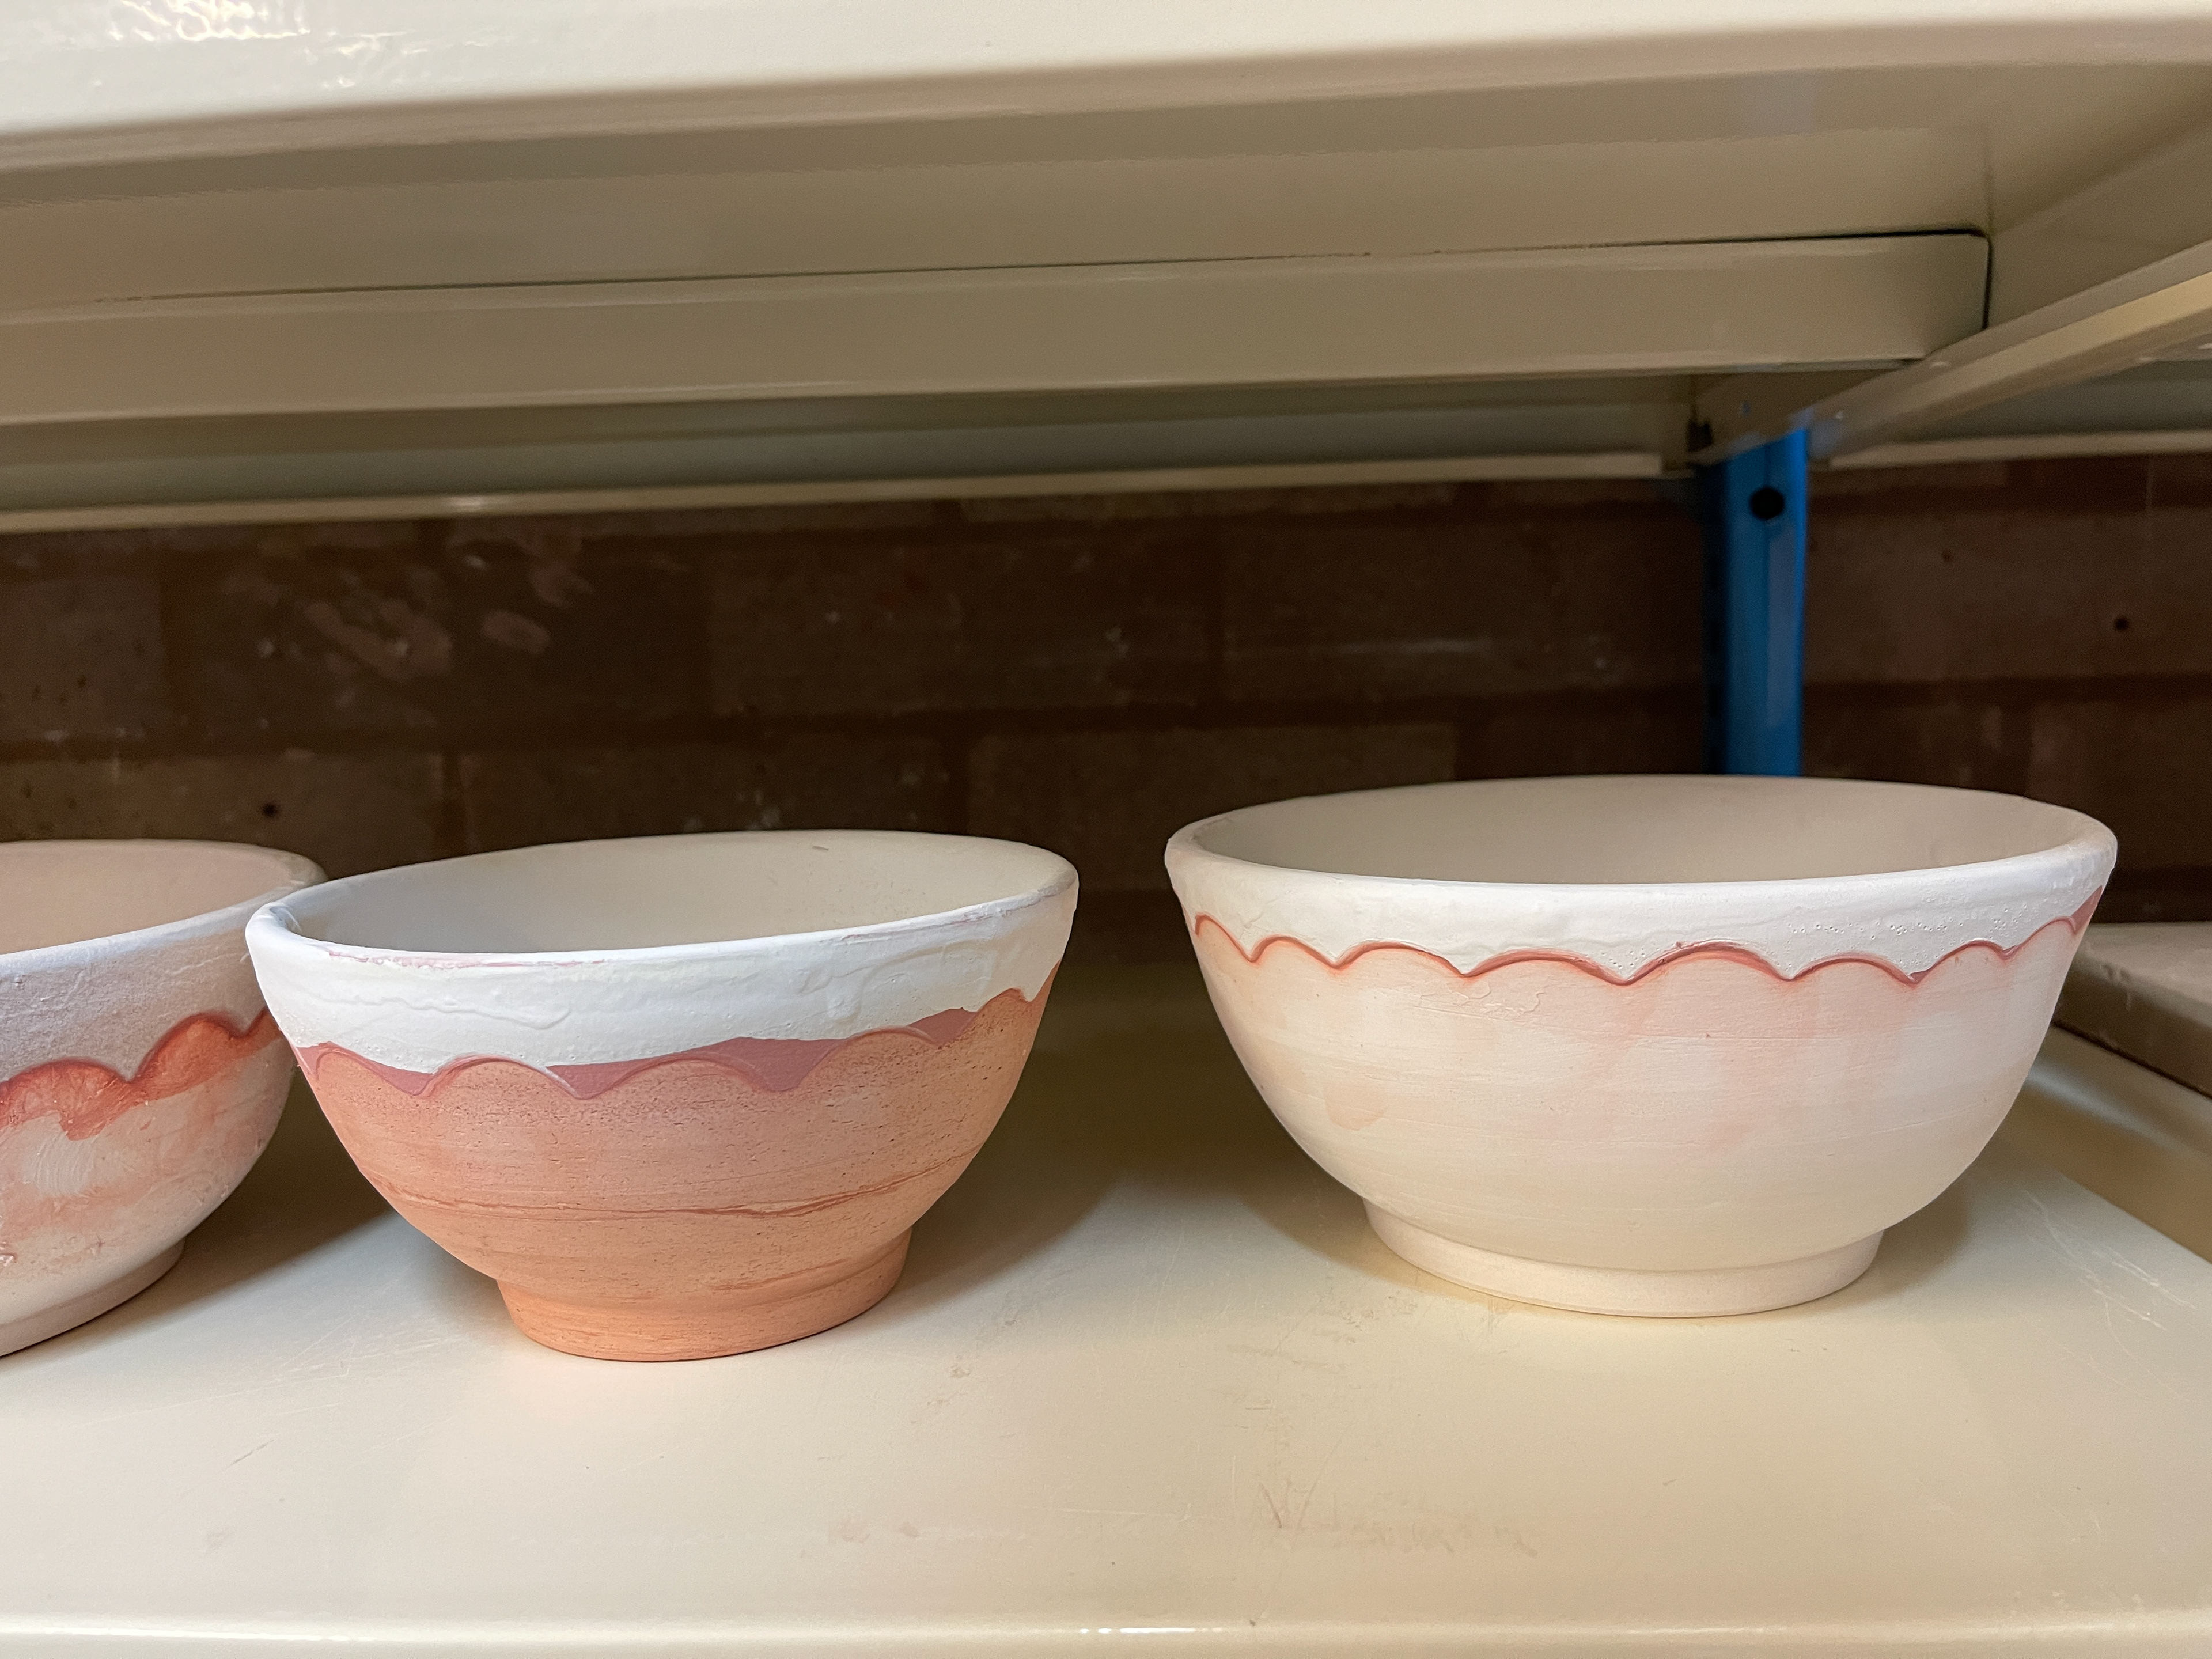
added white slip on the surface, BEFORE glaze
With the amounts of the Cobalt, magnesium and iron oxides within the clay staining, the clay body cannot with stand high temperatures. The release of carbon caused it to bloat, on this type of clay its on the higher side. 
The above samples were fired to 1240c, which is low stoneware. I feel this clay is a better suit for Earthenware temperatures. 
The Glaze response on the black clay body were not as it would appear on a non/ low iron clay body(ivs or alm), the applied glaze is the same- white/pink speck from the 'Chaiwares' project. The surface produced on that clay body was a glossy translucent surface with the rutile addition creating white/pink specks. Whereas, the surface quality on these pieces are not the same,  the left two images are an example of how the glaze reacted on a none-slipped body- the cobalt from the clay body seems to have transferred into the glaze. The quality of the surface is a Satin/matt. Really enjoying the dark brown colours across the breaking point (rim). 
The right two images are of a slip applied bowl, the idea was that adding slip onto the surface will stop the oxide transfer from the body into glaze. Which was a successful attempt, not hints of blue, on the inside of the bowl but some dotted on the rim. From this test i have understood, adding slip did conceal the clay body, but a thick layer is require to make it affective. 
Other oxides addition to clay-blending:
The use of oxides into clay was to make the contrasting colours of clay and glaze softer. the glazes are rich and vibrant against the white clay body the transition feel distant. It feels like the clay has to be a little less pale for the glaze and clay to blend together. 
Adding high iron oxides into clay, to create a marbled effect similar to the almington clay. Visible, from the above test even just adding 2% of black and red iron to the clay(first image- middle and left sample), created a huge difference but this also has a impact of the surface quality of the glazed surface. The colour of the glaze seem to have hints of dark hues. 
Adding oxides to the clay also created bubbly surface( Albany oxide- first image, right sample.), probably needs to be fired lower, like conducted in previous test on almington.  
UX exhibtion- mock up 
Feedback: 
shelves are not the best way to demonstrate your vessels, they don't speak for the functional objects i have made but rather shows more of a museum curated style. 
If you intend your objects to be everyday vessels for everyday use, display them in a way that allows the audience to invasion them as though it was displayed in their own home (how it would sit on the table)   
Video= dining with these objects, food being served. family dining experience. 
Lazy susan Table (rotating table top), allowing the user to interact and build connections with the curation. I found this suggestions quite interesting since it reminisces the cooking style plus having multiple bowls dispayed over a round table top would be a direct reference to how Thali is served but in this case on na large scale for a family rather then one.   
DECISIONS:
- medium sized bowls plus, small ones to make the reference between thali platter. Mix of handles and no handles.  
my previous set felt like they could have been lightweight to make it easier to handle after adding food into the vessel. carrying this into this project- light objects.   
-introducing metal characteristics from the cooking vessels. 
- surfaces to represent spices and their texture and colour. 
Using Red Iron glaze Base-further experiment:
Since the colour and textural effect on this particular glaze is very distinctive, i conducted a colour response test. using only the base and instead of red iron, i used variety of oxide (high in iron since thats hight content makes it effective) 
colours used: generally this glaze is under a dry/matt opaque glaze. which is what gives it a contracting and mottled effect. Glaze tested on almington and ivorystone, on its own and overlapped with opaque white. 
Ilmenite
black iron
chromium
Rutile  

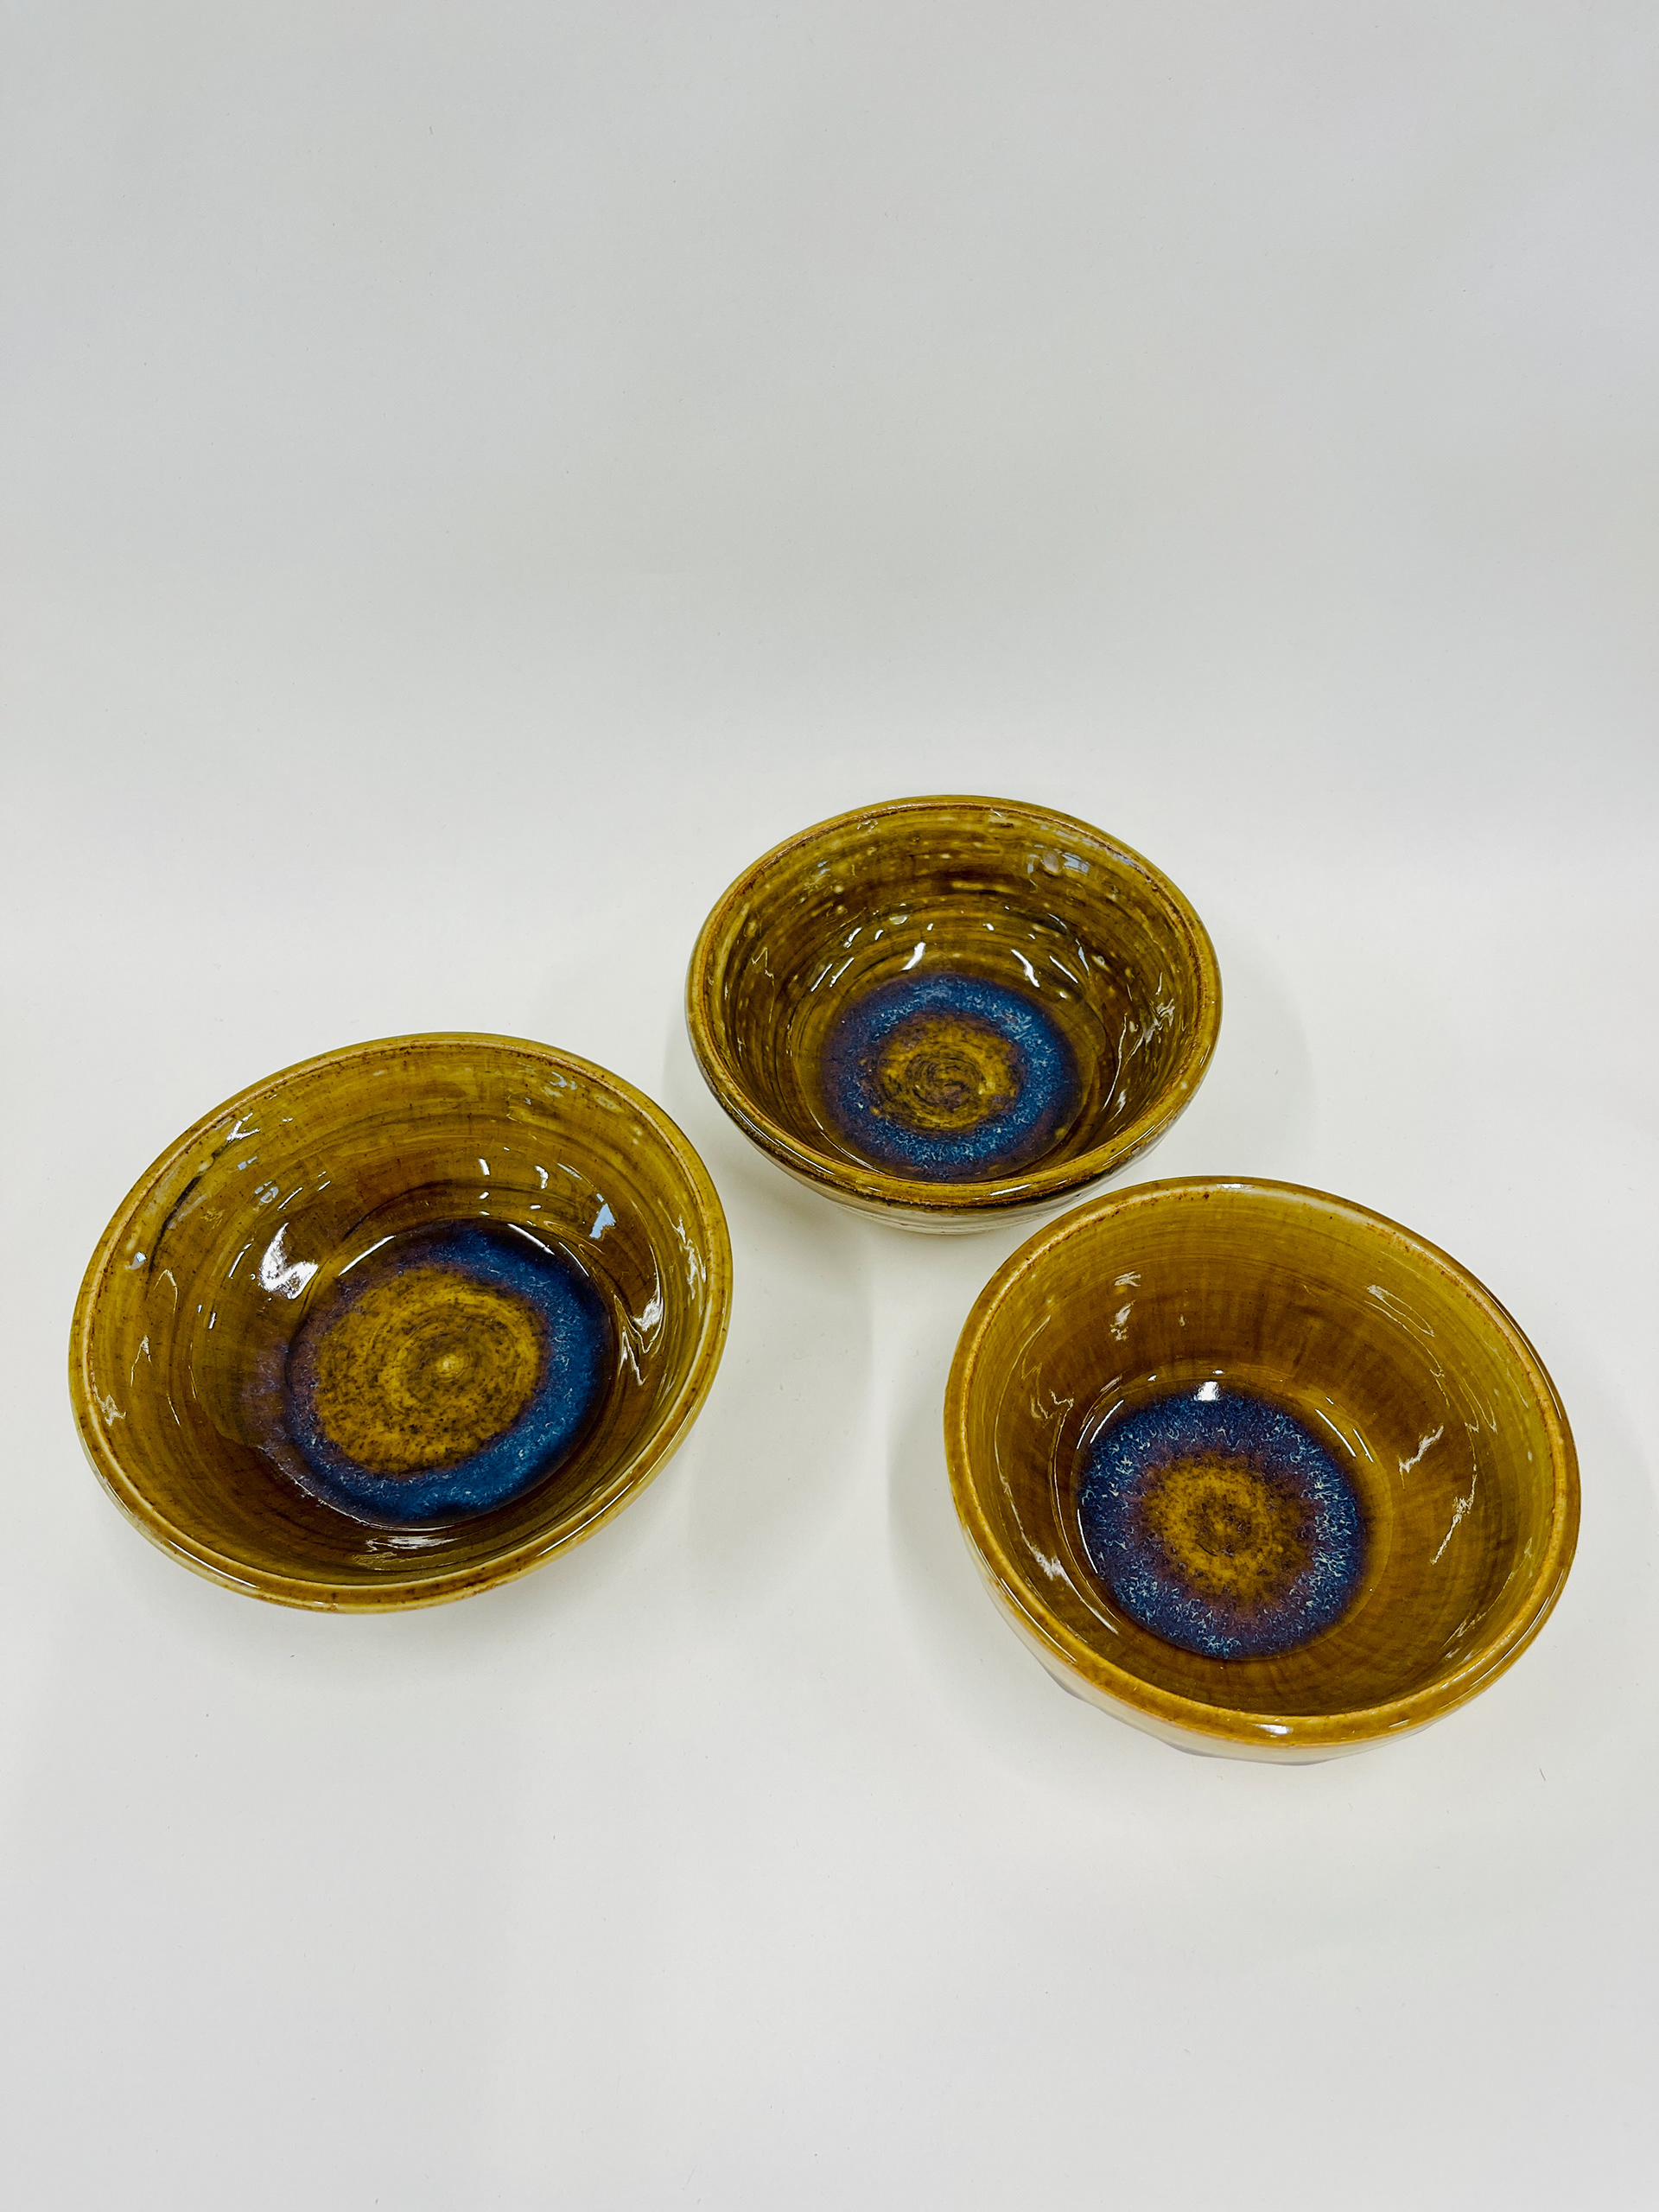
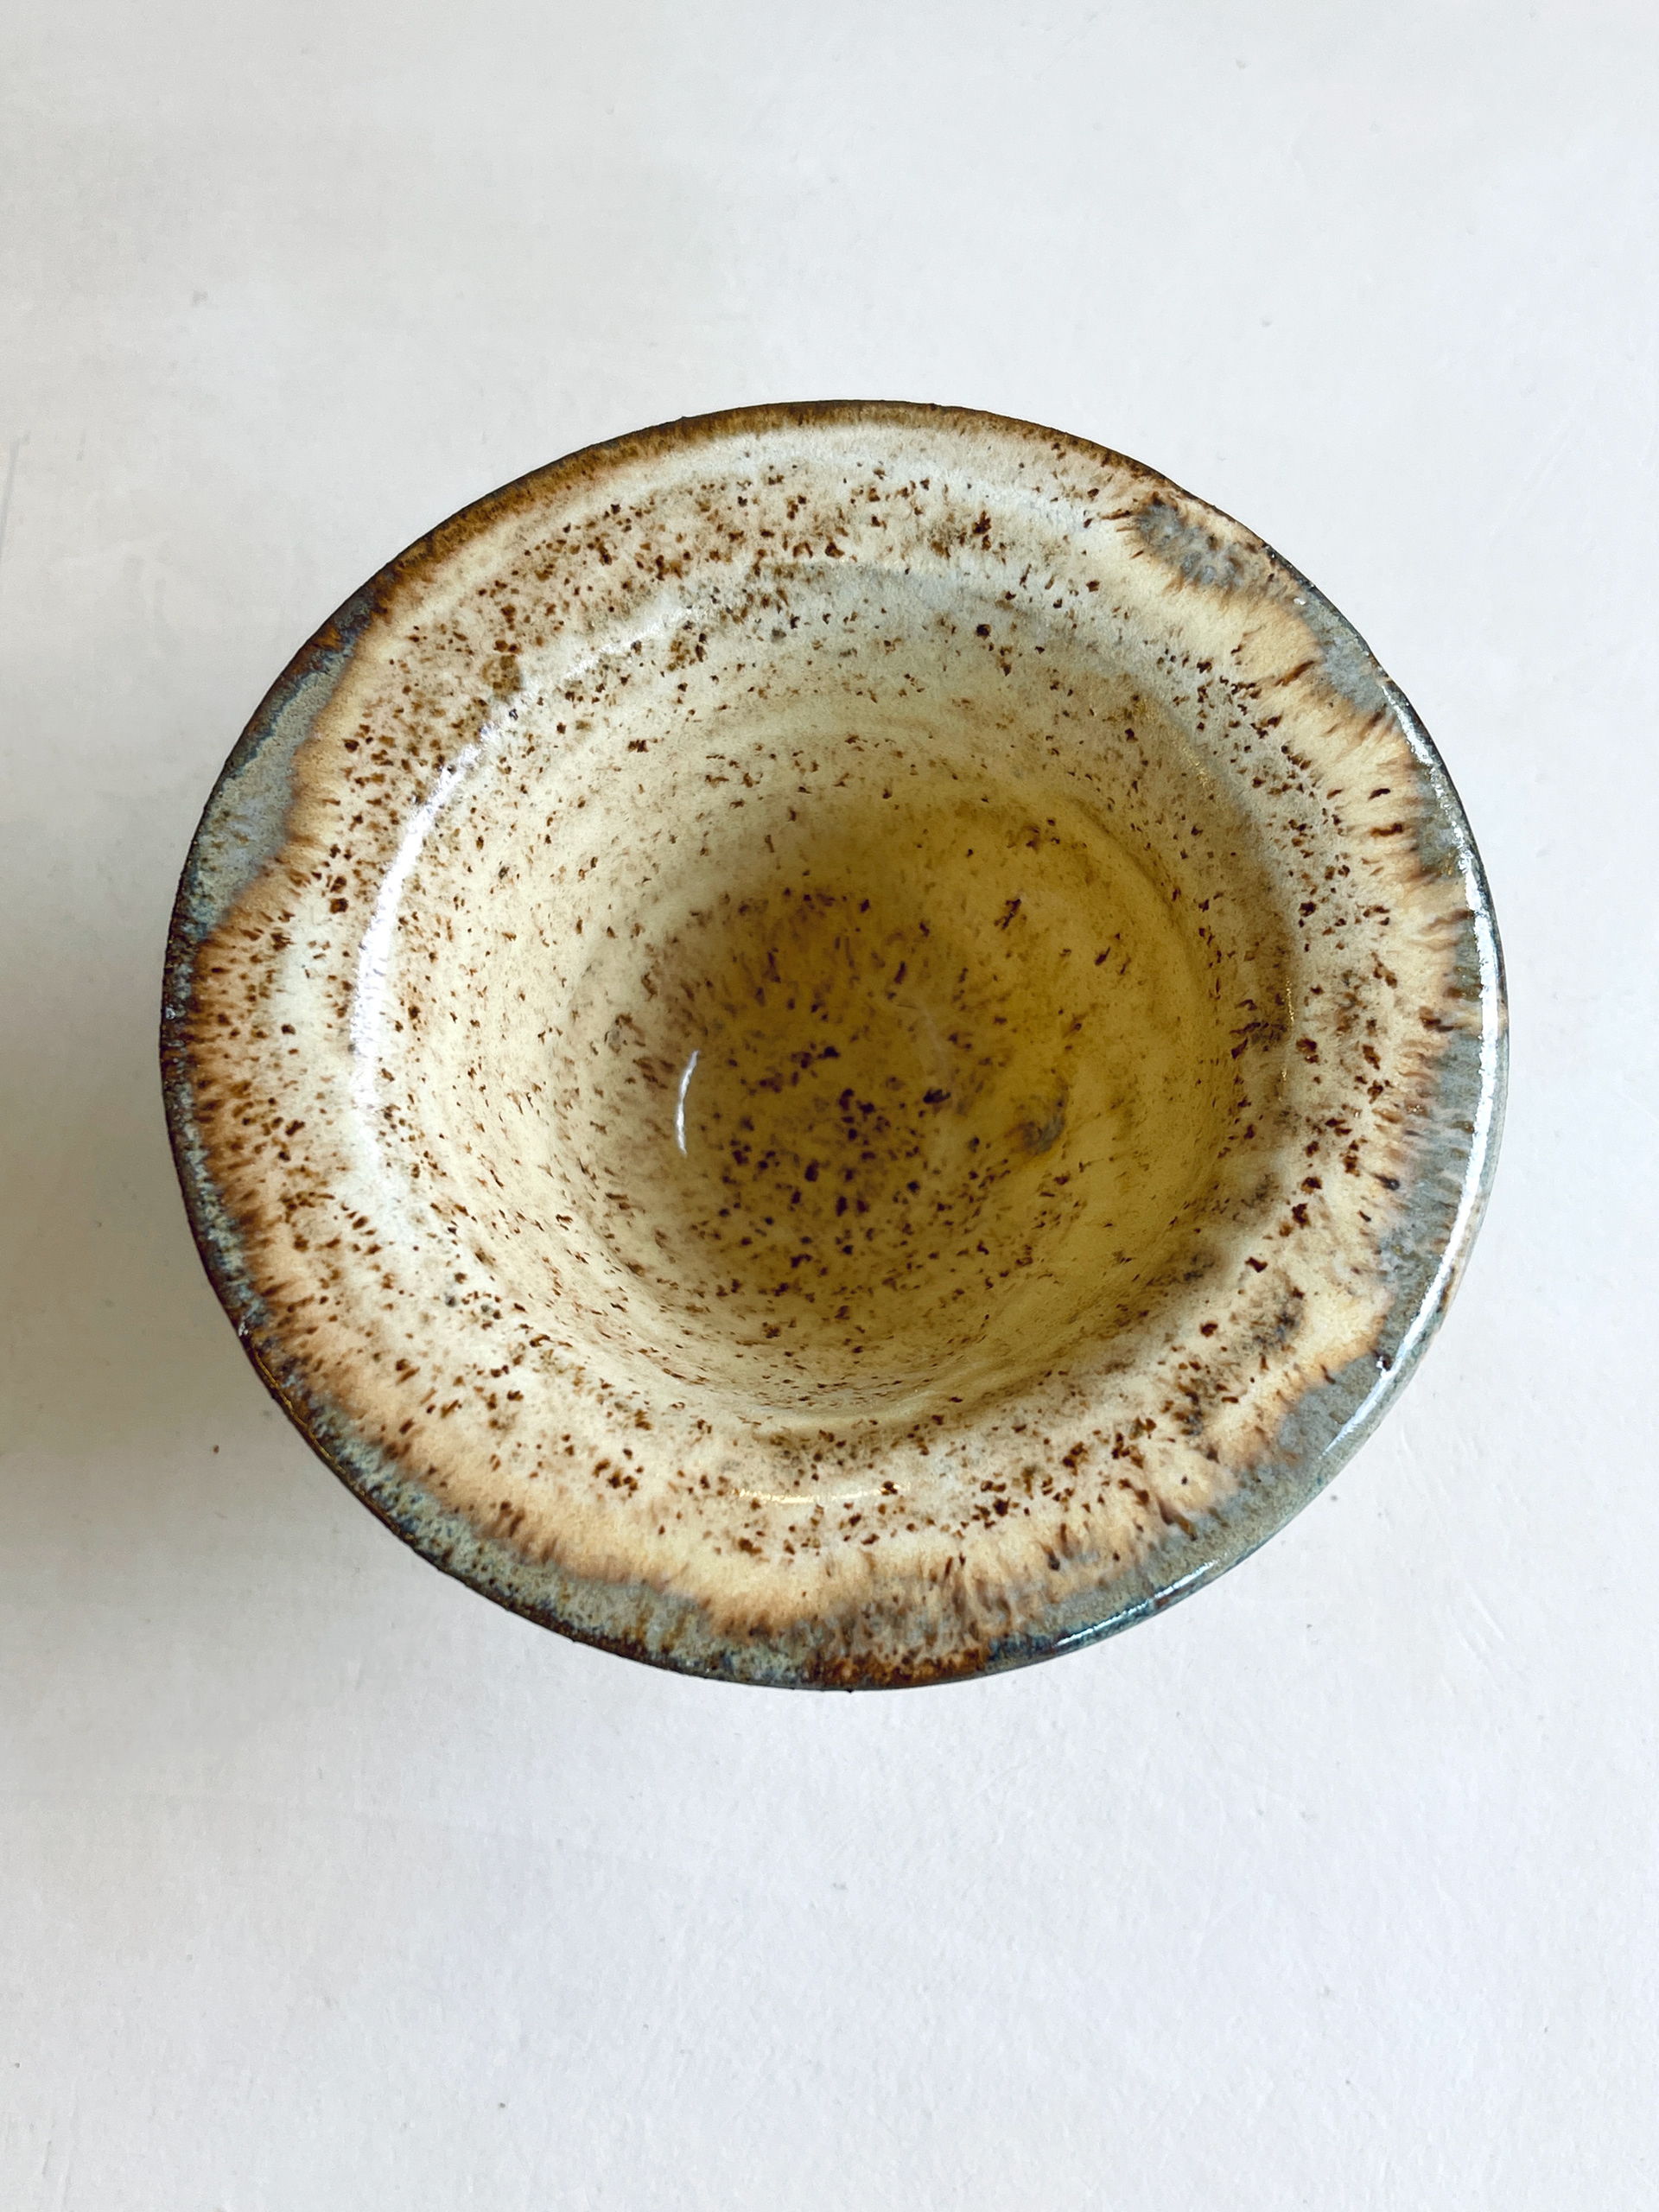
Rutile oxide added to the Oil spot glaze base +  cornish stone(8% tin) on the top- the yellow outcome is a perfect summary of just sprinkles cinnamon over the top.   

Without any opaque glaze over the top- really like the grey/yellow pale specks appearing on the grey background adds much more interest to the surface. 

The front row samples are overlapped with white, these particular ones are stronger colour response. The glaze on its own is interesting the black iron is very strong red making it very bold and eye-catching compared to the red iron. when applied a white it goes dark red, the spotted texture is lost/hidden and produces a still surface. Furthermore, the ilmenite is the second best in terms of surface texture. brown and white reminds me of the masalas when added to food. Rutile produced a beautiful yellow which perfectly fit with the curries and sprinkled masalas. 
Overall, I feel this test was extremely successful and useful. 
GLAZING HANDLE ATTACHED BOWLS:
These bowls were a mock test on the application of glaze, the idea was to see if i could glaze the handles along with the drippy glaze effect. I has three ideas in mind, including the handle as part of the drip. So continuing the marks half way on the handle but is doesn't have a clean results, also with the red coloured bowl because of two glazes being applied the cleaning behind handles after spraying was tricky. 
Secondly, the entire bowl and handles being glazed with a attempt on adding drip marks where the handle ends. I like this outcome, it has clean complete look. the glaze application on this bowl was sprayed, producing a light, even coat of glaze, moving forward i need to stick to dipping the exterior for thick coating thus creating a drippy effect.  
Finally, the third bowl I was playing with the literal drip marks. So looking at the glazes applied on the rim and separately on the handles. This would make it look like the glaze has flowed from the rim onto the handles. 
 Also, the purpose of this experiment was to decide if the the handles were on the right level (mid point), which i think its not, the mid point placement makes it difficult to grip it, especially from a dining setting. The handles are going to be moved to the rim/ closer to the rim.
Individual handles:

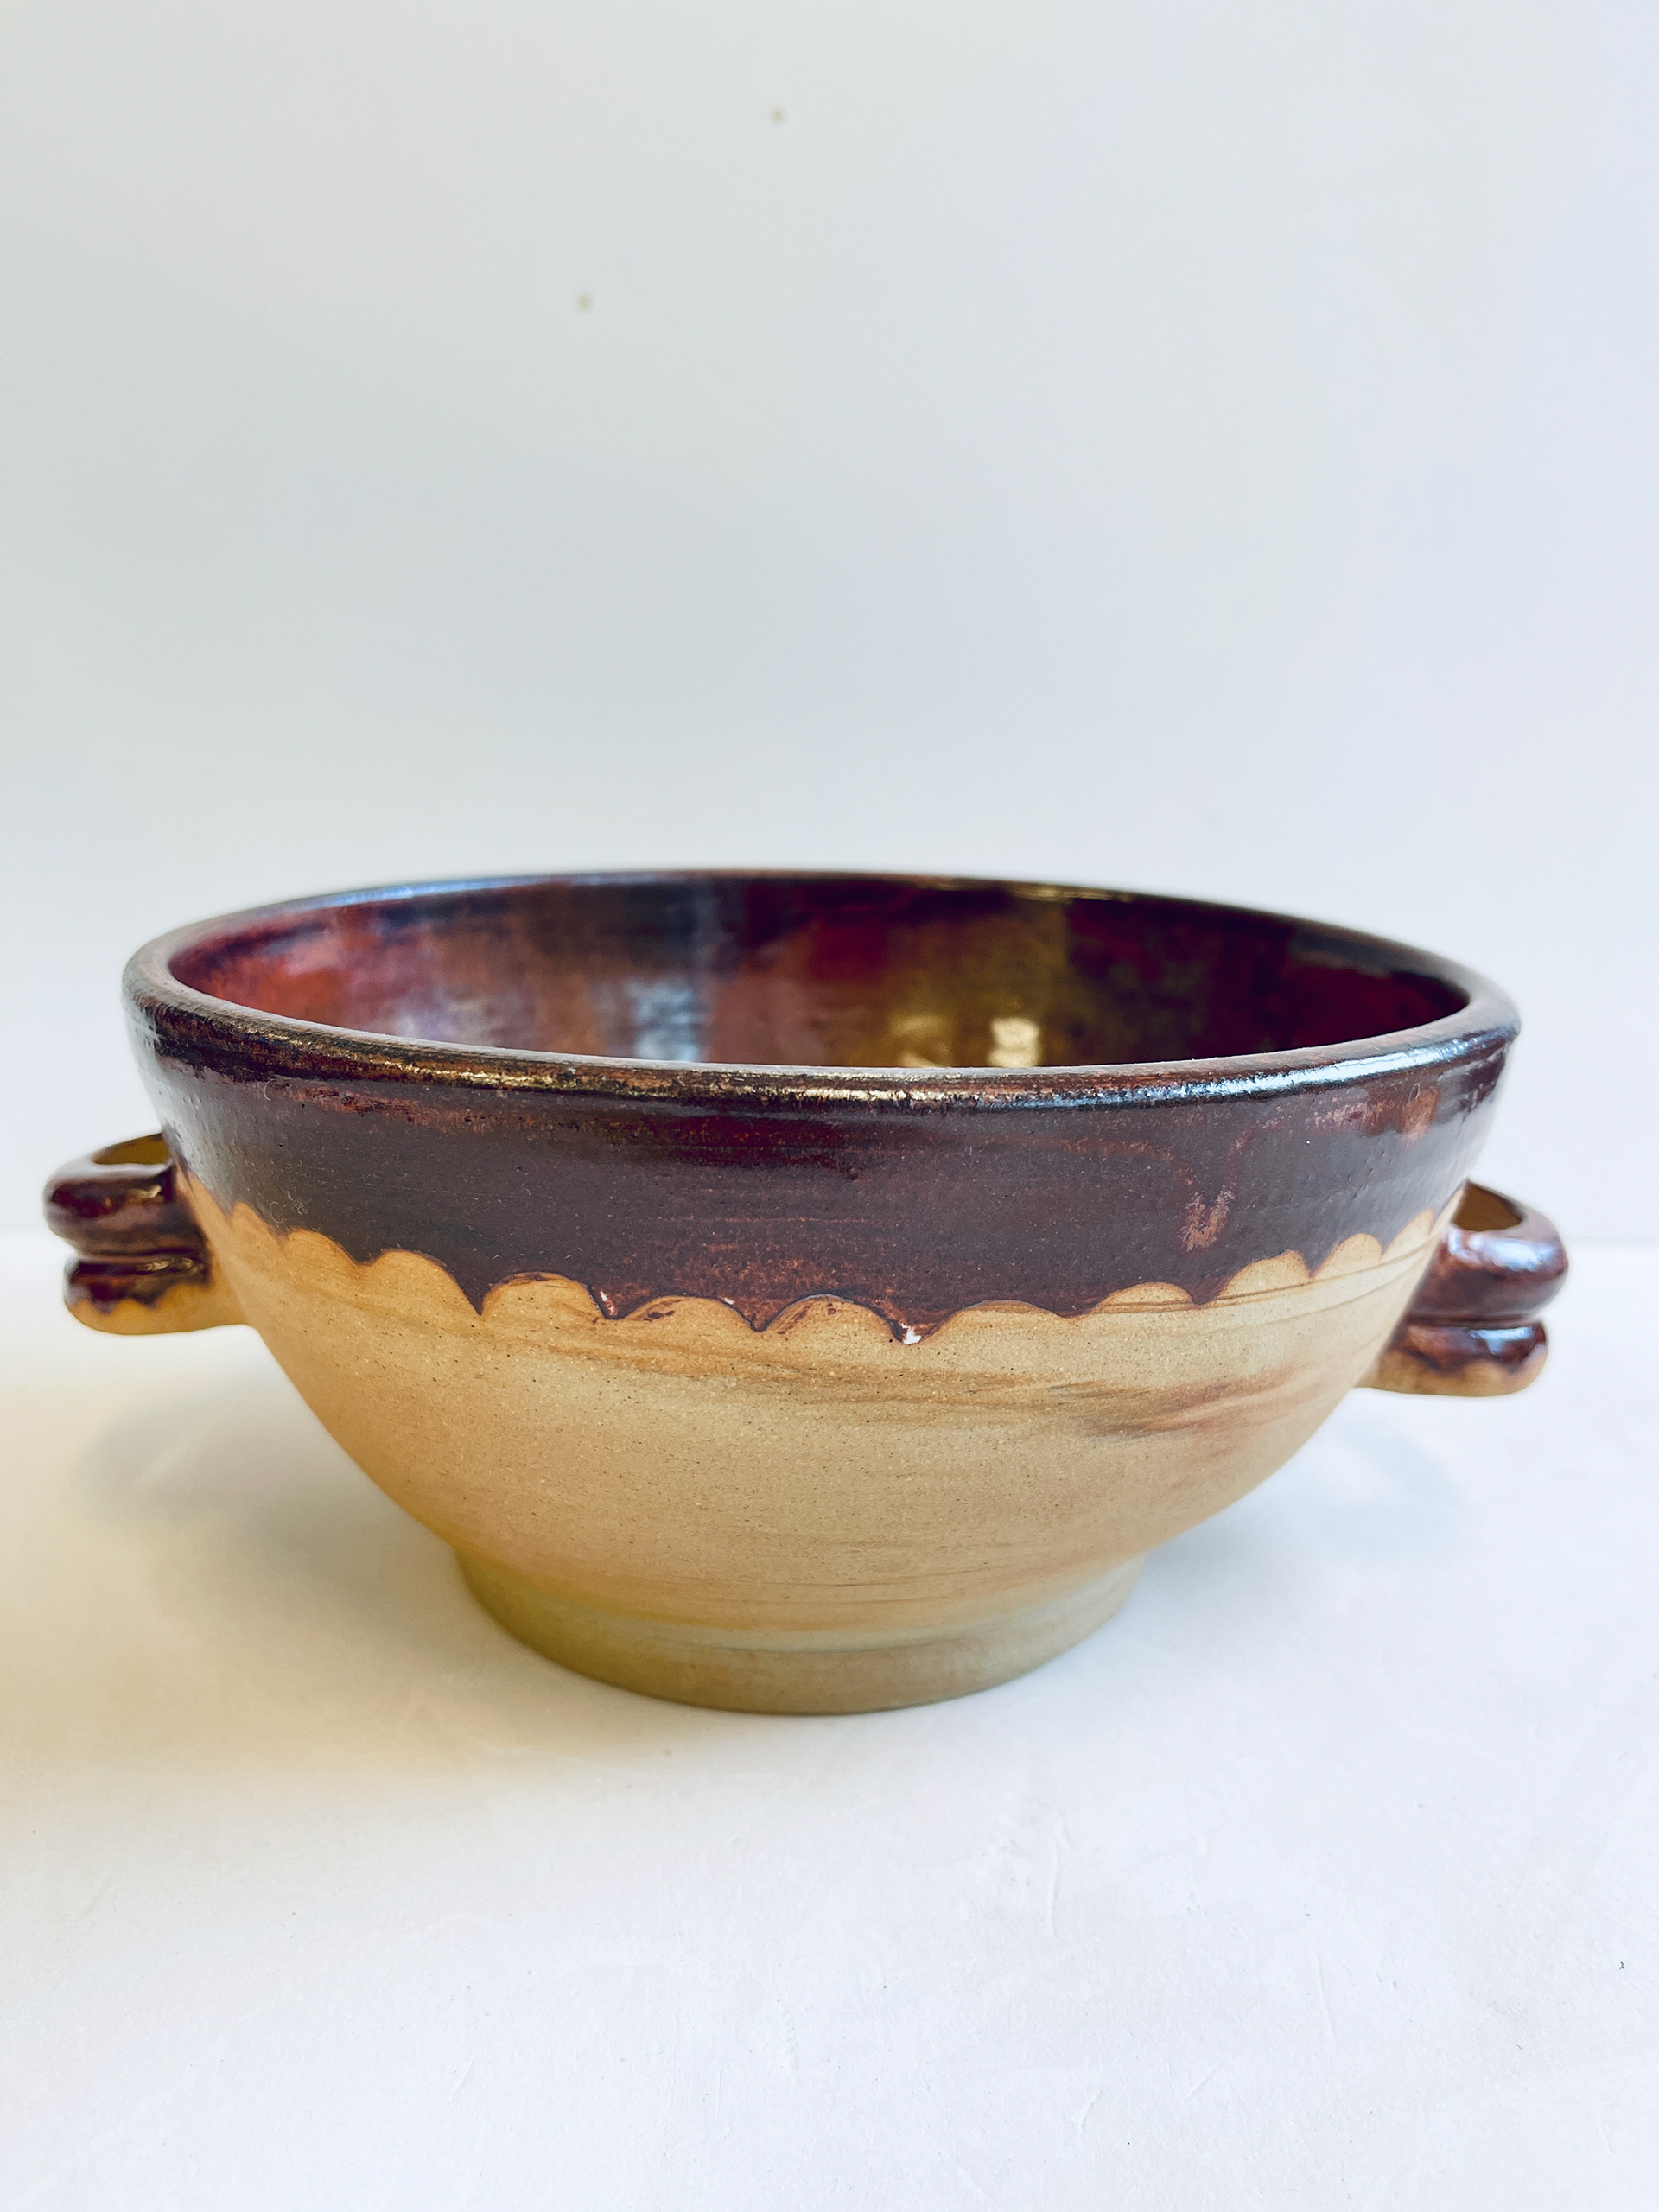
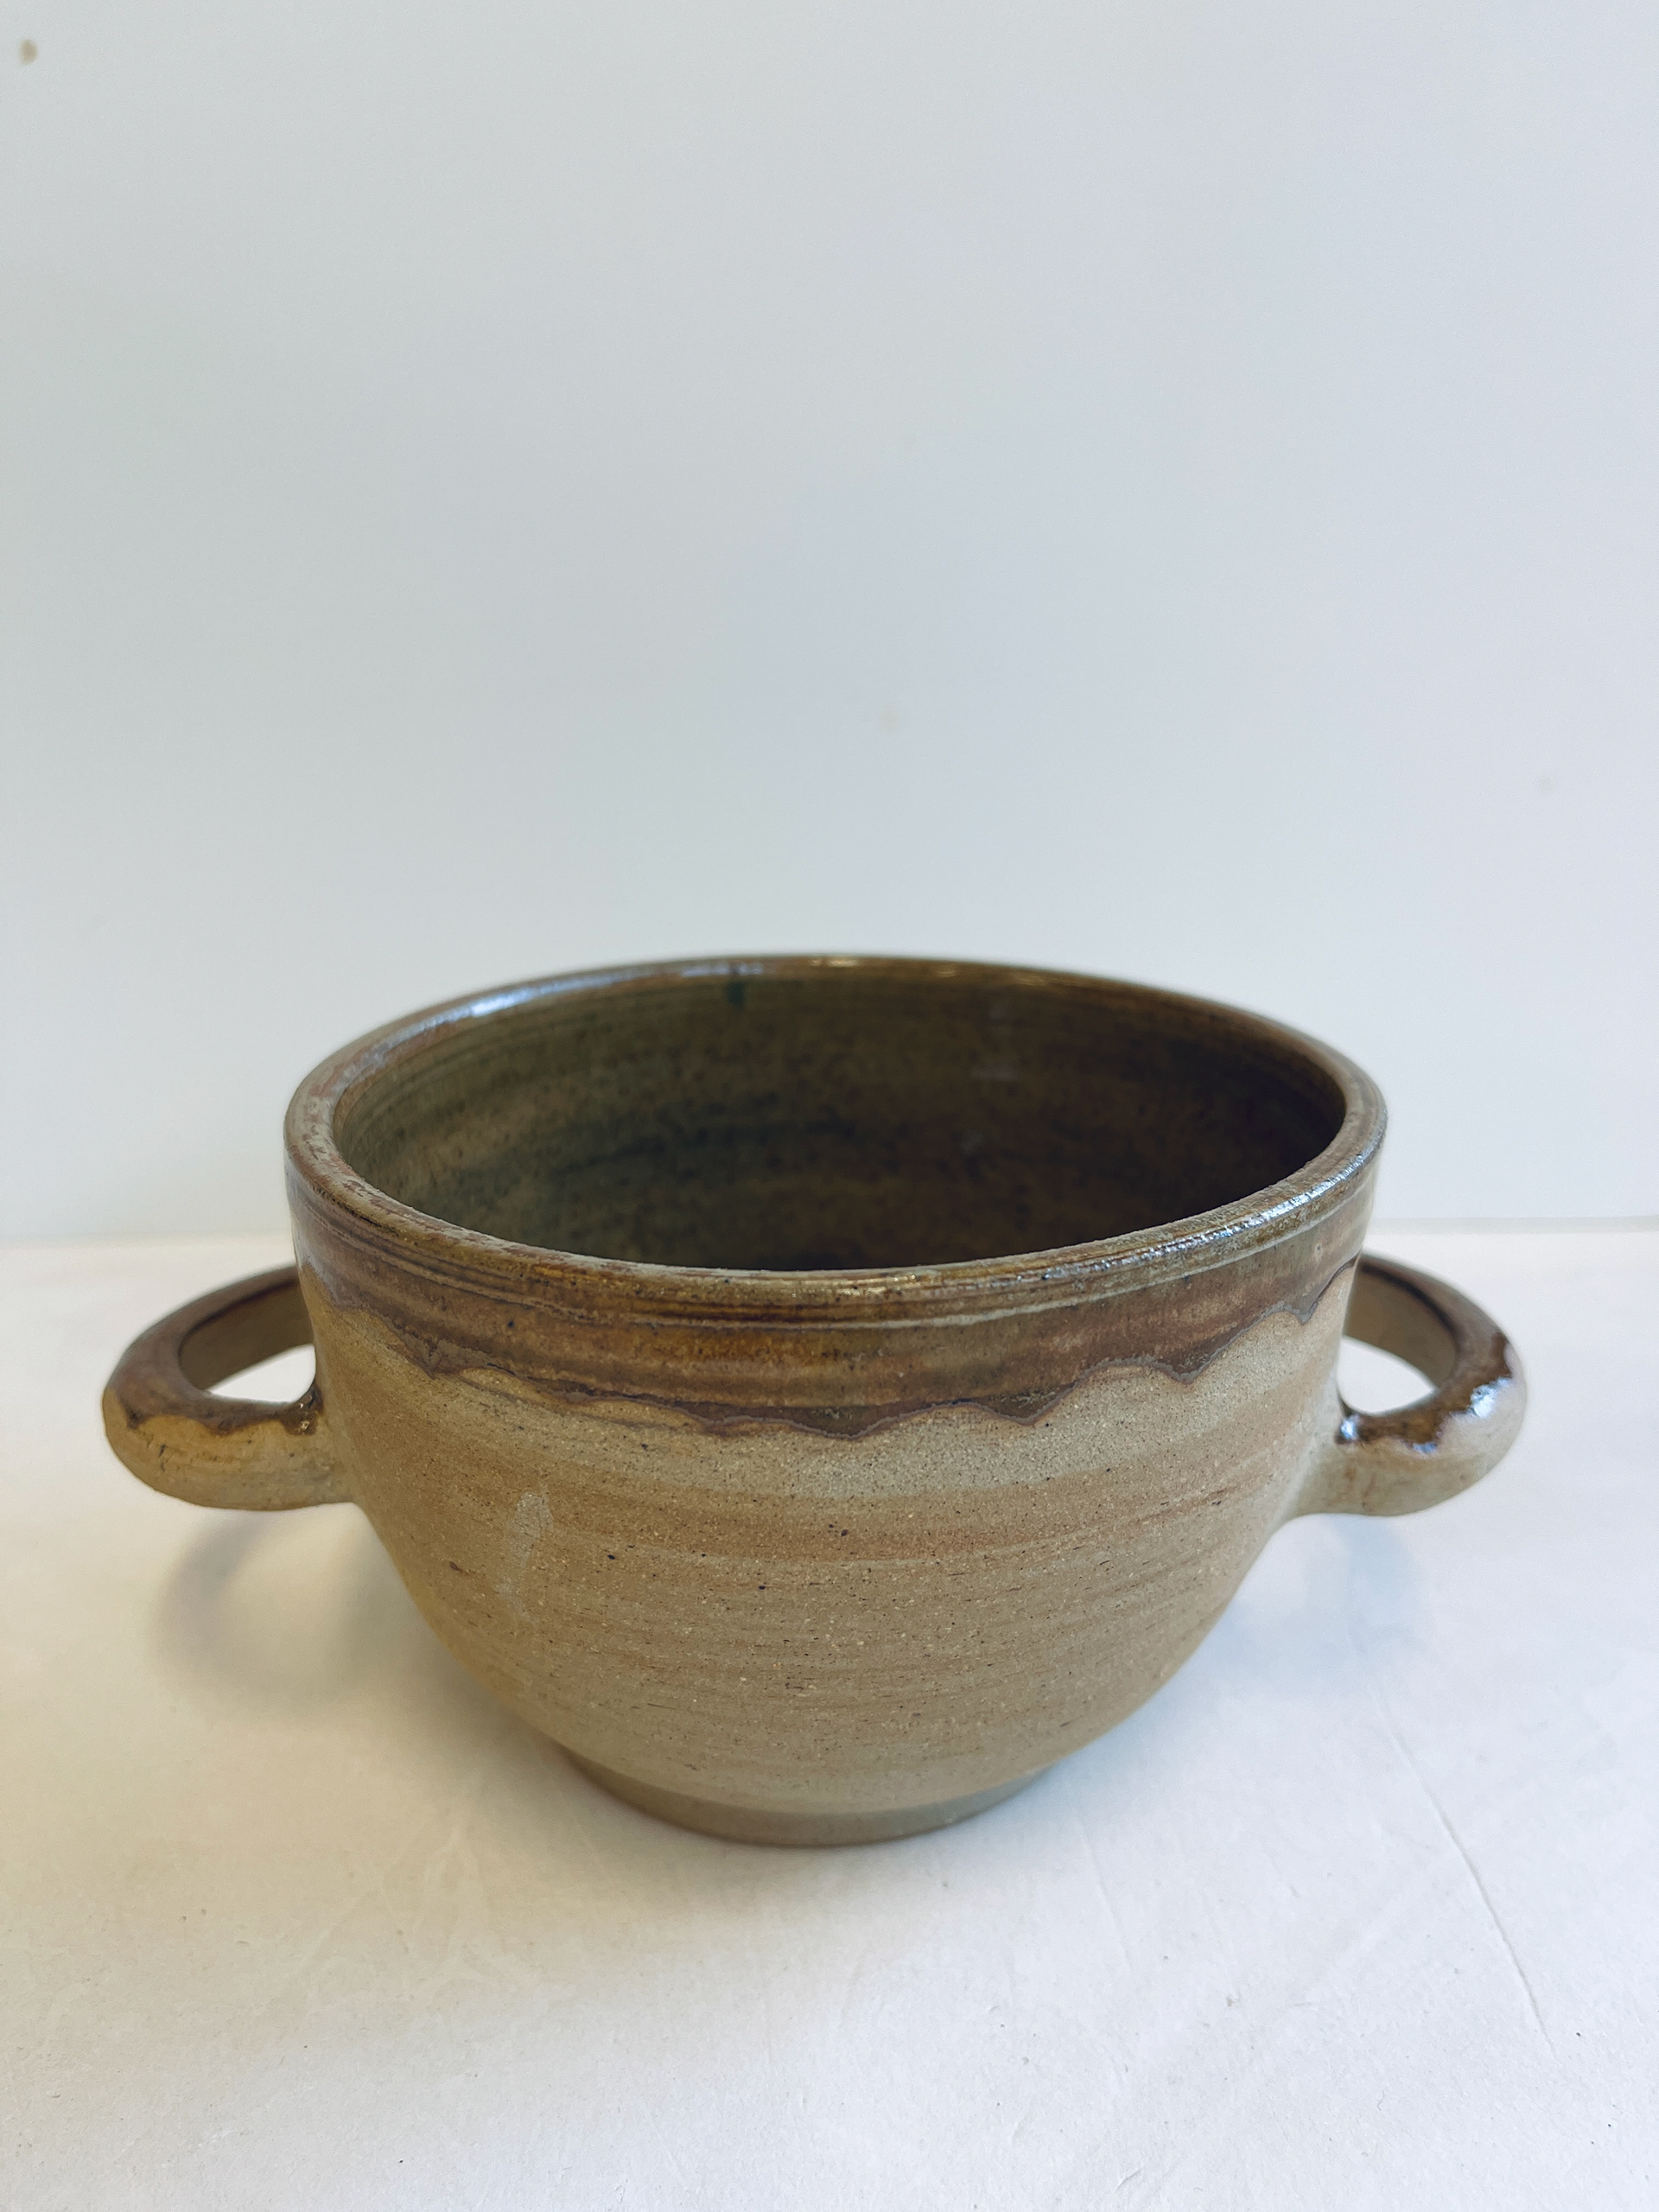
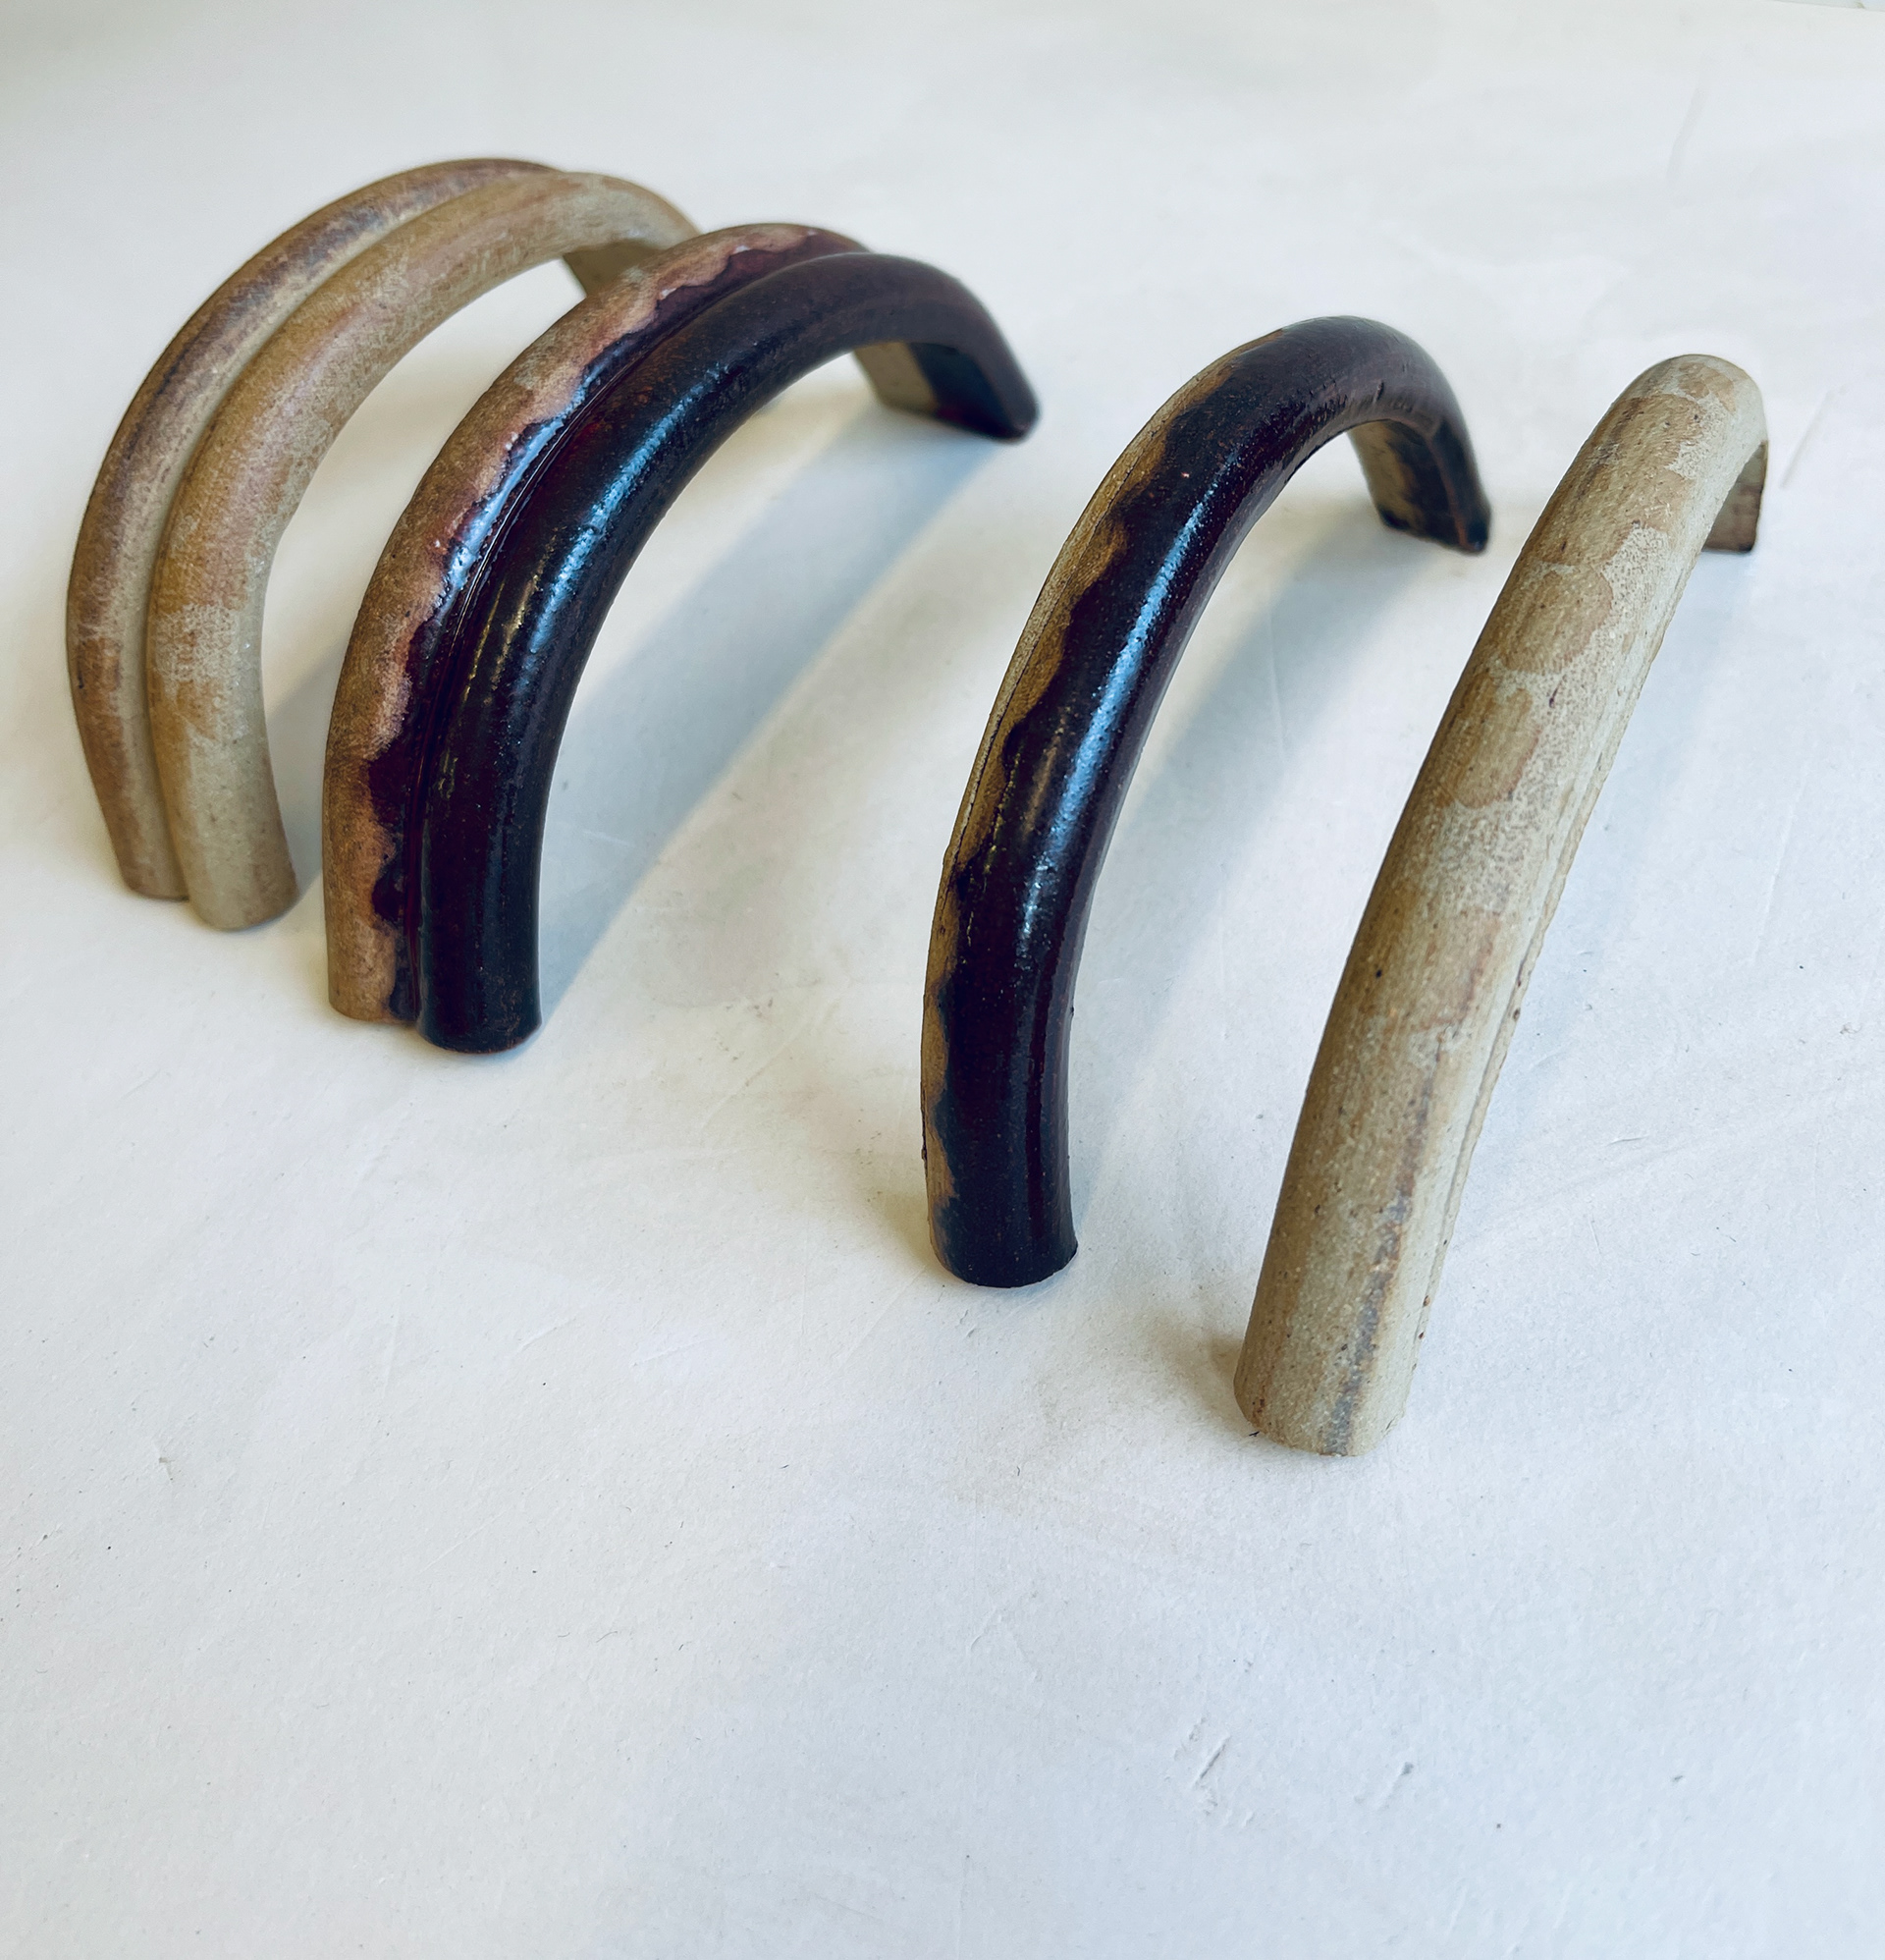
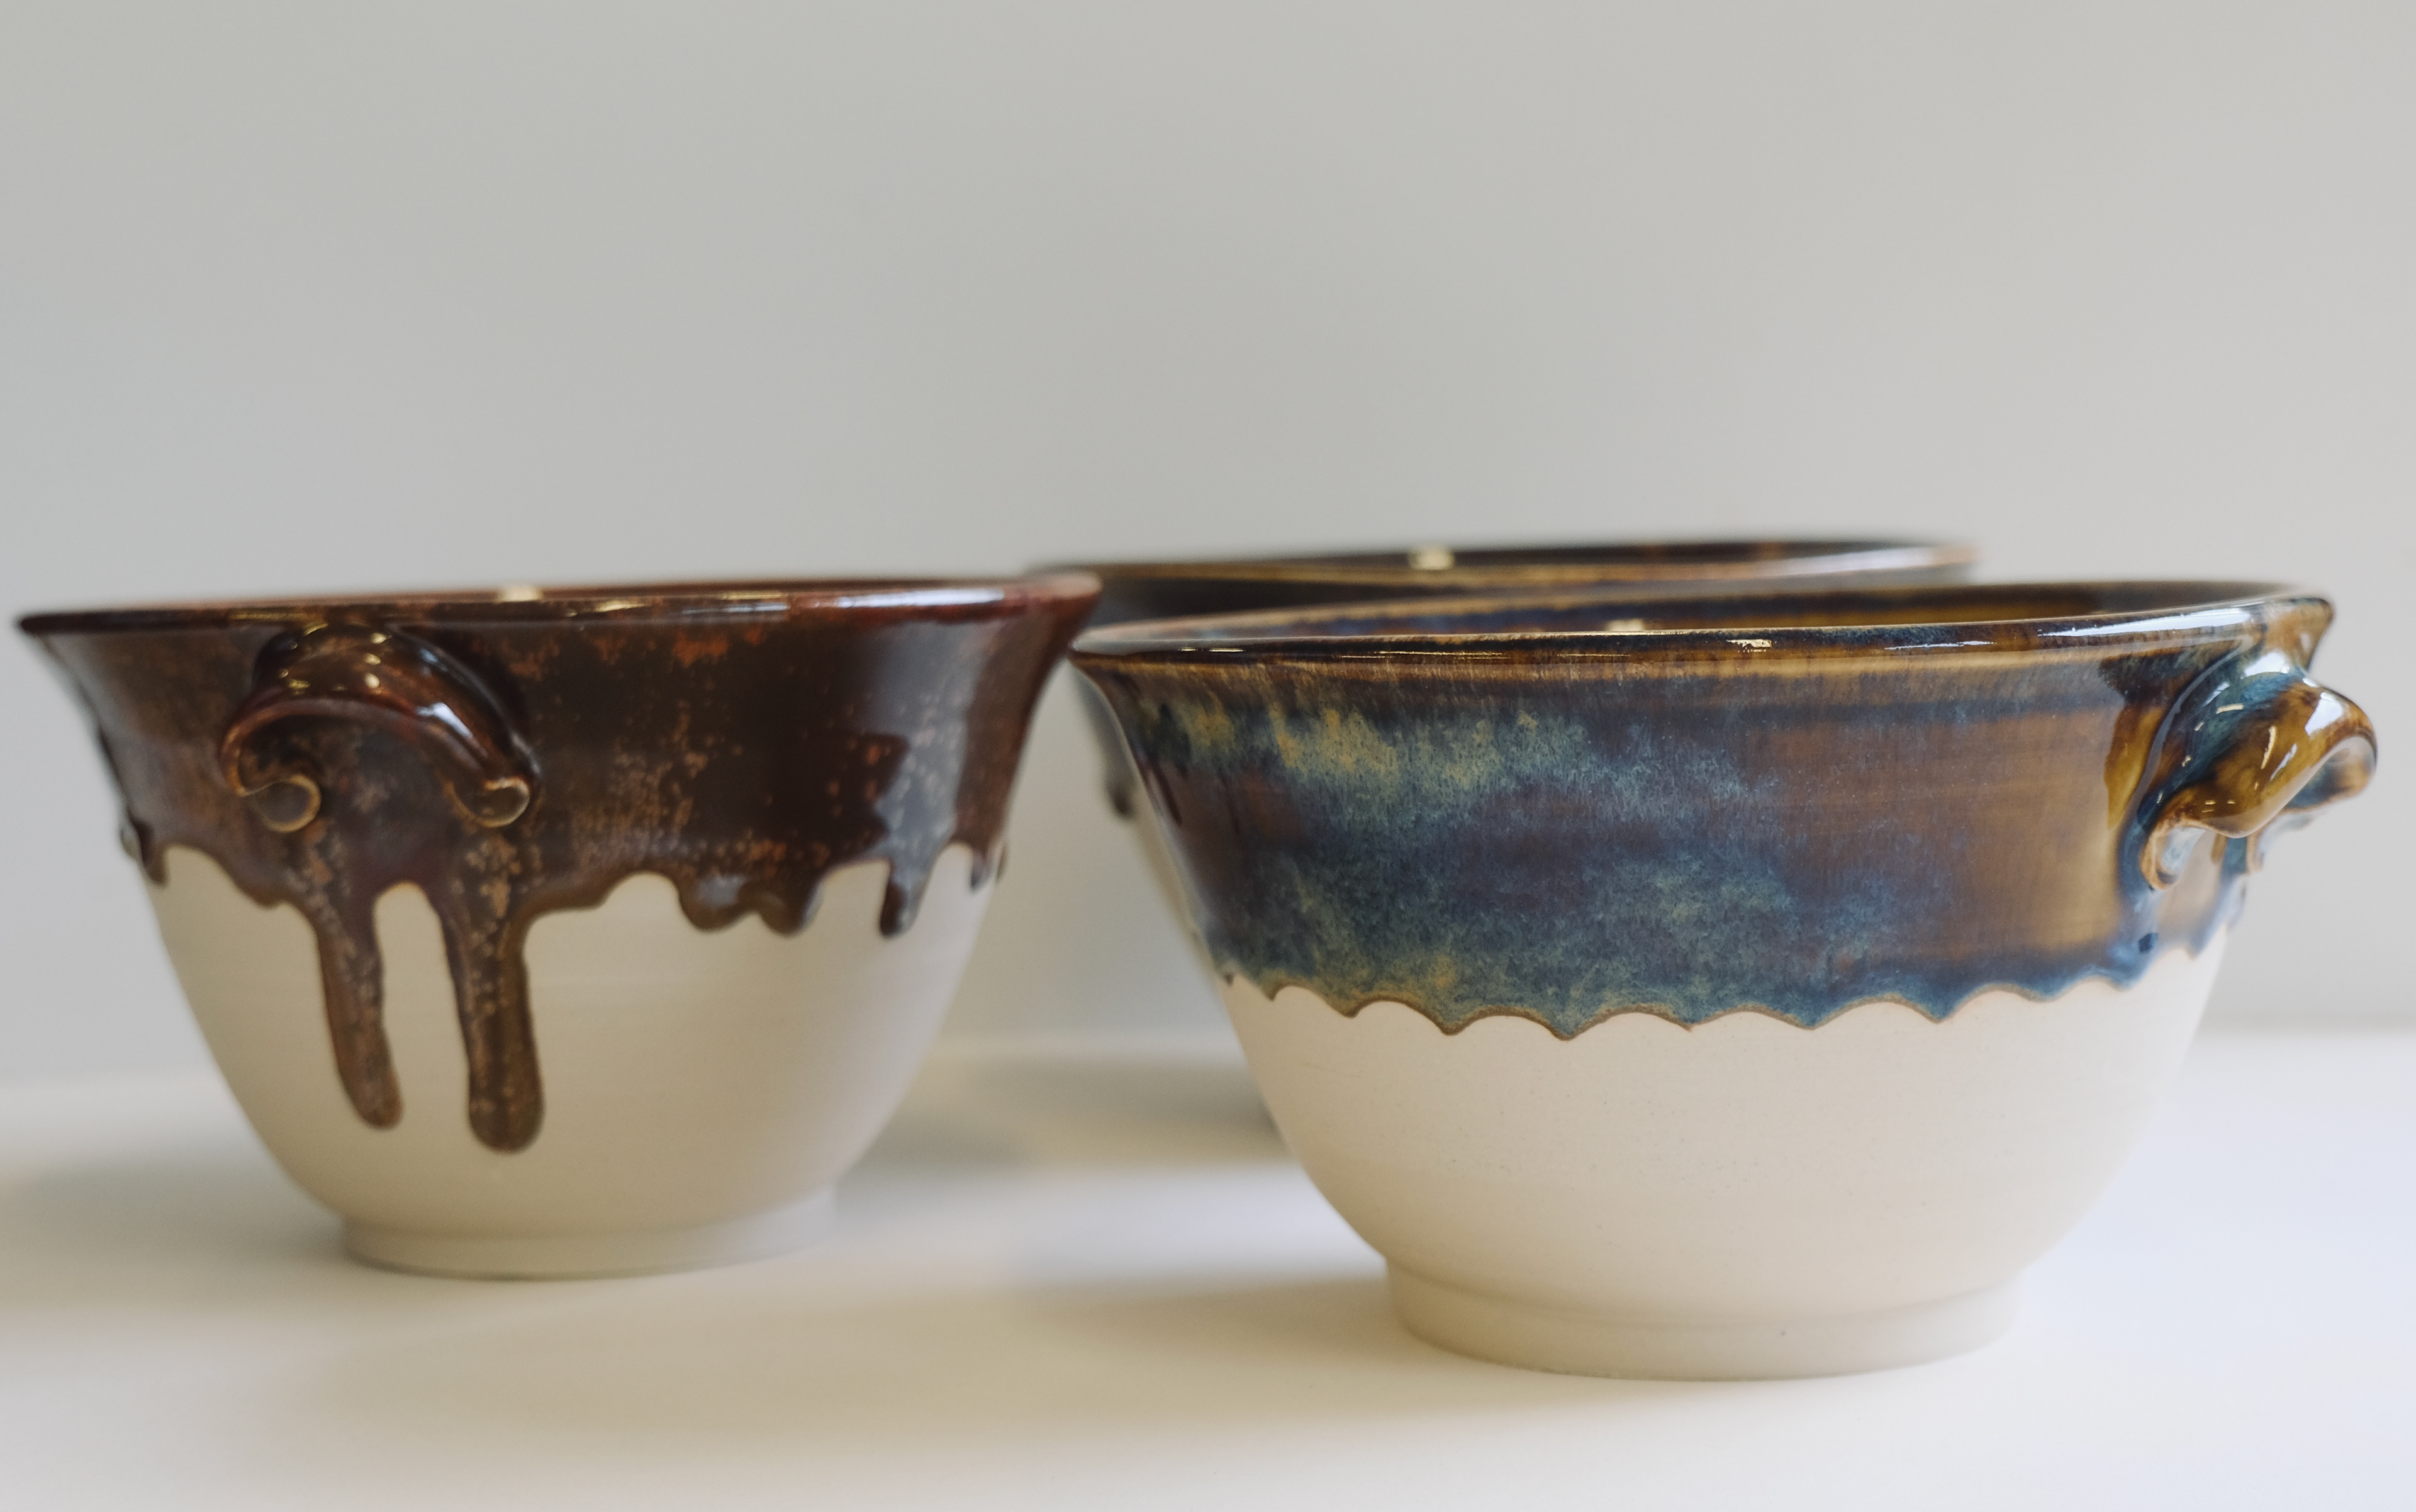
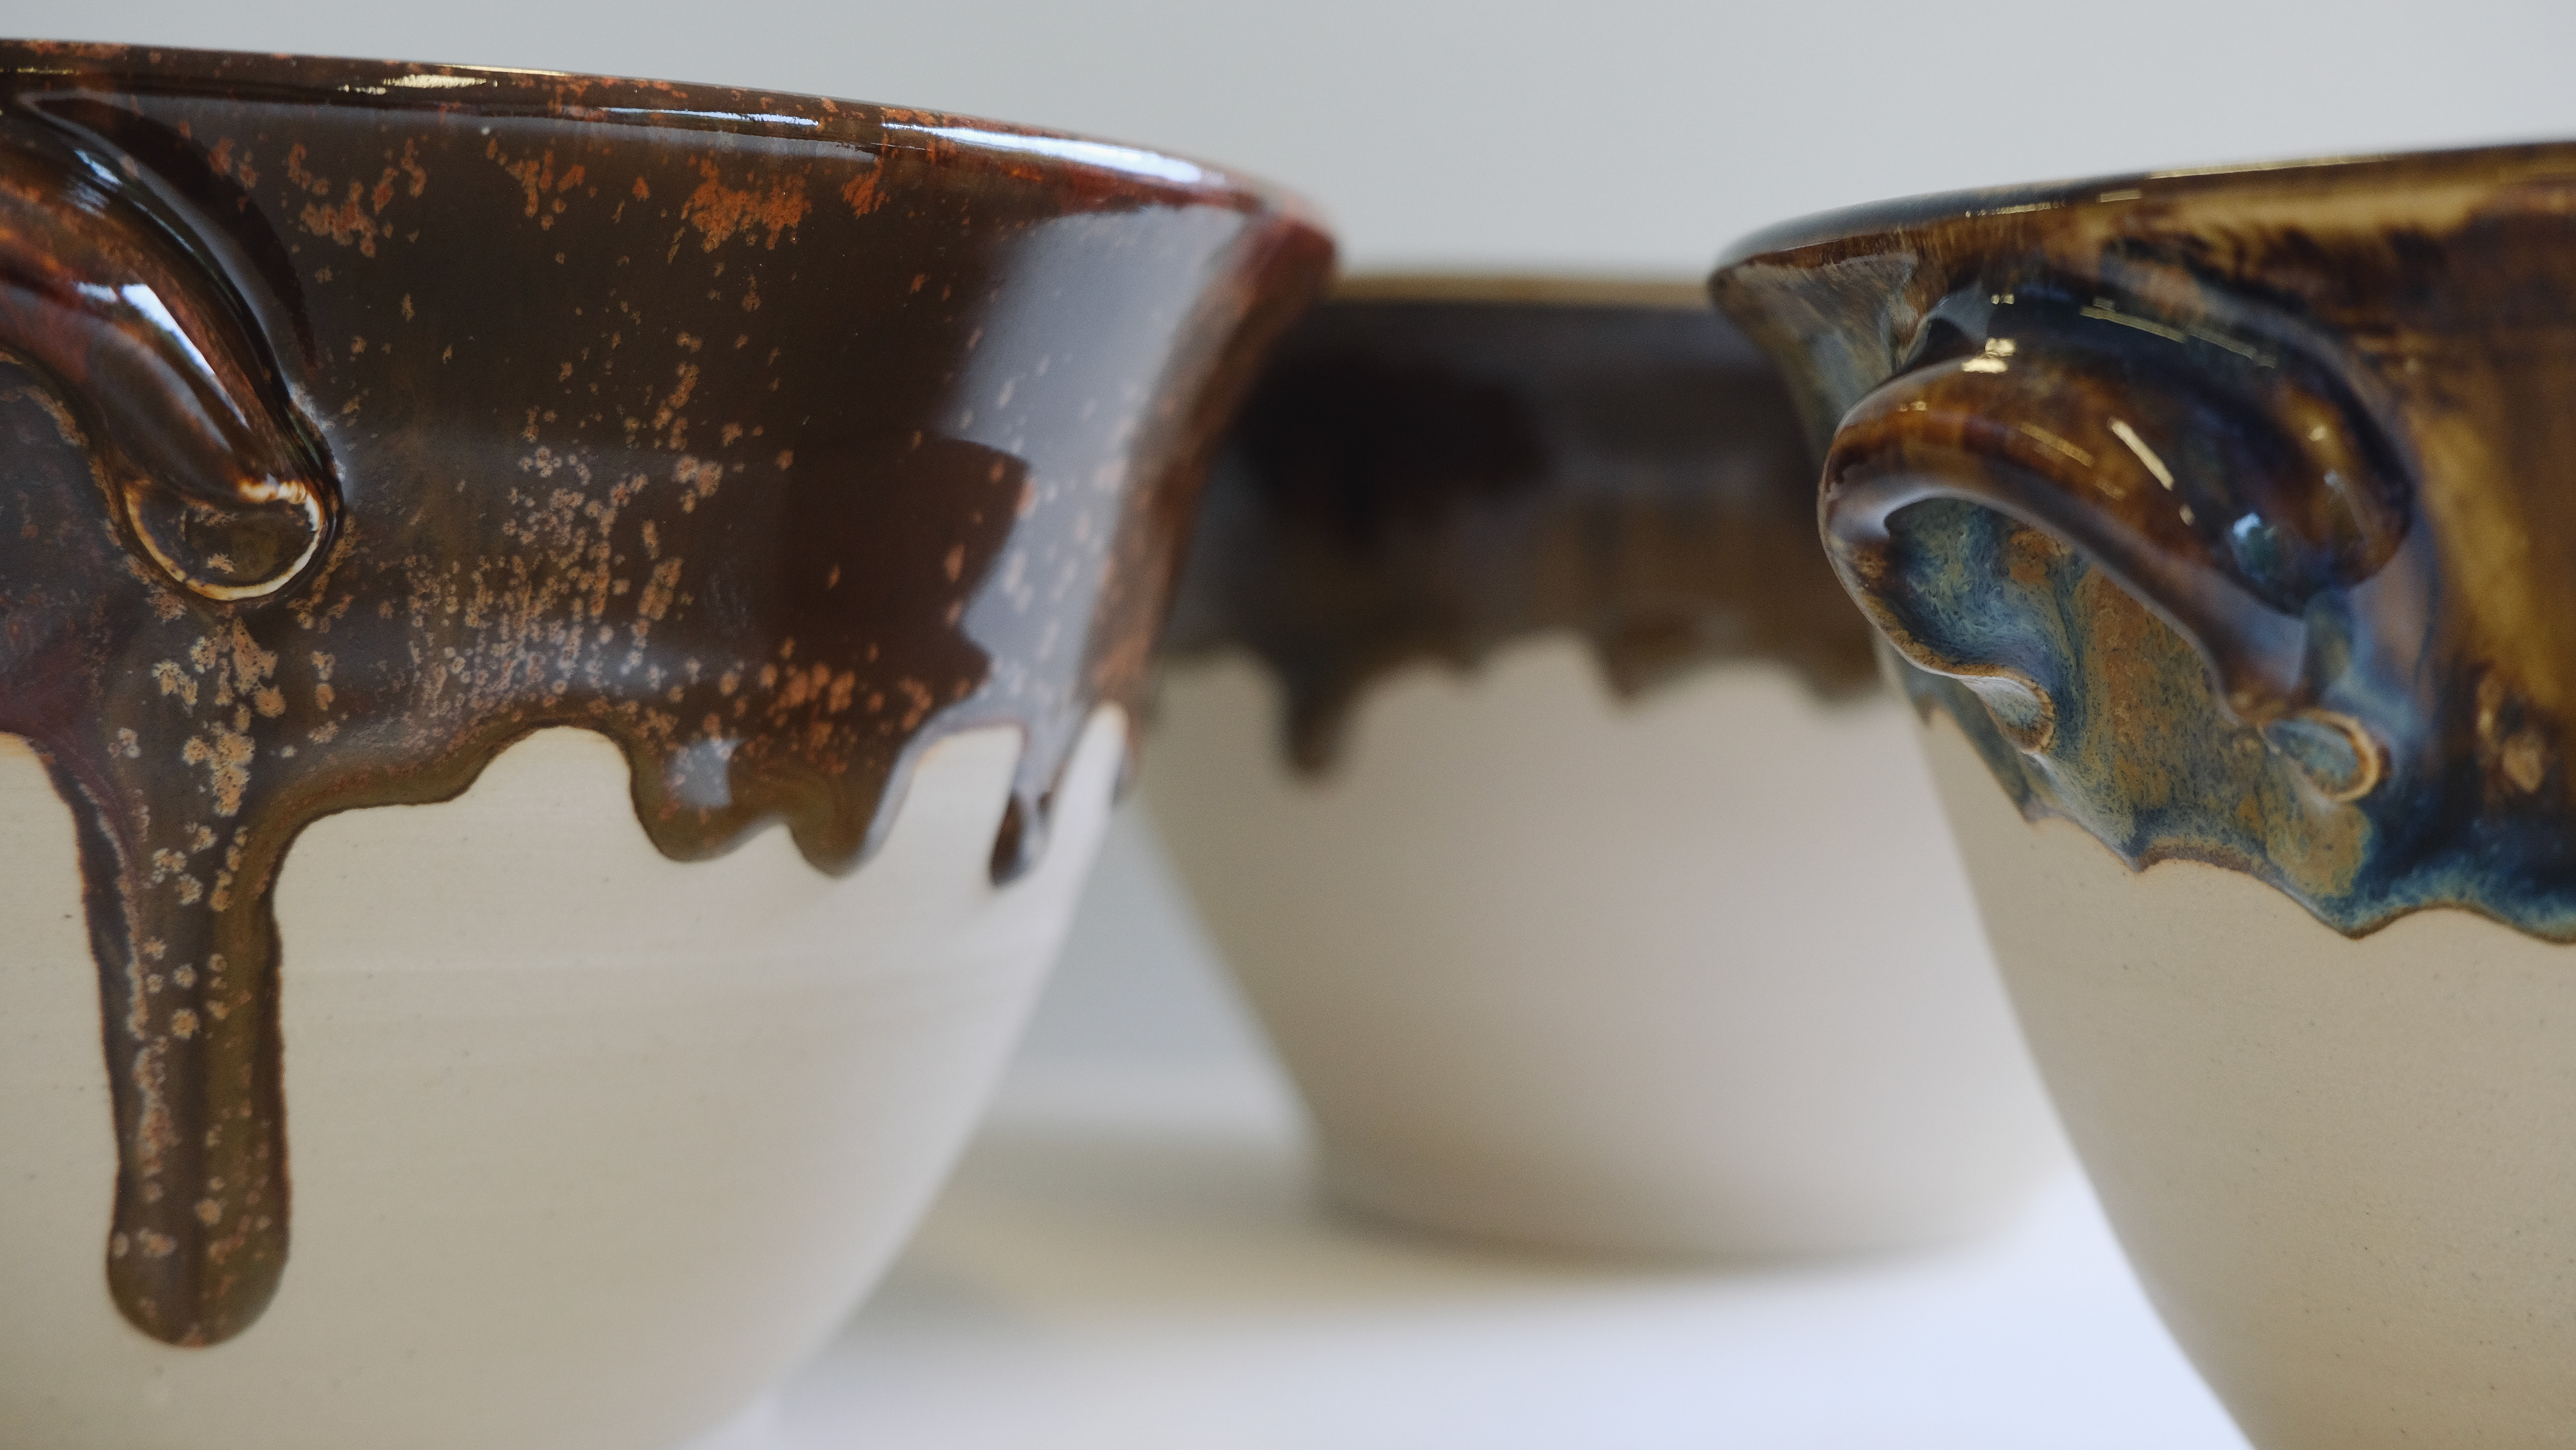
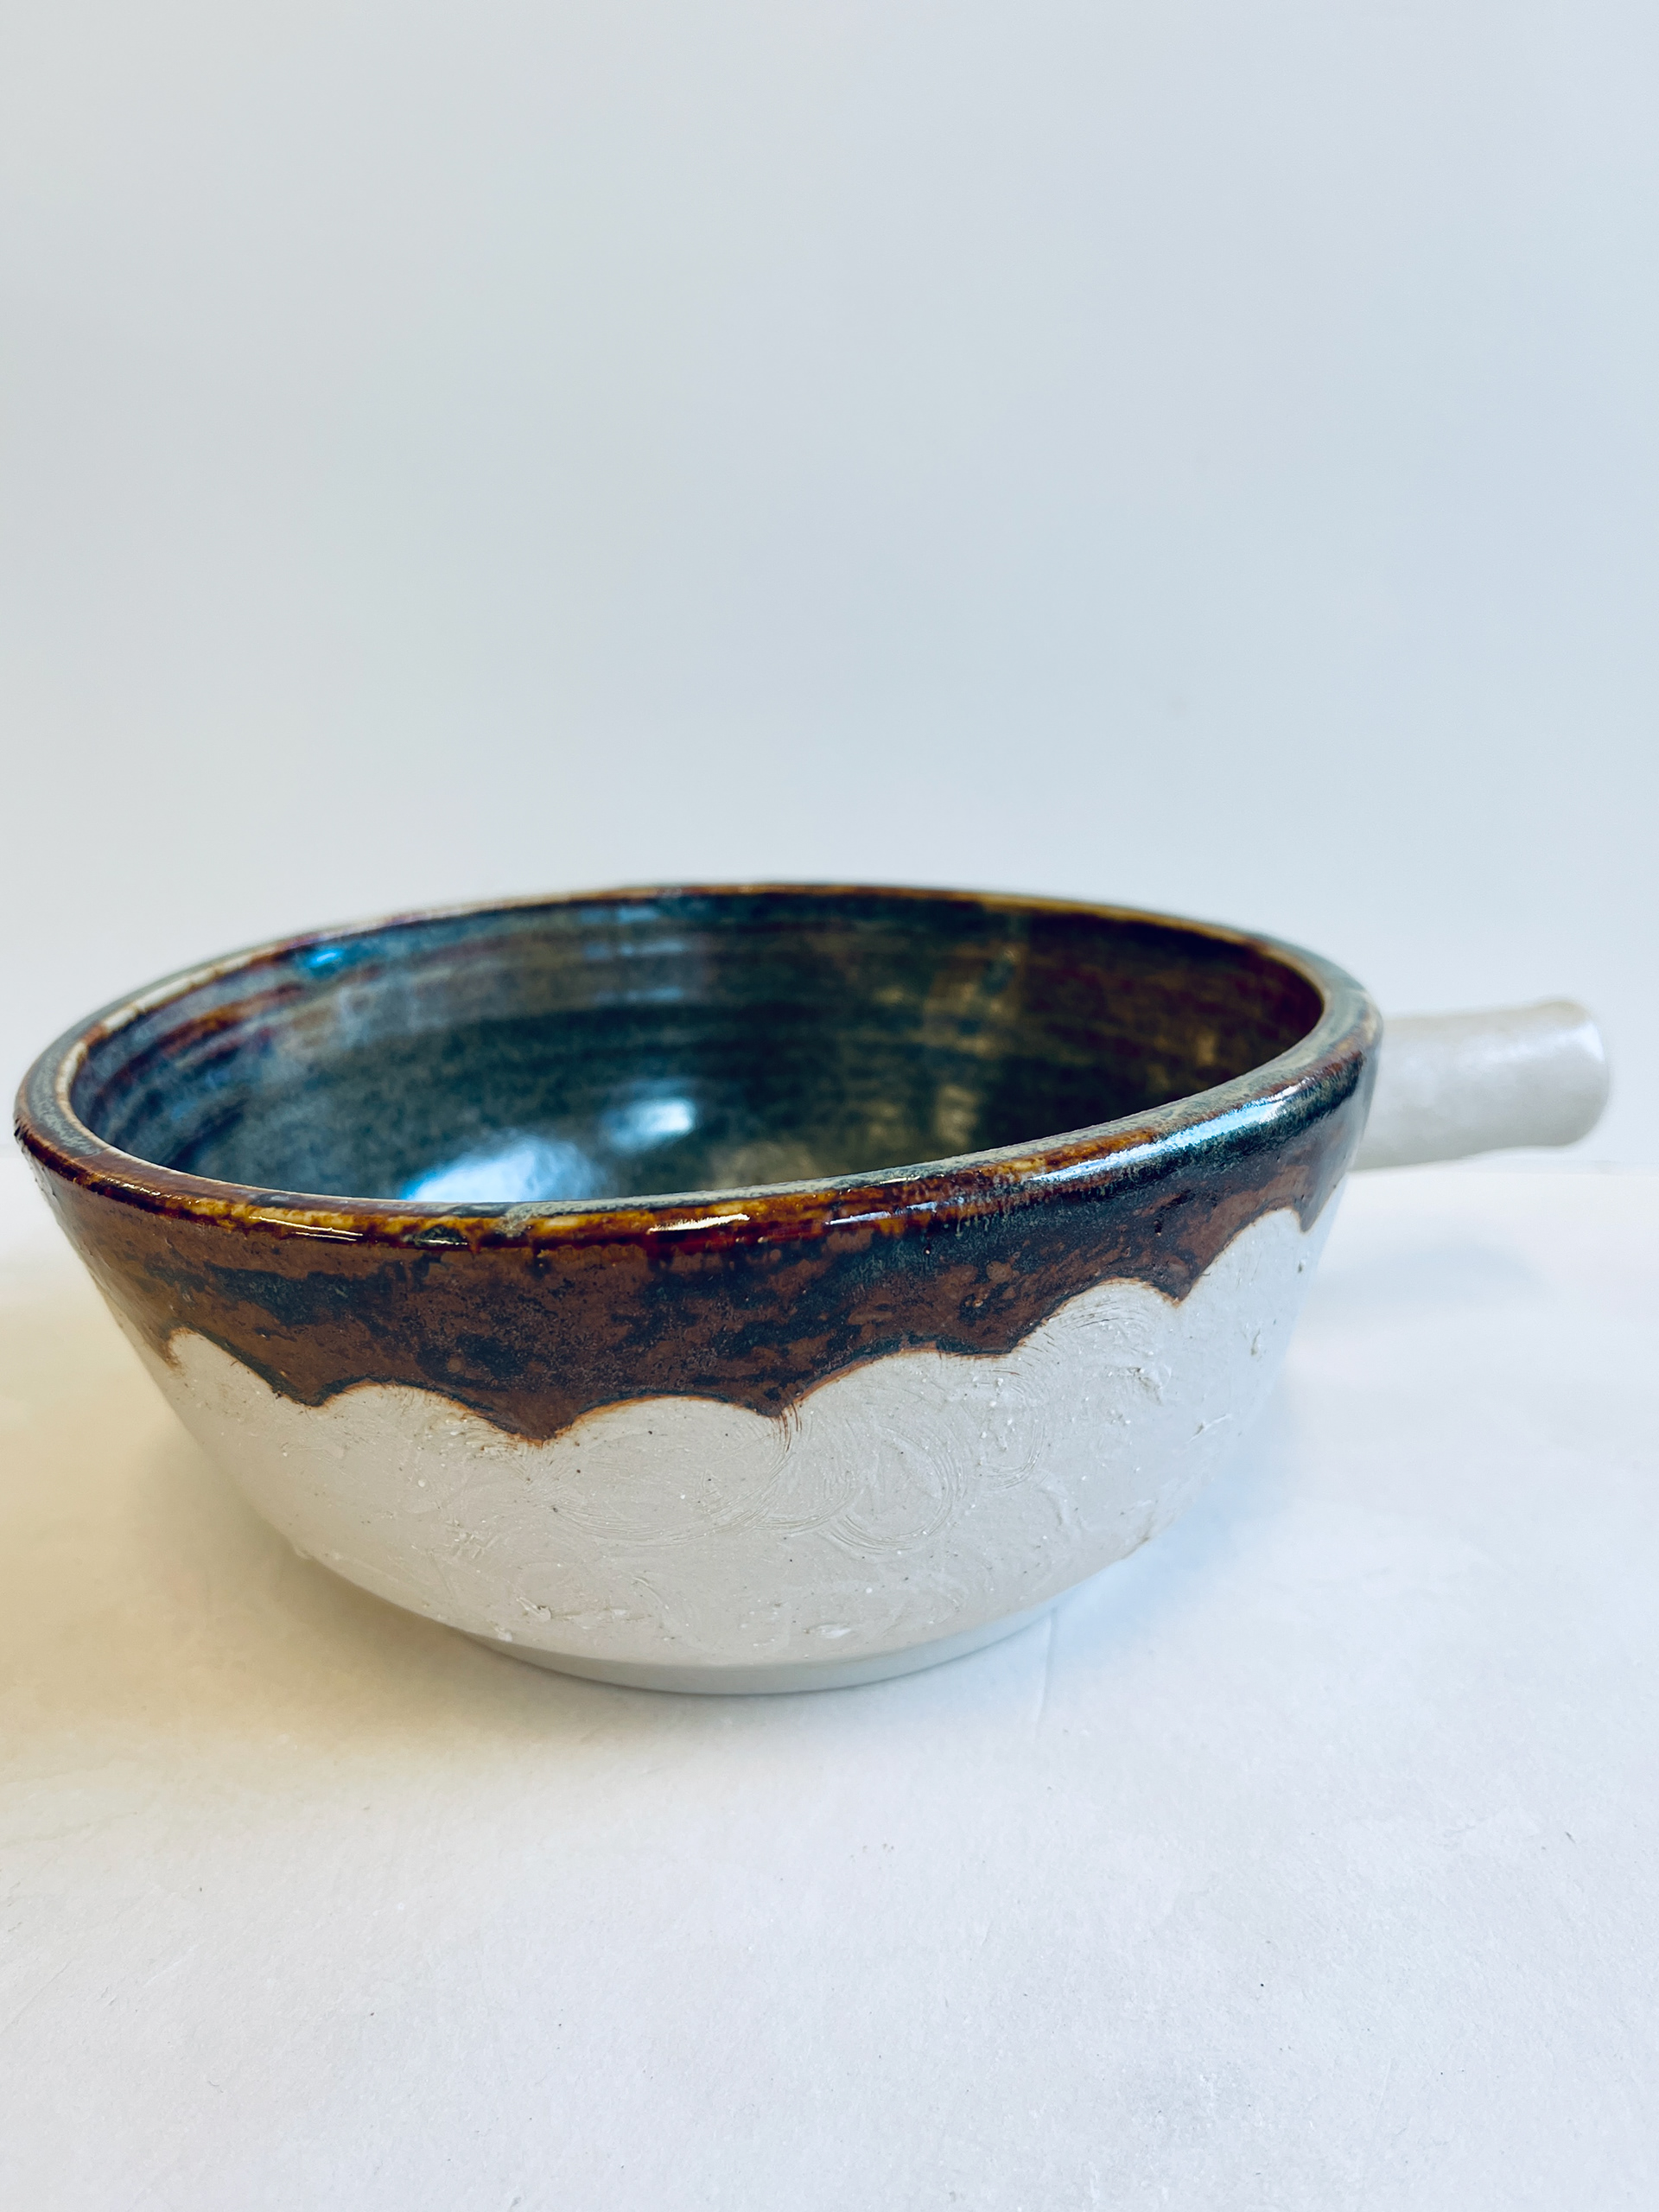
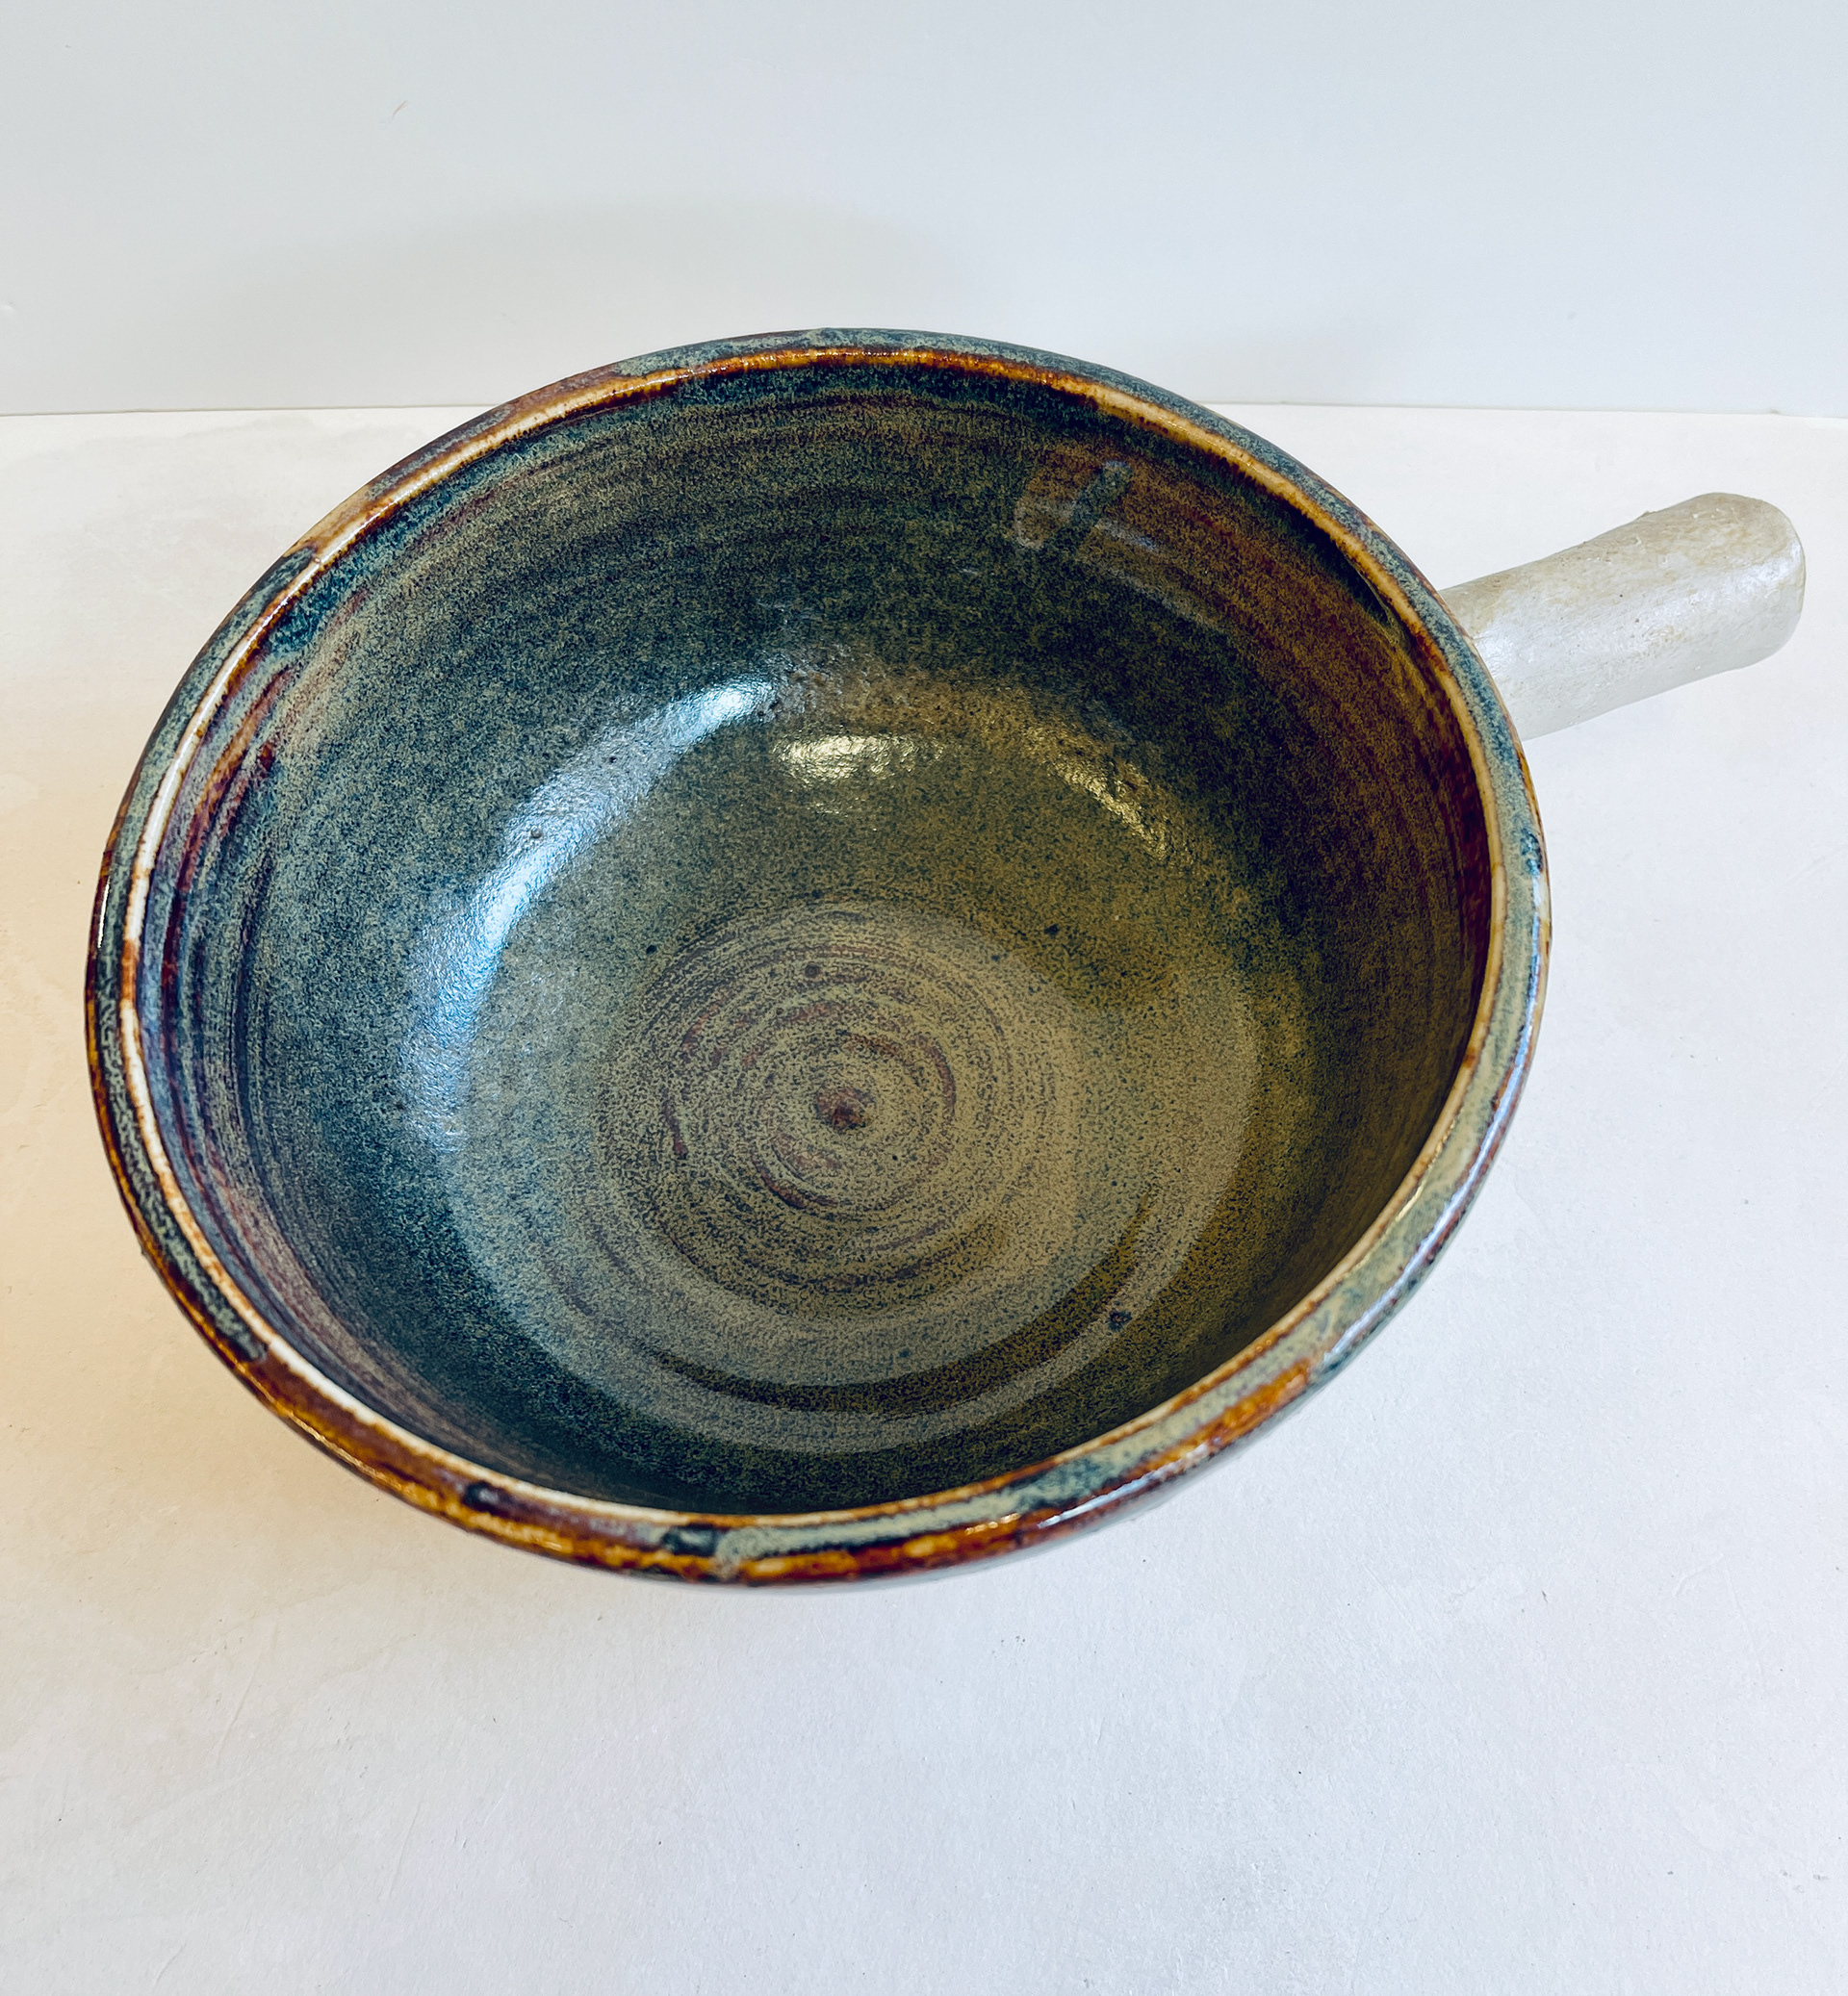
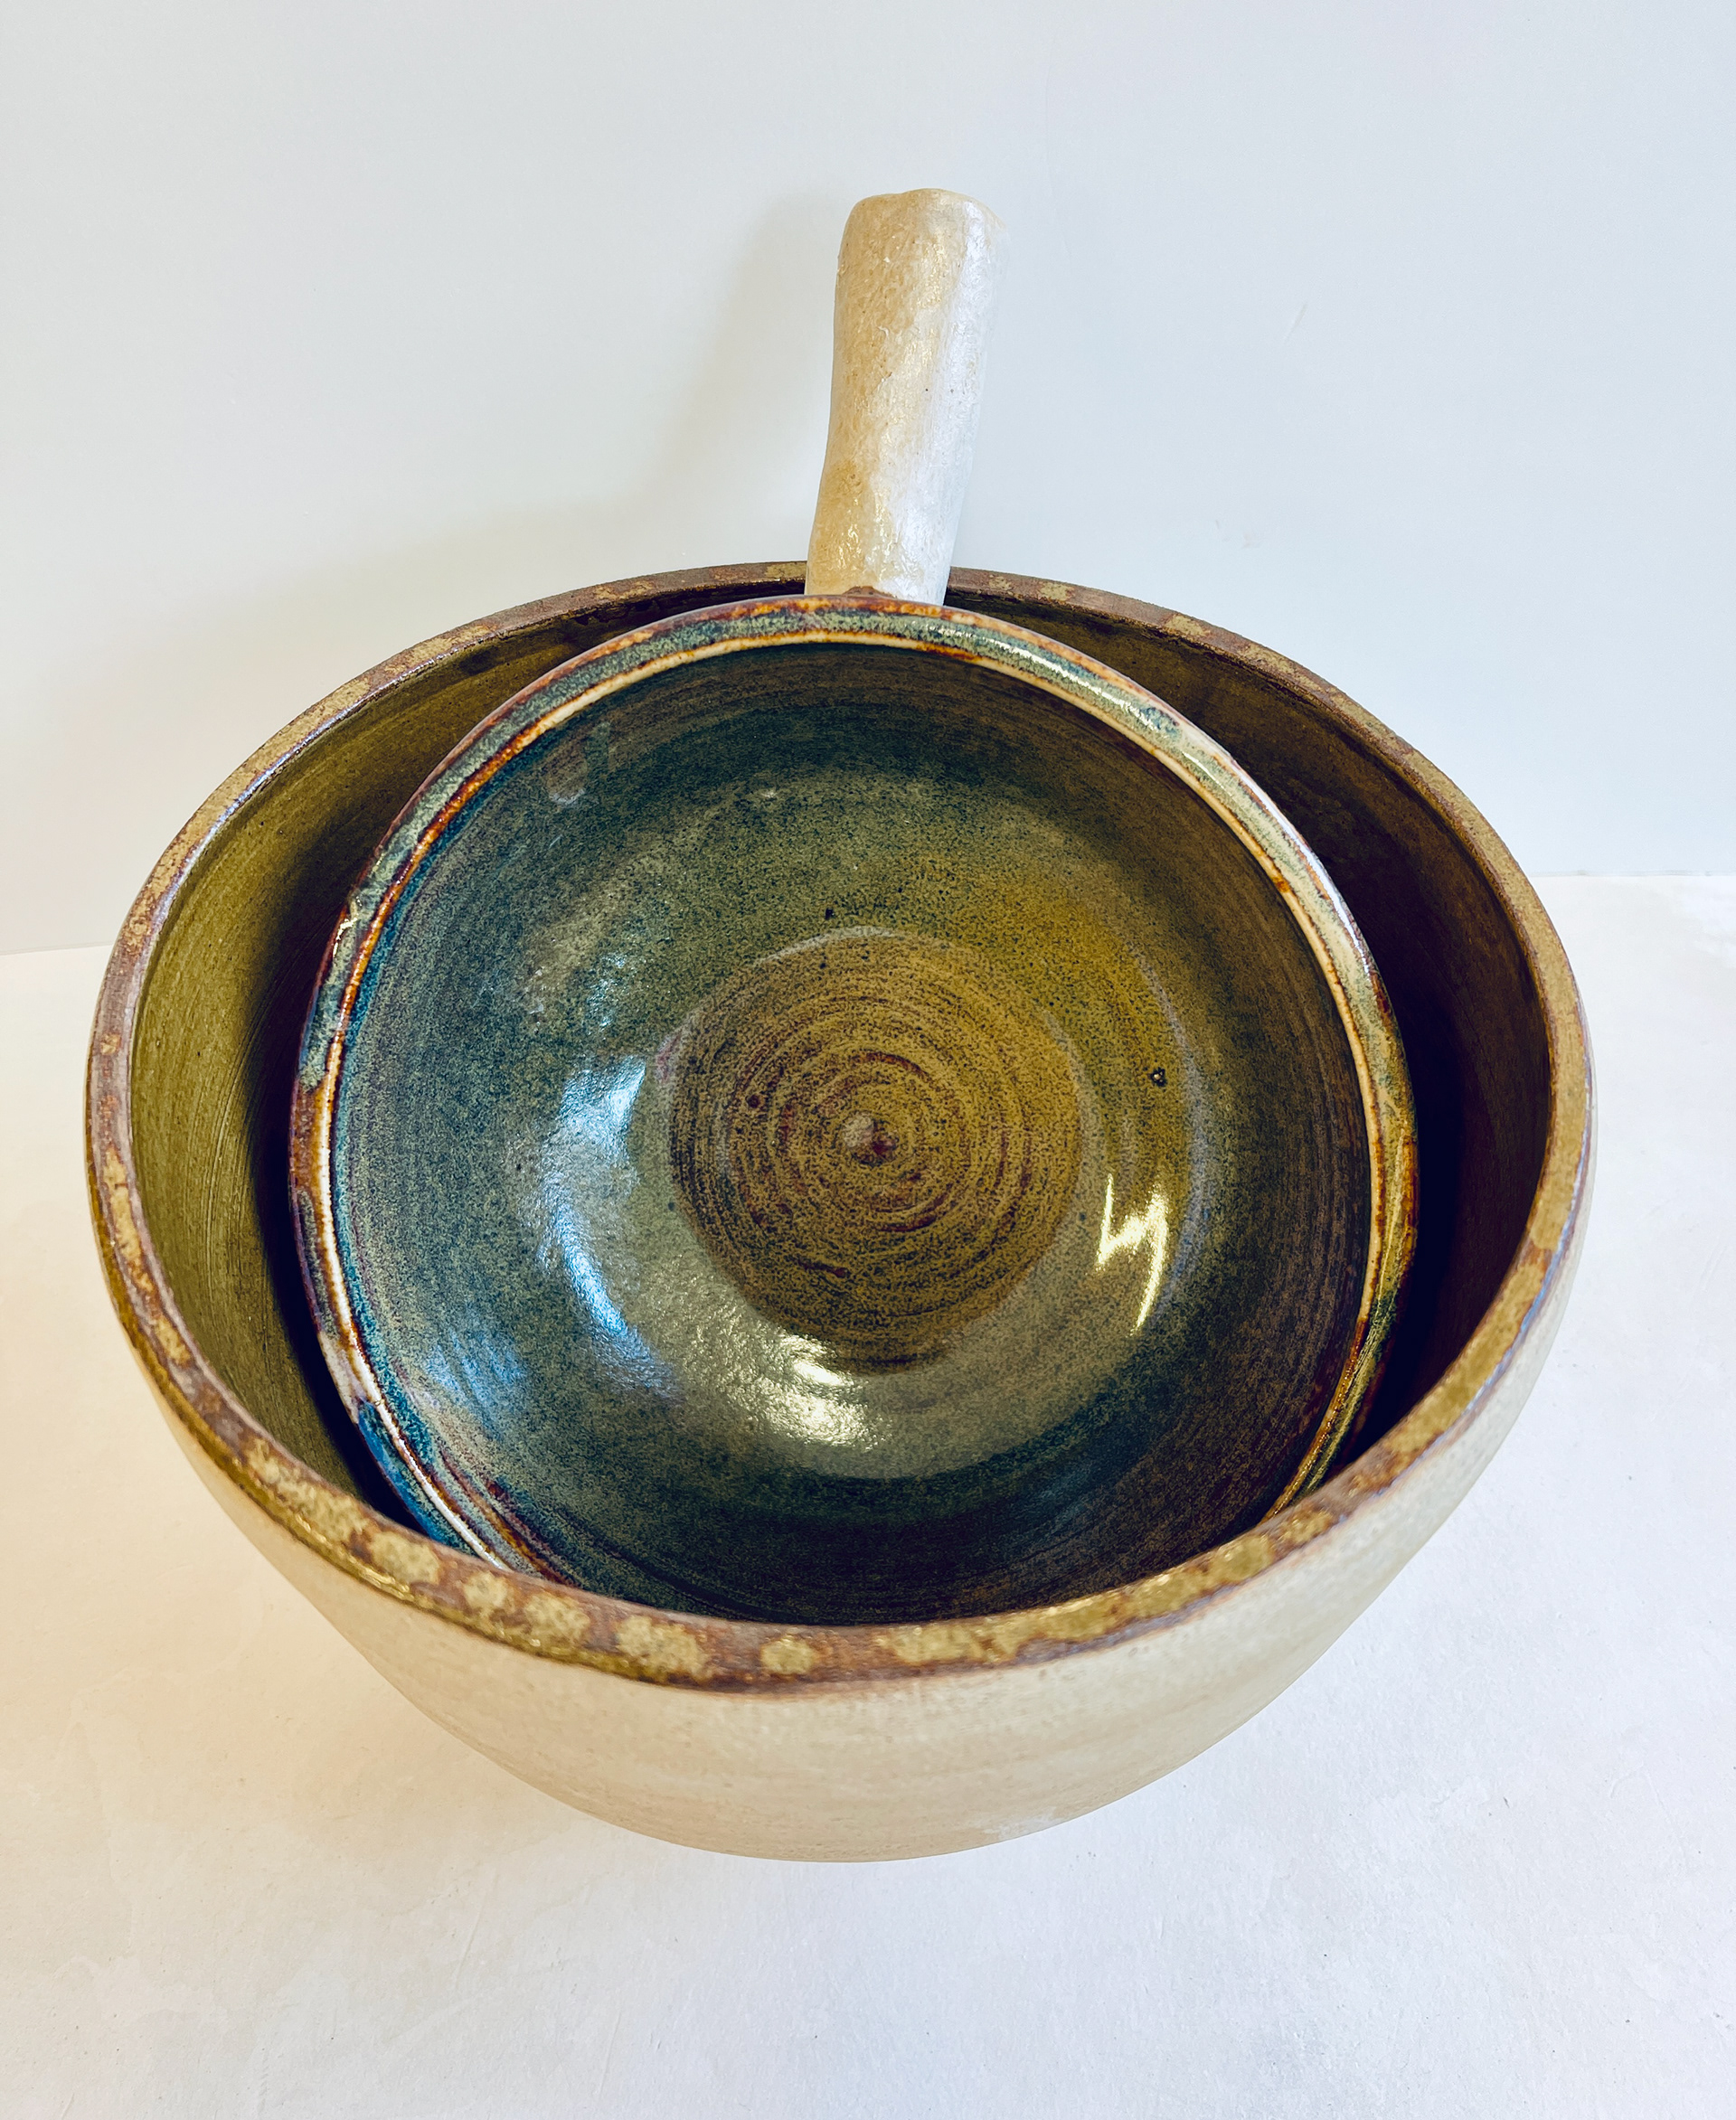
Don't like the look of these, the half and half style doesn't feel like the correct look for these vessels. And the none glazed handles takes away the interesting breaking from edge glaze reaction.  

BOWLS WITH LUGS: 
working with both the clay bodies, the glaze reaction on the more pair of them are different offering me variety and this project is a celebration of variety and flavours.  

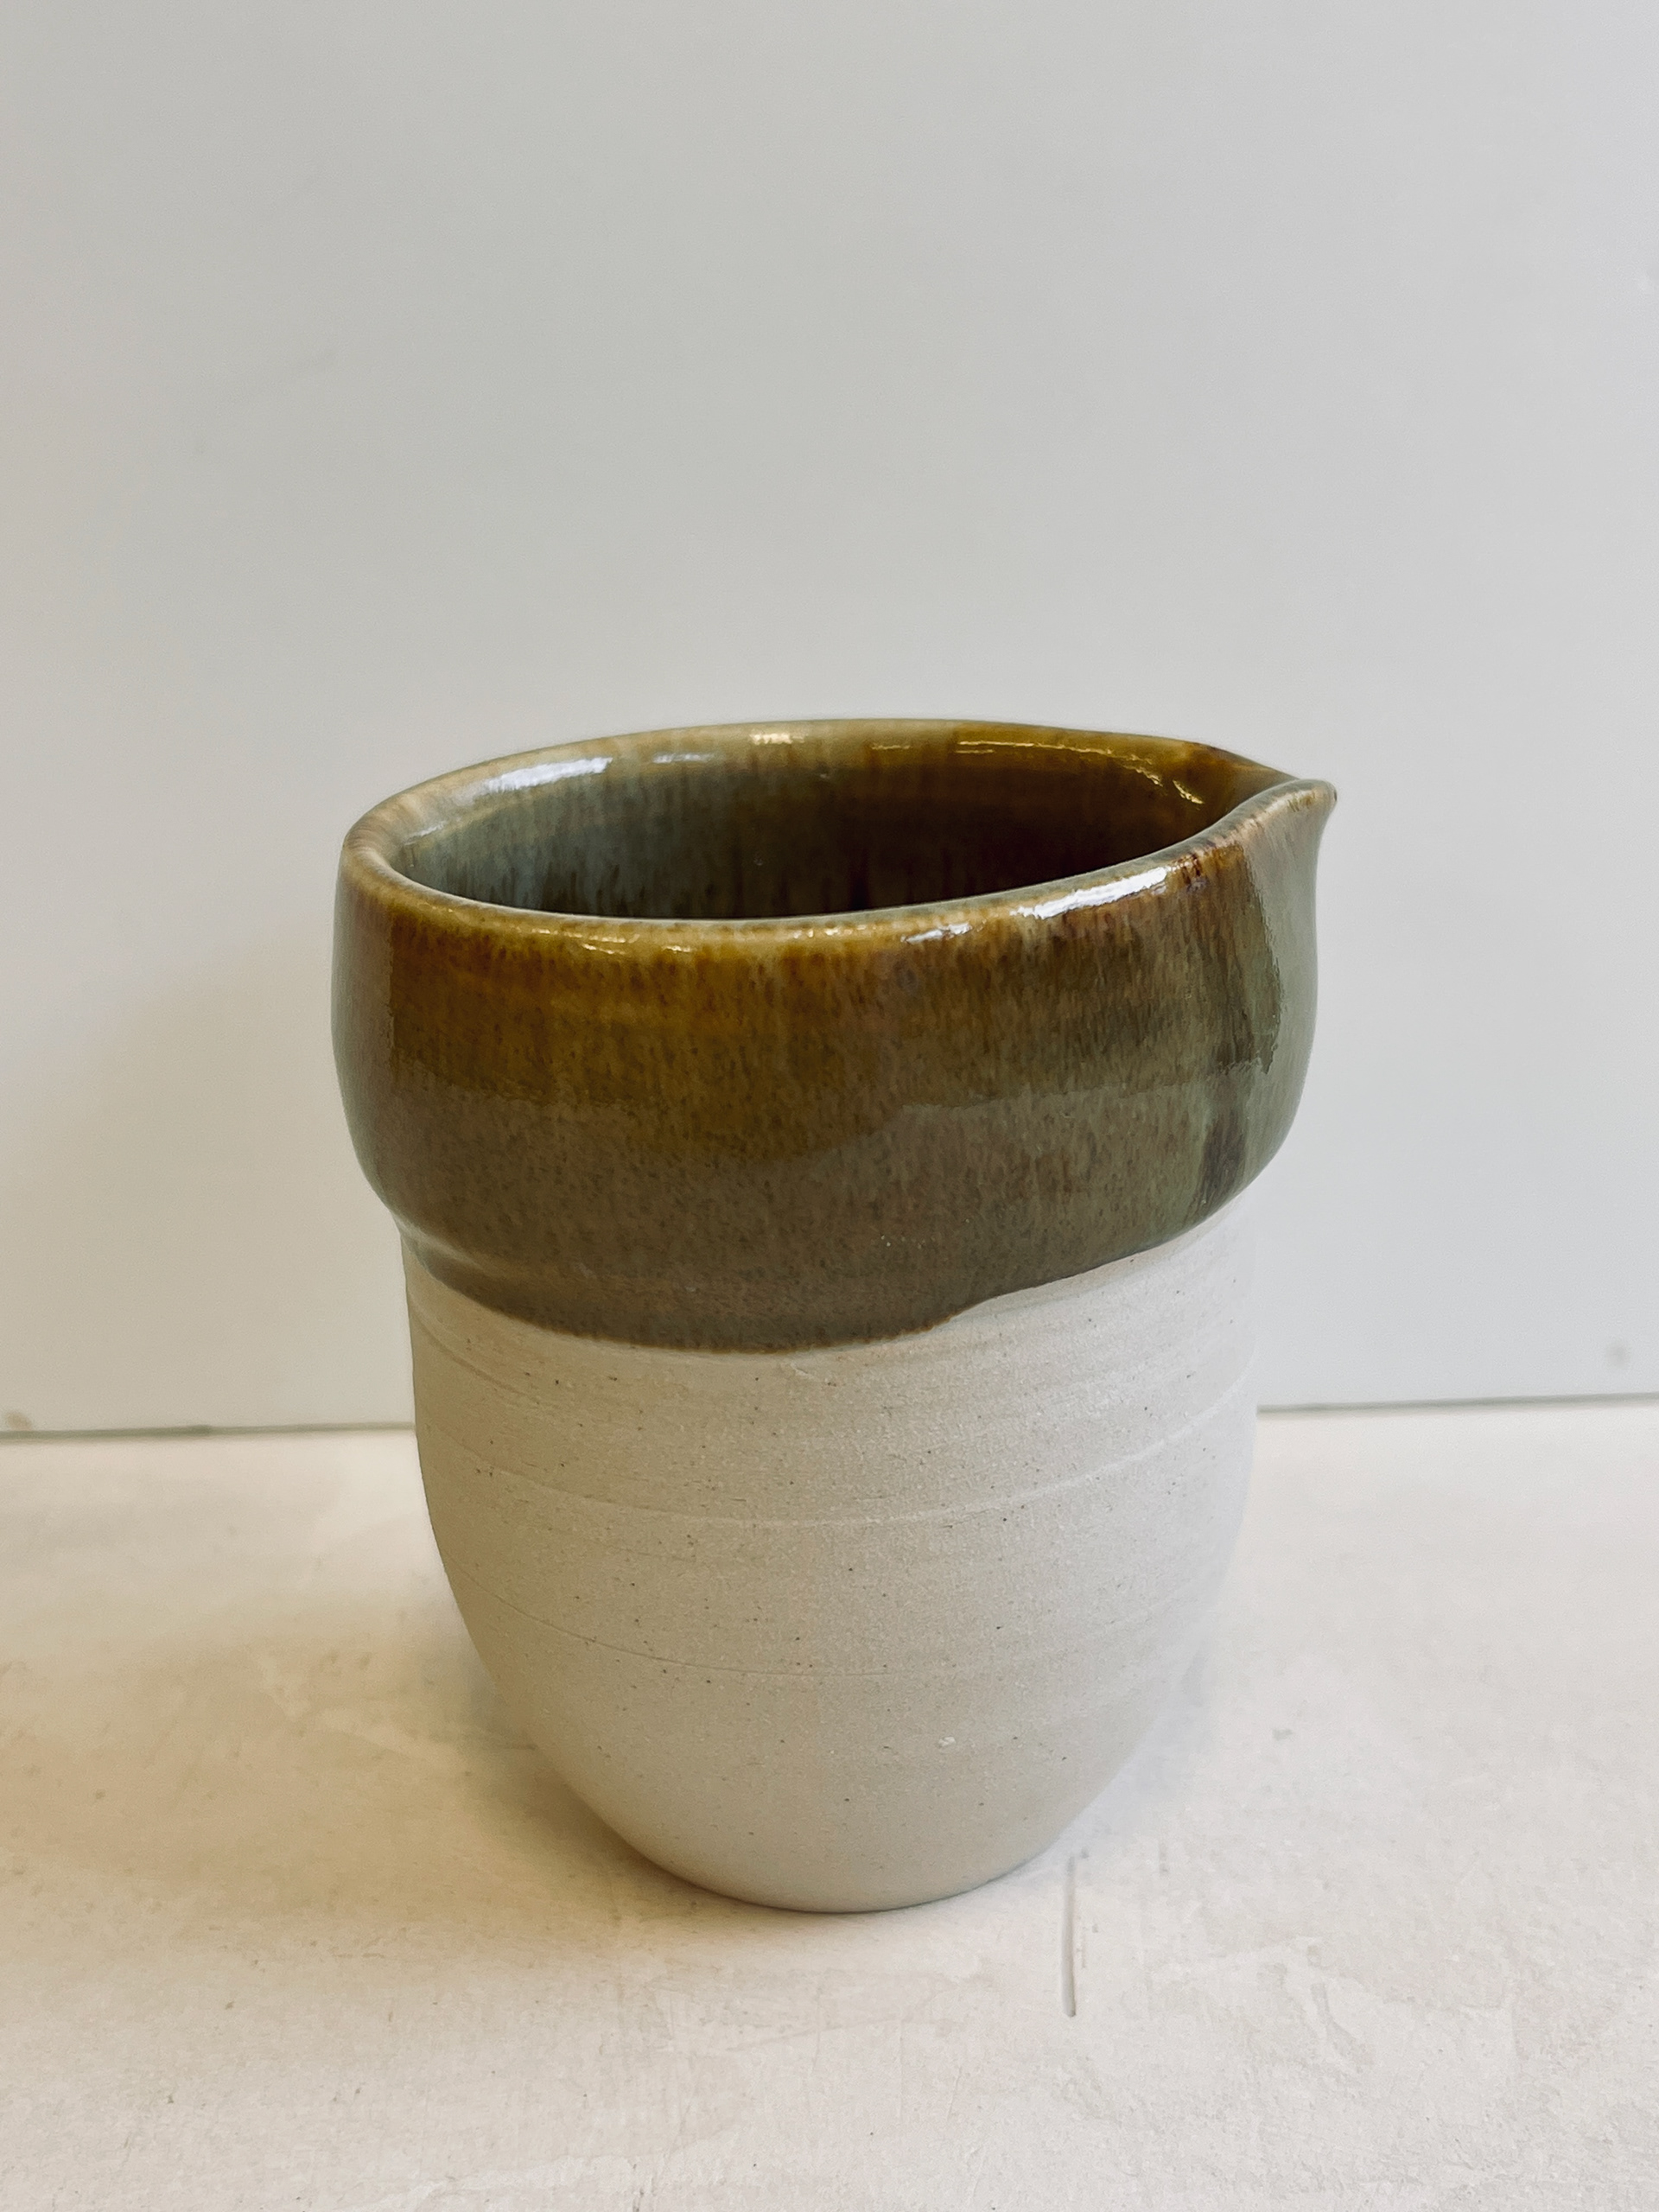
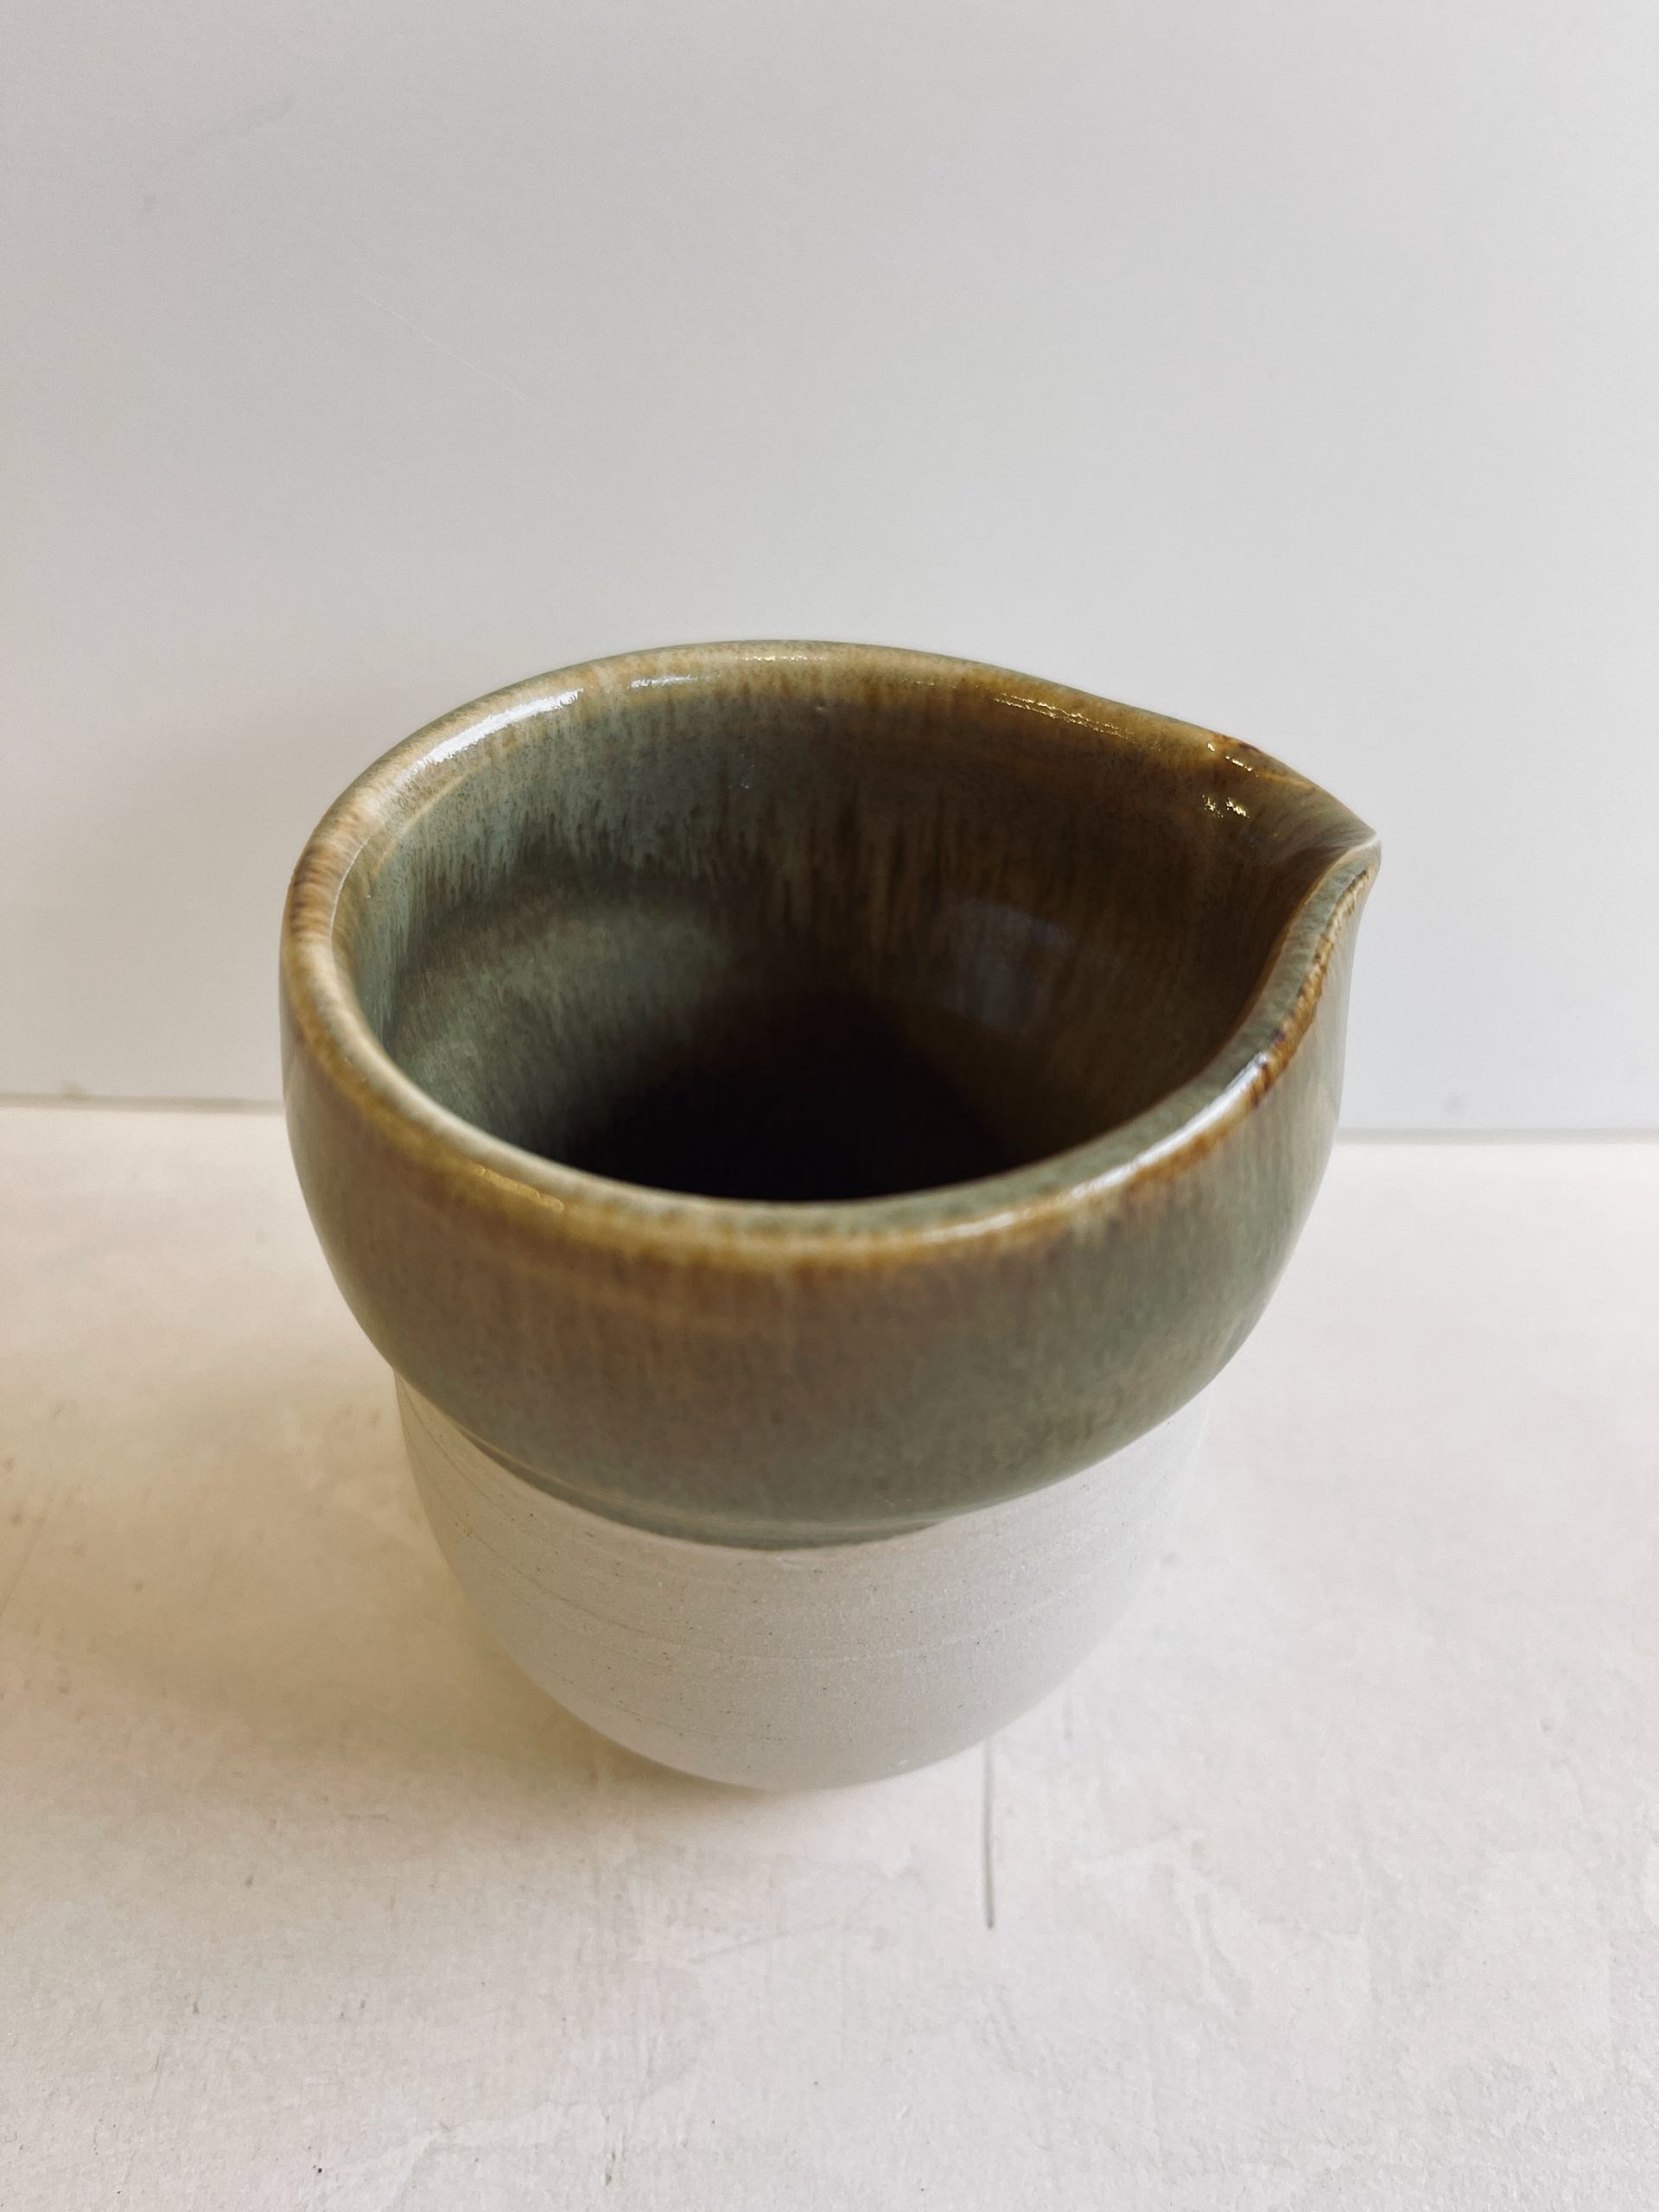
Almington, thrown bell shaped form- best carry over from experiments of metal cooking form and is good fit for glaze. 

BEFORE- ivorystoneware clay
BEFORE- Almington clay
PULLED HANDLES- LUGS:
Playing with different attachment and handles- pulling a handle allowed me the flexibility of playing with the different styles i can achieve. Technique is definitely accomplished my aim to bring metal qualities across. 
My main aim with this test was to be able to try range of styles, playing with the soft clay consistency, the shapes what my hand would form and keeping the original fluidity. Making the cleaning up, tidying up less. 
Truly feel tis helped me understand the possibilities within clay, the sizes and shapes i have tried are what i felt fitted well with that particular bowl.     
Set: Bowls that are identical in form but the handles gives them character. 
Pulled handle- objects: 

I am very happy with the produces outcome, the drippy effects are captivating and the glazes surface are a strong and vibrant reflecting the colours, and texture from the spices. The pulled handles are a better fit for this bell shaped objects. they feel like they are a complimenting through the familiar curves, the rounded form (rim)  fits the curved lugs. 
I wish to explore chun glazes- typically also known as gloppy glazes. 
HAPPY ACCIDENT: 
The glaze from the drippy bowl placed above, a single drip was caught into this bowl creating a contamination effect but this process of having forms designed particularly catch the drippy glaze is order to creates overlaps in hopes to form pattern. 
FUTURE EXPLORATION.    
Back to Top